
Likes
Comments
Share


@OrganicNature420
Follow
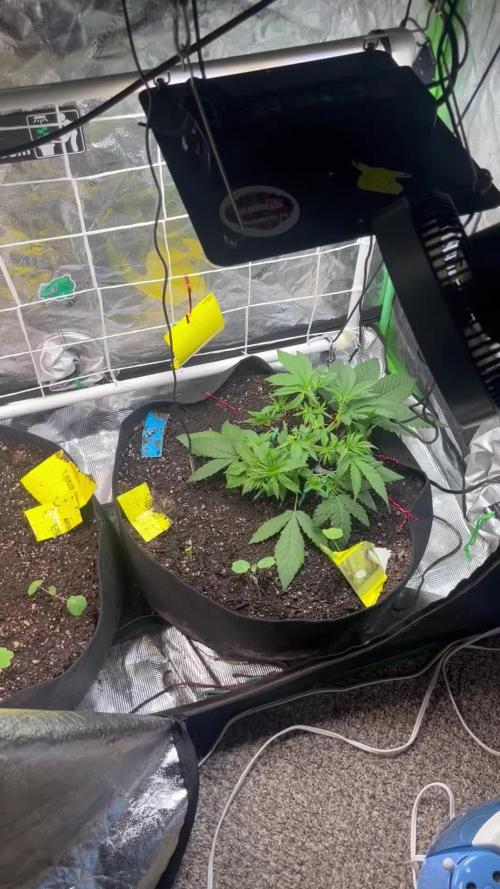
Germination date 🌱 12/07/2021
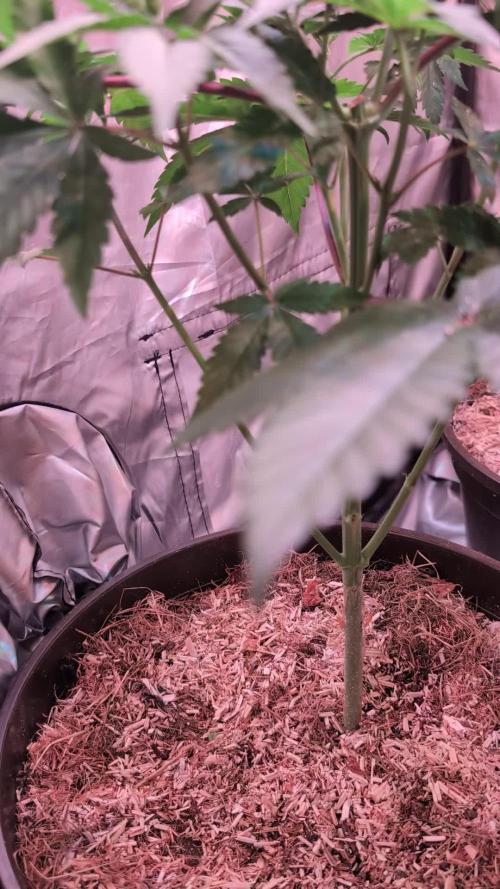
Day 57 09/09/2021
Strain 🍁 Humboldt Purple Matcha (2nd time
(Sherbinski x HSO)
THC% • Unknown
💡 Mars Hydro FC4800
• Power draw 480W + 5%
• Max coverage 5 x 5
• LED 2070pcsSamsungLM30B1&Osram660nm
• Max Yield 2.5g / watt
• Noise level 0 DB
• Removable Driver +2m cable
• Daisy chain (multiple lights)
https://marshydroled.co.uk/products/mars-hydro-fc-4800-led-grow-light-samsunglm301b-commercial-greenhouse-medical-indoor-kit 🇬🇧
https://www.mars-hydro.com/buy-fc-4800-480w-4x4-energy-saving-full-spectrum-commercial-led-grow-light-mars-hydro-for-sale 🇺🇸
PROMO CODE • (ORG420) DISCOUNT 👍🏻 marshydroled.com
⛺ Mars Hydro 120 x 120 x 200cm
📤📥 AC infinity 6inch
💧 10lt dehumidifier
❄️ 3.1kw air con system
💉 Nutrients GreenBuzzLiquids
Organic Grow Liquid • 1-4ml until 2wk flower
Organic Bloom Liquid • 2-4ml flower stage
Organic More PK • 2-4ml +wk3 of flower
Organic Calmag • 1-2ml/lt whole grow
Fast Plants Spray • first 3days at night lights off
More Roots • 2-5ml veg +2wks flower
Fast Buds • 5ml +wk2 of veg until 1wk flower
Humic Acid Plus • 2-5ml whole grow
Growzyme • 2-5ml whole grow
Big Fruits • 2-5ml flower stage
Clean Fruits • 5ml flush 1wk
Ph powder
Root Gel
Living Organics
PROMO CODE • organicnature420 15% off ✌️🏼
https://greenbuzzliquids.com/
🥥 Growing Media • Coco Coir
Notes 📝
1st week of flower done. Girls looking good, temps are good and humidity is spot on but think i will struggle to get it under 40% without buying a new dehumidifier. Ac on dry mode won't stay at desired temp so running it on cool mode. I will have to get Manuel out and have a nosey to see what I'm doing wrong
Happy growing fam ❤️🌱🍁👍🏻

Likes
9
Share


Processing
Likes
15
Share


@Venabr96
Follow
Entrando na terceira semana de floraçao. Planta otima com tons violetas e com otimos galhos.
Como sao de floraçao rapida pulei algumas semanas na tabela de rega na biobizz( sem2 e sem4 ) e esta reagindo otimamente.
Dia 19 floraçao : planta muito volumosa com lindos ramos e frutos com desenvolvimento muito rapido.
Otima para o LST com bastante flexibilidade e rapido crescimento.

Likes
25
Share


@Snaak
Follow
This week ill try to switch over to an English diary because the translation is absolutely crap and i might learn a thing or two about the English terms in growing, also because the American and Canadian researchers extended the growing knowlegde in an absolute insane tempo and i would probably get most of my information from them.
I don't have a spelling-check on this pc, therefore i apologize in advance ;).
I uploaded some photo's with crappy lighting (Next grow ill switch day-night rythm and should give me better opportunities for photo's, but we'll get to that in the future) but also i short video of some notes which i will elaborate below:
Last week on saturday i turned off the carbon vent because i could not get the humidity level right and i was still waiting for my humidifier. I placed a big fan inside the tent for air circulation and besides that i installed a small vent-filling fan in in front for clean-airflow.
Last weekend i closely watched what the humidity and temperature did and started playing with the setup.
All the changes i made in the tent last week are:
06-02:
- Shut down carbon vent
- Added rotation fan inside
- Added small front-fan for clean airflow
07-02:
- Added humidifier (setting 55%)
- Dropped HPS 600W about 15 cm's to 110 cm height
08-02:
- Humidifier setting 60%
09-02:
- Dropped HPS 600W about 20 cm's to 90 cm's height
10-02:
- Front fan on 2 instead of 1
11-02:
- No changes because all is stable
12-02:
- Placed humidifier at the back instead of the side of plants
- Dropped HPS 600W 15 cm's again to 75 cm's height
- Moved the inside fan more to the top-back of the tent (more facing downwards)
- Opened up a vent-hole in the top of the tent for a little warmth release
From the moment i turned off my carbon vent last week the sprouts started flourishing, especially when i added the humidifier. All the changes, noting, and looking at them how they pose, reading blogs and learning have brought me to the point that i think i stabelized it. Allthough i am going to turn on the carbon vent sooner or later (i might do this tomorrow) i need to pay attention again because i'm predicting it will drain the humidifier in a higher speed and that means i have to refill approx. 15 liters in 2 days? The tank is 5.5 liter and at the moment i refill it every evening, so thats already 11 liters in 2 days. I'm really expecting it to increase significantly i ill keep my notebook ready. :p
I'm also a bit worries it will be so warm in my tent because the outside temperature is pretty cold, and that might also be the reason the temperature doesen't go above 28 degrees anymore.
Okay enough about the tent setup changes. Lets talk plants.
After the transplant last week to their end-pot these auto's started to grow immediately and i think they did really well this week. Since the humidifier got added to the tent, every morning the plants praise their "Hallelujah" pose which is really pleasing to watch...
**Last weeks's first time watering in the big pots:**
06-02 around 09.00:
- 750ml around the side
- 750ml around the middle area
- 750ml with nutrients spreaded around the pots
All is equally divided through 4 plants.
This week's watering and nutrients:
08-02 around 16.00:
- 750 ml around the pot
- 750 ml with nutrients
11-02 around 10.00:
- 500ml around
- 500ml around
- 500ml with nutrients
12-02:
- Sprayed Vita Race first time 4ml in 750 ml and sprayed about 15% of it on the leaves, no drups, mostly nebula.
The vita race really made the leaves shine, also within 1,5 hours all moist was took in or evaporated, Today probably again around 1600 ill water them again but ill hold the next vita race for tomorrow or something. as long as the plants shine the same i don't know if it's neccasary?
Okay, last but not least.... This week on wednesday i kinda mis-read some shit on internet and topped 3 of my 4 plants. I think it went okay, because they don't seem to stressed about it. They still flourish and hallelujah on! Still i'm pretty worried because i made the cut right next to the nodes which isen't the best thing (learning phase :p)...... The reason i topped 3 outta 4 because i wanted to see if i diden't stress the smallest one, he would out-grow the others, but that does absolutely not seem to be the case.
Also i think it's a great way to learn by not stressing one plant to see the differences, i want this first grow not to be about end results but more about learning and developing my own personal experience and point of view.
Oh PS, i also drilled all the holes to prepare for LST, but i think they were kinda to small on 10-02 when i drilled it. I'm going to watch the recovery from the topped plants closely coming week and maybe start with LST.
Stay tuned while this noob messes around with Auto Critical Orange Punch of Dutch Passion.

Processing
Likes
37
Share


@Mr_Motalovah
Follow
Hello Growers and Tokers! 👋 👩🌾 🧑🌾.🔥💨
Alright so... she's still growing! 😂
I sure hope this week she'll stop and she can actually start to grow out those bud sites..
Good thing about this final stretch is that the bud sites are growing along with the stretch.
Glad I stopped giving her grow nutes or else she could be stretching even more.
Every 10 days or so I feed them with only water and enzymes to help out with the roots.
Funky smell is starting to come out.
Isn't that strong yet but it's nice. OG Kush type of smell.
Pictures taken on day 42.
Hope you like what you see, if so check out the other diaries of the strains in the tent.
Take care out there.
One love!

Likes
17
Share


@Nicogreen
Follow
Super start på sæsonen!!!! ❤️ ❤️ ❤️ Alt sammen skal nok blive godt!! ❤️ ❤️ 1000 💚 💚 procent. 😉. Og er så småt ved at GORILLA 🦍 GROW OGSÅ DER VIL KOMME OP TIL 35DAGBØGER MERE FRA MIG I ÅR

Processing
Likes
4
Share


@Vorghus
Follow
Last week was fantastic, they grow a lot, they are now in full flowering.
im dealing with the management of the new and bigger colas, im thinking of putting the same orange fence on top and using it as a ScrOG trainer, ill try this in the next few days , ill put more pictures with the testing.

Likes
6
Share


@Grow4ever
Follow
Die Buds werden dicker und dicker.
Der Duft wenn das Zelt aufgeht ist unglaublich süß.
Die Lemon Orange Süßzitronig.
Blueberry Muffin und Pineapple Express finde ich gerade vom Duft sehr ähnlich, beide sehr fruchtig und süß. Bin gespannt, wie die sich später weiter voneinander abheben.

Likes
4
Share


@ObloTheGrower
Follow
2 of 3 plants are females, Others are still unknown, females r hst ed and topped. I will repaet training with fimming after stress. 1 of them is a male ruderalis, I took him from the pot he lost around %95 of his roots but still alive and moved in quarantin to harvest his pollens to cross new combinations for the future,
I broke a flowered stem :( and I dont want to say good bye to that small piece so I will try to make a clone with it, the chance will be less because of her flowers also I have not root hormon so the only chance is aloa vera gel and honey to protect her from infection . 2 fresh cuts from topped girls and 1 broken stem are in a box now (which they borned in it, the destiny :)) . Looking a chance to survive, Im supporting them with foilar spraying 2 or 3 times a day which includes B52 and Revive. Good luck girls God bless u,

Likes
103
Share


@ShowsWorld
Follow
Overall i am satisfied with this strain and I do plan on buying more seeds from Barney’s farm. Very strong and stable genetics I highly recommend this strain to experienced growers as well as newbies. Very easy to grow and a great smoke.0

Likes
Comments
Share

@GoodTimesOrganics
Follow
So Leute, in meinem Experiment sind nun zwei Weibchen ausgesucht worden, welche den stärksten Wuchs ausgeformt haben.
Eine davon (rechts an der Zeltwand) wirkt besonders Homogen. Nach dem Topping wachsen die Triebe nun Recht gleichmäßig.
Bei der anderen, dauert es noch ein bisschen länger, da Sie an sich zwei Tage Jünger ist (vermute ich einmal.) Sie war auch im Höhenwachstum etwas kleiner, da sie auch in einem kleineren Topf war.
Die Pflanzen wachsen sehr schön und gleichmäßig.
Und der Dünger von Weedefix legt auch ordentlich was hin.
Ich werde diesen jetzt zusätzlich zur Anwendung einer Livingsoil hinzufügen um das Potenzial der Erde um ein weiteres zu erhöhen. Den die ganzen Bio Stimulanzien und Bakterien unterstützen die Livingsoil zusätzlich.
Ab nächster Woche kommen die Ladys unter das Scrognetz. 🥦💚


Likes
57
Share


@DogDoctorOfficial
Follow
Ladies and gentlemen, welcome to the grand finale of my Medusa F1 journey! Week 10 has arrived, and it's a spectacle of colors that even the most talented painters would envy. The buds on my Medusa are a visual feast, showcasing a symphony of pinks, purples, reds, and greens. It's like stepping into a surreal world of botanical beauty.
As we approach the harvest, it's time to bid farewell to additional nutrients. Just like saving room for dessert after a sumptuous meal, we're allowing the plant to focus all its energy on maturing those magnificent buds. It's the VIP treatment, giving them the undivided attention they deserve.
Now, let's talk trichomes, those tiny resinous wonders that hold the key to potency. I've become a trichome connoisseur, inspecting them daily with a fascination that could rival an alien investigator. These shimmering crystals are like a galaxy of diamonds, reflecting the culmination of our hard work and dedication.
A special shoutout goes to Royal Queen Seeds for blessing us with the Medusa F1 genetics. They've truly crafted a masterpiece, and I'm honored to have been a part of this growing adventure. Thank you, Royal Queen Seeds, for making our dreams come true.
As we approach the final curtain call, I invite you all to savor the beauty of cannabis cultivation. Embrace the vibrant colors, relish the trichome spectacle, and celebrate the magic of nature's artistry.
As always thank you all for stopping by and for supporting me on this journey, i am super passion about growing and fell blessed to have you all with me on this new journey <3 <3 <3
Genetics - RQS MEDUSA F1
Ligth - LUMATEK ZEUS 465 COMPACT PRO
Food - APTUS HOLLAND
All info and full product details can be find in can find @
https://www.royalqueenseeds.com
https://aptus-holland.com/
https://autopot.co.uk/
https://lumatek-lighting.com/
With true love comes happiness <3<3<3 Always believe in your self and always do things expecting nothing and with an open heart , be a giver and the universe will give back to you in ways you could not even imagine so <3<3<3
<3 <3 <3 Growers love to you all <3 <3 <3
Medusa F1
Medusa is a true F1 hybrid created from pure, inbred cannabis lines. She boasts uniform grow traits, mouthwatering aromas and flavours, and plenty of potency. If you're looking to bring stable, elongated plants into your room, tent, or garden, look no further. Mouthwatering Aromas, High Potency, and Mid-Size Plants
Though she won't turn you to stone like the mythical goddess after which she's named, Medusa F1 is bound to get you plenty stoned in her own special way. Combining genetics from inbred lines deriving from Sugar Magnolia, a thick and sweet indica, and American Beauty, a fast, fruity hybrid loved for its well-balanced, positive high, the result is an autoflowering F1 variety that produces fresh flavours, a unique cannabinoid profile, and large yields.
A very aromatic cultivar with a vibrant concentration of terpenes bearing notes of fresh mint alongside an upfront peppery kick, backed up by hints of fresh fruit, berries, and tangy fuel. Her thick, frosty flowers consistently produce high levels of THC and CBG, as well as high concentrations of myrcene, ocimene, farnesene, and caryophyllene. As a result, Medusa F1 has strong effects that relax and stone the body from head to toe (brought on by particularly high concentrations of myrcene and farnesene) while motivating the mind with an uplifting, creative, and motivating kick (thanks to high concentrations of ocimene).
Medusa F1 seeds produce elongated autoflowering plants with long, strong branches and well-spaced internodes. Plants regularly grow up to 80–85cm tall and boast a fast flowering time of just 42–45 days (72 days from germination to harvest). Thanks to her genetics, Medusa F1 produces plenty of thick flowers with big, swollen calyxes that make for very easy trimming. Medusa F1 is very stable, handling stress and unfavourable growing conditions with ease, though she is somewhat susceptible to Botrytis, so make sure to keep tabs on the humidity in your grow room/garden
Likes
5
Share


@Brosciencegrowmie
Follow
Plant did great. The final product looks great and smells good too. Very easy going grow with great results.
Likes
10
Share


@jahredi
Follow
Things are looking good. I started counting Day 1 before the dummy leaves even shed the seed, also, I think the 3 gal pots are probably holding back the above ground growth a tad. Been watering about .5 gallons each in a ring just outside the plant every 2-3 days. They look healthy and I'm sure by the end of the week, they'll be screaming along.
Not sure if I'm more excited about the ganja or the melons. Lol. Can't wait to enjoy both ☀️🍉💨
Likes
18
Share


@ganjameister
Follow
Flowering Day 35
I’ve starting steering vegetatively this week which means less stress on the plants to increase bud size.
Watering has been frequent with low EC. Lower VPD along with other veg crop steering techniques used.
Buds getting bigger every day
Likes
2
Share


@fabialien
Follow
Semana sel 9 al 14 de septiembre 2024.
Vemos un desarollo bastante vigoroso en todas, esto también se puede adjudicar el hecho de la nutrición que han estádo llevando esta tanda se fem y regulares, la mandarine qué nació con apical va bastante bien.


Likes
5
Share


@Creatorknbsland
Follow
Semma iniciando para 5 semanas!ph estava muito alto nessa semana que passou e lela aprese deficiência de magnésio !reguei com sais de epson ah 1 semana e meia!depois de medir o ph percebi que estava alto!tentando consertar esse erro!abraço
Likes
4
Share


@xANICx
Follow
“Everything is going great, but my big problem now is that all three plants are in different stages—one of them feels like it’s three weeks ahead of the others. But apart from that, everything is perfect and I’m very satisfied so far. I think for my next grow, I’ll switch to photoperiod plants, since I can control them a bit more than autoflowers. But for my second grow ever, I’m already really happy with how it’s going.”

Likes
10
Share


@Mo_Powers
Follow
the first week in the greenhouse is over and i think it has recovered well. still quite small but i think it will start to grow well in a few weeks. let's see. hope dies last
