


Likes
Comments
Share


@Backwood_scientist
Follow
Everything is looking good and doing good . Not bad for my first run . Also I would love to know about any nutrients that you use . Looking to try new ones so leave a comment .

Likes
14
Share


@Terpyboyz
Follow
Hi growmies 👌🏻 sorry I’ve missed out the last 3 weeks but al add them to the diaries soon. Everything has been going great so far only a few more weeks to go on some of these girls - the clones are in week 3 of flowering as well so they’ll not be far behind. Clones are looking beautiful as well happy with this run of they fill out a bit more before chopping 👌🏻🔥


Likes
30
Share


@XperencdGmanXG
Follow
just keeps growing nicely. Can't wait to have some room to put this in a bigger pot. Going to have to shuffle plants around hope the nice weather comes outside soon, need to move some plants outdoors.


Likes
Comments
Share



Likes
4
Share


@Naujas
Follow
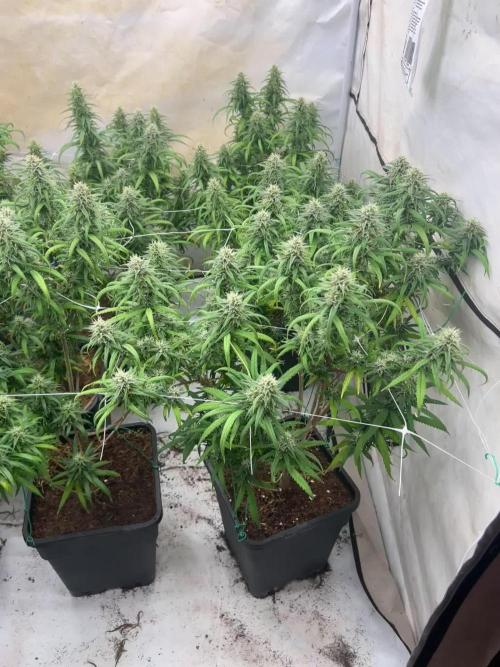
Day 89!!!! I came back from vacation and started harvesting right away, so the girl grew really big, but I gave her too little light, and at the end of the growth I didn't remove the leaves :( because I was busy on vacation :( but basically I'm still incredibly happy, her flowers are not very firm, they have a lot of "AIR", but a lot of shiny sticky trichomes, the girl grew really well throughout her growth, next time I will definitely use LST, this growth was with very little LST, there will be an update when the harvest dries up :) good luck to everyone:).
Likes
10
Share

@BlaKX
Follow
Möge die Macht mit euch sein Growmies!
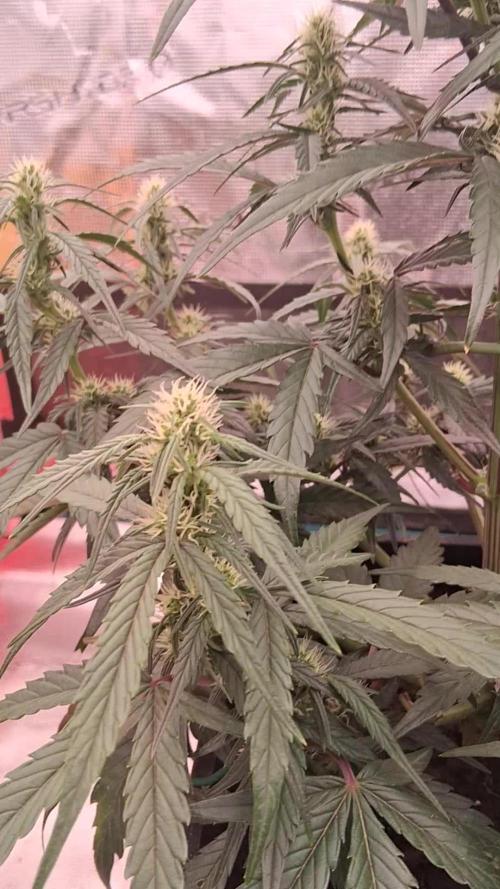
Die Alderaan Cookies Automatic ist ein wunderschöner strain der mittlerweile an einigen Buds rosa / lila Pistillen Fäden auszubilden.
Auch der strech war ordentlich sind nach genau 35 Tagen jetzt 61cm Hoch und einen schönen Weihnachtsbaum wuchs dank LST.
Es ist ein erdiger Zitrusfrüchte Geruch den sie schon verströmt und neben Buds auch schon Harz entwickelt.
Wahrscheinlich bis jetzt eine Augenweide wie ich finde ❤️🧡💛💚💙💜
Likes
81
Share


@Hou_Stone
Follow
This week i flush the roots with tap water ( PPM : 310 , PH : 7.5) after i add water with 0.7 grow powder and 0.1g of Booster PK+ to reach 720PPM and adjust PH to 5.8
----------------------------------------------------
-Daytime temperature: 27°C
-Night temperature: 23°C
-Humidity: 45-65%
-Lamp: Mars Hydro FC3000. intensity 80% at 40cm from the top leaves
-Room: Mars Hydro 100x100x180cm
-Extractor: Mars hydro 402 CFM Max. power 2/10
-Substrate : 70% coco, 25% perlite, 5% vermiculite.
My instagram : https://www.instagram.com/p/CuMhQ_BsjRP/?utm_source=ig_web_copy_link&igshid=MzRlODBiNWFlZA==

Likes
57
Share


@Fibro_Witch
Follow
13 hrs and 33 mins of daylight when I took these pics on 8/27
There's not much to say other than that this Girl is a beast. I'd say she's pushing 7 feet, I've been just guessing height, but I should probably get an accurate measurement on the plants next week. It's hard to get her in frame!
I was a bit lax with feeding this week so her color isn't as good as it could be but I should have more time going into September to really put the juice to these girls so they have a strong finish💪

Likes
10
Share


@1soloflowerlover
Follow
This week was transition for my girls now we will focus on growing bigger and up out of that small cup and into 5 gallon pots
Repotted and doing great

Likes
Comments
Share


@Canha_Patch
Follow
Iv started my 9 beans out in jiffy pallets on the 29th of march so we are 2 days in and they are already starting to pop out!
I have 1 of each making way through the top layer of Coco in the pallet.


Likes
11
Share


@Mo_Powers
Follow
she is slowly getting a complete dark red autumn colouring. it looks really nice. the buds are getting thicker and the smell more intense. but she still has a few weeks to go. luckily no mould or anything like that so far.

Likes
65
Share


@Dendegrow
Follow
Week 2 of the flowering phase flew by 🌱💨. Unfortunately, I may have overdone it with potassium or kept the water level too high – the classic signs of clawing leaves were evident. Thankfully, they seem to be recovering now and are back under control 💪🍃.
My IR night experiment is showing clear results 🌌: The plants exposed to infrared radiation at night stretched significantly more. This might be especially beneficial for this indica-dominant strain as it leads to better canopy distribution, improved airflow, and reduced risks of mold and disease. Plus, the light distribution is much more efficient now, which I’m excited to see pay off.
On the downside, my Orange Sherbert turned hermaphroditic 😔. It’s hard to pinpoint the cause – overfertilization seems unlikely since I’m using only organic nutrients. I suspect it might be linked to an E-field experiment I’ve been running. To confirm this theory, I’ll conduct a new grow with a similar strain next year to see if the electric field negatively impacts cannabis development.
Stay tuned for updates! Drop a like and follow along for more grow insights 🌿✨. See you next week!
Woche 2 der Blütephase ist wie im Flug vergangen 🌱💨. Leider habe ich wohl etwas zu viel Kalium gegeben oder den Wasserstand zu hoch gehalten – die typischen Anzeichen von Adlerkrallen waren sichtbar. Zum Glück scheinen sich diese jetzt zurückzubilden und sind wieder unter Kontrolle 💪🍃.
Mein IR-Nachtexperiment zeigt bereits deutliche Ergebnisse 🌌: Die Pflanzen, die nachts mit Infrarotstrahlung bestrahlt wurden, haben deutlich stärker gestretcht. Das ist besonders bei dieser indica-dominanten Sorte wahrscheinlich von Vorteil, da es zu einer besseren Verteilung des Blätterdachs führt. Dadurch verbessert sich die Luftzirkulation, das Risiko von Schimmel und Krankheiten wird minimiert, und die Lichtverteilung wird effizienter. Ich bin gespannt, wie sich das weiter auswirkt!
Leider hat meine Orange Sherbert gezwittert 😔. Woran das genau liegt, kann ich schwer sagen. Eine Überdüngung halte ich für unwahrscheinlich, da ich nur biologischen Dünger verwendet habe. Ich vermute, dass mein E-Feld-Experiment eine Rolle spielt. Um das zu bestätigen, werde ich nächstes Jahr einen neuen Durchlauf mit einer ähnlichen Sorte machen und prüfen, ob das elektrische Feld tatsächlich eine ungünstige Rückentwicklung der Pflanze verursacht.
Bleibt dran, lasst ein Like da und folgt mir für weitere Updates 🌿✨. Bis nächste Woche!


Likes
7
Share


@Jumbotron
Follow
Flushing this week or for the next two depending on how much time she needs.
Likes
4
Share


@QixxGrows
Follow
Day29: New sets of leaves. I'll repot and switch to proper Veg Lights on the weekend.
Day30: I'll repot tomorrow.
Day31: Repotting done. She had a crazy amount of roots in the seedling pot. MUCH more than I expected. I switched to Veg lights at 90% power.
Day32: Settling in new pot
Day33 & 34: I had to perform some maintenance on the tent. Lost some hours due to that.
Day35: Growth really looking healthy. Although she's not really stretching high, she does look rather happy. I do like them thicc ;)
General: I need to put the camera somewhere else so that the growth can be better seen. Right at the end I'll edit out the white flashes. They're caused by the humidifier running and will be really easy to cut out without losing the gist of the grow :)
