


Micro-Reversal - Collodial Silver&STS





Tent
40x40x8
Seedling/Clone Tent

Fan
PC-Fan
PC-Fan


Indoor
Room Type
Transplantation
weeks 1, 3
12-12
weeks 5
1 liters
Pot Size
0.1 liters
Watering
Start at Harvest
1
Week 1. Vegetation8mo ago
4 cm
Height
18 hrs
Light Schedule
26 °C
Day Air Temp
5.8
pH
No Smell
Smell
70 %
Air Humidity
19 °C
Solution Temp
25 °C
Substrate Temp
23 °C
Night Air Temp
1 liters
Pot Size
60 cm
Lamp Distance
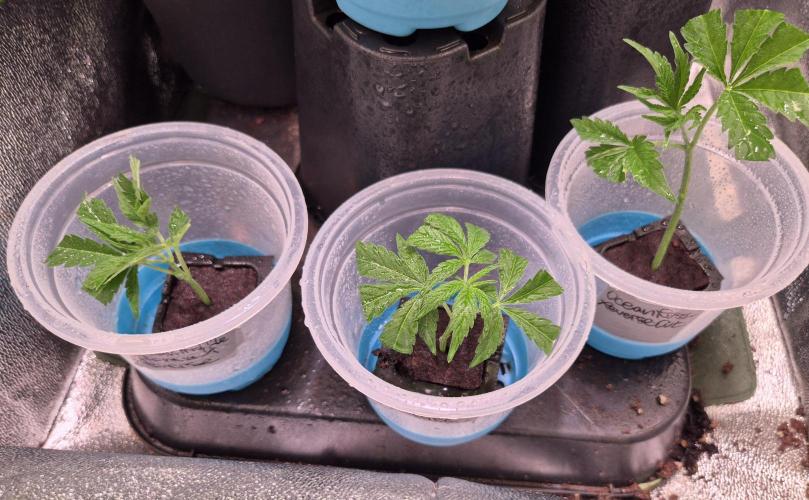
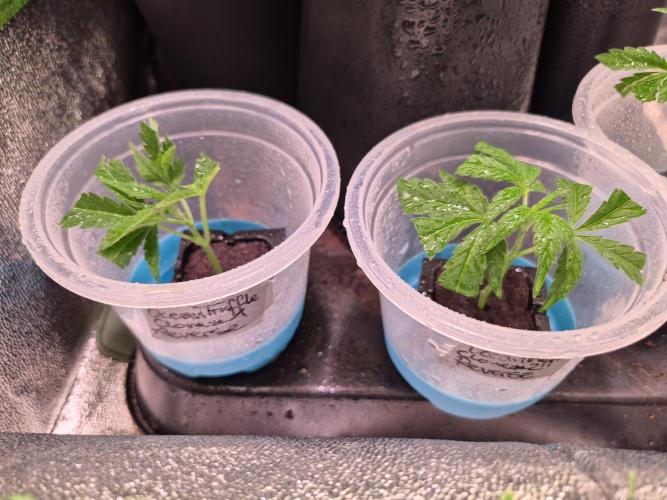
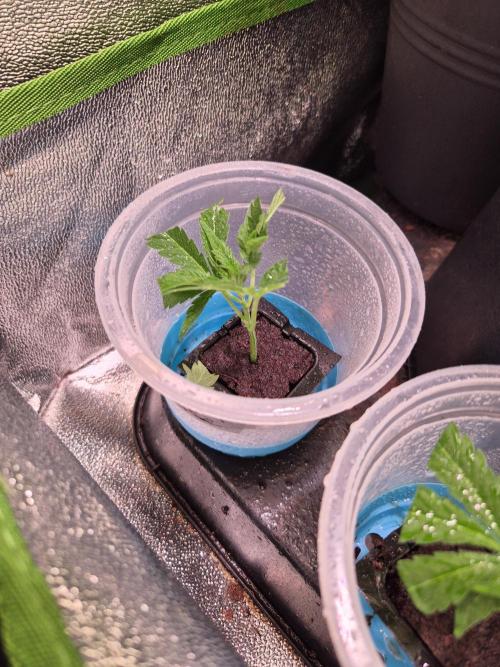
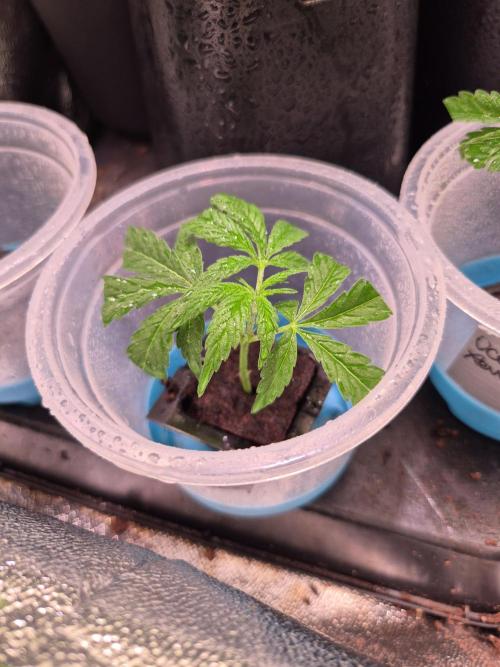
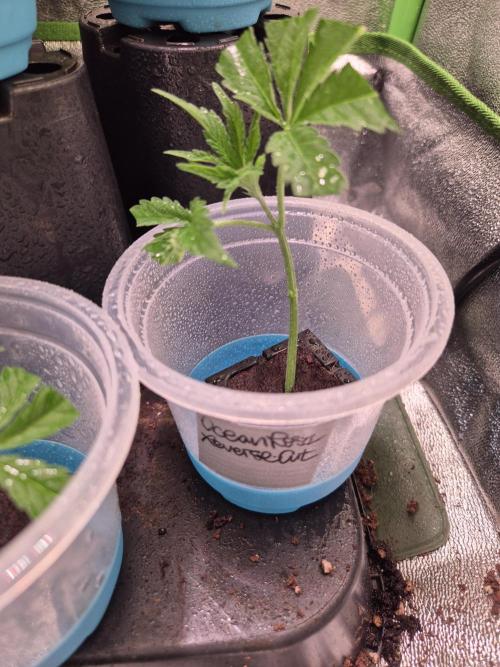
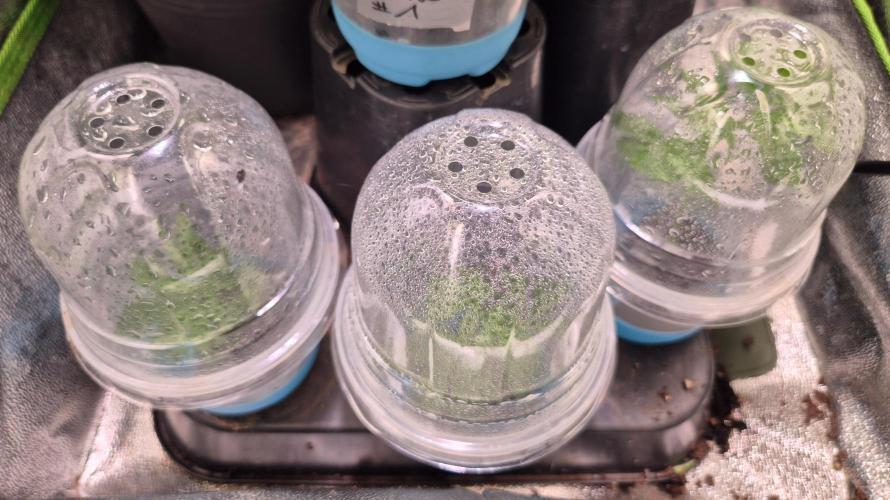
GanjaGecko Unfortunately, I killed the 3 original cuts. I may have been a bit too generous with moistening the substrate. So, I ordered a few Eazy Plugs. Due to space constraints, the individual Eazy Plug cubes were placed in the propagation pots with a dome. This way, the ladies have the necessary climate in the first days, and overwatering is now also more difficult. With the first cuttings, both the Lemonites and the first two OceanTruffle cuts, it worked so smoothly that I might have approached it a bit half-heartedly.
I had to remove a few side shoots from the OceanRosa anyway, so I thought, why not make a cutting from one of the shoots.
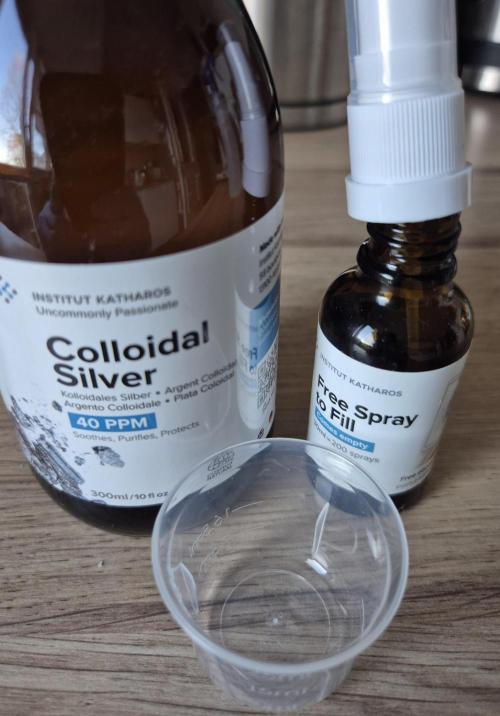
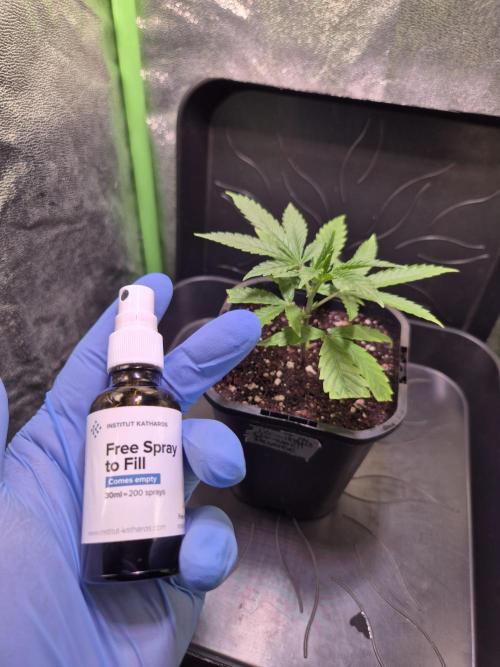
In this little mini-grow, if all goes well, I will reverse one or both of the cuttings with colloidal silver to hopefully collect some pollen and realize the first small breeding project. The colloidal silver has a value of 40ppm and is applied once daily two days before switching the light cycle to 12/12. It's best to do this as early as possible when turning on the LED. The shoots, the nodes, and the developing flowers are sprayed with the colloidal silver. The ladies are briefly taken out of the tent and placed in the bathtub or shower, then generously sprayed with colloidal silver and put back in the tent after a few minutes when the plant is dry again.
Silver solutions are light-sensitive. Therefore, for application, it's best to either take them out of the tent briefly or spray them 10-15 minutes before the lights come on.
This whole procedure is repeated until the first male pollen sacs open. If you stop spraying the ladies beforehand, it may be that the anthers of the male pollen sacs produce little to no pollen.
With STS spray, the frequency of applications is significantly reduced. However, you need to store the two stock solutions [silver nitrate + distilled water] and [sodium thiosulfate + distilled water] separately and mix the amount you need in a 1:1 ratio shortly before application, then mix 1 part of the solution mix with 9 parts of distilled water (1:9). With colloidal silver, on the other hand, I just fill what I need into a small spray bottle and off we go. The effort remains relatively manageable since everything takes place on a rather small scale.
So, first, let's see how the first attempt with colloidal silver goes.
Anyone planning to reverse multiple plants or a large plant would probably be better off with the STS spray.
The two new cuts were placed in a nutrient-poor substrate on the first day of this week. The larger leaves were halved to reduce their evaporation.
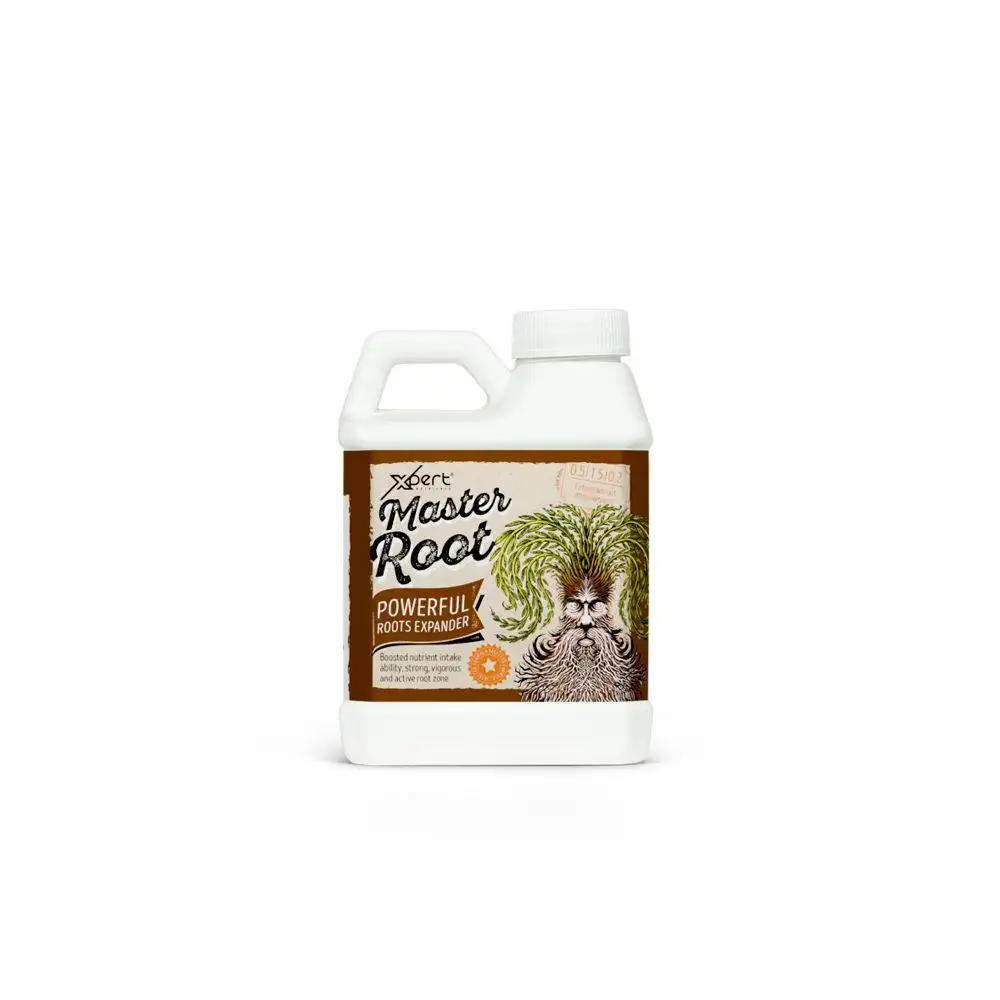
To stimulate root growth, there was 1g/L BioEnhancer and 1ml/L MasterRoot in the watering water. Each cut received about 50ml with a pH of 5.8.
RootMaster and BioEnhancer both contain algae extracts and humic acids. Algae extracts act as natural biostimulants that promote plant growth, strengthen root development, and improve nutrient uptake, while humic acid also positively affects root development and plant growth. In addition to the algae extracts and humic acid, MasterRoot also contains fulvic acid, which is also beneficial for root development and plant growth. The application of fulvic acid stimulates the formation of lateral roots and root hairs, which is essential for cutting propagation. It promotes faster rooting, reduces failure rates, and strengthens cell metabolism. MasterRoot from XpertNutrients is an absolute insider tip for rooting, whether from cuttings or young plants from seeds. For moisture under the dome, the cuttings received a small foliar feeding with AlfaBoost from GrowsArt at a ratio of 5ml/L. Here, too, the pH was adjusted to 6.0. AlfaBoost strengthens root formation and improves nutrient uptake, promotes the formation of strong shoots and leaves, and enhances resilience to stress factors, which is especially needed in the first days.
Unfortunately, one cut didn't make it. The shoot unfortunately died because the substrate was a bit too wet. That's why you take at least one more cutting than you need in the end. Now, fingers crossed that the last small cut makes it. Just in case, I took another small side shoot in case the other one doesn't make it either.
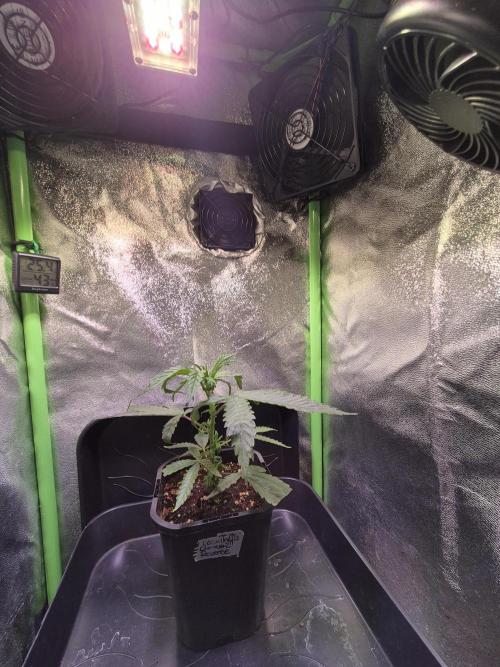
The cuttings are in a small 40x40x80cm propagation tent under a Sanlight Q1Wdim with 30W at a distance of 50cm, providing around 200-250ppfd, and two PC fans that provide some air circulation.
On day 3, both cuttings received about 20ml with a pH of 6.0. MasterRoot was included at a ratio of 1ml/L. Additionally, there was again foliar feeding with AlfaBoost at a ratio of 5ml/L and adjusted pH to 6.0.
On day 5, there was only a foliar feeding with AlfaBoost at a ratio of 5ml/L and adjusted pH of 6.0.
On day 6, each lady received about 20ml with MasterRoot at a ratio of 1.5ml/L. There was also a foliar feeding with AlfaBoost at a ratio of 5ml/L with a pH of 6.0.
On day 7, there was only a foliar feeding with AlfaBoost at a ratio of 5ml/L with a pH of 6.0.
____________________________________
Strain:
OCEAN TRUFFLE
(Wildberry Truffle x Ocean Fruit)
Terpene Profile: Sour, Sweet, Gas, Hint of berry
21 likes
7 comments
Share
Used techniques
Transplantation
Technique
3
Week 3. Vegetation8mo ago
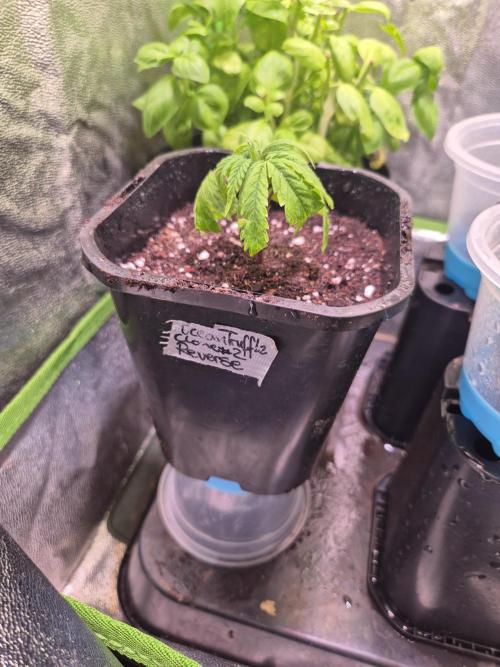
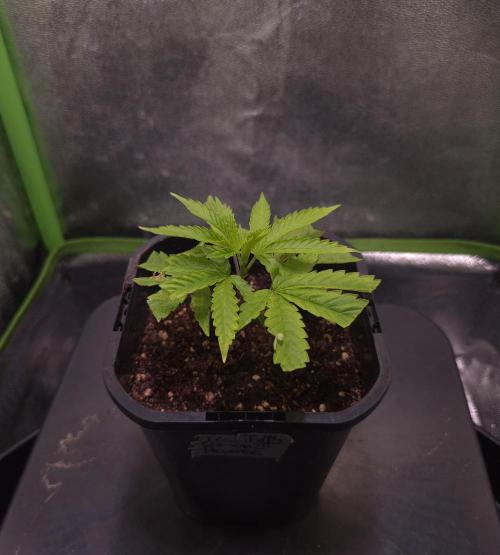
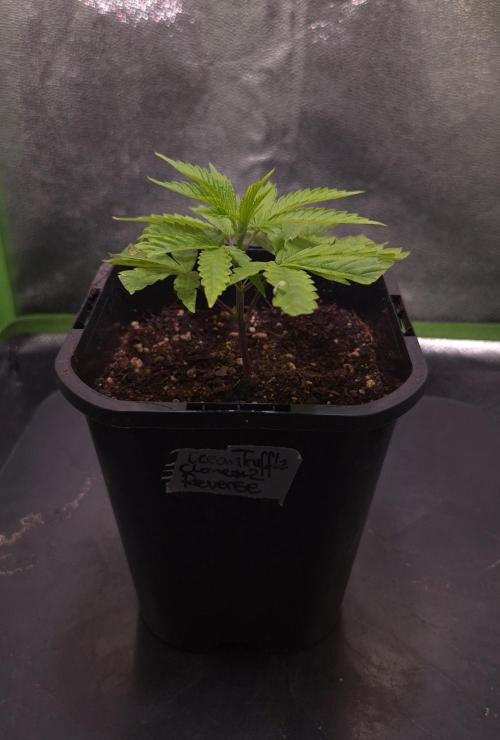
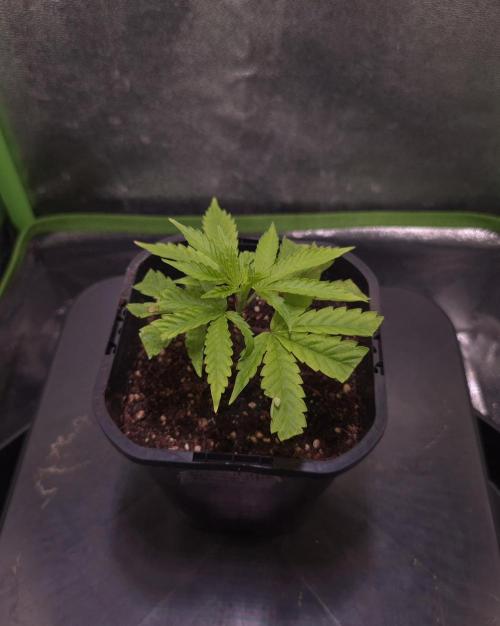
8 cm
Height
18 hrs
Light Schedule
26 °C
Day Air Temp
5.8
pH
No Smell
Smell
60 %
Air Humidity
19 °C
Solution Temp
25 °C
Substrate Temp
23 °C
Night Air Temp
1 liters
Pot Size
50 cm
Lamp Distance
Nutrients 5

Power Roots
1 mll

BioGrow
20 mll

BioEnhancer
1 mll
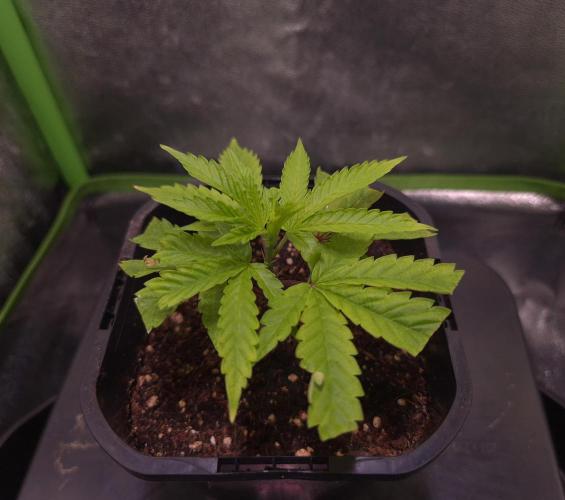
GanjaGecko In week 2, not much happened, except for moistening the cuts 1-2 times a day. To be honest, I thought the cuts wouldn't make it again. 😄
Week 3
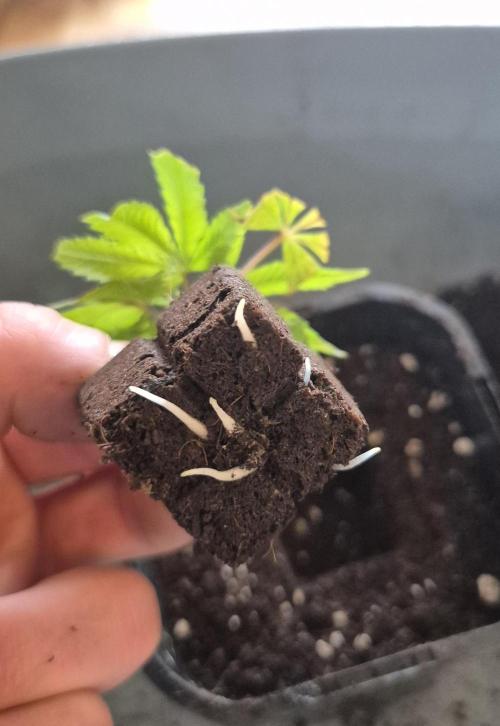
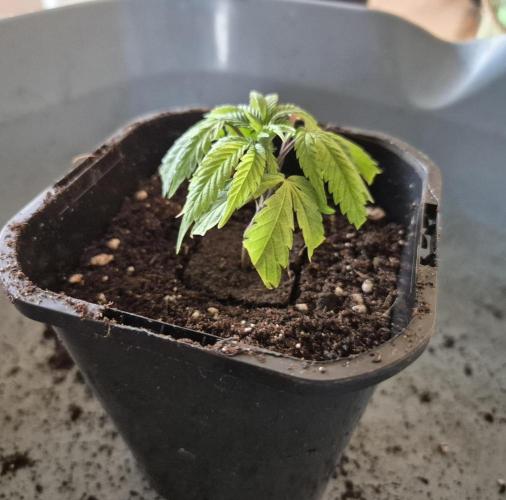
Fortunately, on day 9, the first roots were seen. Right after that, I repotted them. The little 1L pot will be the one where the cuttings will be sent into flowering in about a week to continue the little micro-reversal project.
I was considering that if all the cuts survive, maybe I'll reverse all of them to increase the chances of getting something out of the pollen at the end.
Unfortunately, I messed up hardcore with the OceanTruffle and OceanRosa, and when adding the bloom fertilizer, I didn't split the Batguano (booster) into two parts, like 6 teaspoons in week 1 and 6 teaspoons in week 3, but like an idiot, I thought, oh, it's organic, what could go wrong, and gave all 12 teaspoons at once... The plant is burning, showing extreme signs of over-fertilization...
The topdress was replaced, and this week will be watered with 30% distilled water, but it doesn't look good. At the end of the week, there will be an update on that. If the seed ladies don't make it because I had a total brain fart, I'm glad that all the cuts have rooted and luckily I have a backup for the OceanTruffle and OceanRosa. In this case, only 1 cutting will be reversed as originally planned.
One thing's for sure, at least 1 cutting will be reversed. 💪🏽
20 likes
comments
Share
Used techniques
Transplantation
Technique
4
Week 4. Vegetation8mo ago
9 cm
Height
18 hrs
Light Schedule
27 °C
Day Air Temp
6.0
pH
No Smell
Smell
55 %
Air Humidity
19 °C
Solution Temp
25 °C
Substrate Temp
23 °C
Night Air Temp
1 liters
Pot Size
0.1 liters
Watering Volume
40 cm
Lamp Distance
Nutrients 11
Alfaboost
3 mll
Power Roots
1 mll

CalMag Pro
0.8 mll
GanjaGecko Week 4 // D22 - D23
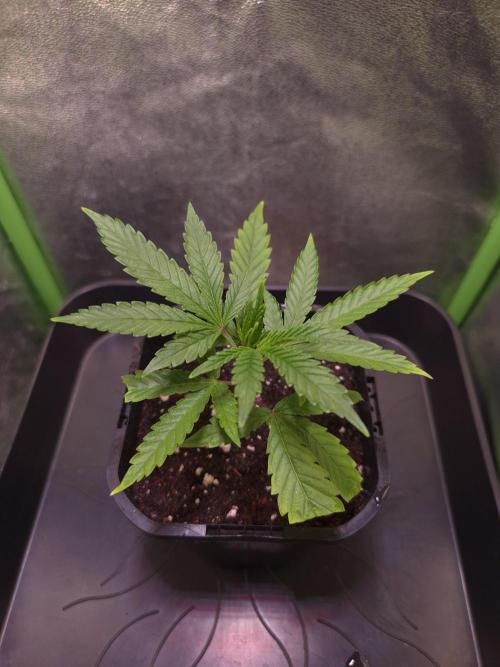
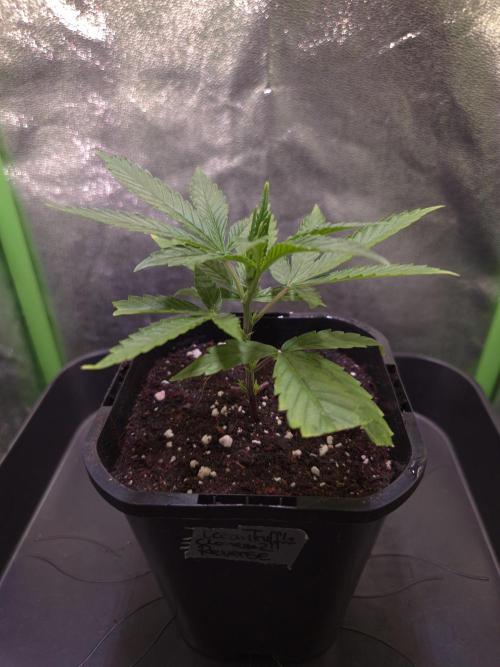
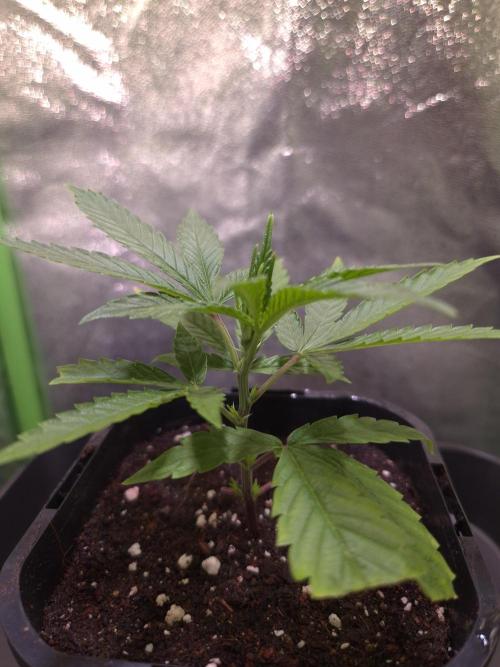
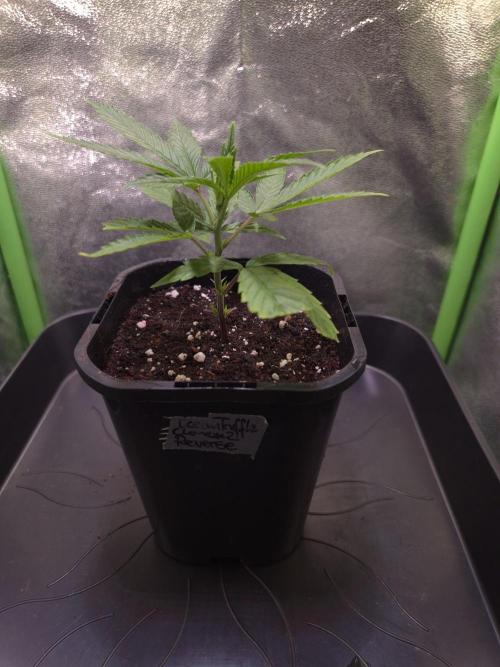
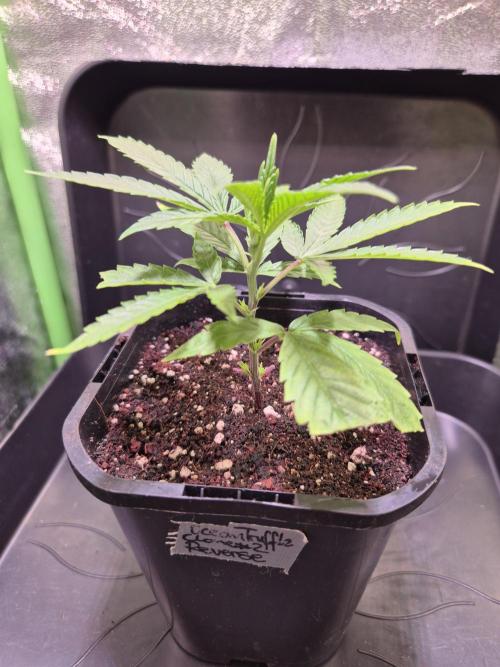
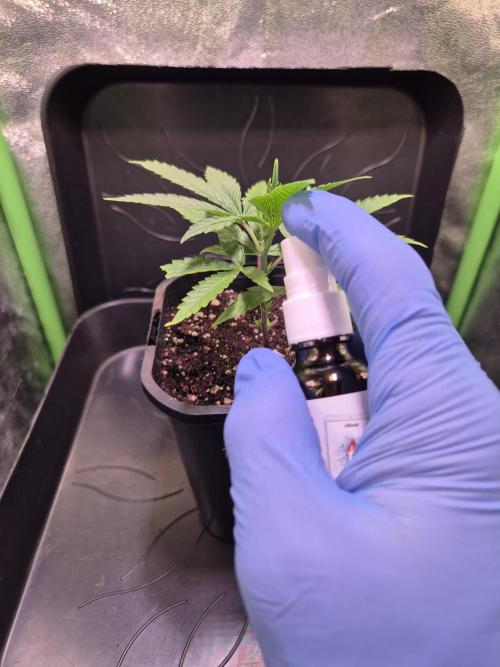
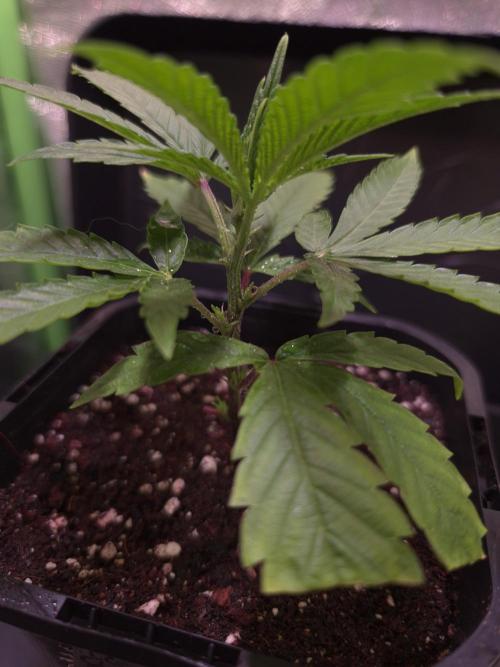
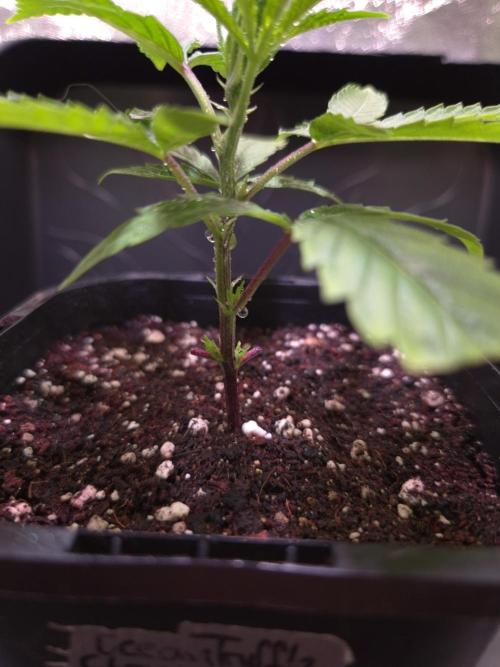
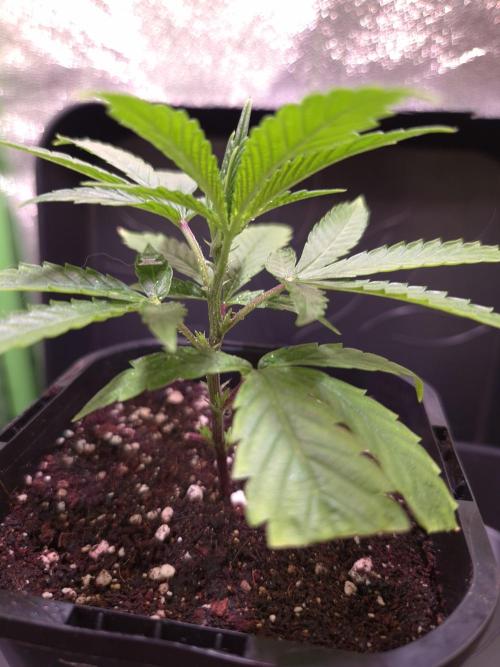
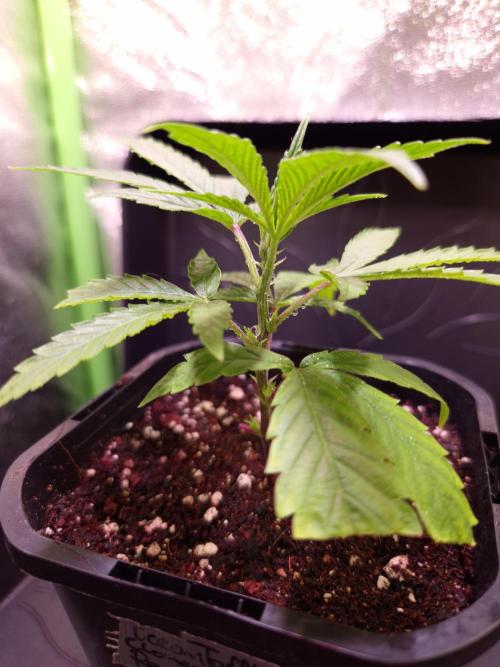
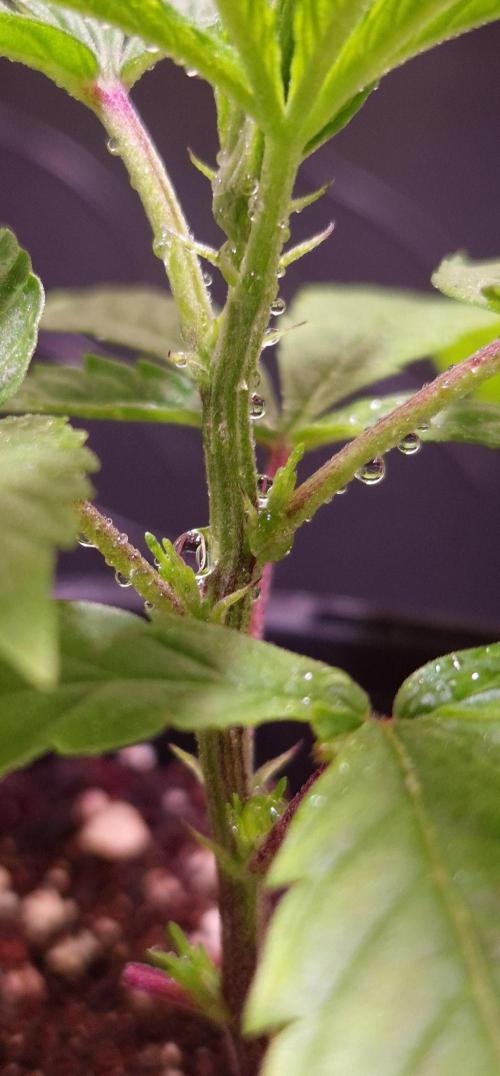
The little OceanTruffle cutting has again received nice juicy green leaves this week and looks fit again.
I decided today on day 23 to give the flowering fertilizer as a top dress and to let the light go out two hours earlier today. Tomorrow the light will come on 2 hours later and go out 2 hours earlier again, thus having the first day of 12/12 tomorrow. Additionally, the LED will be dimmed to its maximum of 50W. Since the Q1Wdim only reaches around 600-650ppfd at a distance of 40cm, during the flowering phase, the pot will be adjusted a bit to achieve the desired 500-550ppfd in the first week of 12/12. During the flowering phase, the distance to the LED will ideally be adjusted through the stretch to reach at least 800ppfd. If not, the plant can be placed without problems up to 25cm under the LED and will need to be adjusted a bit for that.
The cutting was therefore sprayed for the first time today on the shoot and its nodes with colloidal silver. During the day, the leaves are only sprayed from the underside. When the light is off, the whole plant can be moistened. This process will now be carried out 3 times a day as much as possible, until the ideally formed male pollen sacs open. At a minimum, it should be done in the morning and evening. Best just before the light comes on and shortly after it goes out.
Tomorrow is therefore the first day of 12/12 and the exciting part of the micro-reversal project can begin. If everything goes according to plan, the first male flowers will appear between day 8 and day 20 after the first application. The colloidal silver will continue to be applied until the pollen sacs open. If you stop before that, it may be that the anthers contain little to no pollen.
For the flowering phase, a small layer of substrate with some worm humus and long-term fertilizer was added as a top dress in the small pot today. There was 1 teaspoon of worm humus and initially 5g of BioBloom. This will probably not be enough for the flowering period. I don't want to overwhelm the small plant in the small pot too much at once. During this time, I will closely monitor the leaves and correct any potential nutrient deficiency either with liquid fertilizer or by adding a bit more BioBloom, depending on how long the little lady still needs. I will probably add another 10g of BioBloom in week 2 or 3 to be on the safe side.
On day 22, there was 1ml/L SilicRock, 0.8ml/L CalMagPro, 1ml/L PowerRoots, 1ml/L MasterRoot, 1ml/L PureZym.
The little Truffle received 30ml with a pH value of 6.0
On day 23, there was 1ml/L SilicRock, 0.8ml/L CalMagPro, 1ml/L PowerRoots, 1ml/L SugarRoyal, 1ml/L PowerBuds, 2ml/ Alfaboost, 1ml/L Orgatex, 1g/L BioEnhancer, 0.7g/L DynomycoSpark.
The little Truffle received 100ml with a pH value of 6.2.
27 likes
12 comments
Share
5
Week 5. Flowering7mo ago
15 cm
Height
12 hrs
Light Schedule
26 °C
Day Air Temp
6.3
pH
No Smell
Smell
48 %
Air Humidity
19 °C
Solution Temp
22 °C
Substrate Temp
21 °C
Night Air Temp
1 liters
Pot Size
0.1 liters
Watering Volume
40 cm
Lamp Distance
Nutrients 7
Alfaboost
3 mll
Power Roots
1 mll
CalMag Pro
0.5 mll
GanjaGecko Week 4/5// 1F /// D24/1F - D30/7F
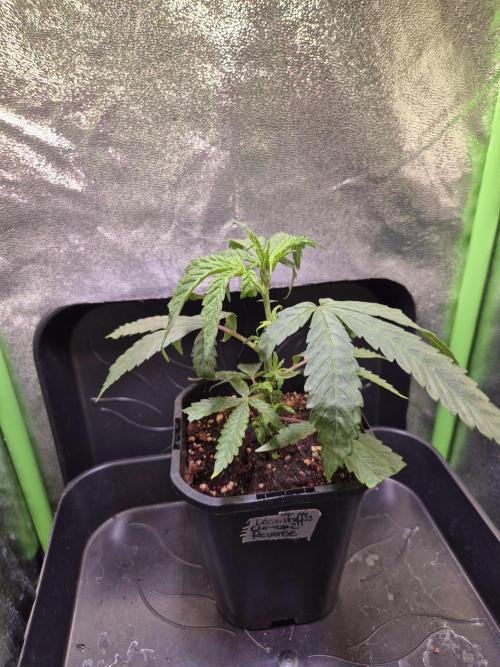
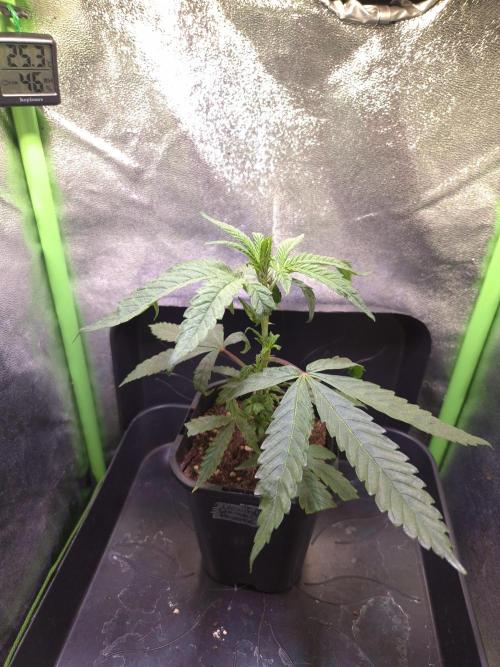
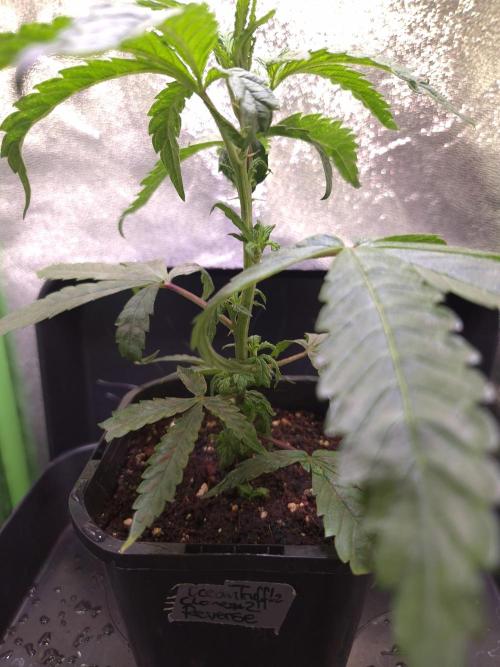
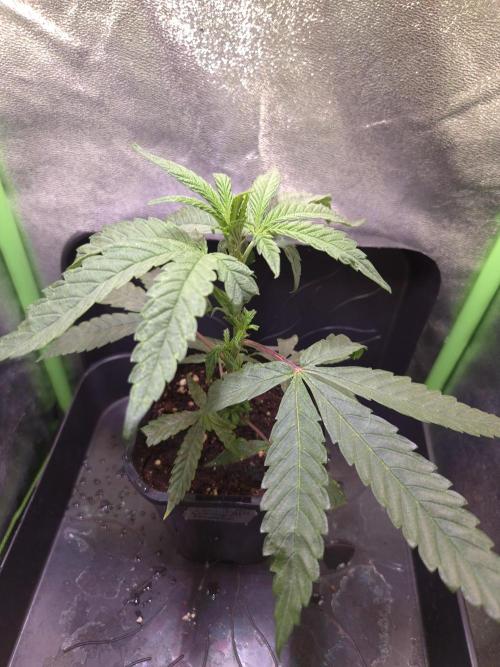
The OceanTruffle was sprayed with Colloidal Silver 3 times a day during the first week of 12/12. Here and there, some leaves were or are hanging a bit. I'm not exactly sure if it's from the stress of the reversal or if it was the 3x daily spraying that made it look a bit overwatered. Another reason to work with STS, since you only apply it a maximum of 3 times during the entire reversal period. To be on the safe side, there will be 1-2 more treatments with STS.
After a bit of research, I can say that the curling of the leaves is due to stress. More specifically, it’s due to hormonal stress (phytotoxicity).
When using Colloidal Silver or STS, the silver ions block the ethylene receptors in the cell membranes. The plant continues to produce ethylene but can no longer perceive it.
Ethylene normally requires a copper ion at the center of the receptor to bind and trigger the hormonal signal. The silver ions are very similar to the copper ion in their chemical structure and charge. They occupy the space in the receptor that copper would normally take. Once placed in the receptor, the silver ions bind much more tightly than copper. This prevents the ethylene molecule from docking at the receptor.
The receptor remains in a "trapped" state, signaling to the plant that no ethylene is present. Since ethylene is essential for the development of female characteristics, the absence of this signal causes the plant to develop male flowers instead.
The treatment with Colloidal Silver will now be reduced from 3x to 2x a day to avoid stressing the plant to the extreme. The little lady will be sprayed with Colloidal Silver before the LED turns on and when the LED turns off.
_________________________________________
Fertilizing/Watering:
Day 24/1F had 1ml/L SilicRock, 0.8ml/L CalMagPro, 1ml/L PowerRoots, 1ml/L PowerBuds, 4ml/ Alfaboost
The little Truffle received 30ml with a pH of 6.5.
Day 25/2F had 30ml pH-adjusted water.
Day 26/3F had 30ml pH-adjusted water.
On Day 27/4F, there was 1ml/L SilicRock, 0.8ml/L CalMagPro, 1ml/L PowerRoots, 1ml/L PowerBuds, 4ml/ Alfaboost.
The little Truffle received 100ml with a pH of 6.5.
Day 28/5F had 30ml pH-adjusted water.
Day 29/6F had 1ml/L SilicRock, 0.8ml/L CalMagPro, 1ml/L PowerRoots, 1ml/L SugarRoyal, 1ml/L PowerBuds, 4ml/ Alfaboost.
The little Truffle received 50ml with a pH of 6.2.
Day 30/7F had 30ml pH-adjusted water.
19 likes
comments
Share
Used techniques
12-12
Technique
6
Week 6. Flowering7mo ago
28 cm
Height
12 hrs
Light Schedule
25 °C
Day Air Temp
6.5
pH
No Smell
Smell
45 %
Air Humidity
19 °C
Solution Temp
22 °C
Substrate Temp
21 °C
Night Air Temp
1 liters
Pot Size
0.1 liters
Watering Volume
20 cm
Lamp Distance
Nutrients 5
Alfaboost
4 mll
CalMag Pro
0.5 mll

Power Buds
1 mll
GanjaGecko Week 5/6// 2F /// D31/8F - D37/14F
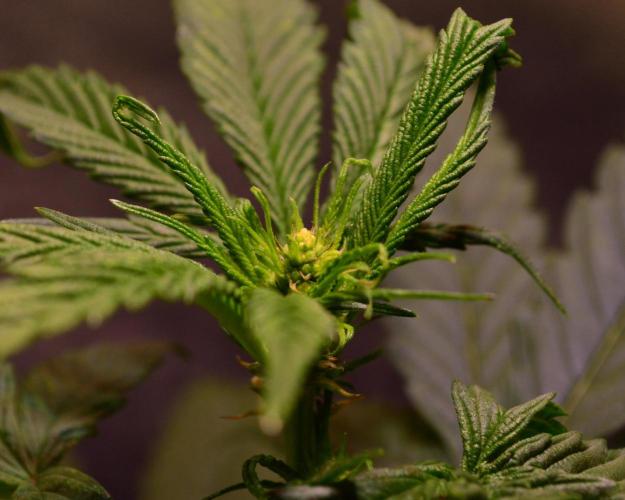
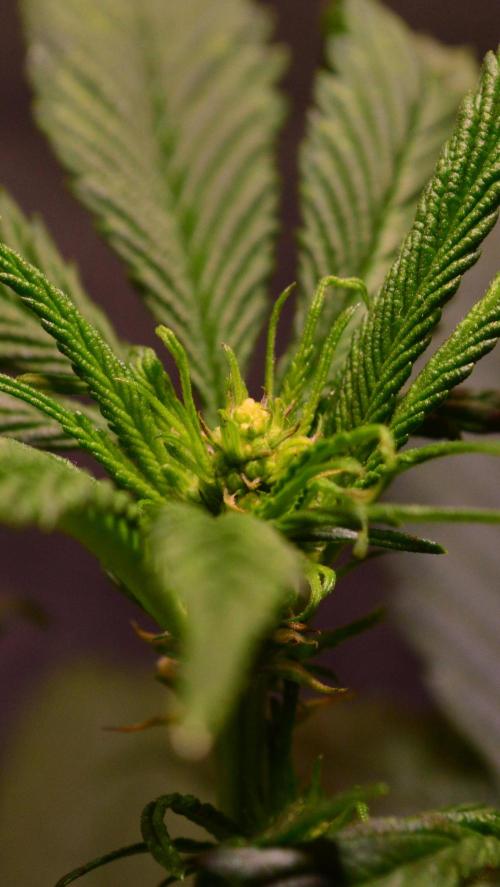
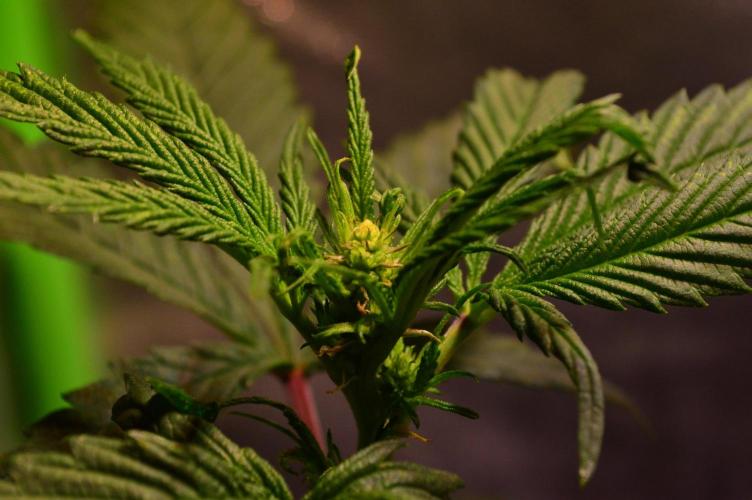
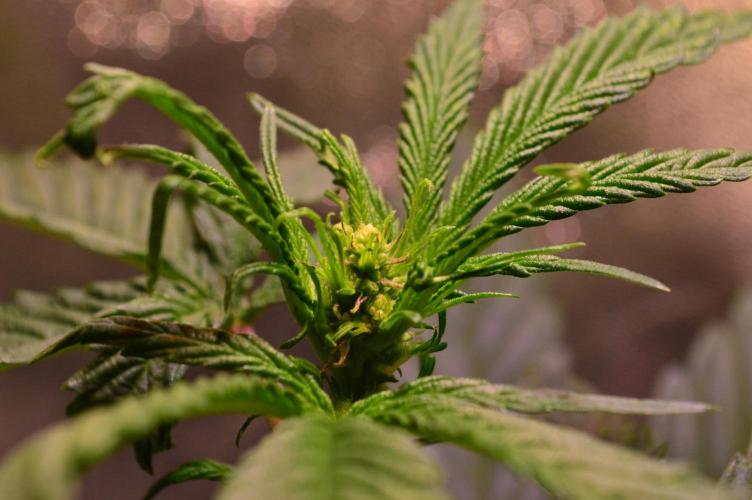
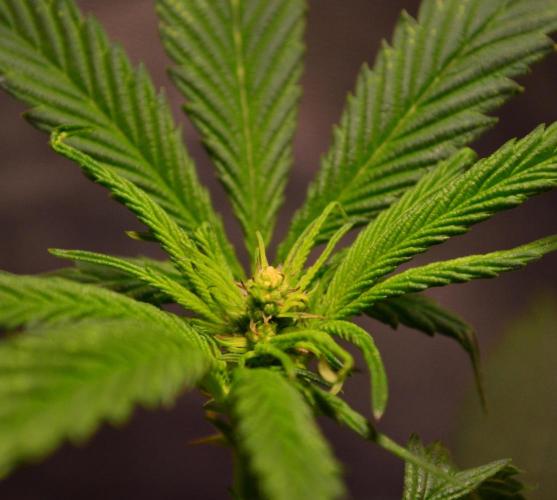
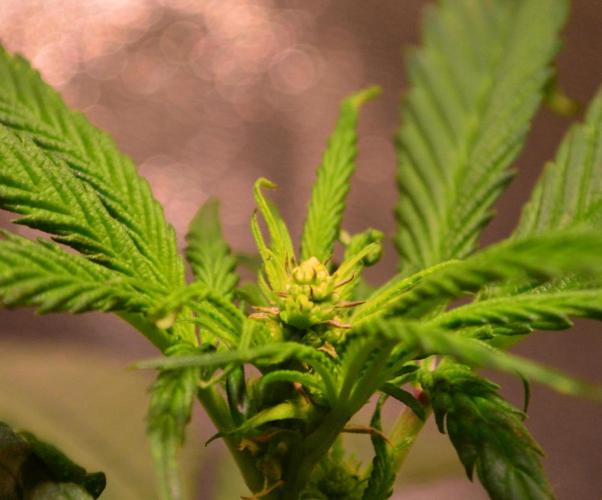
The OceanTruffle was sprayed with colloidal silver only 2 times a day starting in the second week of 12/12.
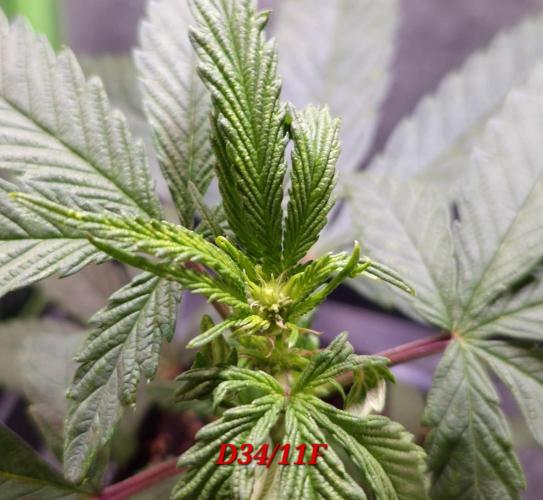
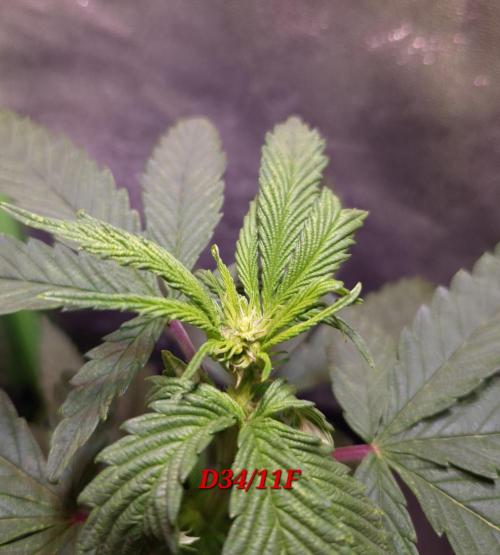
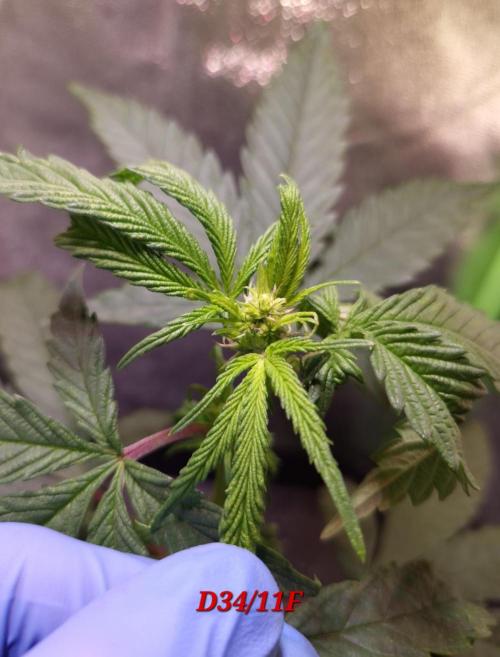
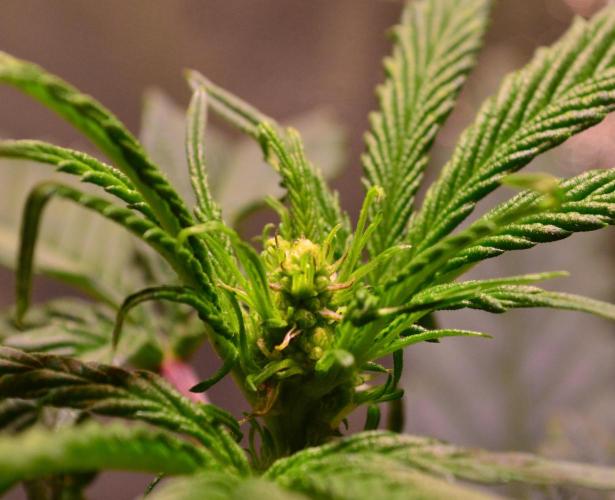
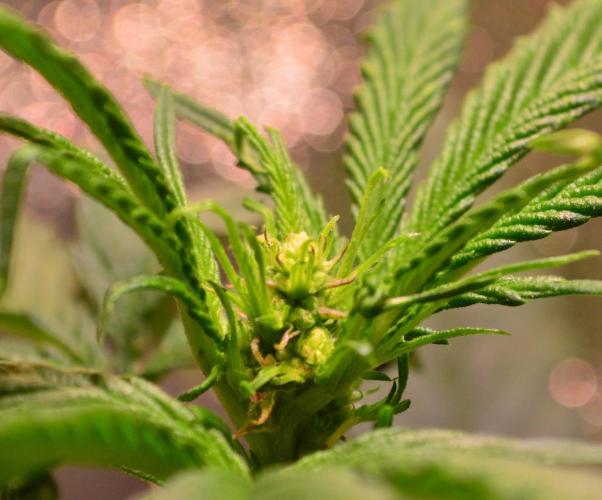
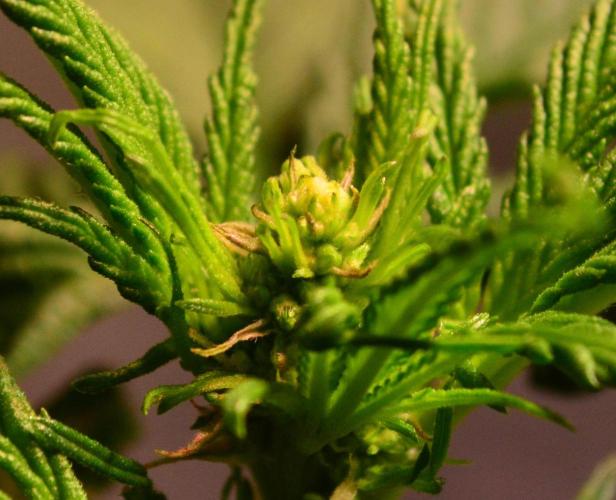
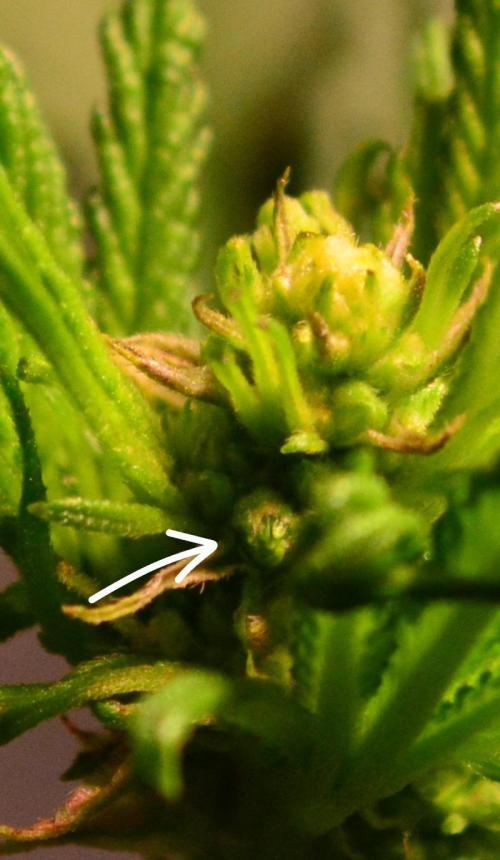
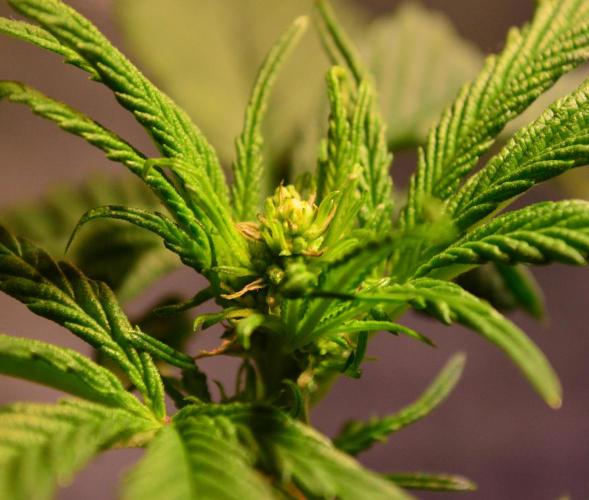
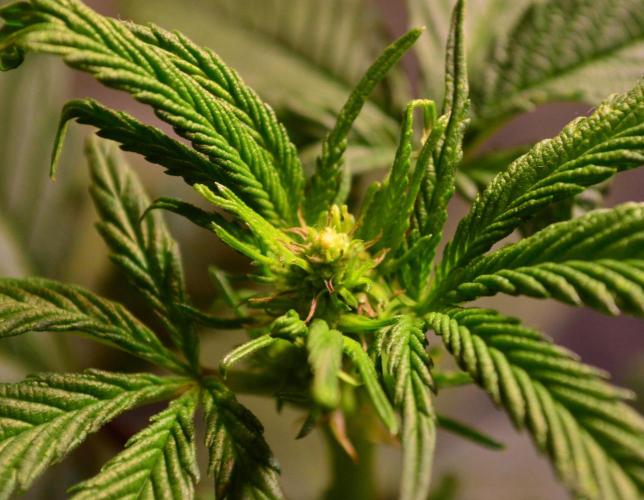
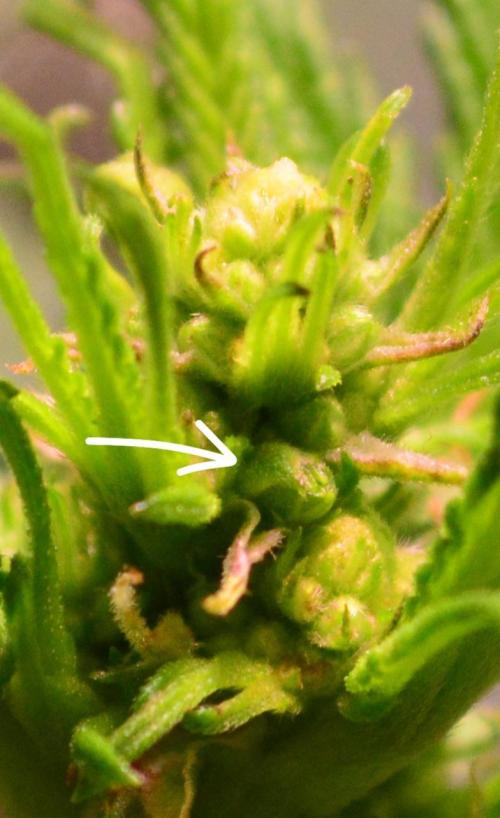
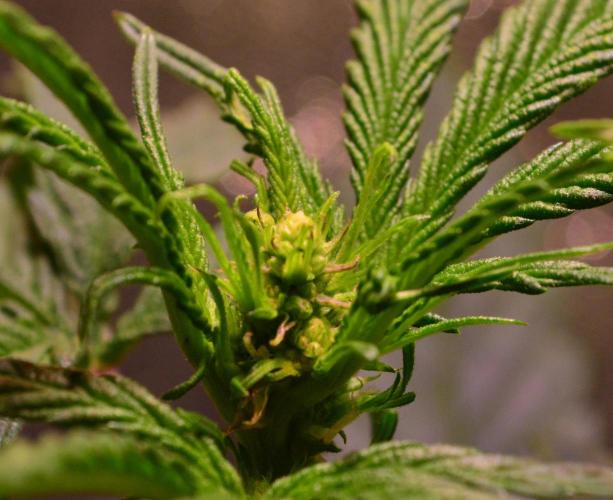
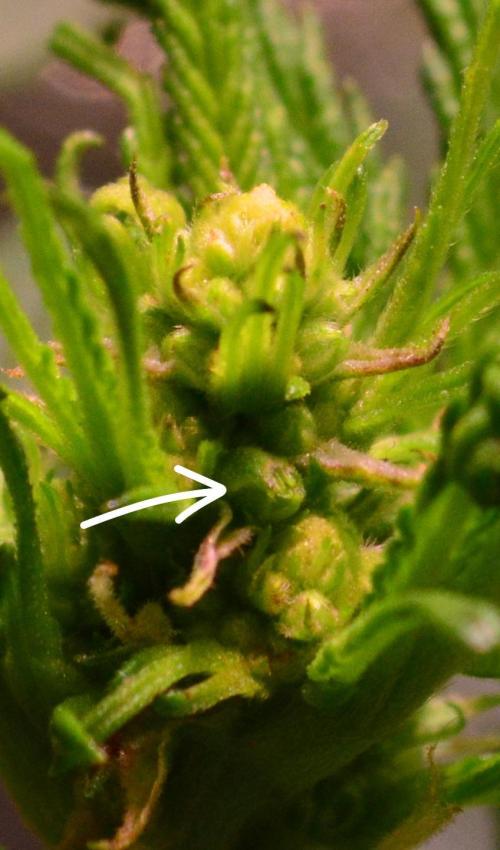
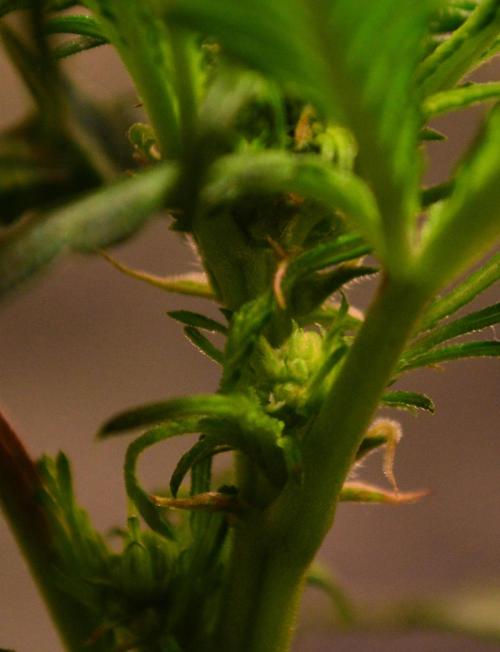
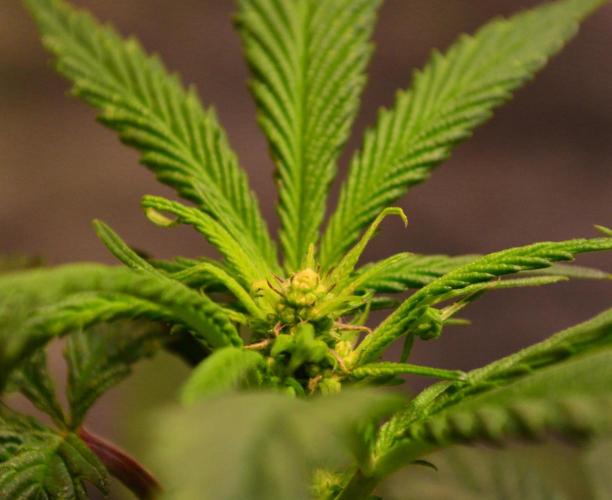
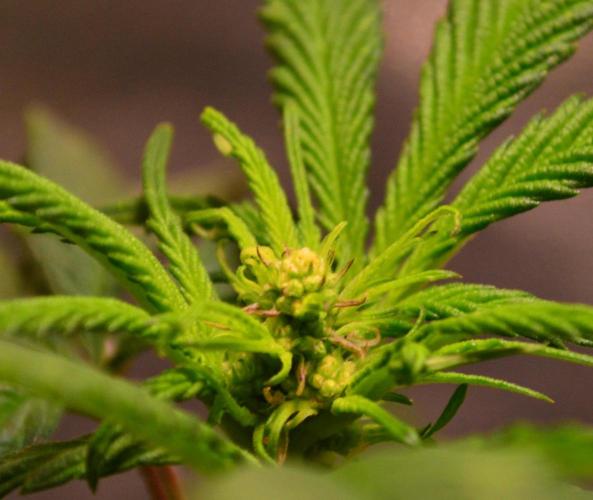
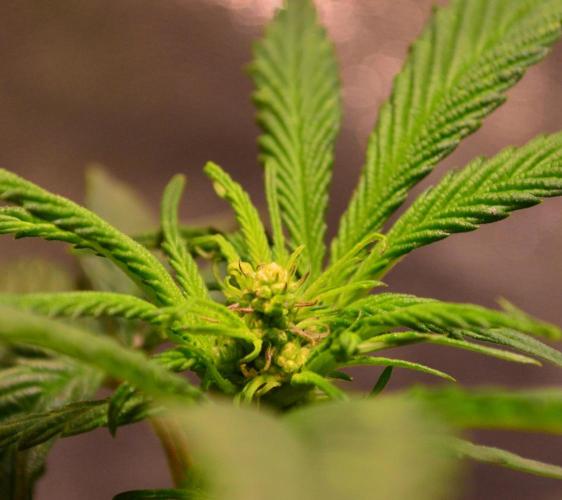
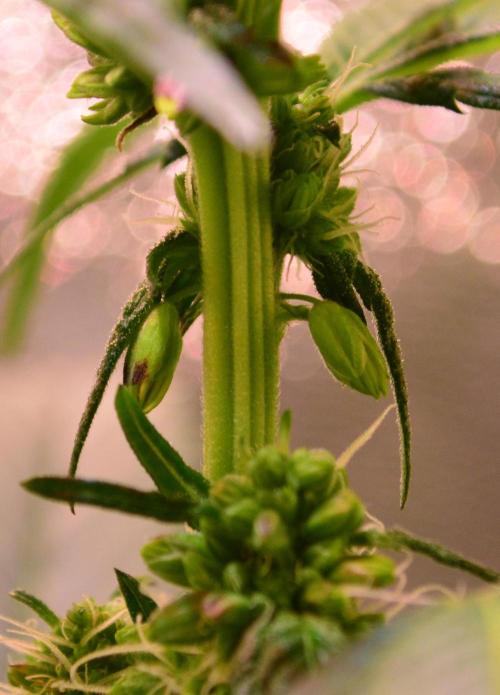
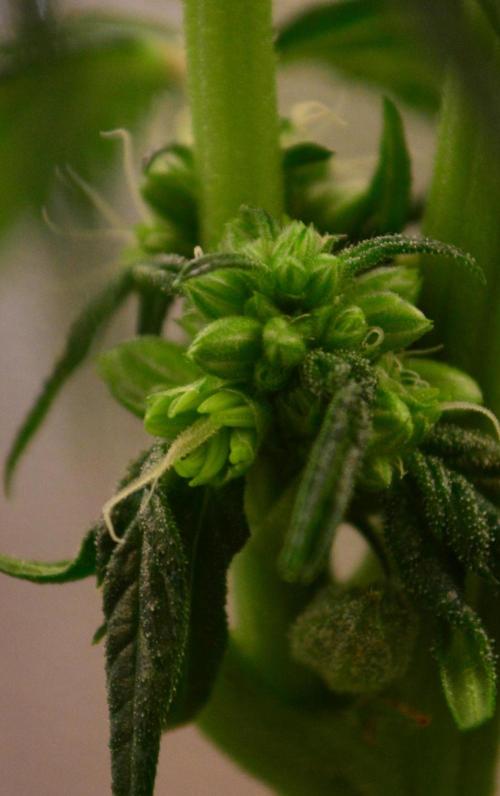
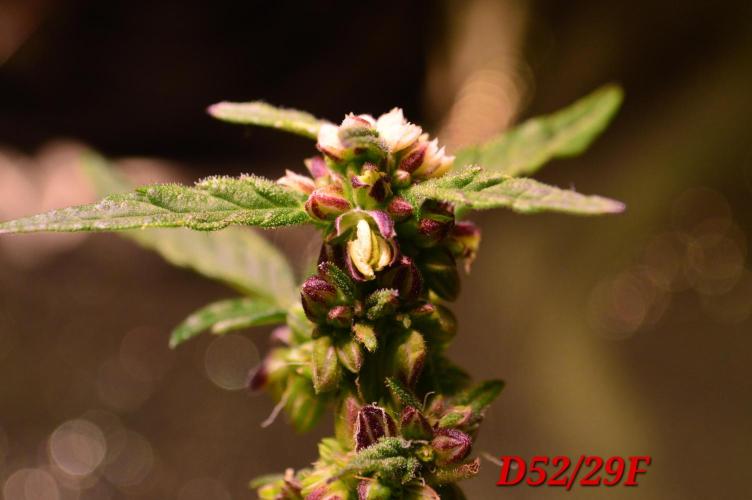
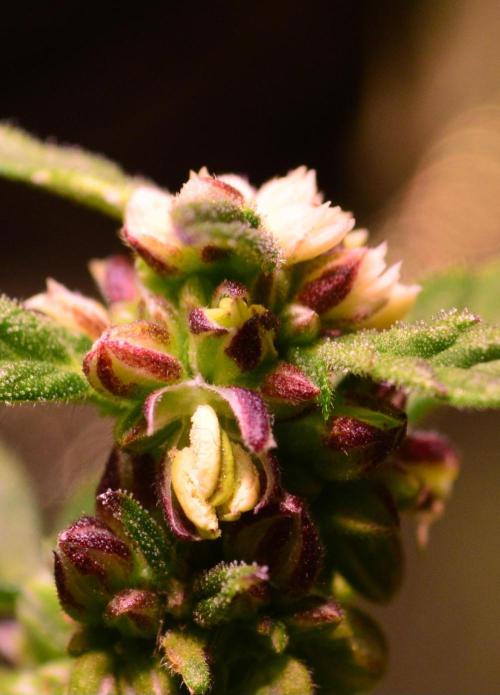
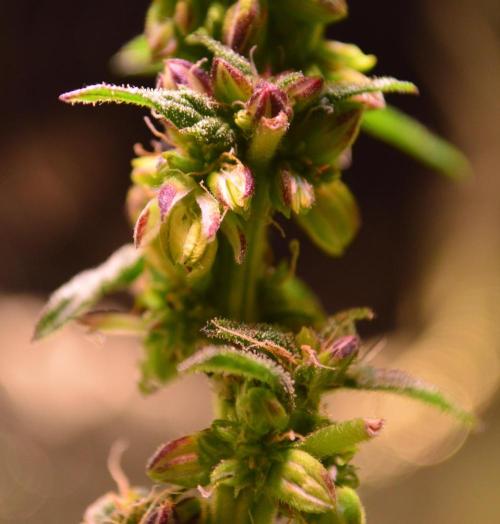
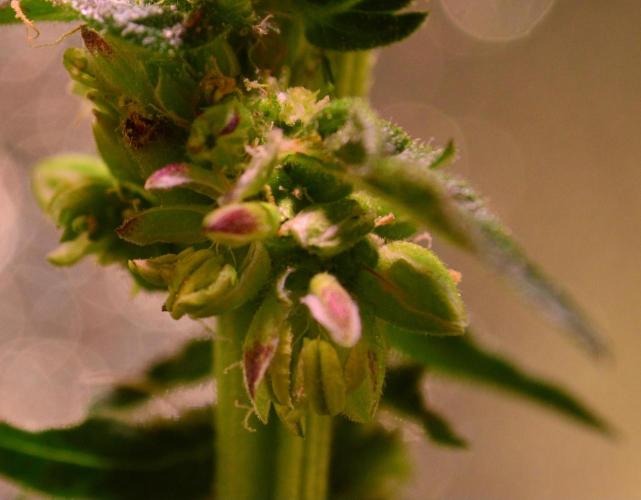
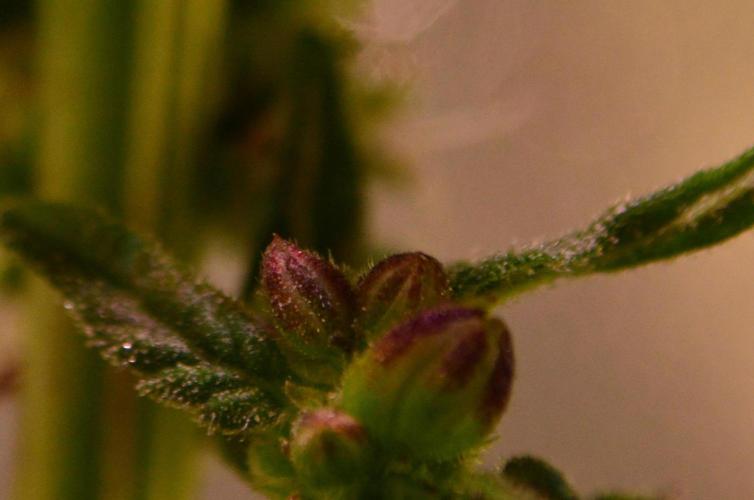
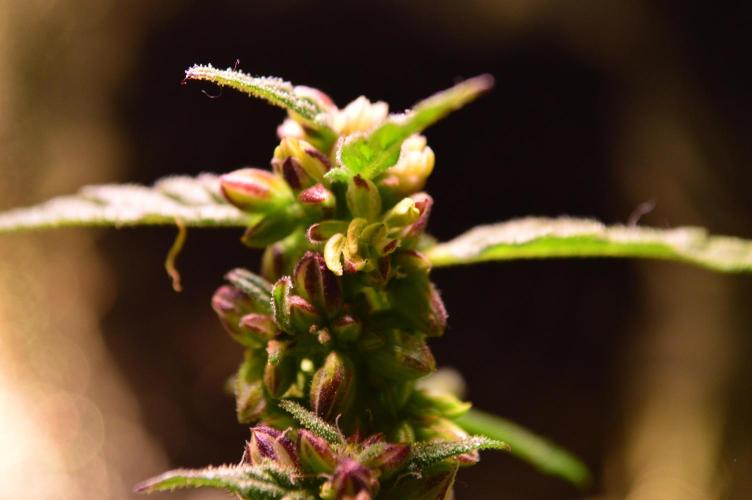
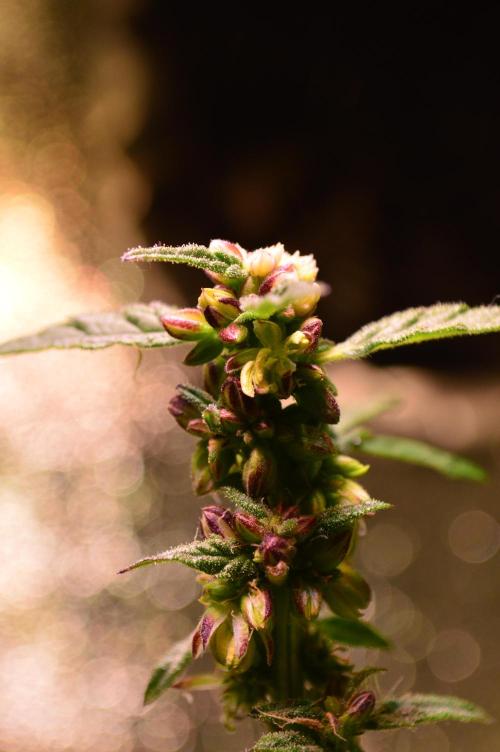
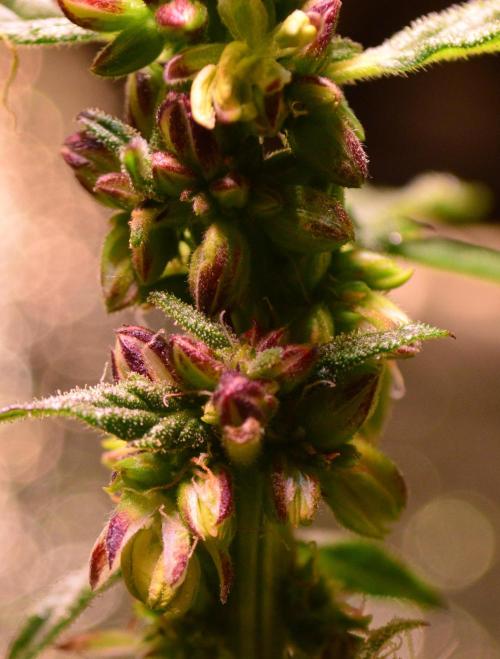
On day 9, you could gradually observe the typical initial flower formation. The part where you can see that the next thing you see is the bloom. What has been encouraging so far is that no or very few pistils have been noticed. This gave hope that everything is going according to plan. In the meantime, the little lady is also drinking well, which is a good sign.
To provide the OceanTruffle with a decent ppfd value of just over 800 despite the low power of only 50W, the distance from the LED to the plant is only 20cm. With the Q1W, you can work quite well at this distance without the plant being stressed by the light.
On the penultimate day of this week, on day 13F, the OceanTruffle was sprayed for the first time with STS in the evening when the LED went out. This increases the likelihood that pollen can also be harvested at the end.
Even though things have gone quite well with the colloidal silver so far, I wanted to be absolutely sure.
__________________________________
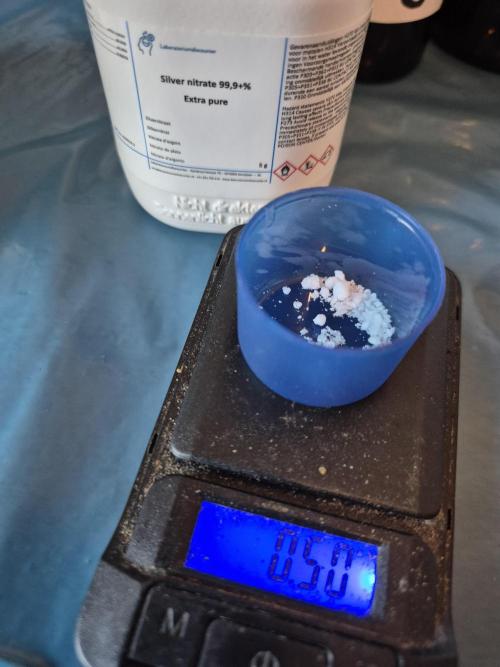
Preparation and Application of STS
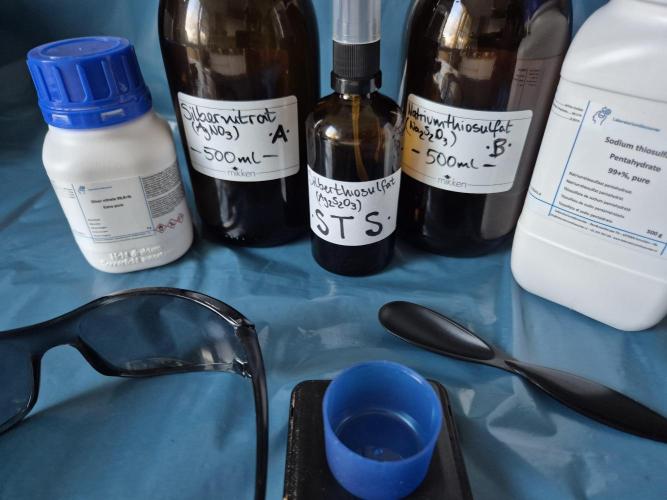
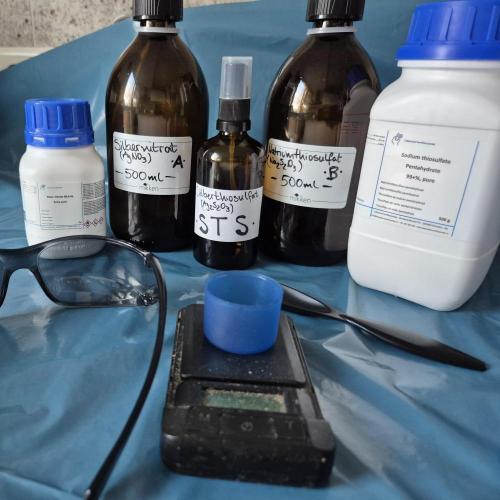
For Solution A, 0.5g of silver nitrate was stirred into 500ml of distilled water with a plastic spoon until completely dissolved.
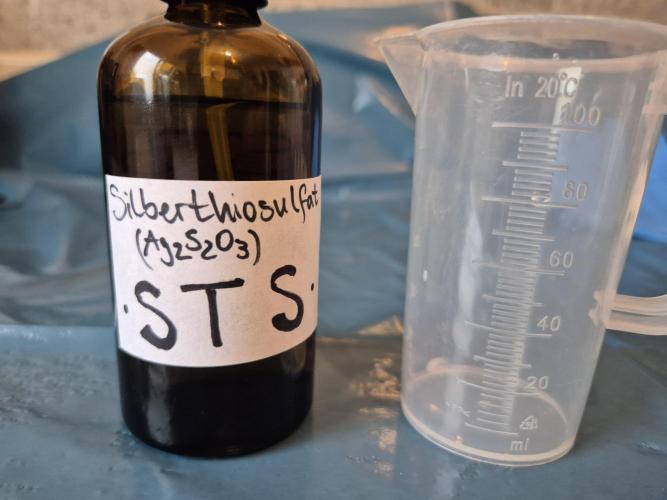
For Solution B, 2.5g of sodium thiosulfate was stirred into 500ml of distilled water with a plastic spoon until completely dissolved.
The silver nitrate Solution A is mixed 1:1 with the sodium thiosulfate Solution B. The silver nitrate Solution A is slowly poured into the sodium thiosulfate Solution B while constantly stirring. (!NEVER THE OTHER WAY AROUND!)
The resulting solution is silver thiosulfate.
The silver thiosulfate solution is diluted 1:2 with distilled water to obtain the ready-to-use STS spray. (The ratio of silver thiosulfate varies greatly when you do some research). This 1:2 ratio comes from the video podcast of Mr.GrowIt where the breeder from Brothers Grimm was a guest. He mentioned that he uses the silver thiosulfate in a 1:2 ratio for the first 7-8 days of 12/12. He also mentioned that he has a friend who uses a product for reversing where one application is sufficient, and he said that with this friend, the leaves of the plant curl, and he doesn't want his plants to look like that. Therefore, I assume from this statement that his plants look very healthy despite the quite strong ratio of 1:2 and daily application.
For the 100ml spray bottle and the micro-reversal, 30ml of silver thiosulfate (15ml silver nitrate + 15ml sodium thiosulfate) is mixed with 60ml of distilled water. This creates a 90ml ready-to-use solution that lasts for about 3 days. The OceanTruffle will then be treated once daily for the next 3 days when the LED goes out. Possibly, another spray bottle will be prepared and sprayed for another 3 days, depending on how the plant and flower development look.
The silver nitrate Solution A and the sodium thiosulfate Solution B are stored separately in glass bottles with plastic lids in the refrigerator. Only as much is mixed together as needed to fill one spray bottle that lasts for 3 days. This way, both solutions can be kept in the refrigerator for a few months. So, for the next run, you can do a micro-reversal with 2-3 strains without having to prepare new base solutions first, but can mix the STS spray and reverse right away.
_________________________________________
Fertilizing/Watering:
Day 31/8F had 1ml/L SilicRock, 0.8ml/L CalMagPro, 1ml/L PowerRoots, 1ml/L PowerBuds, 4ml/Alfaboost.
The little Truffle received 100ml with a pH of 6.5.
Day 32/9F had 50ml of pH-adjusted water.
Day 33/10F had 50ml of pH-adjusted water.
On Day 34/11F, there was 1ml/L SilicRock, 0.8ml/L CalMagPro, 1ml/L PowerRoots, 1ml/L PowerBuds, 4ml/Alfaboost, 2ml/L PK5-8, 1g/L BioEnhancer.
The little Truffle received 150ml with a pH of 6.5.
Day 35/12F had 50ml of pH-adjusted water.
Day 36/13F had 1ml/L SilicRock, 0.8ml/L CalMagPro, 1ml/L PowerRoots, 1ml/L SugarRoyal, 1ml/L PowerBuds, 4ml/Alfaboost.
The little Truffle received 100ml with a pH of 6.5.
Day 37/14F had 50ml of pH-adjusted water.
_____________________________
Height from substrate surface: 28cm
_______________________________
Light:
Distance: 20cm
Watt: 50W (100%)
Ppfd: 840
DLI: 36
_______________________________
Environment:
Temp: 24-26°C
RH: 40-50%
VPD: 1.05-1.39 kPa
23 likes
5 comments
Share
7
Week 7. Flowering7mo ago
33 cm
Height
12 hrs
Light Schedule
25 °C
Day Air Temp
6.5
pH
No Smell
Smell
45 %
Air Humidity
19 °C
Solution Temp
22 °C
Substrate Temp
21 °C
Night Air Temp
1 liters
Pot Size
0.1 liters
Watering Volume
20 cm
Lamp Distance
Nutrients 4
Alfaboost
4 mll
CalMag Pro
0.5 mll
Power Buds
1 mll
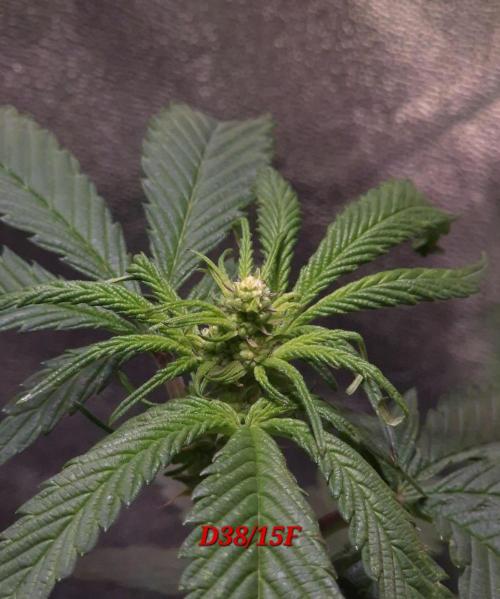
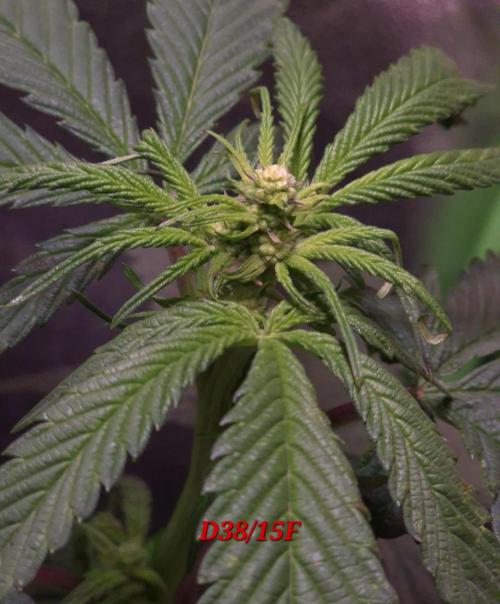
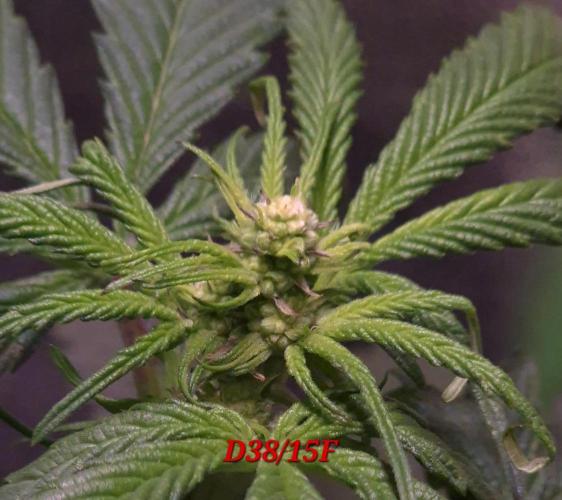
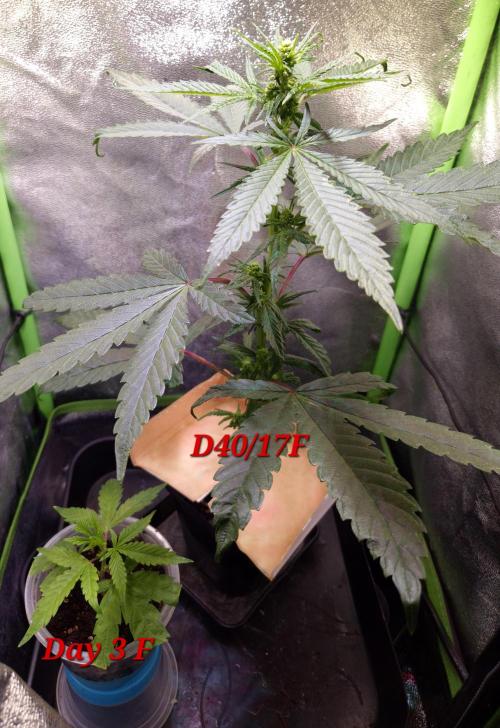
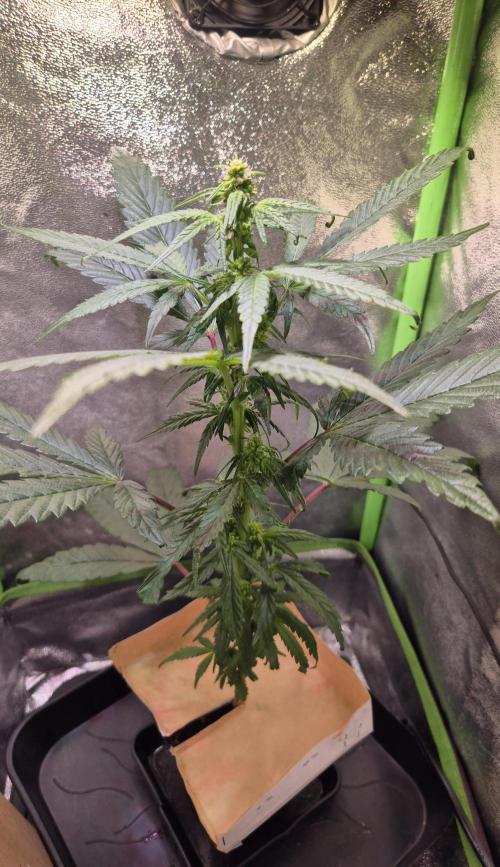
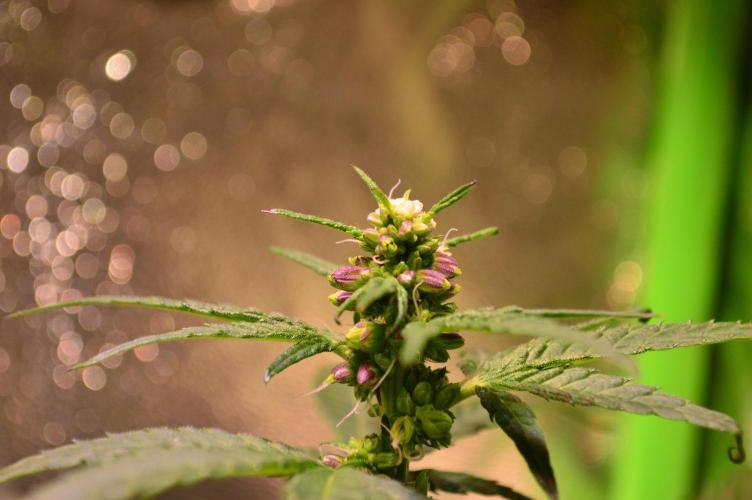
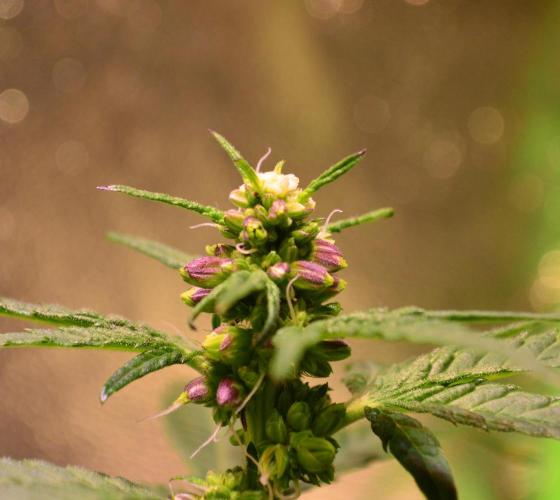
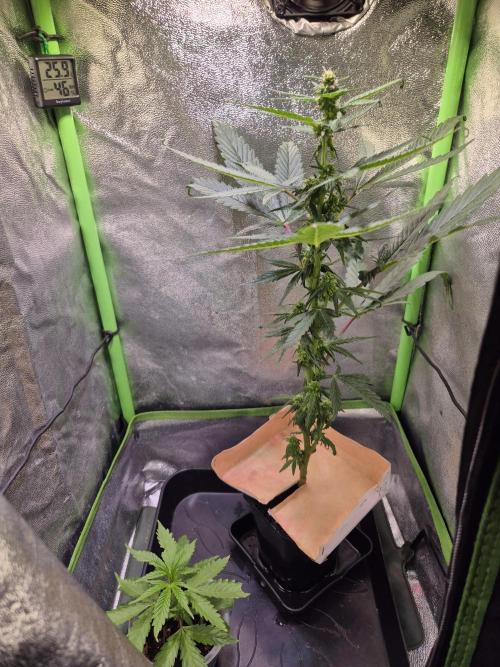
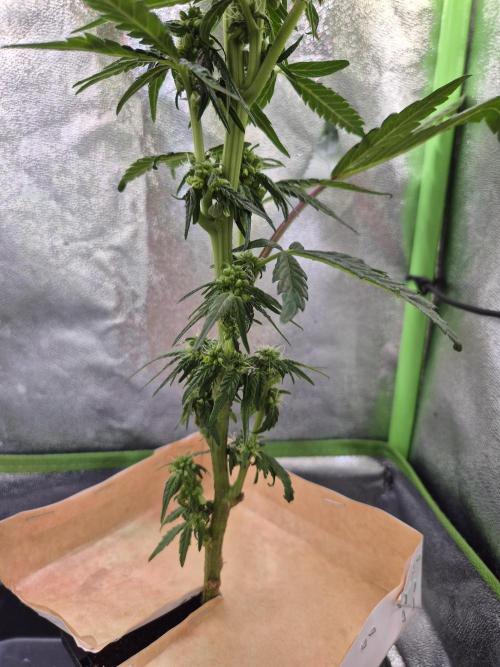
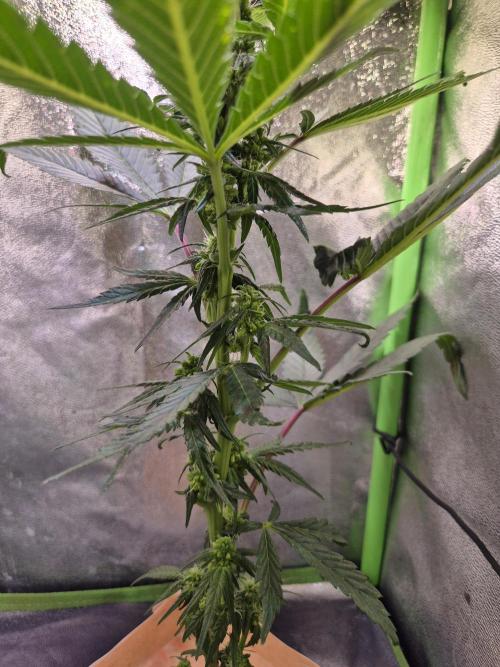
GanjaGecko Week 6/7// 3F /// D38/15F - D44/21F
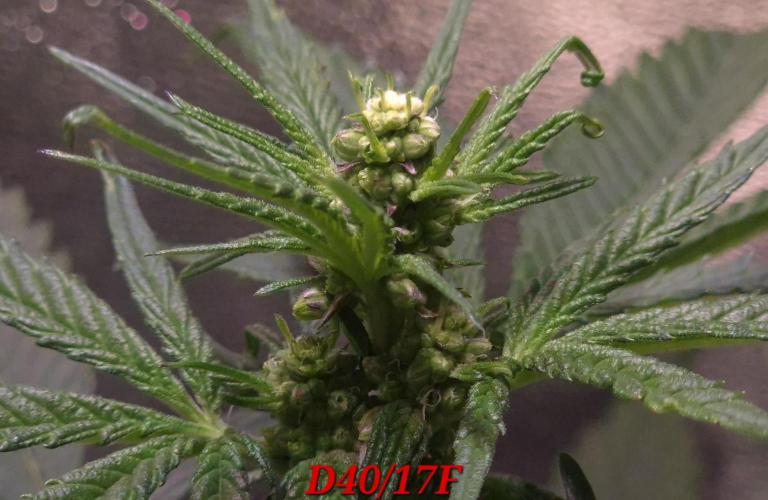
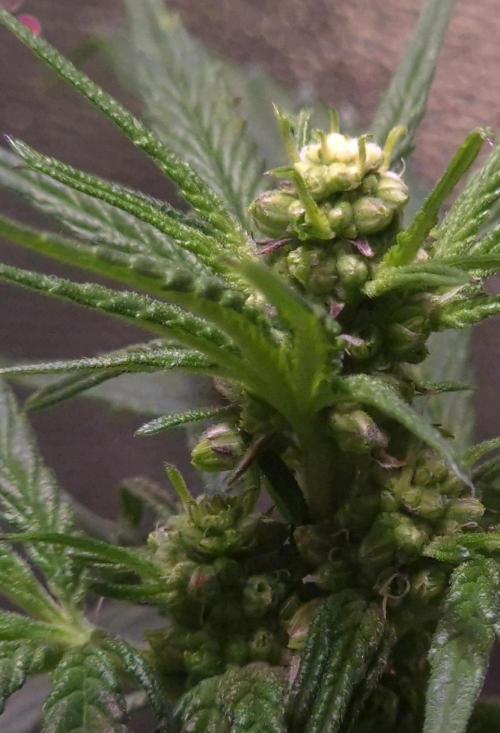
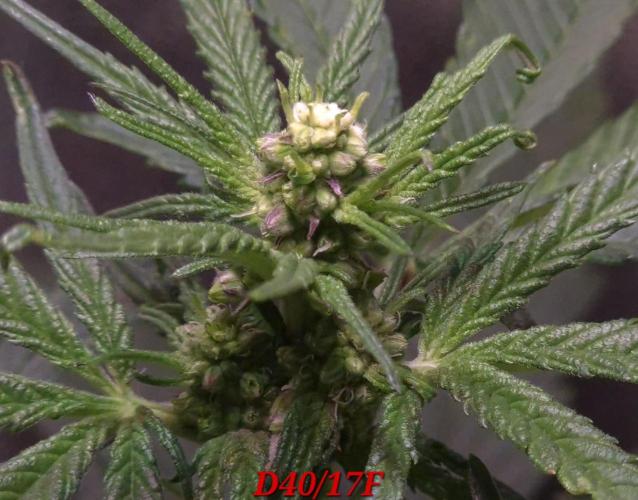
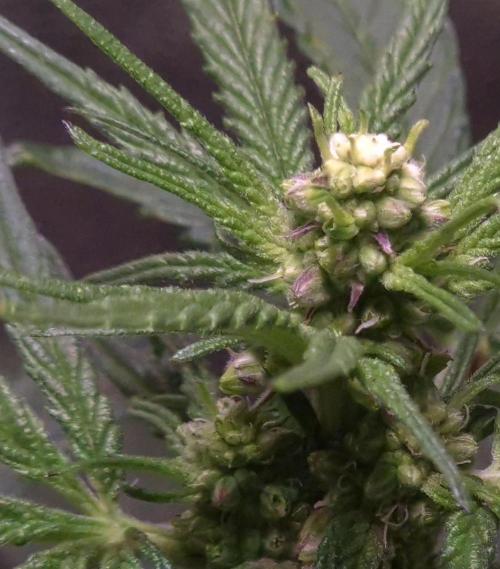
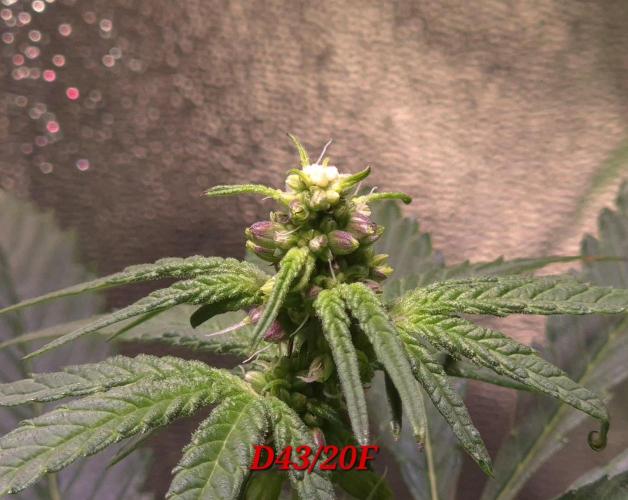
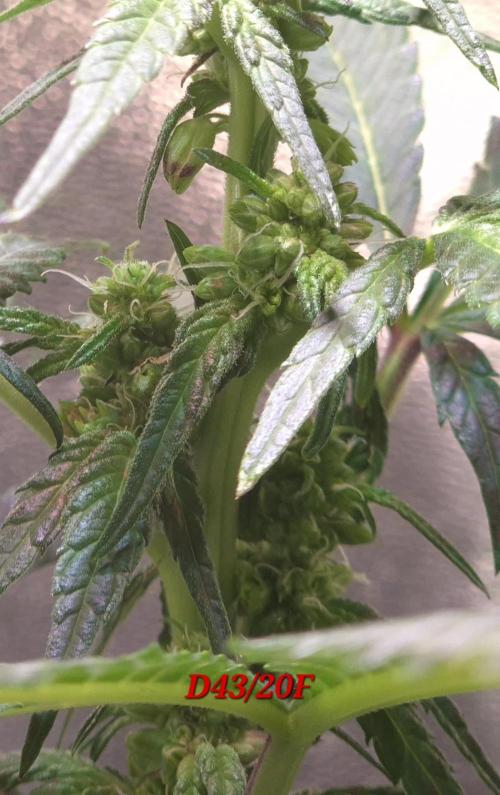
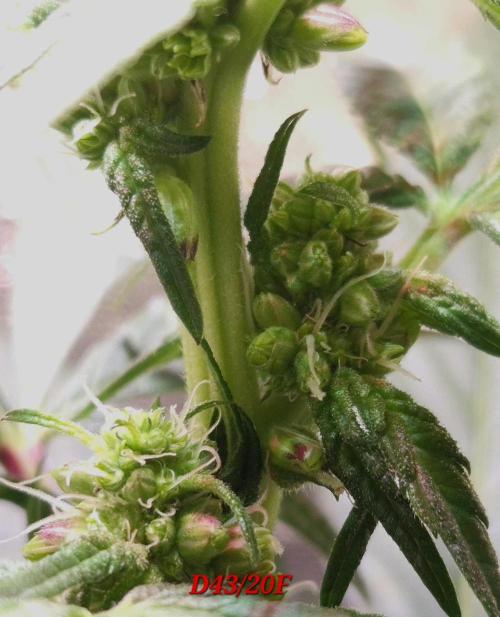
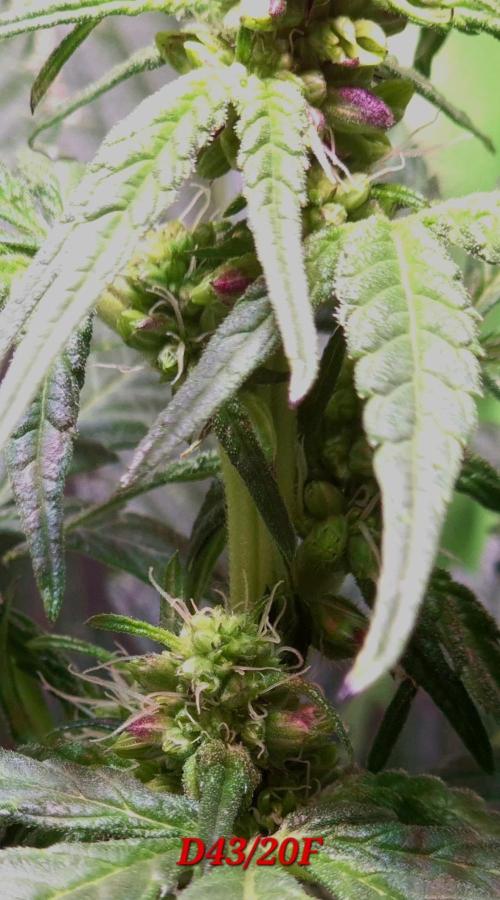
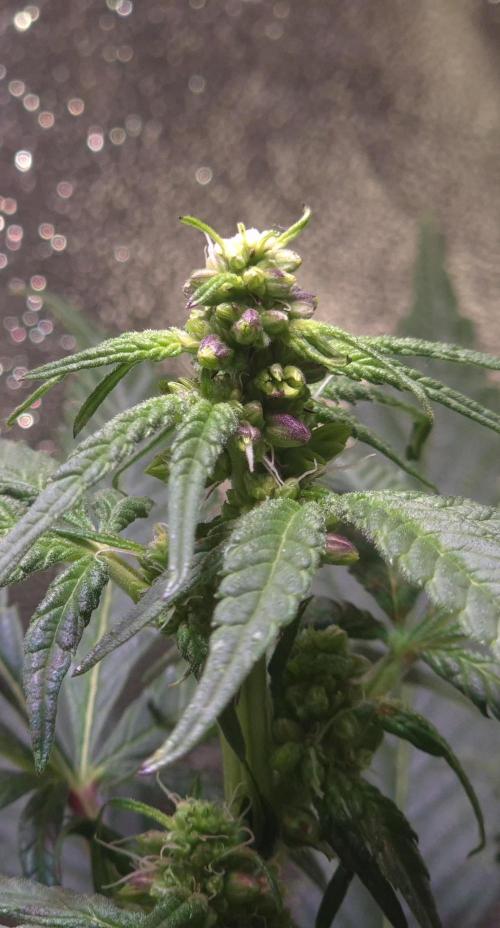
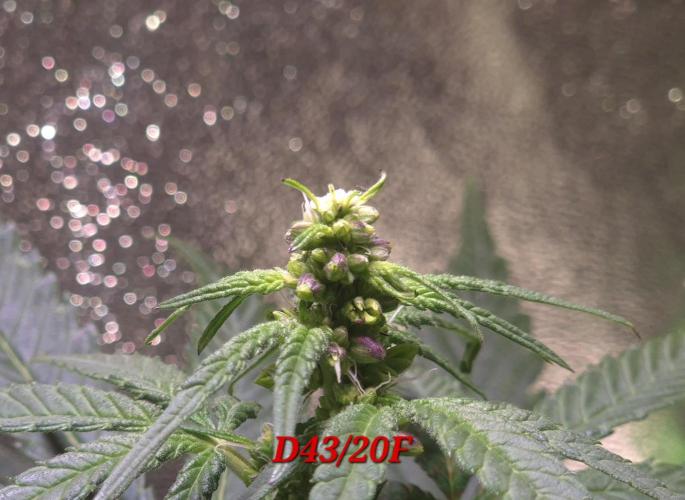
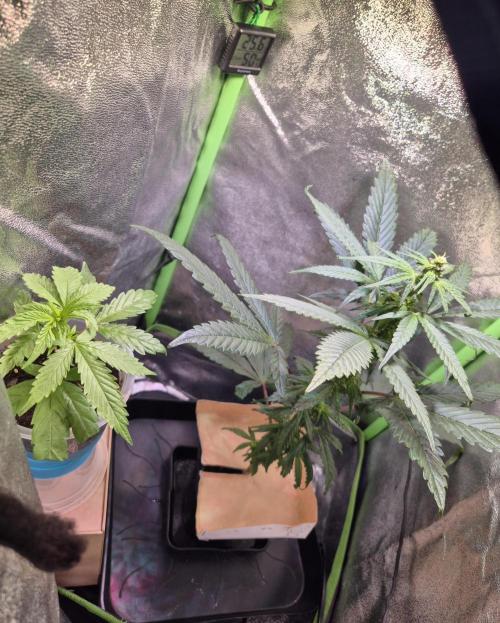
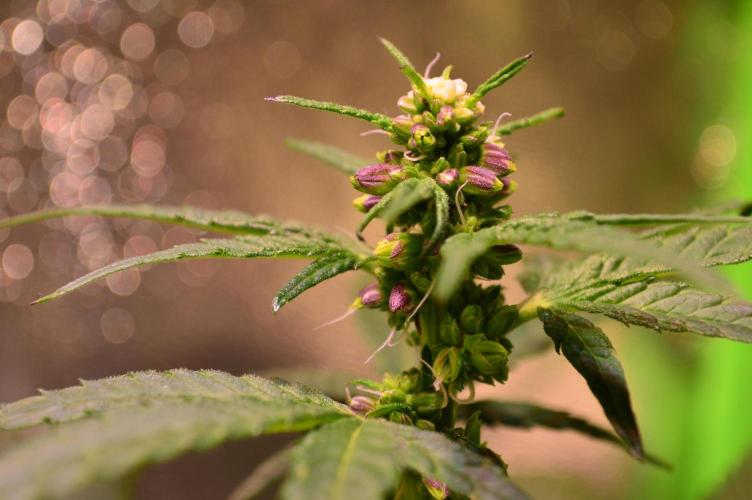
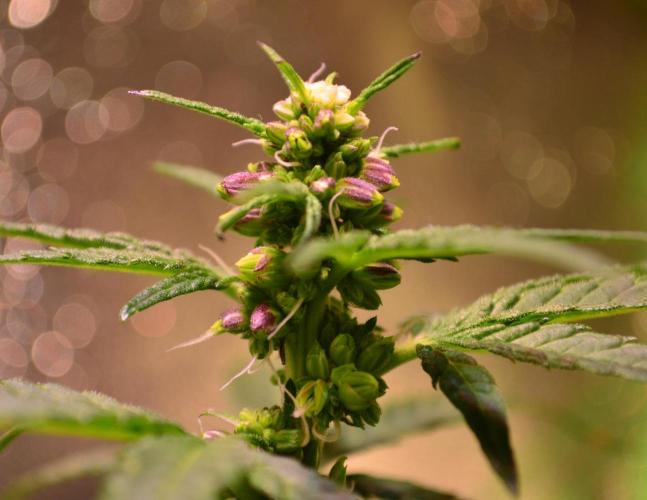
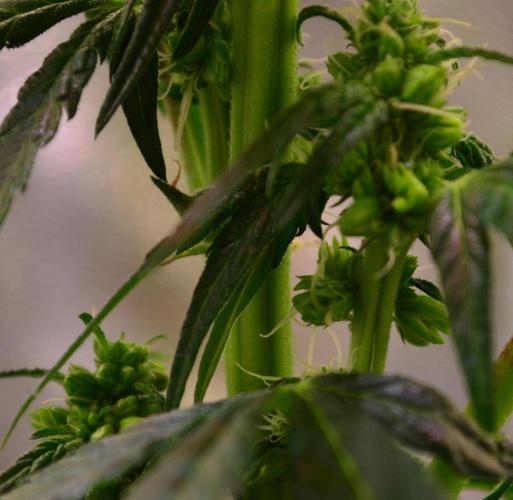
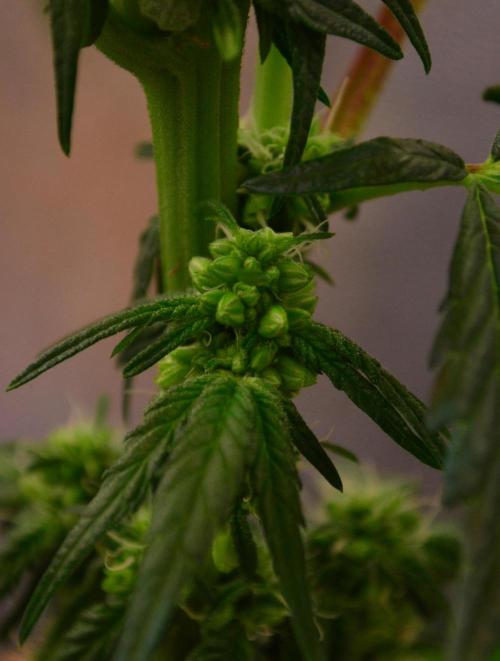
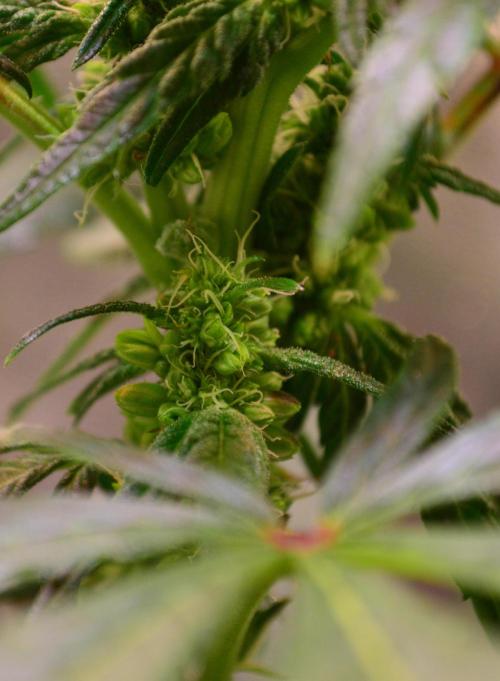
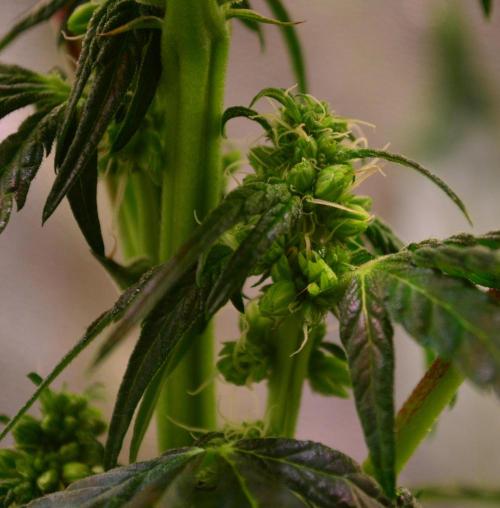
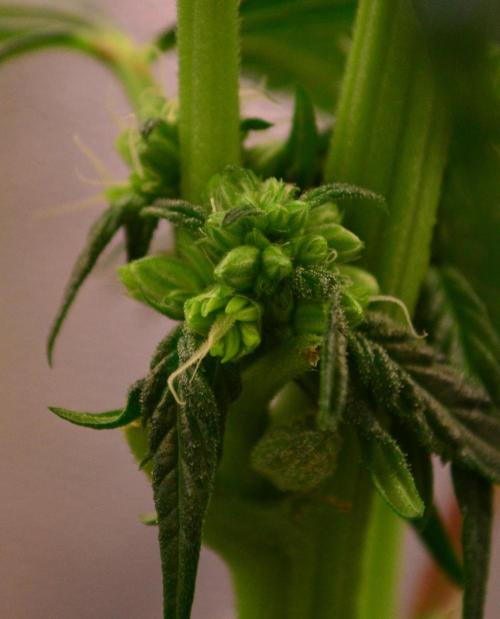
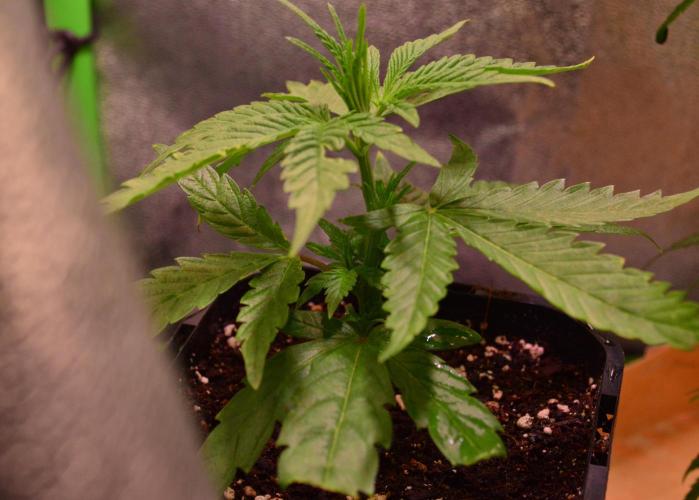
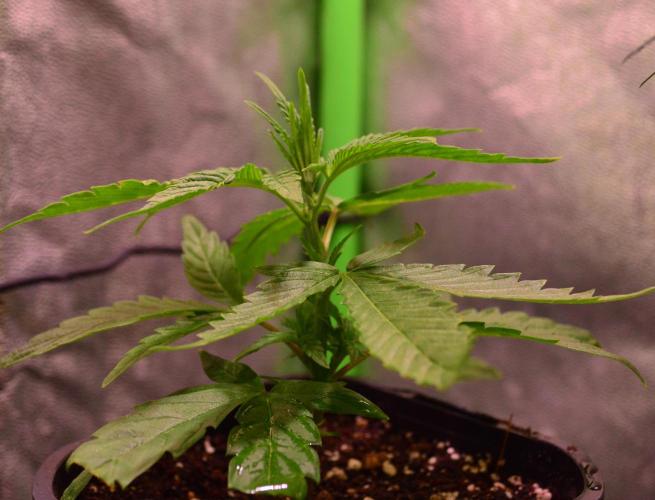
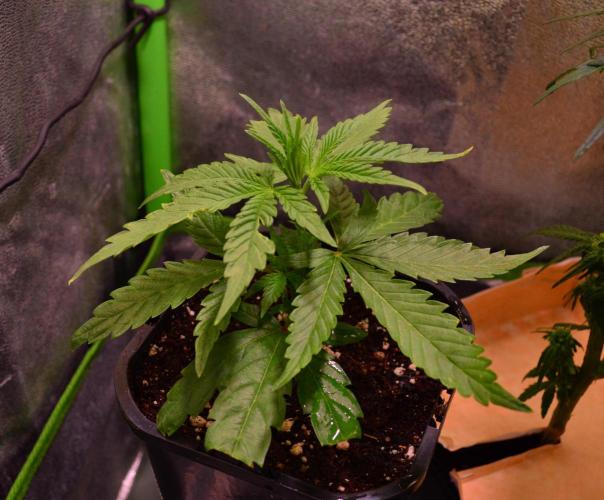
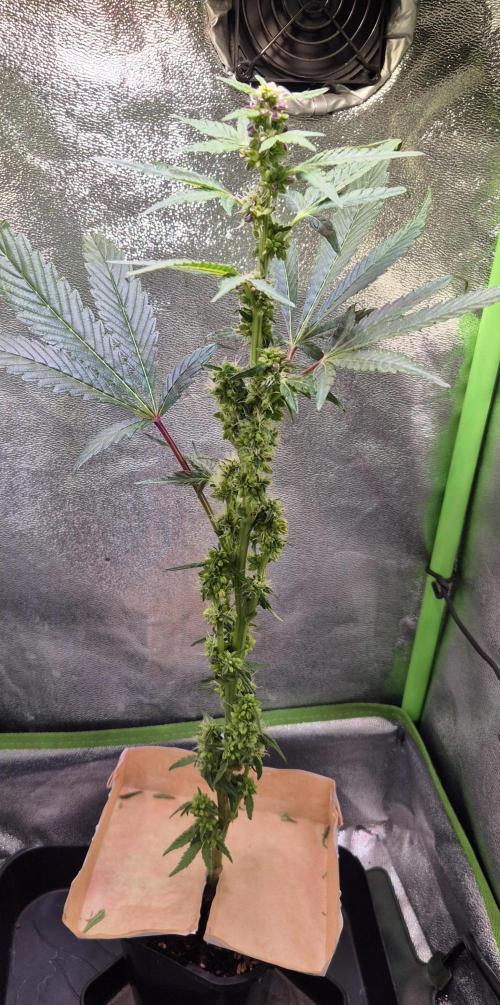
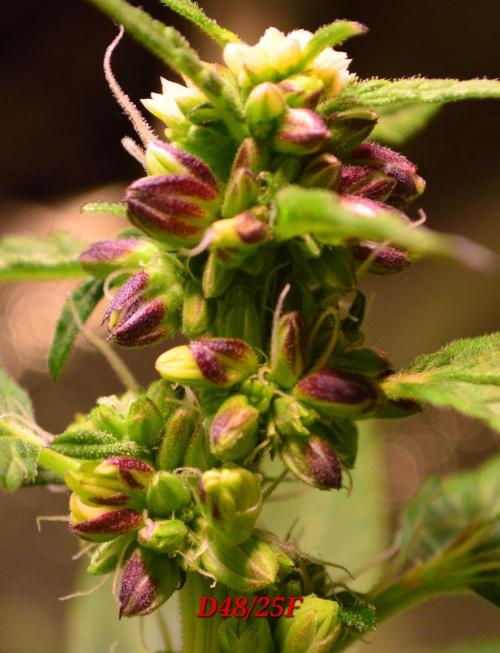
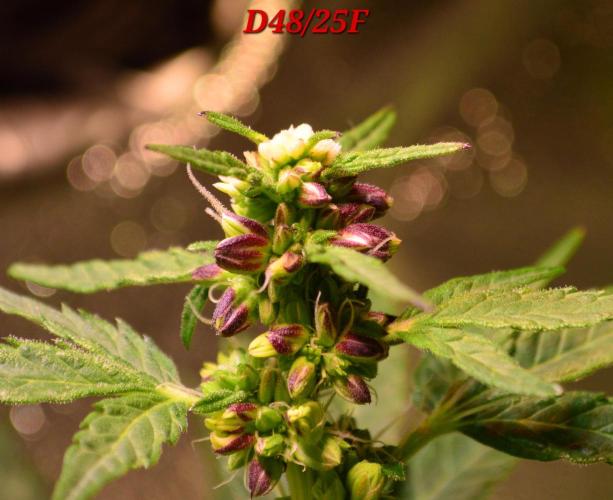
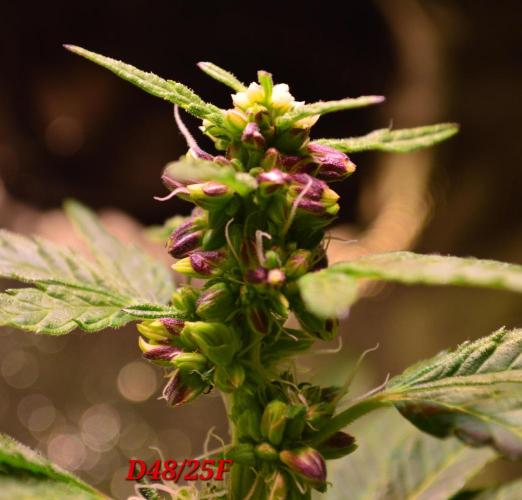
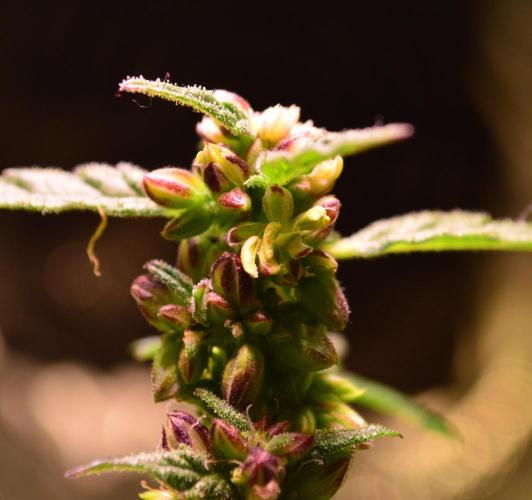
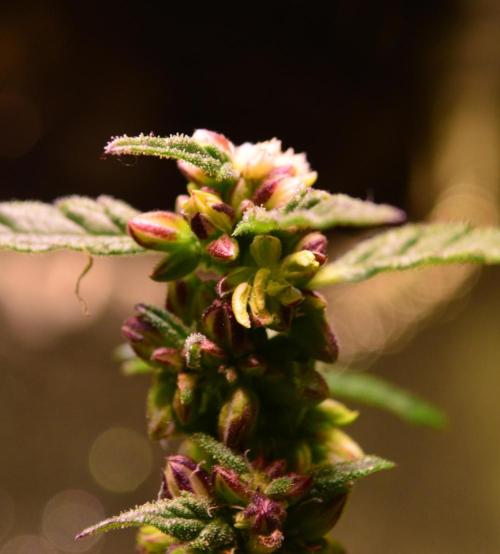
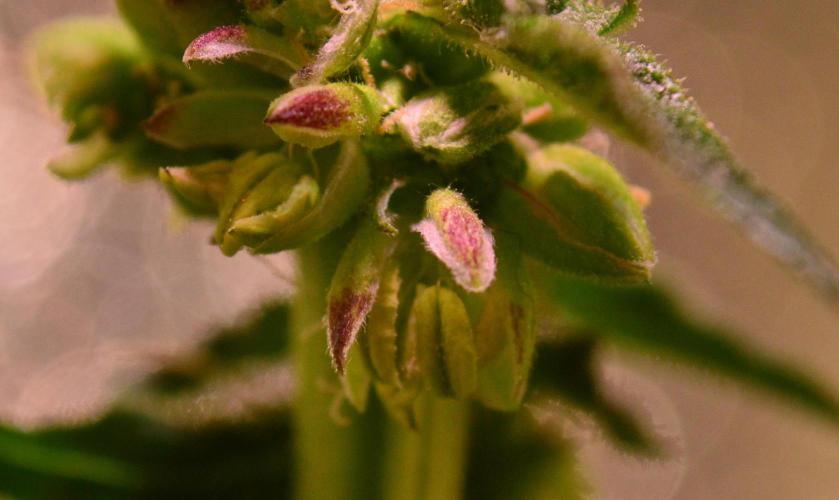
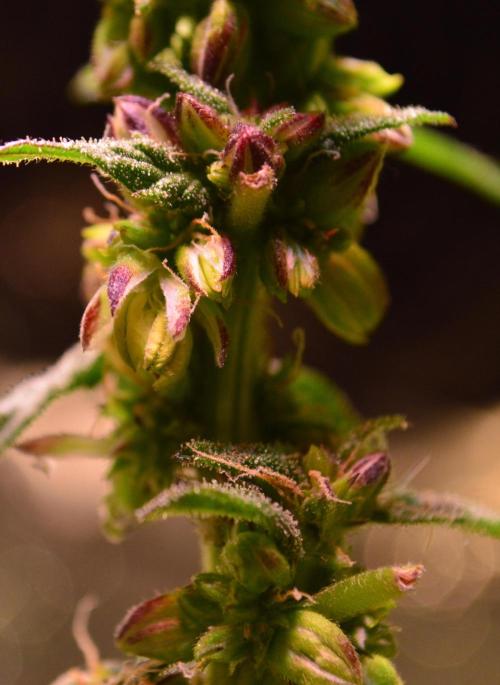
It's kind of crazy, this whole thing. In the third week, you could see progress in the flowering every day. When the pollen sacs in the upper part of the plant slowly opened and the stamens started to appear, only the leaves and the lower part of the plant where the pollen sacs were still closed were sprayed with STS. The last time was on day 43/20F. From day 44/21F, a makeshift catch made of paper and baking paper was placed around the stem of the plant to secure the first falling pollen.
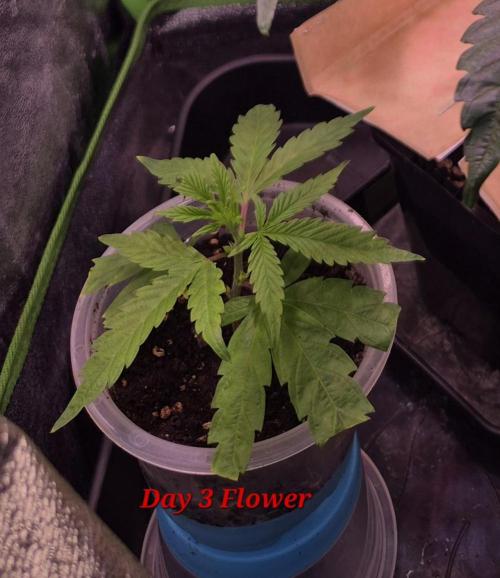
A small cutting of OceanTruffle also came into the tent. Since the Clonex was already there, we wanted to test it out 😄 The cut had visible roots about 2-3 days earlier with Clonex than without it in the eazy plug. A big difference was that the cutting didn't look as stressed as without Clonex, not to mention how the ladies looked when they were just stuck in substrate. In this attempt, it looked more like the cutting had just been taken a few days ago. This cutting had visible roots just one day after repotting in the new pot, which you could see really well through the transparent pot. Therefore, this cutting was also sprayed with STS and went into the small seedling/experiment tent. It was treated like the Brothers Grimm method for the first 7 days 12/12, sprayed with STS when the light went out. From now on, it will just be allowed to grow.
_________________________________________
Fertilizing/Watering:
On day 38/15F, there was 2ml/L PK5-8, 1ml/L PowerRoots, 1ml/L PowerBuds, 4ml/ Alfaboost. The little Truffle received 120ml with a pH of 6.5.
On day 39/16F, there was 30ml of pH-adjusted water.
On day 40/17F, there was 50ml of pH-adjusted water.
On day 41/18F, there was 2ml/L PK5-8, 1ml/L PowerRoots, 1ml/L PowerBuds, 4ml/ Alfaboost. The little Truffle received 120ml with a pH of 6.5.
On day 42/19F, there was 40ml of pH-adjusted water.
On day 43/20F, there was 2ml/L PK5-8, 1ml/L PowerRoots, 1ml/L PowerBuds, 4ml/ Alfaboost. The little Truffle received 120ml with a pH of 6.2.
On day 44/21F, there was 50ml of pH-adjusted water.
_____________________________
Height from substrate surface: 28cm
_______________________________
Light:
Distance: 20cm
Watt: 50W (100%)
Ppfd: 840
DLI: 36
_______________________________
Environment:
Temp: 24-26°C
RH: 40-50%
VPD: 1.05-1.39 kPa
24 likes
4 comments
Share
8
Week 8. Flowering7mo ago
34 cm
Height
12 hrs
Light Schedule
25 °C
Day Air Temp
6.5
pH
No Smell
Smell
45 %
Air Humidity
19 °C
Solution Temp
22 °C
Substrate Temp
21 °C
Night Air Temp
1 liters
Pot Size
0.1 liters
Watering Volume
20 cm
Lamp Distance
Nutrients 4
Alfaboost
4 mll
CalMag Pro
0.5 mll
Power Buds
1 mll
GanjaGecko Week 7/8// 4F /// D45/22F - D51/28F
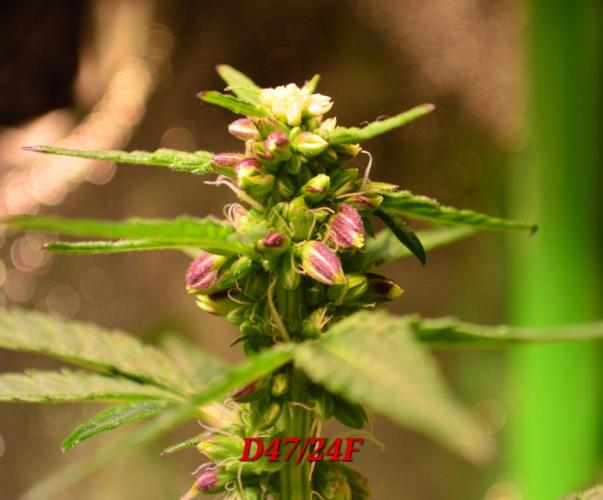
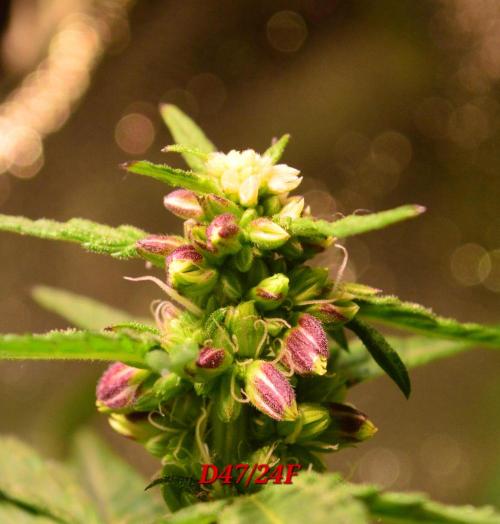
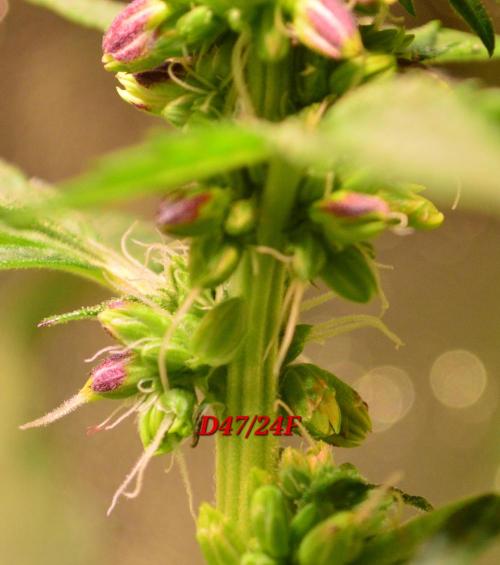
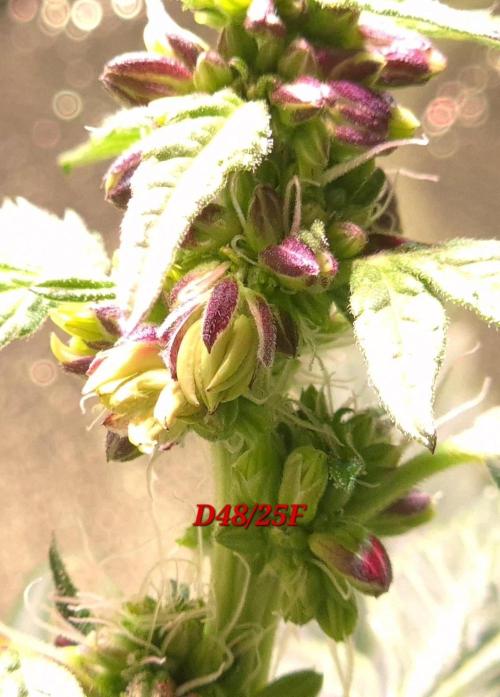
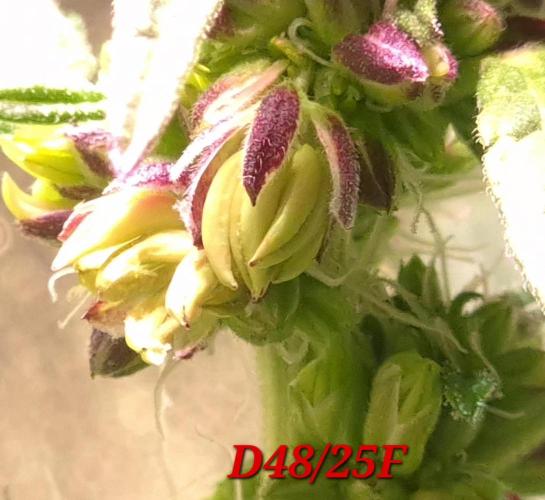
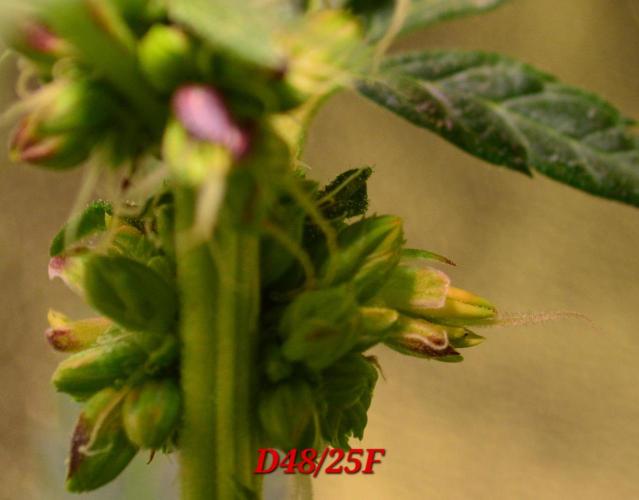
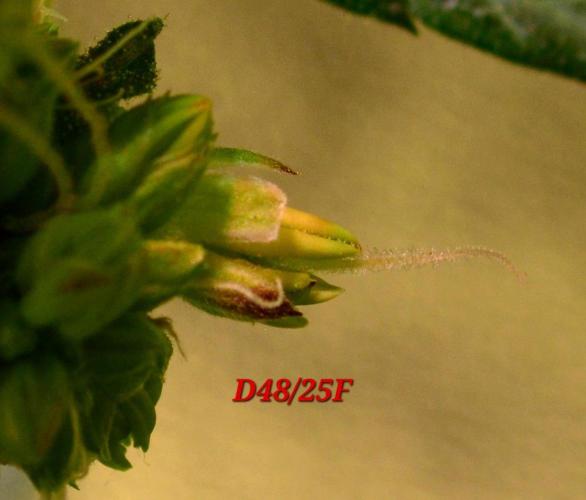
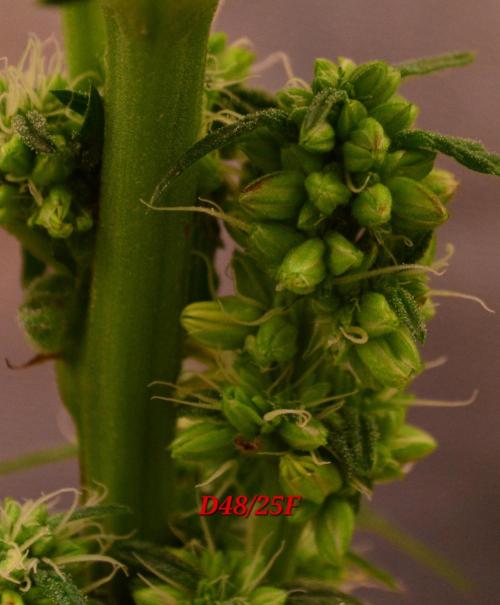
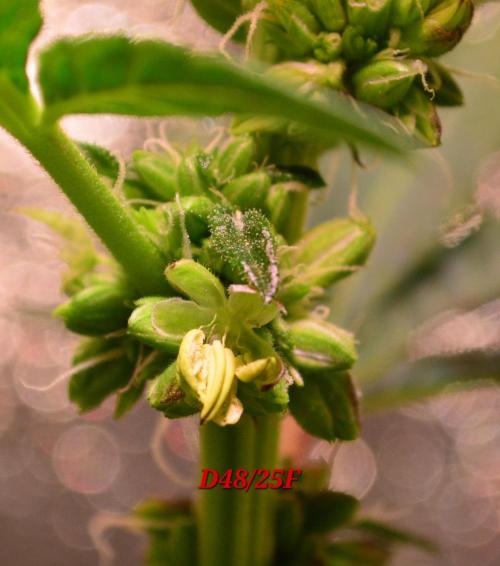
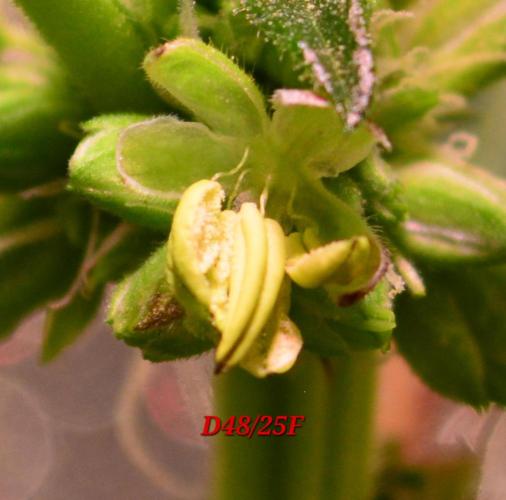
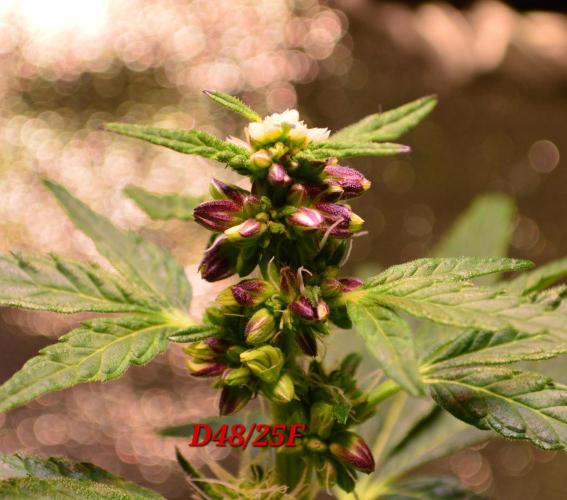
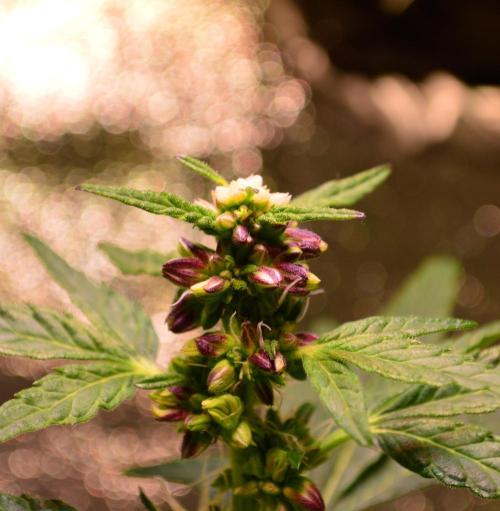
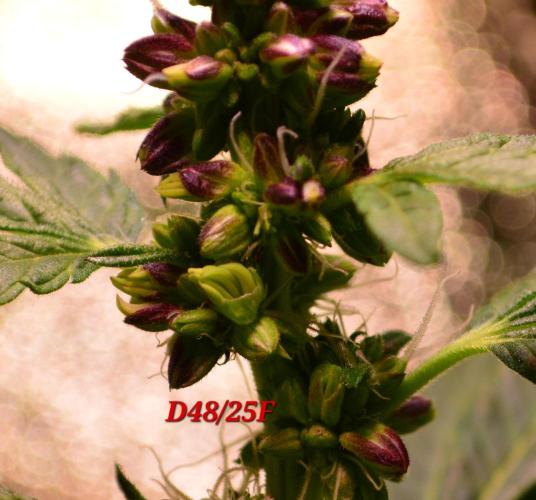
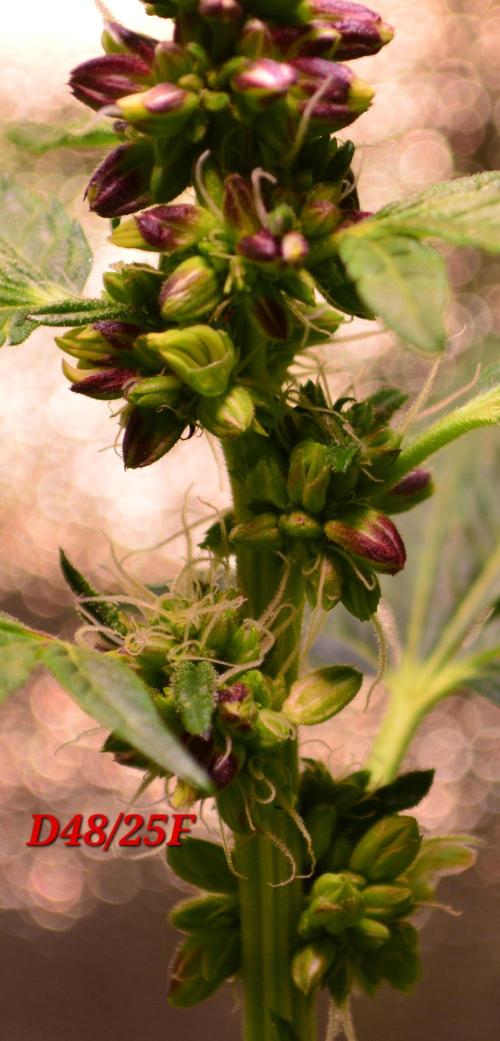
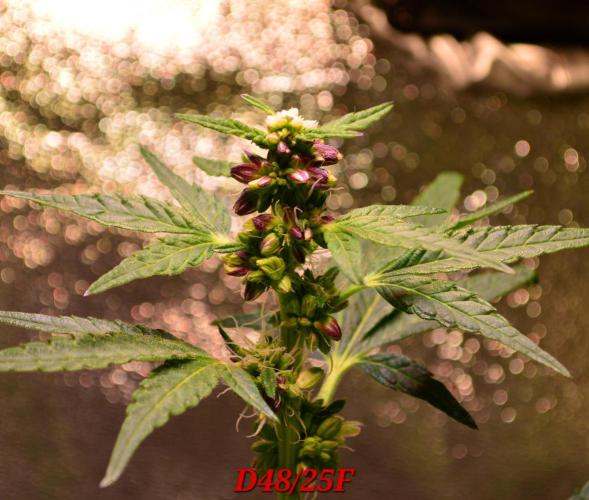
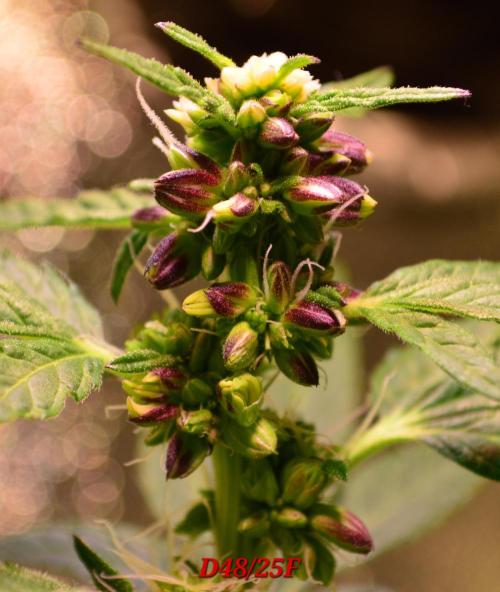
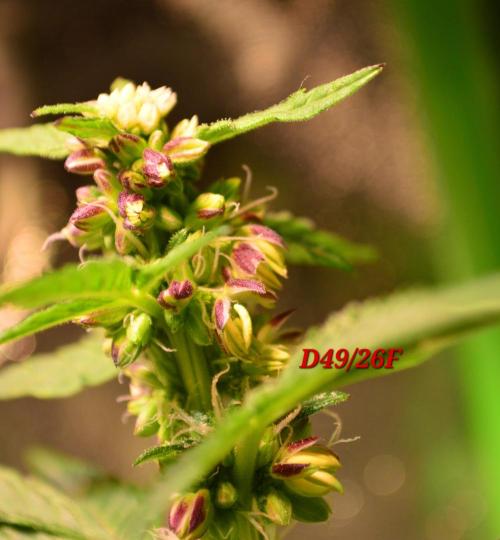
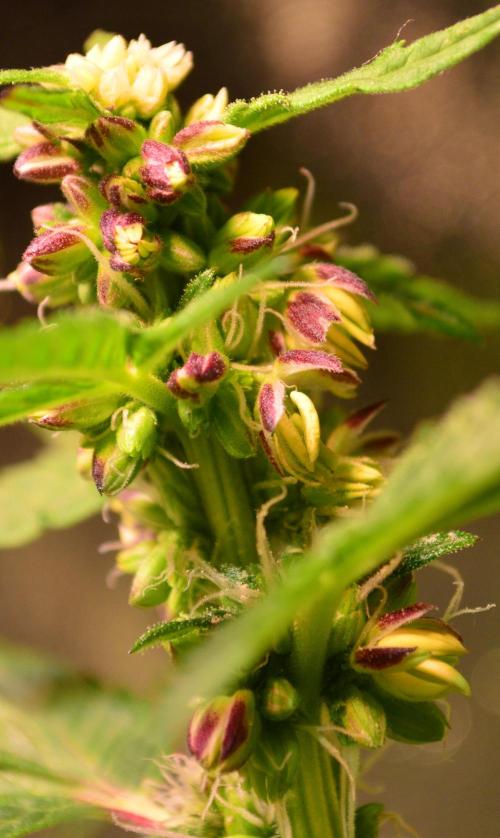
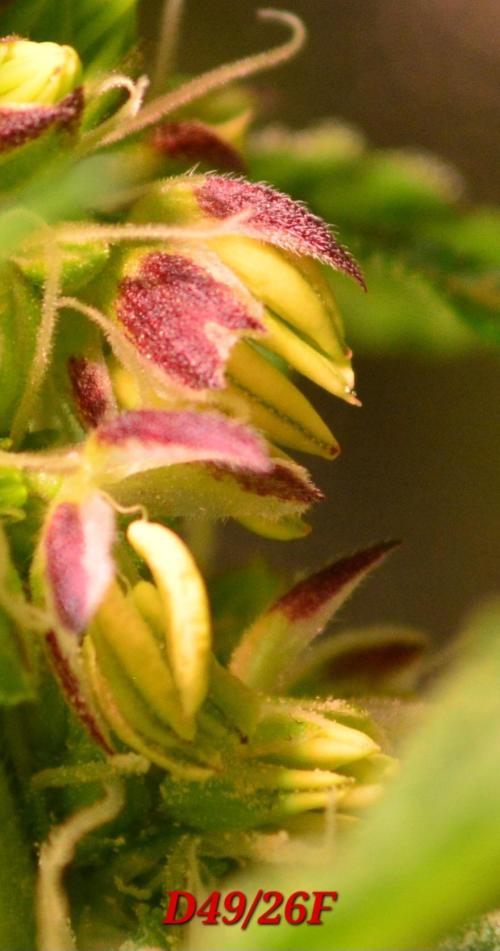
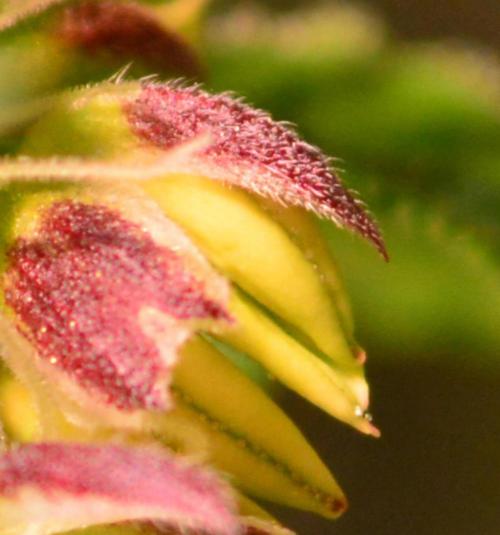
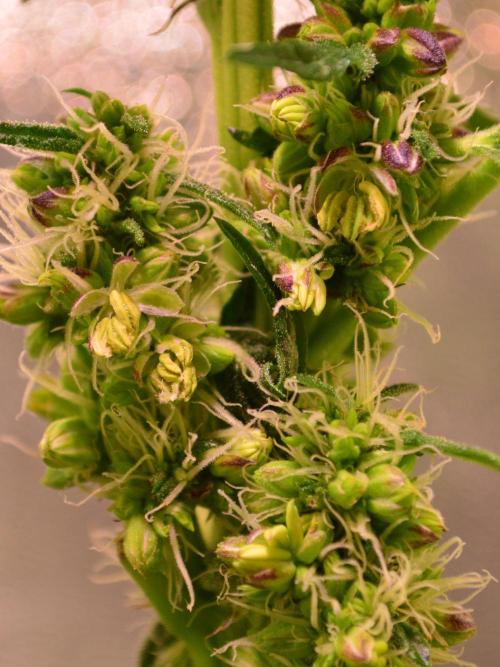
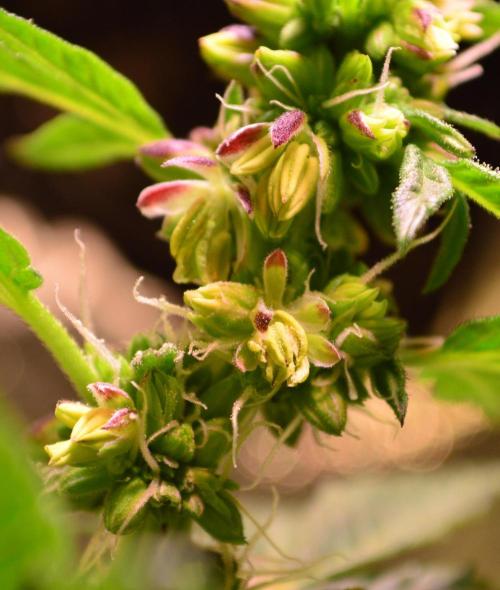
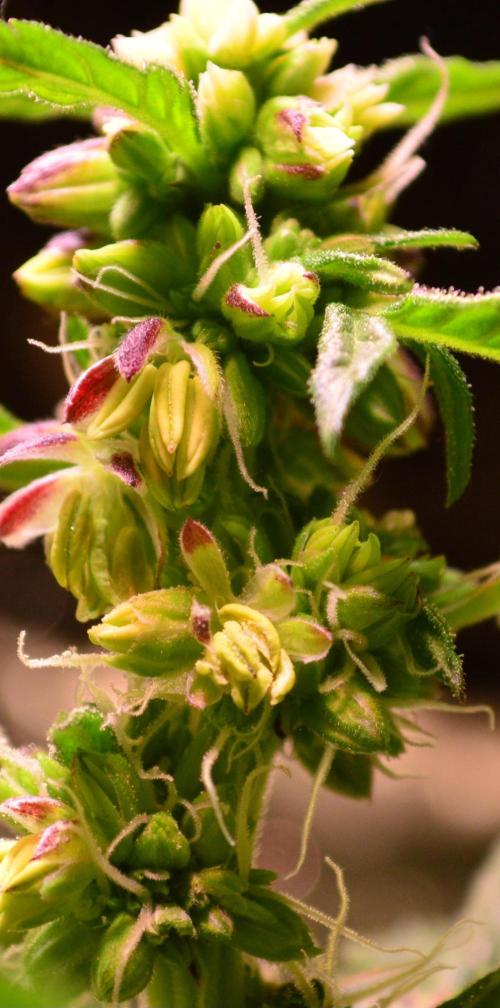
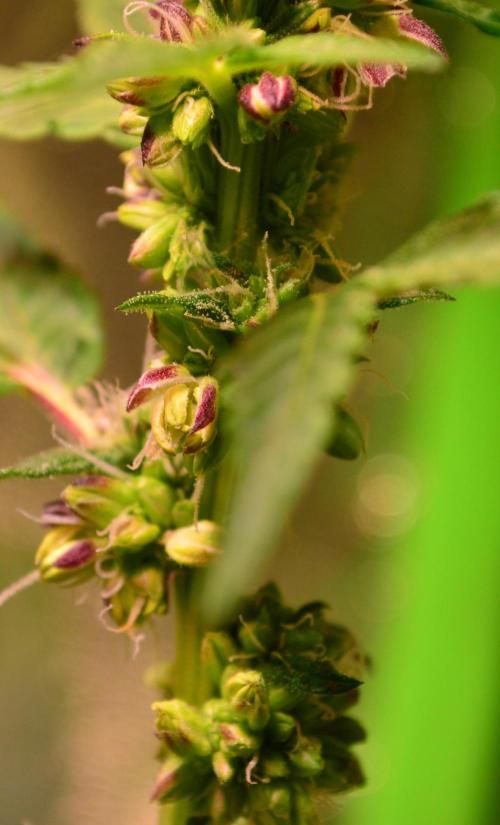
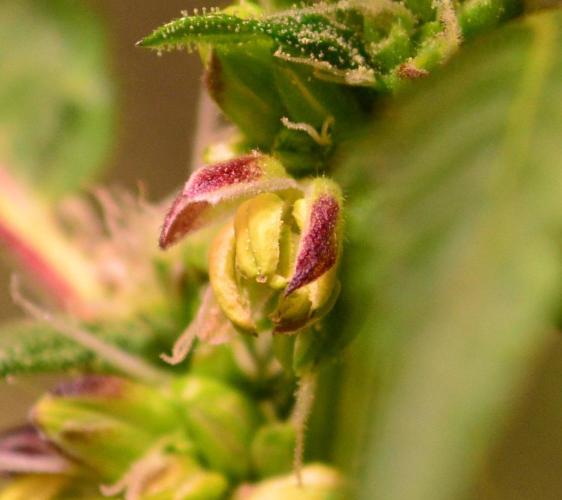
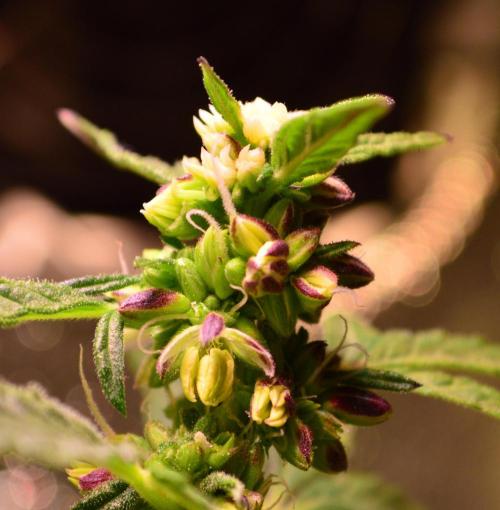
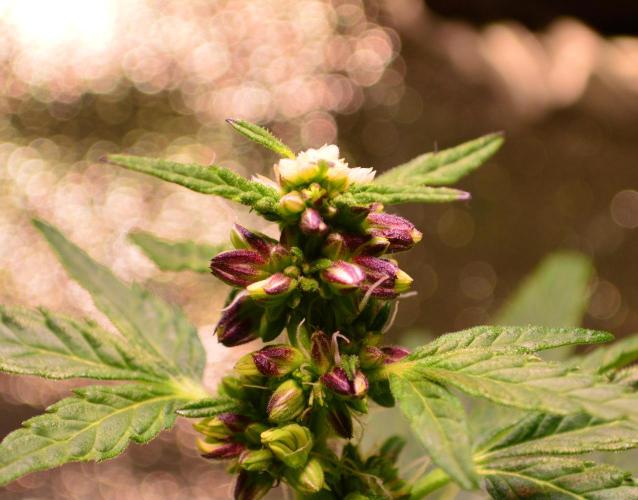
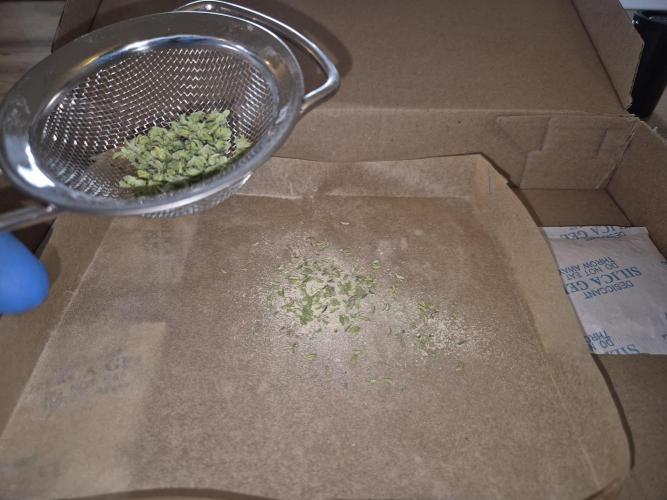
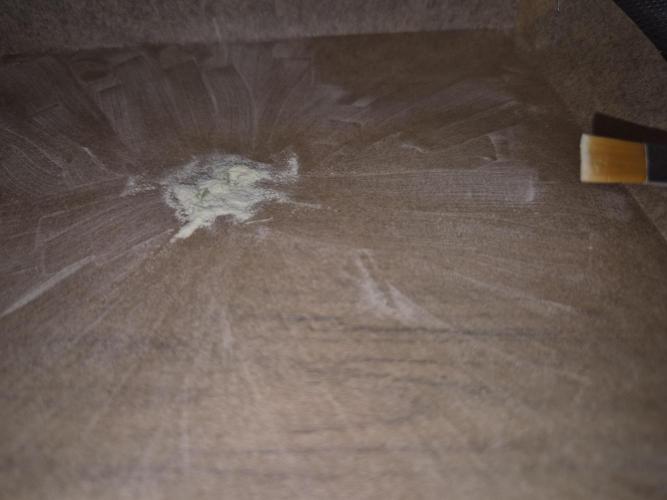
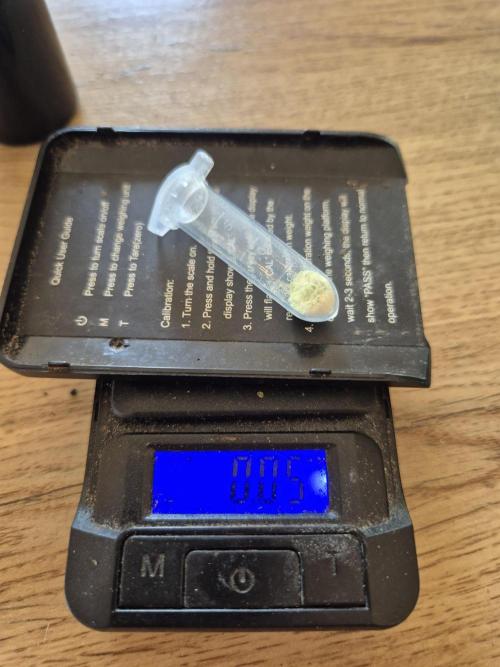
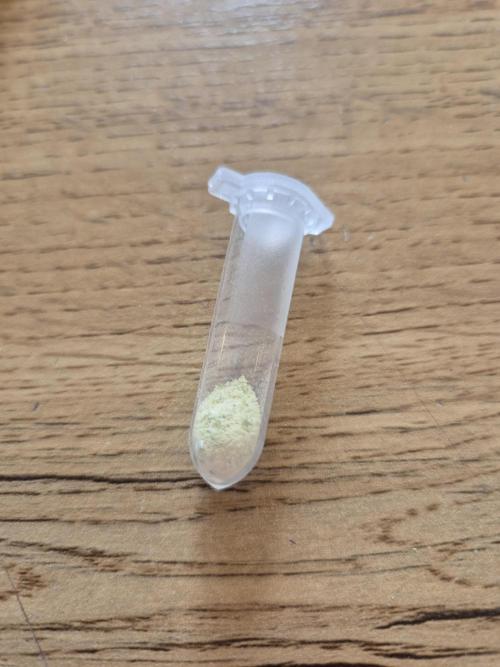
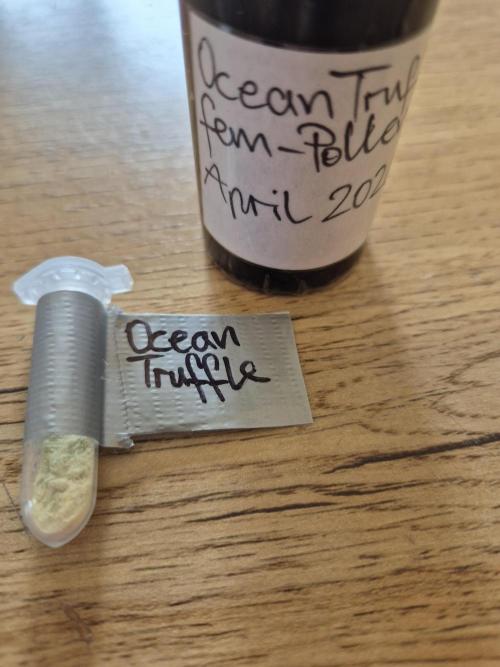
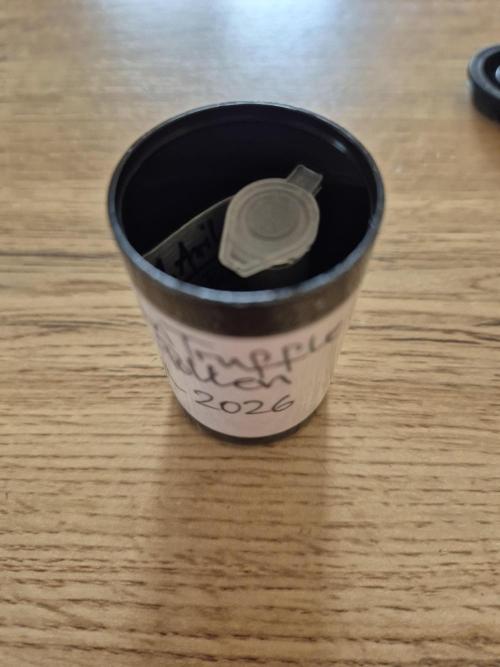
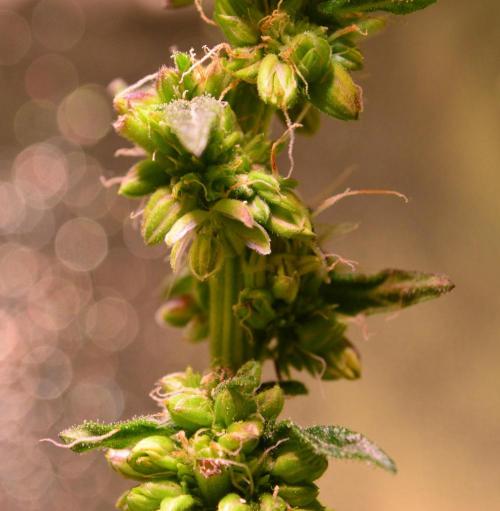
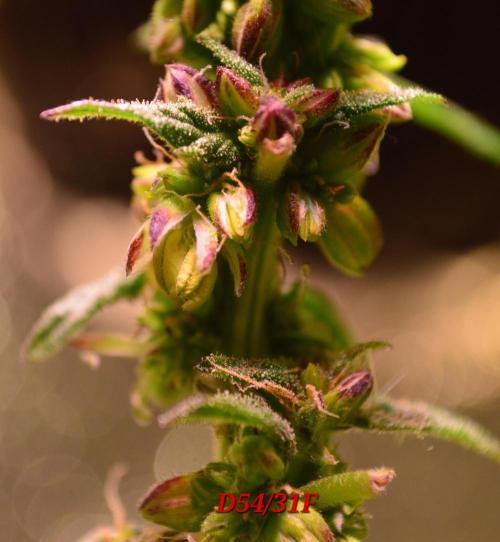
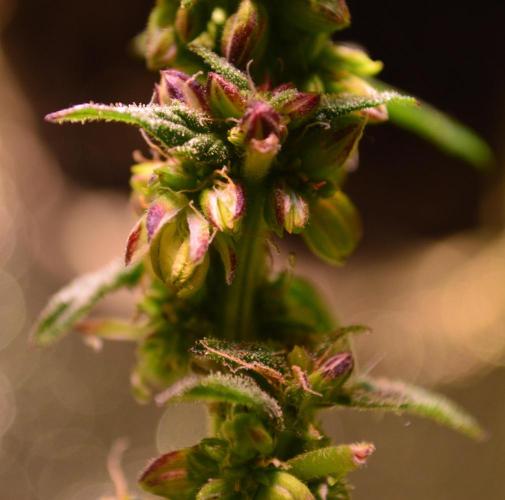
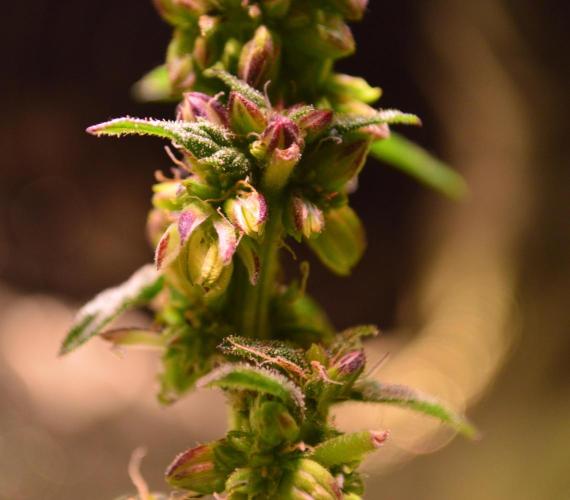
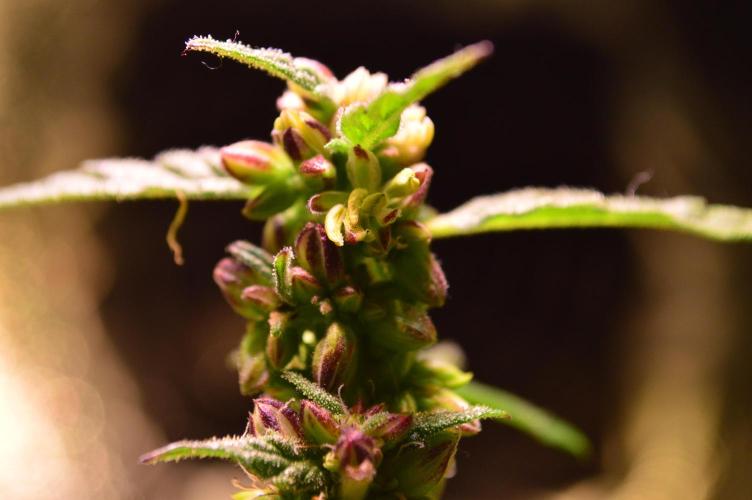
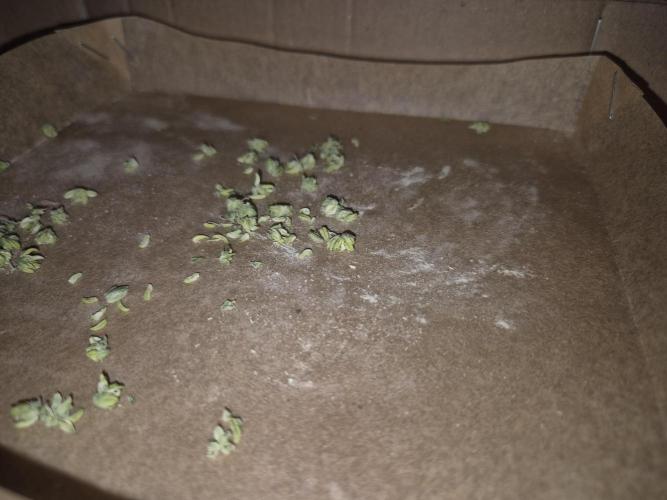
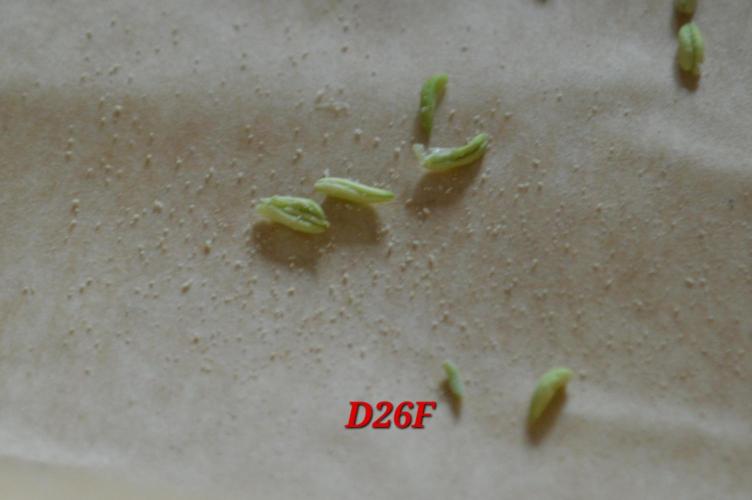
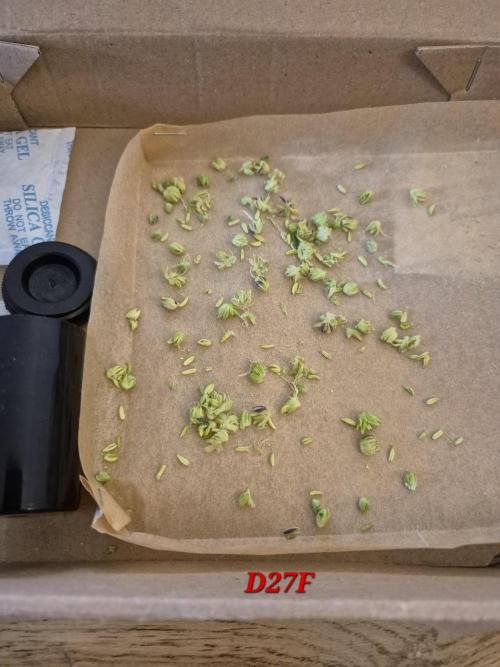
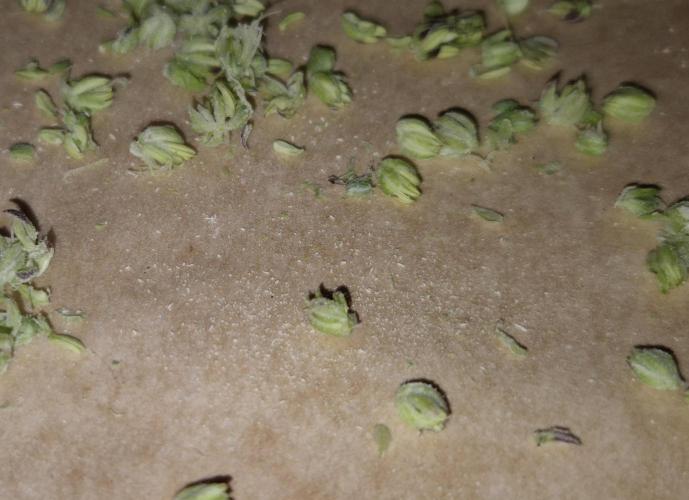
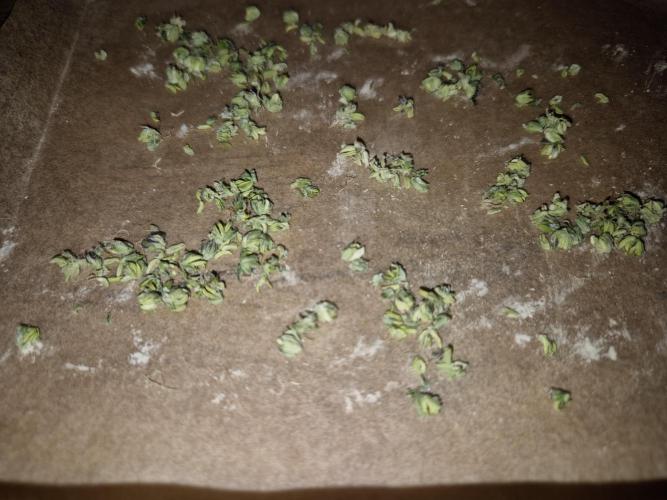
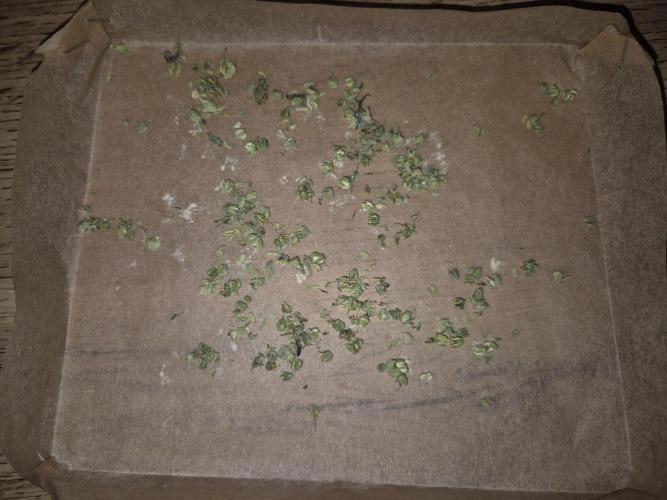
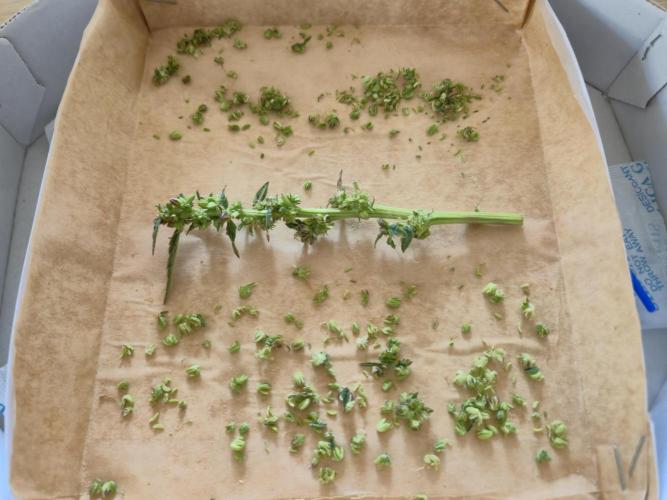
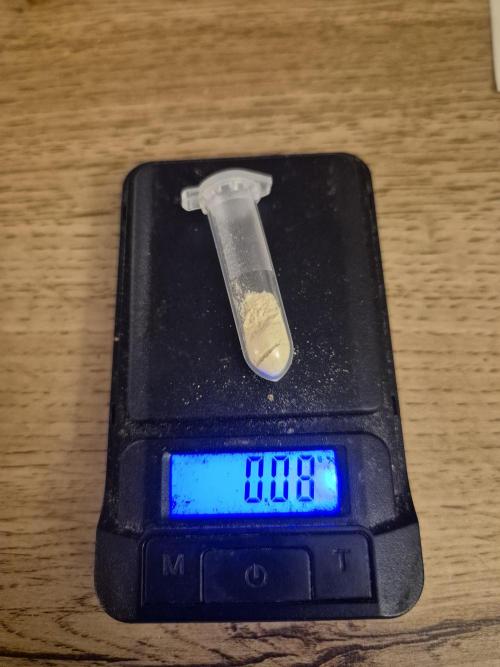
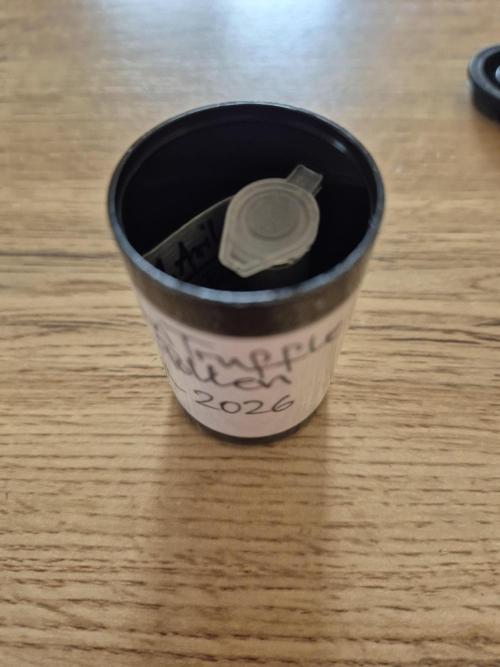
On day 24 of flowering, the first open flower cups were carefully removed with tweezers. A empty film canister was held underneath to catch everything that fell as best as possible. The first harvested flower cups from days 24/25F actually released some pollen. From day 24, I could harvest 1-2 times every day. It started slowly on day 24. On day 26, I harvested twice, and it was almost as much yield as on days 24/25F combined. On day 27, I also harvested twice, and on day 28, due to time constraints, only once. The harvested flower cups and stamens were dried for about 2 days each. The collected pollen was sifted to separate it from the plant residues. The sieve in the picture worked somewhat, but the dry stamens unfortunately slipped through the sieve, which was too coarse. It was a bit tedious, but it was still a lot of fun to carefully process the first small pollen harvest. The respective harvests are stored double airtight to be safe regarding moisture, and it also prevents smaller temperature fluctuations that should be avoided for longer storage. The 1:1 pollen/flour mix is packed in Eppendorf cups and then goes into a film canister. One batch of pollen is ready in the fridge for the next seed run as soon as the OceanTruffle is finished, while the remaining pollen is also packed double airtight harvest by harvest and each gets a small silica gel bag in the film canister to absorb any remaining moisture. Over the days, the ripe flower cups were carefully removed with tweezers and caught in the film canister. With reversed plants, you are almost forced to go this route, as the flower cups are closer together than on a male plant. Additionally, reversed plants generally have slightly less pollen than purely male plants. Sure, you can wait for most of the reversed plant to open and then harvest the entire plant, but you won't get the maximum yield that way.
All collected pollen is then mixed again in a ratio of 1:1 - 1:5 with flour. I will choose the 1:1 - 1:2 ratio because it effectively draws the residual moisture from the pollen and can be used quite efficiently. This way, you can be sure that the flour/pollen mix contains about 50% pollen, and you can see quite well where you've been.
!!!IMPORTANT!!! With this method, the flour must be dehydrated and sterilized beforehand. For this, you place baking paper on a baking tray and spread a thin layer of flour on the baking paper using a sieve. The flour must be "baked" or roasted at 100°C for 20-30 minutes.
When mixing pollen and the dehydrated flour, the flour draws any residual moisture from the pollen and helps later with dosing because it is a bit easier to see when dusting the plant.
Harvest: pure pollen weight
Day 24&25F 0.05g
Day 26F 0.04g
Day 27F will be weighed again this evening. I think it will be around 0.05 - 0.06g.
Day 28F... drying until tomorrow😄 but will also be more towards 0.07g.
(Update in two days)
_________________________________________
Fertilizing/Watering:
Day 45/22F there was 2ml/L PK5-8, 1ml/L PowerRoots, 1ml/L PowerBuds, 4ml/ Alfaboost
The little Truffle got 120ml with a pH of 6.5.
Day 46/23F there was 80ml pH-corrected water.
Day 47/24F there was 80ml pH-corrected water.
On day 48/25F there was 2ml/L PK5-8, 1ml/L PowerRoots, 1ml/L PowerBuds, 4ml/ Alfaboost, 1g/L BioEnhancer.
The little Truffle got 120ml with a pH of 6.5.
Day 49/26F there was 80ml pH-corrected water.
Day 50/27F there was 2ml/L PK5-8, 1ml/L PowerRoots, 1ml/L PowerBuds, 4ml/ Alfaboost.
The little Truffle got 120ml with a pH of 6.2.
Day 51/28F there was 80ml pH-corrected water.
_____________________________
Height from substrate surface: 28cm
_______________________________
Light:
Distance: 20cm
Watt: 50W (100%)
Ppfd: 840
DLI: 36
_______________________________
Environment:
Temp: 24-26°C
RH: 40-50%
VPD: 1.05-1.39 kPa
20 likes
7 comments
Share
9
Week 9. Flowering7mo ago
34 cm
Height
12 hrs
Light Schedule
25 °C
Day Air Temp
6.5
pH
No Smell
Smell
45 %
Air Humidity
19 °C
Solution Temp
22 °C
Substrate Temp
21 °C
Night Air Temp
1 liters
Pot Size
0.1 liters
Watering Volume
20 cm
Lamp Distance
Nutrients 1
H²O
50 mll
GanjaGecko Week 8/9// 5F /// D52/29F - D58/35F
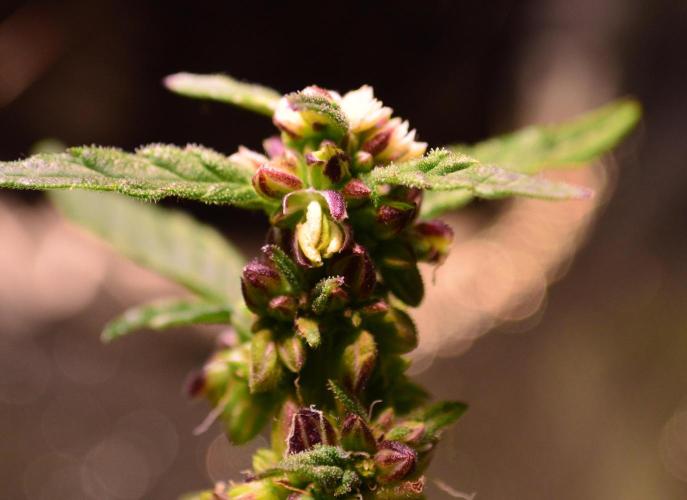
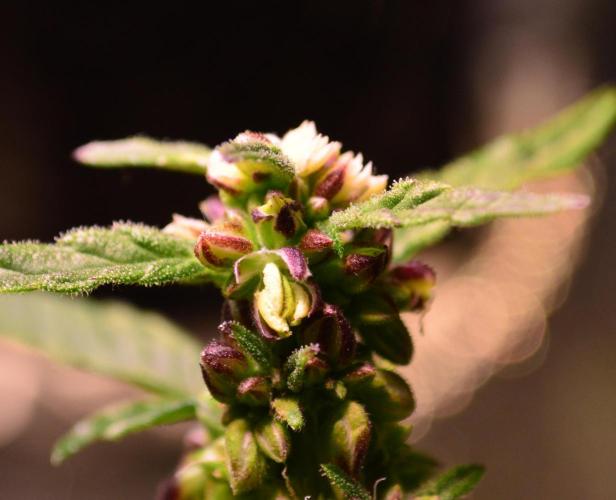
The plant was harvested once daily throughout the week. On day 34 of flowering, the rest of the plant was harvested. The individual shoots in the lower area didn't have many flower cups left. The flowers that were still closed or were just starting to open were removed with tweezers. The upper approximately 5cm of the plant, with still a handful of flower cups, was cut off entirely and laid out to dry. Since the second reversal is also going successfully so far, I don't need every single pollen sac from this plant and can easily harvest the same amount with the second micro-reversal.
I also switched from the small kitchen sieve to the tea sieve to better separate the pollen from the plant remnants. The anthers that were too large for the kitchen sieve were saved and also shaken through the tea sieve, yielding about 0.04g. However, I had to admit that the tea sieve was still too large. So, the collected pollen will go through a new trimming sieve. This will finally ensure that the anthers are caught as well, resulting in a purer outcome.
Harvest: pure pollen weight
Day 24&25F 0.05g
Day 26F 0.04g
Day 27F 0.08g
Day 28F 0.10g
Day 29F 0.06g
Day 30F 0.06g
Day 31F 0.05g
Day 32F 0.05g
Day 33F still drying
Day 34F still drying
_________________________________________
Fertilizing/Watering:
There was only rarely some pH-corrected water. With fewer and fewer leaves, strong transpiration is also lacking.
_____________________________
Height from substrate surface: 28cm
_______________________________
Light:
Distance: 20cm
Watt: 50W (100%)
Ppfd: 840
DLI: 36
_______________________________
Environment:
Temp: 24-26°C
RH: 40-50%
VPD: 1.05-1.39 kPa
19 likes
1 comment
Share
10
Week 10. Harvest6mo ago
Happy Harvest Day!


10/10
Rated
The OceanTruffle handles training incredibly well, whether HST or LST. Topping at the right time really gets those little side shoots going and creates a nice bush. (You can see the female mother clone in a separate diary (OT-Clones & Truffle&Rosa)). The stacking of the OceanTruffle is an absolute dream. Even though it almost triples in size when switching from 18/6 to 12/12, there's hardly a part of the stem that isn't covered in flowers. With a bit of luck, a large portion of the mother genetics in this OceanTruffle pheno is the WildberryTruffle. If that's the case, a high yield is guaranteed, and I have no worries at all about loud and tasty terps from Square1Genetics.
Show more
Original
Spent 57 days
Ger Veg Flo Har
1
Plants
0.1 m²
Grow Room size
Easy
Difficulty
Height
Day air temperature
Air humidity
PH
Light schedule
Solution temperature
Night air temperature
Substrate temperature
Pot size
Lamp distance
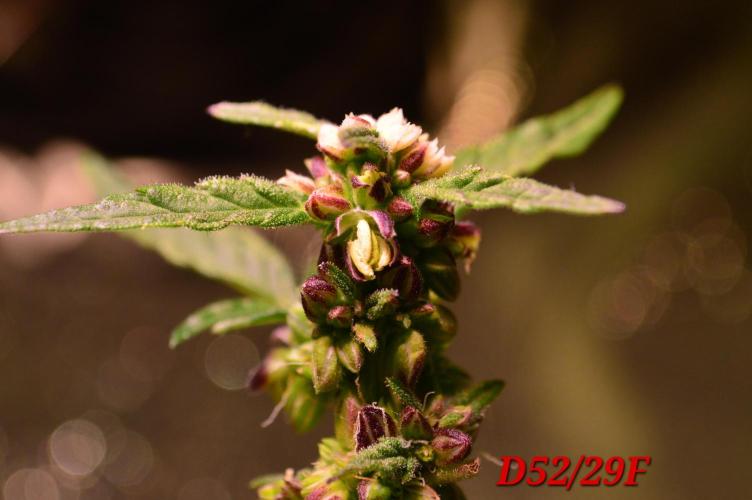
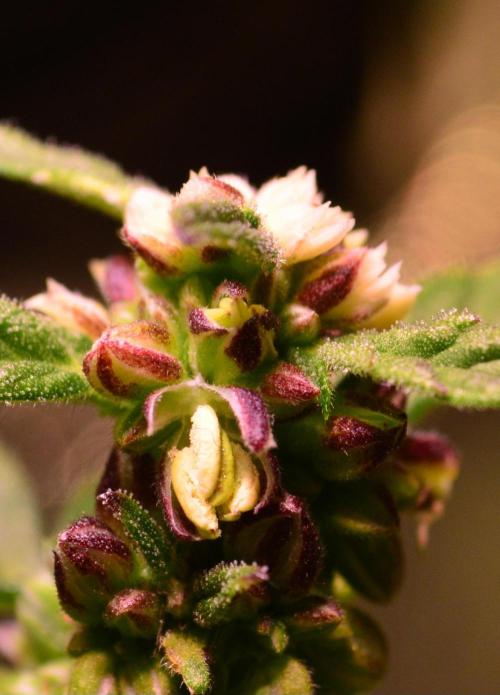
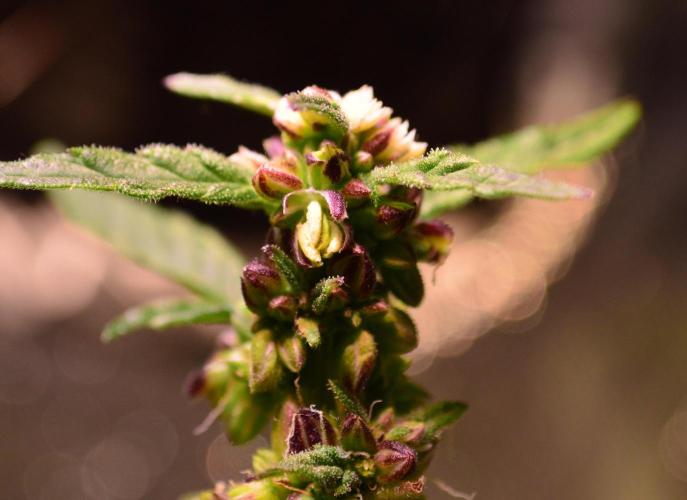
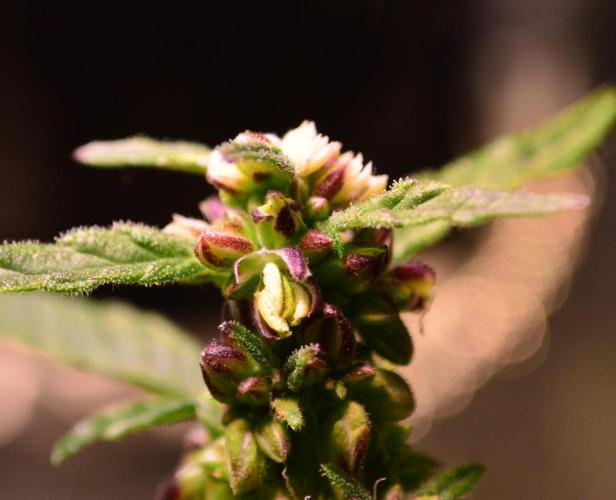
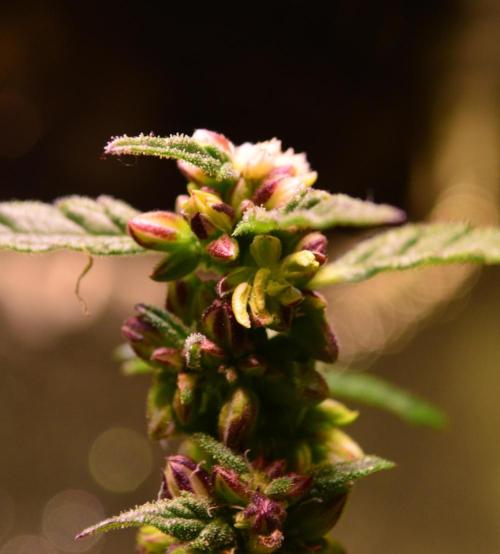
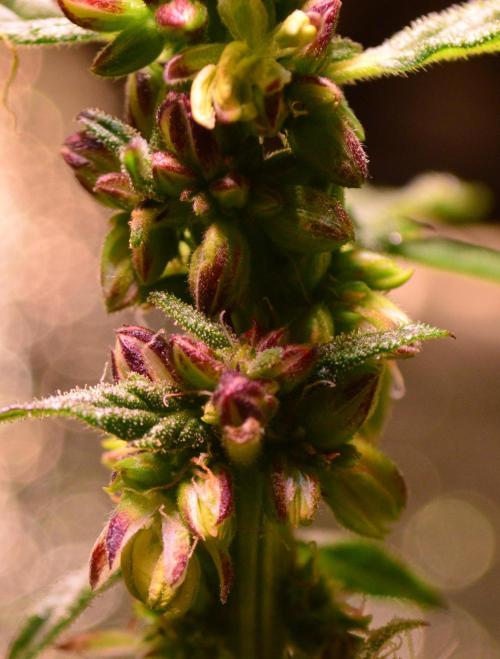
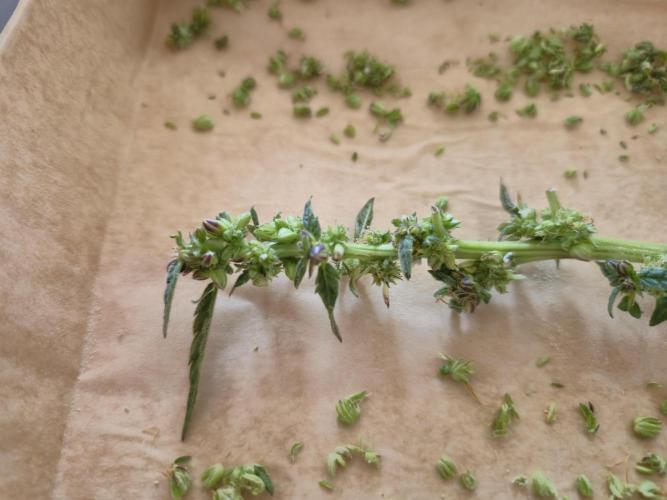
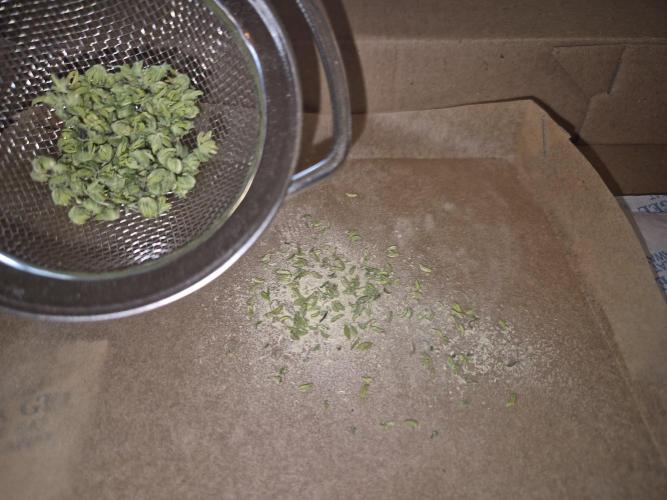
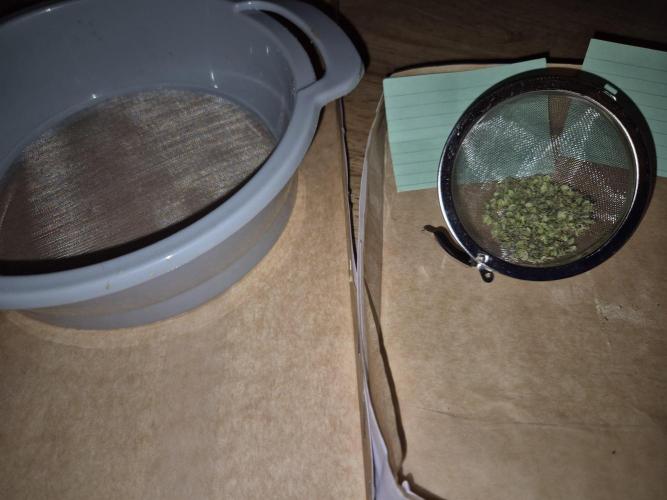
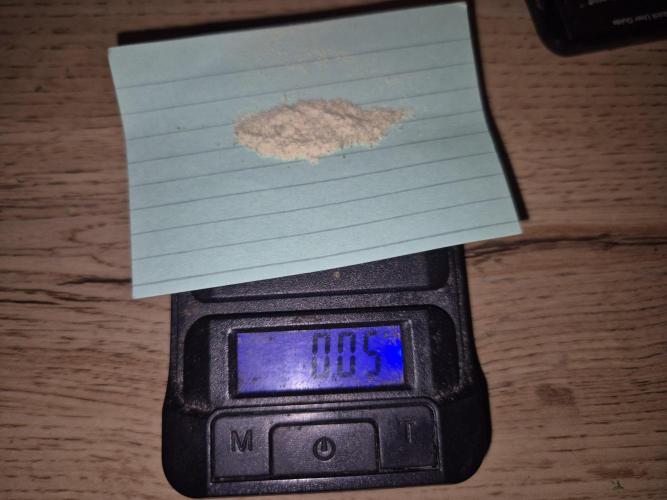
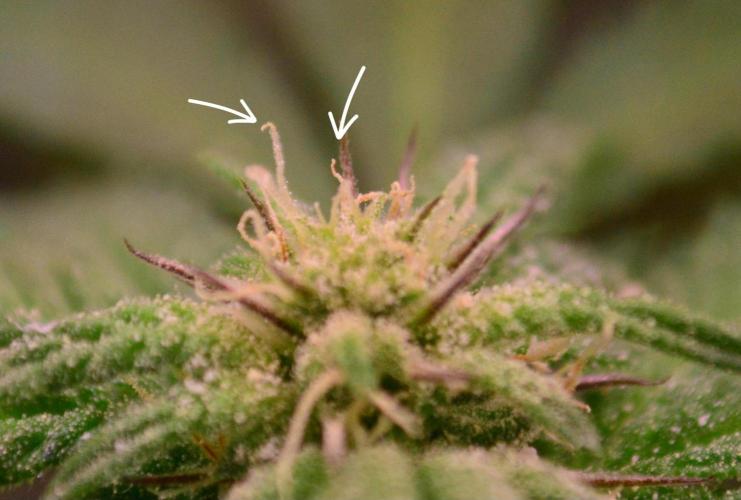
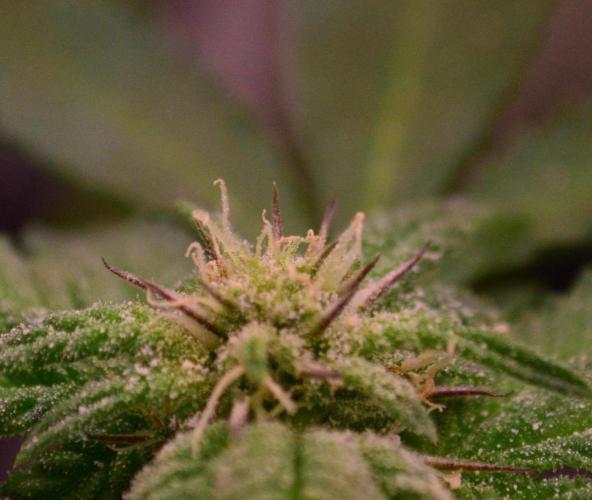
GanjaGecko As the first pollen donor, the OceanTruffle already showed during the growth phase that it was a lucky find. The growth of the OceanTruffle is incredibly good. The OceanTruffle reacts almost gratefully to topping. This really gets the side branches going. The stacking of the repotted OceanTruffle is absolutely dreamy. The repotted cutting was more or less a complete long bud.
So far, only the micro-reversal of the OceanTruffle has made it to the finish line. If the female siblings show even a hint of such stacking and also produce somewhat large buds, I’ll be happy, and the first test crosses can begin. With the micro-reversal, I was able to take away a lot, as I could improve on the second reversal. In the end, a total of 0.53g of pure pollen was collected. For the first attempt and the very small plant, I am absolutely satisfied.
Harvest: pure pollen weight
Day 24&25F 0.05g
Day 26F 0.04g
Day 27F 0.08g
Day 28F 0.10g
Day 29F 0.06g
Day 30F 0.06g
Day 31F 0.05g
Day 32F 0.05g
Day 33&34F 0.04g
My recommendation for separating the pollen from the harvested flower cups and anthers is to gently rub the harvest with gloves in a tea strainer first. This way, only the pollen and anthers fall through, and the larger plant material like the empty flower cups is already well separated from the rest. The whole thing then goes through a trimming sieve again to separate the last plant residues like the anthers (nanners) and any remaining smaller plant parts from the pollen. This way, you end up with a pretty pure result. The harvested flowers were placed in a sealable box on baking paper for at least 24 hours. Each box had 3 silica packs to absorb excess moisture. The weather was quite lucky, so the environmental conditions during drying remained stable at 35-40% humidity and 20-22°C. For storage, the pollen was mixed in a ratio of 1:1-1:2 with sterilized and dehydrated flour, then placed in small Eppendorf cups, and finally packed again in an empty film can with small silica gel packs, making it double airtight. One part went into the fridge, and the other part went into the freezer. The test pollination was also successful. The pollen is therefore potent and does its job. With successful pollination, the pistils already give you a hint of whether it was successful. About 3-5 days after pollination, the pollen reaches the ovary. The tips of the pistils turn brown with successful pollination while the rest remains white. Another indicator is when the pistils change color from white to dark orange or red. With non-potent pollen, the flowers would remain unpollinated, recognizable by the pistils staying long white and ripening over time as usual to brown. Further progress will be documented in the OceanTruffle Clone Diary.
Thank you to everyone who was part of this little project💚
18 likes
3 comments
Share
Equipment Reviews




39 comments
Sort by
popularity
popularity
newest
oldest

DrGruen commentedweek 18mo ago
Good luck with your project😎
likes 5
GanjaGecko commented8mo ago
@DrGruen, thank you so much!🤙🏽
likes 2

UnorthadoxDude commentedweek 18mo ago
Interesting sounding strain and breeder... let's hope your plant stands and delivers!
likes 4
GanjaGecko commented8mo ago
@UnorthadoxDude, I hope so, too.😄 hopefully we know more in one ore two weeks
likes 3

SpliffyRand commentedweek 18mo ago
Awesome! I'm already looking forward to the results. Good luck! 💪
likes 3
GanjaGecko commented8mo ago
@SpliffyRand, unfortunately, I killed them all🤣
I just ordered some easy plugs again that arrived today. I'm going to give it another shot now.
likes 4
SpliffyRand commented8mo ago
@GanjaGecko, ups :D shit happens. Stay strong!
likes 4

Stony_German commentedweek 48mo ago
I'm curious and sure I can learn a lot from you. I'm looking forward to following this experiment.
likes 3
GanjaGecko commented8mo ago
@Stony_German, I'll order the stuff for the STS as soon as possible. There should be at least one application, maybe two applications to definitely get pollen. I think that spraying 3 times a day is already less optimal than once a week.
likes 2

SmallGrowz commentedweek 48mo ago
Viel Erfolg weiterhin😎🍀
likes 3
GanjaGecko commented8mo ago
@SmallGrowz, danke dir. Jetzt gehts endlich los🍀💪🏼
likes 2

KurtHighgrade commentedweek 48mo ago
Good luck, mate🍀🍀🍀 What a cool project👍🏼♀️♂️⚧️
likes 3
GanjaGecko commented8mo ago
@KurtHighgrade, thanks buddy💚🤙🏼
likes 3

RockoCalenberg commentedweek 48mo ago
Really cool project 🙌🌿
I'm also doing a bit of reversing – but with GA3 😄
I'm super curious to see how the silver works out for you! 👀
likes 2
RockoCalenberg commented8mo ago
@GanjaGecko, Right now it's the White Gushers 33 😎 I took a few cuts and they're running in the small setup while the mama finishes flowering 😁
likes 2
GanjaGecko commented8mo ago
@RockoCalenberg, hört sich gut an. Viel Glück dabei💪🏼🍀 hast du auch schon eine Idee wo du sie reinkreuzen willst?
likes 2
RockoCalenberg commented8mo ago
@GanjaGecko, thank you! 💪🌱
First, the reversed plant needs to properly form pollen sacs with usable pollen – that's already the first hurdle.
If that works, I'll make an S1 from the original plant.
And if there's enough pollen left, I'll collect some to hand-pollinate a bloom in future grows. ✌️💚
likes 2
Show More (1)

JackOfAllTrades commentedweek 87mo ago
Normally an absolute nightmare, but in your case a dream :D really a very cool project!
likes 2
GanjaGecko commented7mo ago
@JackOfAllTrades, funny. I also thought it was crazy that you want to avoid it so much otherwise, and here you’re as happy as a little kid. And the second cutting is just showing its first signs of flowering.😄💪🏽
likes 3
JackOfAllTrades commented7mo ago
@GanjaGecko, very cool! I also think it's a nice change to see completely different "buds" 🙏🏽
like 1
Stony_German commentedweek 87mo ago
I was just about to say that you should add silica pearls or rice, which should work really well, but you already thought of that. 😁 I'm glad it worked out so great. I will follow your steps just like that when I do it. I'm curious to see how the pollination and seed production will turn out. The test grow will also be super interesting.
likes 2
GanjaGecko commented7mo ago
@Stony_German, you said it 😄 I'm super excited for the next steps. Now we just need the seeds to germinate if the pollination works and the pollen is potent too 💪🏽
likes
Stony_German commentedweek 77mo ago
Looks good. I'm glad your way worked out. I'll definitely make use of your experience sometime. Thanks for that, buddy. 😁
likes 2
GanjaGecko commented7mo ago
@Stony_German, thanks, not for that. Now the good one just needs to drop some pollen. 😄 Hopefully, that will happen in the next few days. 💪🏽 Otherwise, there's still the little backup in the tent that was sprayed with STS from the start, and that backup will definitely work. I'm still quite optimistic. Since I sprayed 2-3 times daily for the first two weeks and then the entire third week of flowering with STS, the hope for the first reversal is relatively high.
like 1
KurtHighgrade commentedweek 77mo ago
Wicked work, a great success👍🏼
likes 2

valiotoro commentedweek 106mo ago
Amazing work bro, really cool project! You don’t see this often on GrowDiaries 👏
like 1
GanjaGecko commented6mo ago
@valiotoro, thanks bro, it was a lot of fun💚
likes
KurtHighgrade commentedweek 87mo ago
Super cool👍🏼 have you done it before? Where did you get your knowledge from? The James Loud book about breeding? It's the Aladdin Khalifa method, isn't it? I'd really love to know, please reveal it! Or did you have a mentor? 💚 🖖
like 1
GanjaGecko commented7mo ago
@KurtHighgrade, i send you a dm. Maybe later or tomorrow🤙🏼💚
like 1
Stony_German commentedweek 67mo ago
Thank you very much for the detailed explanation. I had never dealt with it like this before, and you saved me hours of research if it works for you. I wish you good luck, my friend.
like 1
GanjaGecko commented7mo ago
@Stony_German, it always helps to have something to look back on. And somehow I felt like there was a detailed diary on this topic missing here on Growdiaries.😄💪🏽
like 1
SpliffyRand commentedweek 67mo ago
Now it's really starting! Good luck!!
like 1
GanjaGecko commented7mo ago
@SpliffyRand, thank you thank you. I'm looking forward to it too!🤙🏽
likes

Mia_BIOTABS  commentedweek 106mo ago
wow really pretty buds the plant has - these purple petals - stunning,
like 1

UDUDUDUDU commentedweek 76mo ago
thiz I want in my Garden 💠 sure iz a beuEt
like 1
calculated commentedweek 97mo ago
pretty cool dude - nice pictures - exciting project - someone is really into it - I'm totally following this. I'm also like that - feel free to check out my stuff too. good luck 😀
like 1
Mia_BIOTABS commentedweek 67mo ago
thanks for describing this process in such detail - super interesting and educational
like 1

GhostTerpZ commentedweek 48mo ago
Looking really good ❗️ ❗️ ❗️
like 1

the end.
Enjoying this diary? Follow for more updates!
Prefer the old Diary view?
Go back to the old Diary view