Pennello Hi guys, hope everyone is doing ok!!
As always I like to thanks the generous @BCBD guys for the super appetible strain. First timer with this seed bank, really in love with the name!
This strain, has been cross-bred with an Afghani Garlic Bud making it, a very indica-dominant strain with a spicy, earthy, cheese-y perfume. I personally love Cheese genetic in general. Those super smelly and strong tasting weed drives me crazy!! I've been living in London for a while and when I saw the name, I could taste the fatty&buttery garlic bread! I just couldn't resist to this one!!
For this run, and hopefully the following ones too, I will be using the Bokashi compost I'am making those days. I'am not really sgood with bottled fertilizer + it's NOT work at all when it comes to feeding the plants.
WHY BOKASHI? IT IS A GREEN CHOICE + (as if the GreenChoice wasn't enough) it re-pays me off while I'am woroking and don't get much time to spend with my plants. The water and the previous cares, will do.
I'am a recycling enthusiast and, as a Chef, with Bokashi I'am growing weed as well as my ZeroWaste policy. This compost it's being prepared with an old soil from my outdoor&indoor runs, well washed and sterilzed.
I will be using as well EM-1 fermented, to keep feeding the bacterias that will be present in the soil.
SET-UP:
Tent: MarsHydro 2x4
Light: 2xTGL60
Ventilation: VK vents 125mm
Fan: 2x 15w clip fan
Soil: Bokashi compost + BioBizz LightMix
Pot: 0,5-3,5-7-11L black plastic
Seed bank: BCBD
HERE WE GO 👺
1/12: The 0,5lt pot are sitting ready, waiting for the seeds to sprout. Seeds are in a shot glass of Ph 6.2 water at 20ºC
2/12: The seeds are still closed, water temp is 19ºC. Those seeds are pretty solid, Big n'fatty, Nicely round just like marbles
3/12: 1/2 opened up, water temp is 19ºC.
4/12: I did transfer the seeds into a makeup disc, and hopefully will move them to a 0,5lt pot!
5/12: Still "work in progress", Those huge seeds are taking theit time.
6/12: The seeds are fully open! One of the 2 seeds took slightly longer to sprout. Going into 0,5lt pot.
7/12: No change, they went in just yesterday night, I'll give them time! 😁
See you next week people!
8 likes
2 comments
Share
Used method
Glass Of Water
Germination Method
1
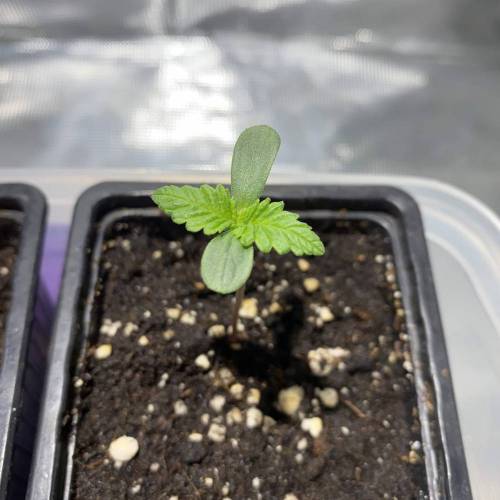
Week 1. Vegetation
6y ago
1/13
5 cm
Height
18 hrs
Light Schedule
20 °C
Day Air Temp
6.3
pH
220 PPM
TDS
68 %
Air Humidity
18 °C
Solution Temp
16 °C
Substrate Temp
16 °C
Night Air Temp
0.5 l
Pot Size
0.01 l
Watering Volume
55 cm
Lamp Distance
Pennello Let's go with the 1 week.
The germination stage took slightly longer than expected, understandable though, temps dropped quite a bit in the last two weeks. I didn't want to switch on the light yet, using the sunlight instead, because the growtent is stuffed with hanging plants from the previous run.
The GT is located in a small room, it was meant to be for guests.........with a nice large window to get a good air circulation. Perfect for summer time, when temps rise up a lot and is the only room where the sunlight only hits early in the morning. Negative point: that window it's just next to my front door, and all the rest of the doors on my floor, just need to be careful when opening and see where the wind blows. I barely need to regulate the humidity, if more is needed, I generally use domes at this stage, or, if the plants are bigger I'd nebulize the growtent with water. When less needed the extraction fan and the air circulation in my house will do the job easily. 💪
I thought of sharing information about the making of "my" living soil with the bokashi system, starting by the first week of fermentation of the food waste with the bran and a few more things.
1 - Start from laying at the bottom tray 1/2 sheets of paper, otherwise, the crumbling waste could pass through and will clog the tap, from which I collect the bokashi tea.
2 - Pour 1lt of Biochar on top of the paper as a starting base for every single bucket I will fill up, so that the Biochar will soak the microbial life from the juice the runs towards the bottom, and a handful of Bokashi bran on top, to begin the fermentation process.
3 - Start filling the bucket with the food waste. Add about 10% of agricultural corn bran (quite cheap) and mix well, this will help to dry up a bit any excess humidy. Yes, we want the bokashi tea, but too much never work's out well.
4 - Make a layer of food waste, 2cm maximum, press it well so that excess air escapes and sprinkle a handful of Bokashi Bran on top.
5 - Place a plastic bag over the damp so that as little air as possible can pass and close the lid.
Repeat the procedure until the bin is completely full, then add 2 handfulls of Bokashi Bran and let it ferment for at least 15 days, it can remain in fermentation for months without problems, probably even better.
NOTE: Empty the liquid from the tap every 2-3 day, if left for too long, it might create black mold and you will have to throw everything away, better open it even once a day if you see that there is a lot of humidity with excess liquid.
DAY 1:All good in the hood. Just the heads of the seeds are checking out how's the situation is around, couple of days we should be start seeing green stuff!
DAY 2: Sbang! They're all out! I left them on the router with a dome on top and it worked perfectly! I'll switch ON the light tonight, probably dimmed down to 50%.
DAY 3: Sun is back, temps raised up to a nice 18ºC, lot's of humidity, and yeah, the green stuff is out finally!
DAY 4: They did appreciate the 18h light on, unfortunately temps drop a bit with light off, but nothing mayor.
DAY 5: Situation look still, temps and UR stable.
DAY 6: Finally showing some growth! It' been a pretty nice day outside and had higher temps and UR while light was off.
DAY 7: Ready to begin a new week! I fed them with a shot glass each of water pH 6.2.
See you next week fellow growers!
9 likes
3 comments
Share
2
Week 2. Vegetation
6y ago
1/15
5 cm
Height
18 hrs
Light Schedule
21 °C
Day Air Temp
6.3
pH
330 PPM
TDS
84 %
Air Humidity
18 °C
Solution Temp
17 °C
Substrate Temp
20 °C
Night Air Temp
0.5 l
Pot Size
0.01 l
Watering Volume
47 cm
Lamp Distance
Nutrients 1
Bokashi tea from composting
10 mll
Pennello Week 2
The second week started quite well I have to say, the weather outside it's nice and warm, and this affect my cultivar in a good way.
STEP 2 to transform the fermented food waste into compost.
1 - Get a container of at least 100 liters and make several holes at the bottom for air circulation.
2 - Empty a bucket of fermented product into the container with 16lt of the 20lt light mix bag (I used the LightMix from my previous run, well flushed and sterilized, you can do the same once you finish your run with the bokashi composting, without the need of flushing) and mix well together, then cover everything with the remaining 20% of soil.
3 - Pour about half a liter of decanted water (otherwise kill the bacteria with chlorine) evenly and cover the container with a rag so not to let pass flies or other animals, however they will die during the thermophilic phase, more than anything else it is important to cover after that phase.
4- after about 3-4 days the thermophilic phase begins where the bacteria break down the fermented product and transform it into compost, the temperatures will rise close to 60 degrees in the core.
PROGRESS:
DAY 8: Solid difference from last week. Temperature raised 1 or 2 ºC and so the UR% to a good 84% with lights off, plants seems to enjoy.
DAY 9: Nice noticeable growth, still not giving any water because of the high UR%.
DAY 10: Yes they are growing!! Nice chunchy leaves... thinking of switching ON the 2nd light to get to crazy power of 114W😬
DAY 11: I'm an impulsive person. Both lights are ON, the plants responded well for the first day, still no giving any water. Drained my first ever bokashi tea from the composting bucket.
DAY 12: Gave a shot glass each of 10ml/l of bokashi tea. Nice growth!! Definitely the extra light ON its doing her job! Sprayed the rest of tea solution on the soil I'm going to use for composting.
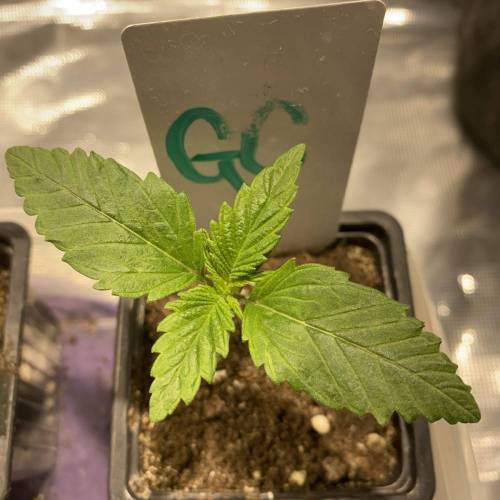
DAY 13: The GC#2 it's going faster, she has really fatty leaves! 22.2ºC and 87%UR with light just switched ON.
DAY 14: All good for the 2nd week, plants did show sign of wanting to grow, surely enjoying the second light on, planning to up pot them in 3 o 4 days probably.
See you next week fellow growers,
STAY TUNED!
7 likes
comments
Share
3
Week 3. Vegetation
6y ago
1/13
9 cm
Height
18 hrs
Light Schedule
20 °C
Day Air Temp
6.3
pH
330 PPM
TDS
84 %
Air Humidity
18 °C
Solution Temp
17 °C
Substrate Temp
29 °C
Night Air Temp
0.5 l
Pot Size
0.01 l
Watering Volume
47 cm
Lamp Distance
Nutrients 2
Bokashi tea from composting
10 mll
Sensizym
2 mll
Pennello Week 3
The thrid week started quite well as the previous one. I'am giving 10ml/l of bokashi tea solution from the fermenting waste and using it to water the soil that's going in the compost, along with 2ml/l of sensi zym to help getting rid of dead roots that are in the soil. I did sieve the soil from plenty of them, but there's still probably the same amount broken down.
STEP 3 to transform the fermented food waste into compost.
5 - As soon as you feel that it starts to heat, by putting your hand on the container, wait about three days and then, mix everything and add another half liter of water. Repeat after three more days until the end of the thermophilic phase.
6 - In order not to make a mistake, take some compost, squeeze it hard with your hands and check if it remains compact, only a few drops of water should come out, and if it does not remain compact it is too dry.
7 - after about 12-15 days the compost is 98% ready and you can empty it into a large plastic bin (without holes in the bottom) depending on how much you want to do, add zeolite and mix, once a week check that it does not it is drying out, otherwise add some water. It is important to keep it moist because if it happens that it remains dry for too long a part could mineralize and you will have ruined all the work by over-fertilizing the plants.
8 - Also add the rest of the soil and mix, obviously you make the exact proportions of the percentages of the various elements. I use that amount of soil so I calculated on that amount.
Repeat the procedure until the bin is completely full, then add 2 handfulls of Bokashi Bran and let it ferment for at least 15 days, can be left fermenting for months without problems, probably even better.
PROGRESS:
DAY 15: Nice grow from the GC#2 while the GC#1 it's slightly behind I'd say, any way is still early to speak, let's see how do they react to the transplant.
DAY 16: Not giving any water because of the high UR% thinking about up potting them tomorrow and watering.
DAY 17: Sorry guys I lost the pics, I've looked everywhere but could not find them!
DAY 18: As I said I'm a bit of an impulsive person so I traspanted them! I could have wait the whole week, soil was not really pressed, I did water with 10mll Tea and 2mll Sensizym.
DAY 19: I kept the UR% high after the transplant for a more comfortable enviroment, hopefully by the end of the week they will start showing grow signs again.
DAY 20: Both of the plants have nice fatty leaves and strong looking stem. 22.2ºC and 87%UR with light just switched ON.
DAY 21: The GC#1 took over on the sister, but those two looks like two strong girls!! Definetly the strongest of the growtent.
See you next week fellow growers,
7 likes
comments
Share
4
Week 4. Vegetation
6y ago
1/12
9 cm
Height
18 hrs
Light Schedule
18 °C
Day Air Temp
6.3
pH
330 PPM
TDS
84 %
Air Humidity
18 °C
Solution Temp
17 °C
Substrate Temp
17 °C
Night Air Temp
6.5 l
Pot Size
0.01 l
Watering Volume
47 cm
Lamp Distance
Nutrients 2
Bokashi tea from composting
10 mll
Sensizym
2 mll
Pennello Week 4
Here we go with the fourth week for the Crystal Candy, very very compact genetic, I will wait to top them slightly longer than their flatmates I believe.
STEP 4: Transform the fermented food waste into soil compost.
Soil composition 180 liters approx.
4x20 liters light mix (80 liters)
4x16 liters of homemade wet fermented with bokashi (64 liters)
1.25 liters chabasite zeolite. 1% of the total volume (For the cationic exchange which serves to retain the elements that are washed away by irrigation or excess and releases them to the plants when needed. release to plants gradually)
1 liter of biochar at the bottom of each compost bin, so that it soak up the bokashi tea and increase the bacterial flora
Some reported info from the guys I buy the biochar from:
With organic biochar, the nutrients present in soil can be better stored, the delivery and bioavailability of nutrients improved which in turn leads to more efficient results. With regular use, soils are permanently improved, which translates into better growth, higher yields and healthier plants. The use of organic Biochar promotes and improves;
Soil Health – through long-term stewardship; increased microbial activity, water retention, reduced soil compaction
Climate Stability – through careful monitoring of the net carbon footprint of our activities;
Water Use – through making agricultural production at all scales cleaner and more efficient;
Biological Diversity – through the use of sustainably produced feed stocks only;
Waste Avoidance – through better use of biomass waste;
Food Security – through improving soils and conserving agricultural land; increased production and quality
Energy Security – through energy efficiency and utilizing excess energy from biochar production;
Community Health – through respecting and investing in our communities; and more.
Making Biochar also traps CO2 gas in the carbonized biomass and creates a “soil reef” where valuable microorganisms can multiply, making nutrients and minerals more available to plants, that in turn make these nutrients and minerals available to us. This ability to make the char recalcitrant, or permanent, makes it carbon negative, or a valuable method to mitigate climate change by fixing, or “trapping” the CO2 in the char, and putting it back into the soil, where it belongs.
PROGRESS:
DAY 22: All good, the begin of the fourth week doesnnot look bad at all!
DAY 23: Started some LST on the both. The GC#1 it's sligthly taller and so easier to train.
DAY 24: The top it's already facing up, after 8h, looks like they did not mind.
DAY 25: After 48h from the first LST the GC#1 looks fine and healthy, I want to wait longer for the 2 more nodes to form before topping.
DAY 26: Both GC are growing good, nice strong stem, fair distance between nodes.
DAY 27: All good in here!
DAY 28: No pics today guys, I had few things to do in the morning and once I got back lights were off already! Anyway pretty much the same as yesterday :)
See you next week fellow growers.
8 likes
comments
Share
5
Week 5. Vegetation
6y ago
1/15
9 cm
Height
18 hrs
Light Schedule
19 °C
Day Air Temp
6.3
pH
330 PPM
TDS
84 %
Air Humidity
18 °C
Solution Temp
17 °C
Substrate Temp
18 °C
Night Air Temp
6.5 l
Pot Size
0.01 l
Watering Volume
50 cm
Lamp Distance
Nutrients 1
Bokashi tea from composting
10 mll
Pennello Week 5
Here we go with the fifth week of my grow, things gone a bit better than the past one, I did not water this week basically, just a 100ml of the same solution (10ml/l of Bokashi tea from compost).
STEP 5: Transform the fermented food waste into soil compost (PART2)
Soil composition 180 liters approx.
10% agricultural corn bran (based on the volume of compost) fermented with bokashi to dry up the excess humidity, to provide phosphorus, to increase carbon and to provide various elements and amino acids.
Another 25 liters of light mix
45 grams per 11-liter jar of unfermented, slow-release guano added just before switch them into flower to bring phosphorus.
10 liters of light mix for germination and first up pot in 1.2 pots, then continue with the compost on 6.5 pots without adding the bat guano till it's needed.
Total about 33% of compost and 67% of soil.
This is the recipe i'm about to use, hopefully, which is been shared from a fellow growers like us, which personally explained to me a "few" things about the whole process.
THANK YOU VERY MUCH LATAKIAA, if you ever gonna read this! 😎
PROGRESS:
DAY 29: All good, the begin of the fifth week does not look bad at all! both plants are doing good.
DAY 30: Making some space to the new branches coming up form the bottom side of the plant.
DAY 31: Nothing happened, Happy new year BTW :)
DAY 32: Still situation, gave a 100ml of water with bokashi tea.
DAY 33: Both plants are growing good can't complain too much, nice and bushy.
DAY 34: Just took a look at the bottom of my pots, and they all have plenty roots coming out, nice and super white roots! I probably will need to up pot them anytime soon.
DAY 35: Today i've been cleaning around, tiding up a bit, getting ready for the 6th week. I might up pot them and switch to 12/12 by the end of next week. Let's see how it goes. Those two are gowing way faster and stronger than theyre collegues in the Growtent!
See you next week fellow growers.
6 likes
comments
Share
Used techniques
LST
Technique
6
Week 6. Vegetation
6y ago
1/14
19 cm
Height
18 hrs
Light Schedule
20 °C
Day Air Temp
6.3
pH
330 PPM
TDS
84 %
Air Humidity
18 °C
Solution Temp
17 °C
Substrate Temp
18 °C
Night Air Temp
11 l
Pot Size
0.01 l
Watering Volume
50 cm
Lamp Distance
Nutrients 2
Bokashi tea from composting
10 mll
Sensizym
2 mll
Pennello Week 6
PROGRESS:
DAY 36: All good in the growtent, temps and HR are stable.
DAY 37: Bending a few stem here and there, I will transplant them tomorrow surely, going in 11 lt.
DAY 38: Up pot them to 11lt, the soil was quite compact at the bottom, while the top part was a bit
DAY 39: I probably could have transplant them a few days earlier without problems, roots were a bit clinging on the sides of the pot.
DAY 40: Still situation, just recovering from the transplant. Fan leaves are standing proudly now!
DAY 41: Opened them up with ties a gave a very light defoliation to let lower branches gets the light and help ventilation
DAY 42: They all responded well to the transplant, the LST and Topping techniques that have been applied till now.
See you next week guys!!
7 likes
comments
Share
Used techniques
LST
Technique
Topping
Technique
Defoliation
Technique
7
Week 7. Vegetation
6y ago
1/13
26 cm
Height
18 hrs
Light Schedule
20 °C
Day Air Temp
6.3
pH
330 PPM
TDS
84 %
Air Humidity
18 °C
Solution Temp
17 °C
Substrate Temp
18 °C
Night Air Temp
11 l
Pot Size
0.01 l
Watering Volume
50 cm
Lamp Distance
Nutrients 2
Bokashi tea from composting
10 mll
Sensizym
2 mll
Pennello Week 6
All good in the hood boys! Practiced some more LST, checking up on the clones that look still alive, not much more really, jut watering with the bokashi tea and sensizym. I have been taking care of the compost, same recipe as the one explained in previous weeks.
17/1 - Mixed 32lt of bokashi fermented food waste with 40lt of old soil, let it sat for 4-5 days before the thermophilic phase begun.
24/1 - As you can see on the pics, the side of the compost reached a temp of 27Cº while the center of 54.8Cº, and there was a very good amount of white mould, nothing to be worried about of course!!. I gave a good mix up, to better spread the heat all over the compost. I will check it in a couple of days. Might use a bit of it in the last transplant with some guano.
PROGRESS:
DAY 43: Topped the SFLK#2, I wanted to wait a bit longer for her to be fully recovered.
DAY 44: Fed them with 200ml of the solution. I will probably need to start to switch on the extraction more often now.
DAY 45: After fed yesterday, humidity raised in the growtent, not any sign of mold anywhere around, anyway I will deep clean right before switch.
DAY 46: //
DAY 47: Both plants had a nice growth, I bended all the side branches, now they're nicely open to the light.
DAY 48: //
DAY 49: Wanted to switch to flower next week, lets see if I can get few 18lt pot and do the magic!
See you next week guys!!
6 likes
comments
Share
Used techniques
LST
Technique
8
Week 8. Vegetation
5y ago
1/18
34 cm
Height
18 hrs
Light Schedule
21 °C
Day Air Temp
6.3
pH
330 PPM
TDS
62 %
Air Humidity
18 °C
Solution Temp
18 °C
Substrate Temp
19 °C
Night Air Temp
11 l
Pot Size
0.2 l
Watering Volume
50 cm
Lamp Distance
Pennello Week 8
It's been a busier week this one, the clones looks all rooted with small new growth and both the SFLK had a nice sprint! I had to organize better and open them up properly. Tomorrow I will up pot them fot the last time, add some of the compost I just made, zeolite, bat guano and finally switch to 12/12!!
26/1 - Checked average temp in the compost box, as you can see on the pics, the heat is more uniform, thermophilic phase almost over, we are not far away from succes!
30/1 - Checked the compost humidy, have a good squeeze and just one tear of water dropped from the mass. The compost is ready, it can go back to a normal box without any holes, only thing I have to do is keeping it moist, 500ml of declorinated tap water with 3ml of bokashi juice.
PROGRESS:
DAY 50: No big changes, just folding bigger leaves downwards for better light penetration.
DAY 51: Fed them with 200ml of plain water.
DAY 52: We are having some pretty good weather here, temp's in the growtent raised up to 23.6Cº, plants enjoyed it.
DAY 53: It's not comfortable anymore to take pics from the inside, from now on I'll probably take them out.
DAY 54: Tied all the side branches, the plants occupies more space now,
DAY 55: //
DAY 56: Will up pot them tomorrow and switch into to 12/12, might give a full 24h of darkness just to let them relax from transplantig and last defoliation.
See you next week guys!!
6 likes
comments
Share
Used techniques
LST
Technique
Topping
Technique
Defoliation
Technique
9
Week 9. Flowering
5y ago
1/8
34 cm
Height
12 hrs
Light Schedule
23 °C
Day Air Temp
6.3
pH
330 PPM
TDS
56 %
Air Humidity
18 °C
Solution Temp
18 °C
Substrate Temp
20 °C
Night Air Temp
18 l
Pot Size
0.24 l
Watering Volume
45 cm
Lamp Distance
Pennello Week 9
Yep, I did it. I finally switched the box 12/12. They are all inside new 18lt pots, with 75g of batguano each pot and a 1% of zeolite. Did water with just 700ml after transplants, cause the pots were so heavy I though it was the moisture from the compost, but it was just that the compost its freaking heavier than usual Biobizz soil.. Anyway, I gave 2,7lt of water that they happily sucked up.
1/2 - Transplanted them using the compost I just made, bat guano and zeolite
3/2 - My Ph meter its gone. Can't really measure the ph of my water, need to get some GHE drops for the moment. The water in my area its quite strong
PROGRESS:
DAY 56: Up pot them in 18lt pots, 75g of bat guano mixed with the recently made compost, and a 1% of zeolite. Feed 700ml plain water.
DAY 57: Open them up slightly more for better light penetration. Found mushrooms while working on the plants! Switched to 12/12
DAY 58: //
DAY 59: Look's like they are stretching a bit, nothing crazy, quite uniform I must say.
DAY 60: //
DAY 61: Gave 2,7lt of plain water this morning, RH raised a bit to 82%, as soon as the extraction fan went on, dropped to 58%, I need to stabilize this.
See you next week guys!!
9 likes
6 comments
Share
Used techniques
LST
Technique
10
Week 10. Flowering
5y ago
1/9
34 cm
Height
12 hrs
Light Schedule
23 °C
Day Air Temp
6.3
pH
Normal
Smell
330 PPM
TDS
56 %
Air Humidity
18 °C
Solution Temp
18 °C
Substrate Temp
20 °C
Night Air Temp
18 l
Pot Size
0.25 l
Watering Volume
45 cm
Lamp Distance
Pennello Week 10
Just over the second week of flowering, all the plants stretched out. From my point of view, perfectly, because theyw filled up the growing space amazingly. I was very happy with the GC genetic, they did start strongers than the others, but then slightly slow the growth, especially the GC#1, which did not form nice tie-able branches, resulting more compact. While, luckly , I can not complain about the GC#1, she did branch out way more than her sister, resulting in a more uniform plant, well spreded. Anyway, I bet (maybe is just HOPE) that the terpene and resin production war, will make some changes. Let's go to the facts.. This week I had to practice some medium-heavy defoliation, the growtent was packed and I had problem regulating HR, anyway is a step I like to do in the second and third week of flower, for better air circulation and light penetration. Any further I like to leave my plants thinking just about buds.
PROGRESS:
DAY 64: Well, It might sound crazy but I believe they did enjoy the watering. Plants just exploded, dont know which word should I use. An orizontal pic should explain the density.
DAY 65: Very very very light defoliation, just to help out lower branches.
DAY 66: The growtent has now a more uniform green, healthier I'd say. Lots of new growth here and there.
DAY 67: //
DAY 68: Checked on the LST, opened them up a little more, those plants dont want stop growing!!
DAY 69: Important defoliation today, after fully recovered from the first one. As you can see on the pics, the SFLK#1
See you next week guys!!
5 likes
comments
Share
Used techniques
LST
Technique
Defoliation
Technique
11
Week 11. Flowering
5y ago
1/5
48 cm
Height
12 hrs
Light Schedule
23 °C
Day Air Temp
6.3
pH
Normal
Smell
330 PPM
TDS
56 %
Air Humidity
18 °C
Solution Temp
18 °C
Substrate Temp
20 °C
Night Air Temp
18 l
Pot Size
0.25 l
Watering Volume
45 cm
Lamp Distance
Pennello Week 11
Third week of flower gone. The hairs are all out, the teenage is over, time to become women!!! I'am still having problems with RH%, bit too high at this stage. Weather is getting better everyday, I can let the house breath more and let more fresh air in. This week has been quiet, did not water at all, pots are still heavy and I've seen a few fungus gnats wich I'd like t get rid of ASAP. I'm gonna get sticky traps and maybe some diatomaceous earth just to make sure nothing will come back in late flower... MUST fix this RH% problem.
Anyway those two SFLK made me really happy, over the 6 plants in the box, they are the ones that branched out the most, I have really big hopes in them!
PROGRESS:
DAY 72: Very nice recovery from the heavy defoliation I gave last week, barely watering, look's like they holding up a lot of water.
DAY 73: //
DAY 74: Opened them up MORE and MORE, looks like a infinite LST.
DAY 75: //
DAY 76: Checked on the LST, again, opened them up a little more, those plants dont want stop growing!!
DAY 77: //
DAY 78: Important defoliation today, after fully recovered from the second one. Probably this one will be the last defoliation, I might practice one last one toward the end of flowering..
See you next week guys!!
9 likes
2 comments
Share
Used techniques
LST
Technique
Defoliation
Technique
12
Week 12. Flowering
5y ago
1/7
53 cm
Height
12 hrs
Light Schedule
22 °C
Day Air Temp
6.3
pH
Normal
Smell
330 PPM
TDS
56 %
Air Humidity
18 °C
Solution Temp
18 °C
Substrate Temp
20 °C
Night Air Temp
18 l
Pot Size
0.25 l
Watering Volume
38 cm
Lamp Distance
Nutrients 1
Bokashi juice from compost
10 mll
Pennello Week 12
here we go, another week is gone, all the plants looks happy and it's like a while that I'm not watering. I deeped them like a week ago, in ph water and that's all. I'am avoiding watering from the top since there are few fungus gnats around that I'm trying to get rid of, somehow. Waiting for the sticky traps and the diatomaceous earth to come.
PROGRESS:
DAY 79: That is how they look after the heavy defoliation.
DAY 80: //
DAY 81: //
DAY 82: Just look how fast the recover, I'am amazed by the power of organic soil. ORGANICPOWER!
DAY 83: //
DAY 84: //
DAY 85: Plenty of hairs around, when I opend the room where the box is located, a light but permanet smell of sweet cannabis invade the all house. Might need to mount that filter I think 😅
See you next week guys!!
PS: From next week on I will not update anymore with daily-development, but good good weekly-development of buds, so to appreciate more the 7 days difference. hope you guys will enojy 😎
PPS: I did not forget about the clones, they are growing!! Only 4 out of the first 12 made it out decently, I'am still very happy since I hvae just begun practing this tecniques, and there are 8 more in the propagator 😈 let's see how it goes lads!
8 likes
comments
Share
Used techniques
LST
Technique
Defoliation
Technique
13
Week 13. Flowering
5y ago
1/7
53 cm
Height
12 hrs
Light Schedule
22 °C
Day Air Temp
6.3
pH
Normal
Smell
330 PPM
TDS
56 %
Air Humidity
18 °C
Solution Temp
18 °C
Substrate Temp
20 °C
Night Air Temp
18 l
Pot Size
0.25 l
Watering Volume
38 cm
Lamp Distance
Pennello Week 13
End of week 13, buds are forming up nicely I'd say.
A good mistake I made, it's that I should have cleaned up better the low branches, since there are many that are not getting much light, but now I feel sorry, I just can't cut them off...more pop-corn for bubblehash!! 😇
As pre annunced last week, sticky traps (which are already working) and diatomaceous earth are finally in house, probably going to water tomorrow or so with it, I bet the plants will enjoy a bit of water after a good month without getting any from the top.
PROGRESS:
DAY 86: //
DAY 87: //
DAY 88: //
DAY 89: //
DAY 90: //
DAY 91: //
DAY 92: Smell is getting every week stronger and sweeter, seems to live in a candy shop 😂 Those Garlic Cheese smeel fricking strong, like Cheetos, but like crazy you know? Unbeliavable!! I'am not complaing, just to be clear! Vero looking forward the end of the flowerng stage to see those flowers! My jar are almost empty and the month is still long, not to consider drying and curing 😅
See you next week guys!!
PS: I did not forget about the clones, I know I said that last week too BUT this time is going to be for real. The 4 I spoke about last week are growing nicely, while 6 out of 8 of the new ones have rooted, so thing start to look intresting, I might save some time with this action. Next week I will update with more pics, I'm waiting on the compost to be ready to start up potting clones!!
5 likes
comments
Share
14
Week 14. Flowering
5y ago
1/9
53 cm
Height
12 hrs
Light Schedule
22 °C
Day Air Temp
6.3
pH
Normal
Smell
330 PPM
TDS
56 %
Air Humidity
18 °C
Solution Temp
18 °C
Substrate Temp
20 °C
Night Air Temp
18 l
Pot Size
0.25 l
Watering Volume
38 cm
Lamp Distance
Pennello Week 14
Hi guys how you doing? Sun is shining up in the sky and buds are growing hairy and smelly, what else do we need?
Since I dont have great temperatures in the growtent the flowring process is going a bit slow, hopwfully I will be adding an extra TGL100 at least for those last weeks.
I managed to finally stabileze the RH to 60%, I know it is still an high % during flowering, but that is the best I can do for now 😅. Hoping that the weather dries up a little bit so to help me out.
After placing sticky traps on each pot and a dust of diatomaceous earth, there is basically no fungus gnats around, MAYBE 1 OR 2, literally! Very happy about it!
This time I did not forget about clones! The 4 together are the oldest , 2 months old, to be exact, 2xCC#1, 1xCC#2, 1xGC#1, 1x SFLK#1 I should have up pot them but compost wasnt ready so.....probably gonna move them next week in.
Looking at the plants now I'd say that SFLK#2 is producing more resin than SFLK#1, same for CC#2 and CC#1 and GC#2 - GC#1. Do you guys think is just a case that all of the three plants that are producing more resin are at the back of the growtent? I leave the GT open everynight, might this be the cause? No idea, but I will look after those clone 😎
The Bubblehash it's from the weed of the past run, not really good to smoke so.... 😬
PROGRESS:
DAY 93: //
DAY 94: //
DAY 95: //
DAY 96: //
DAY 97: //
DAY 98: //
DAY 99: //
See you next week guys, thank for reading! 👊
7 likes
comments
Share
Used techniques
Defoliation
Technique
15
Week 15. Flowering
5y ago
1/7
53 cm
Height
12 hrs
Light Schedule
22 °C
Day Air Temp
6.3
pH
Normal
Smell
330 PPM
TDS
56 %
Air Humidity
18 °C
Solution Temp
18 °C
Substrate Temp
20 °C
Night Air Temp
18 l
Pot Size
0.25 l
Watering Volume
38 cm
Lamp Distance
Pennello Week 15
How everyone doing?
Well well well.. from what can i start with?
Smells are just WOW. I dont have many runs on my back but the terpene profile that those plants are showing is quite a thing. The compost is doing a great job, only issue I had so far is that I left them without watering too long, I starter to seen some shorthage and slow bud formation, not good at all, obviusly gave a good watering and everything seem to be working jut fine..
PROGRESS:
DAY 100: //
DAY 101: //
DAY 102: Good watering from top, and left them standing in the water to suck up what evere the needed from the bottom.
DAY 103: //
DAY 104: //
DAY 105: //
DAY 106: //
See you next week guys, thank for reading! 👊
7 likes
comments
Share
16
Week 16. Flowering
5y ago
1/8
58 cm
Height
12 hrs
Light Schedule
24 °C
Day Air Temp
6.3
pH
Normal
Smell
330 PPM
TDS
56 %
Air Humidity
18 °C
Solution Temp
18 °C
Substrate Temp
22 °C
Night Air Temp
18 l
Pot Size
0.35 l
Watering Volume
38 cm
Lamp Distance
Pennello Week 16
Smell are fricking strong now, I have been watering quite a bit since I kept them slightly over dry and the terpens seem to have blow out, it's embarassing just walking into the house from work...GOOD!
The end is getting close, I believe a good full 2 week and will be over. Plants are slowing loosing that deep green color...WINTER IS COMING! I'am still testing out the bokashi composting method, talking with some friends about different way to produce organic fertilizer and how/when to use them, getting ready for the next run basically! I will flower ALL the clone and maybe an Wedding cake which is been growing outdoor in mainlining, just to clean up the balcony fro the hot season :D
Just for reminder, clones are:
1xGC#1
2xCC#1
2xCC#2
1xSFLK#2
4xWC
PROGRESS:
DAY 107: //
DAY 108: //
DAY 109: Good watering from top, and left them standing in the water to suck up what evere the needed from the bottom.
DAY 110: //
DAY 111: //
DAY 112: //
DAY 113: //
See you next week guys, thank for reading! 👊
7 likes
3 comments
Share
17
Week 17. Flowering
5y ago
1/7
60 cm
Height
12 hrs
Light Schedule
24 °C
Day Air Temp
6.3
pH
Normal
Smell
330 PPM
TDS
56 %
Air Humidity
18 °C
Solution Temp
18 °C
Substrate Temp
22 °C
Night Air Temp
18 l
Pot Size
0.35 l
Watering Volume
38 cm
Lamp Distance
Pennello Week 17
Yes my friends! I can see now how thirsty they were, after the last week of good watering buds are now all rock dense and clearly did fatten up!
As previously said all the #2's phenos are doing better than #1's in resin production and bag appeal too. Really looking forward to try both of each pheno to see the difference! I'd love to run some TCH% test, I have seen someone doing it on GD, very usefull, but since where I live its like 1800's.......
I'm preparing more bokashi compost for the clone run, which is about to start, i'll be using a bit of warm casting as well as EM-1 activated for watering plants, inoculate the WheatBran and the soil I will mix to the fermented organic waste.
I am making LAB that I will be using as well in the FSST (Fermented Sprouted Seeds Tea) that my friend @MentalGrow kindly explained to me! Next mission is to fix over and over my compost till get a great living soil...next one to be introduced is going to be de bio-char!
PROGRESS:
DAY 114 //
DAY 115: //
DAY 116: Good watering from top, and left them standing in the water to suck up what ever they needed from the bottom.
DAY 117: //
DAY 118: //
DAY 119: //
DAY 120: //
See you next week guys, thank for reading! 👊
6 likes
comments
Share
18
Week 18. Flowering
5y ago
1/6
60 cm
Height
12 hrs
Light Schedule
22 °C
Day Air Temp
6.3
pH
Strong
Smell
330 PPM
TDS
56 %
Air Humidity
18 °C
Solution Temp
18 °C
Substrate Temp
22 °C
Night Air Temp
18 l
Pot Size
0.35 l
Watering Volume
38 cm
Lamp Distance
Pennello Week 18
Yes my friends! One more week is gone, buds are fattening up and the smell is definetly strong now.
Not really much to say about the plants, I'am working on some homemade fertilizer to use..
LAB I was making last week is almost ready, gonna pass it thrugh a cheese cloth and starting to play with it a bit 😈
I won't be uploading anymore about the clones here, since I'll do a diary just for them for easier following!
PROGRESS:
DAY 121 //
DAY 122: //
DAY 123: Good watering from top, and left them standing in the water to suck up what ever they needed from the bottom.
DAY 124: //
DAY 125: //
DAY 126: //
DAY 127: //
See you next week guys, thank for reading! Take care 👊
6 likes
1 comment
Share
19
Week 19. Flowering
5y ago
1/5
60 cm
Height
12 hrs
Light Schedule
22 °C
Day Air Temp
6.3
pH
Strong
Smell
330 PPM
TDS
48 %
Air Humidity
18 °C
Solution Temp
18 °C
Substrate Temp
22 °C
Night Air Temp
18 l
Pot Size
0.35 l
Watering Volume
38 cm
Lamp Distance
Pennello Week 19
That's it guys, last heavy watering today, I was waiting for the CC#1 to fade down a bit but does not look like she's willing to, not like the rest at least!
I will give them 48h of full darkness before harvest, I will hang to dry just the bigger buds while all the rest will go for Fresh Frozen Bubble Hash 😛
Clones are super ready to go into flowering, I will start a few new diary probably, about them and a new collaboration with a dear friend of mine which is releasing crazy genetics.
The following post will be just before harvest to see the colors and then slowdrying and curing 👽
PROGRESS:
DAY 128: Heavy watering to flush down a bit..
DAY 129: //
DAY 130: //
DAY 131: //
DAY 132: //
DAY 133: //
DAY 134: //
See you next week guys, thank for reading! Take care 👊
6 likes
2 comments
Share
20
Week 20. Flowering
5y ago
1/3
60 cm
Height
12 hrs
Light Schedule
25 °C
Day Air Temp
6.3
pH
Strong
Smell
330 PPM
TDS
48 %
Air Humidity
20 °C
Solution Temp
18 °C
Substrate Temp
22 °C
Night Air Temp
18 l
Pot Size
2 l
Watering Volume
38 cm
Lamp Distance
Pennello Week 20
DONE!
It is (finally) over 😂 I did not think it was going to take so long, actually I did not think about the many mistakes I made, that did slow down a bit the flowering process, but still, I'am am amazed from the colorous most of the plants shown at the very end giving an absolute stunning bag appeal at the buds too!
The smells are super strong from every strain, the Garlic Cheese has a pungent gasoline n'smelly feet odor, very good resin production from both pheno, the GC#1 turned completely black till the pop corn buds, I did not expect that, beautiful plant, while GC#2, which I believe to be the one that produced the most resin did not show any particular color.
Now they are just sitting in the box for 48h full darkness and then I will trim all the pop corn buds for FF Bubble Hash 🤤 . I will try to slowdrying them as much as possible but temps did raised quite a bit (28ºC) and its not that easy lets see how I'll manage it.
Obviusly I will update witht the harvest pics that are to die for!
*Sorry for the excitement but the smells, the colours, the toughness of the buds, how could I not be? Im dying to make some hash out of those buds guys, I promise!!
The home made bokashi this is job amazingly. I need to fix it a bit since i has a bit of problems with the fungus gnats.. keep you updated on changes!
PROGRESS:
DAY 135: Heavy watering to flush down a bit..
DAY 136: //
DAY 137: The colours are just WOW
DAY 138: //
DAY 139: //
DAY 140: //
DAY 141: //
See you next week guys, thank for reading! Take care 👊