


Likes
Comments
Share


@AsNoriu
Follow
Day 50. They are flowering !!!
Plant A is taller and starting to run !!! Drop her down a bit and raised plant B to keep even canopy.
Yesterday they got nute blast, close to 850 ppm. Planing plain water and one more heavy feed this week.
Trimmed bottoms a bit, few sucker branches and few leaves gone.
Happy Growing !!!

Likes
1
Share


@Jordantone1
Follow
Just trying to decide on purchasing terpinator or rock resinator?? I have a few weeks left of flower and would love to take them to the next level-though the only thing I think that needs to improve is the size of the buds

Likes
9
Share


@Herbz_Unkraut
Follow
another resin monster from seedstockers, with a very special scent, full of flavors! grinded it smelled like peppermint, and vaped it has a great sweet creamy taste!

Likes
38
Share


@deFharo
Follow
Bienvenidos cultivadores de marihuana a la sexta semana de floración de esta cepa de dominancia sativa y actualmente "La Reina de mi jardín de la alegría"... God save the Queen!! 😍
Otra semana de fácil y satisfactorio cultivo, la planta a parado el crecimiento vegetativo y se esfuerza en la creación de flores, las mismas flores que aparecen a lo largo de todas las ramas y que avanzan una gran cosecha con largas y gruesas colas.
Las marcas de carencia de Magnesio que aparecieron la semana pasada son historia después de la aplicación en superficie de Dolomita y sal de epsom y la recuperación, para riegos, del Ormus (Ca, Mg).
Durante toda esta semana han habido niveles de humedad relativa muy bajos, alrededor del 30%, y temperaturas altas, he rociado varias veces, las plantas con agua para aumentar la humedad en los armarios, también he activado dos pequeños humificadores y sobre todo he mantenido las plantas muy hidratadas, afortunadamente ayer cambió el clima y ha comenzado a llover con bajada de temperaturas. Como hubo una aparición de arañas en otro cultivo rocié esta planta, también, con jabón potásico.
El consumo de agua de este cultivo es muy alto, y en los días secos aumento todavía más, he mantenido y mantengo el sustrato muy hidratado para favorecer la circulación de líquidos, cuidando a la vez la salud de las raíces. Esta semana riegos alternos con nutrientes y otros con agua pura de manantial, preparando las raíces para aumentar las dosis de nutrientes conforme avance la floración.
DECODIFICANDO EL CULTIVO 😛
- Día 93. Riego multicomponentes, con Microorganismos de Montaña Activados de forma líquida con minerales y nutrientes NPK al 2,6%, Humato potásico de leonardita que añade ácidos húmicos y fúlvicos, materia orgánica y extra de potasio al 1,5% y melaza para dar energía a los Microorganismos. PH: 6.40, EC: 1.70. 1000ml.
- Día 95. Para ayudar a la disolución del riego anterior: Agua de manantial. PH: 6.7, EC: 0.50. 1000ml.
- Día 97. Riego para fortalecer el cultivo. Agua de montaña y garbanzos (EC: 0.44), MMA con calabaza, zanahoria y Quitosano al 3,5% y Ormus (Ca, Mg...+PH) al 0,5%. PH: 6.80 EC: 1.54. 1100ml
- Día 98. Agua de montaña y alubias. PH: 6.62 EC: 0.50. 250ml.
• ORGANIC TIP 😋
Activación de Microorganismos de Montaña con Calabaza, zanahoria, minerales y quitosano para fortalecer las defensas de la planta contra patógenos.
Después de 45 días de fermentación anaeróbica he abierto, lo que espero que sea un gran fertilizante para usar desde la etapa de crecimiento vegetativo hasta la preflora y primeras semanas de floración.
La calabaza y la zanahoria contienen multitud de minerales y vitaminas que ayudan a fortalecer el cultivo y ayudan a la expansión de las raíces. Este preparado es comparable, funcionalmente, con los extractos de algas, aunque mucho más completo. Esta hortaliza es rica en antioxidantes. Destaca su contenido en carotenos, que son los responsables del color característico de la calabaza. ¿Será que esto puede influir en los colores de las cepas?... en observación!!
Gracias a la fermentación anaeróbica con Microorganismos de Montaña, los nutrientes, vitaminas y minerales son quelados por la acción de los MM, consiguiendo así un caldo nutritivo de primer orden que las plantas asimilan de inmediato.
INGREDIENTES:
Agua de manantial alcalino: 2,5L
Suero de leche: 1L
Microorganismos de Montaña Sólidos (varias cepas): 400g
Melaza orgánica: 120g.
Levadura de cerveza y fresca: 10g.
Calabaza y zanahoria fresca: 475g.
Cáscara de camarón deshidratado y molido (Quitosano): 6.5g
• Minerales:
10g de Roca fosfórica: P
7g de Azomite: Ca, Fu, Fe, K, Si, B y trazas de el resto de minerales de la tabla periódica.
8g de Ceniza de palmera: Ca y K.
5g de Piedra Pómez: Si, Al, Fe, Ca, K.
8g de caolin con Illita: Fe, Si.
5g de Sal de Epsom: Mg.
• Elementos contenidos en la calabaza y zanahoria:
Aminoácidos: alanina, arginina, cucurbitina, cistina, glicina, histidina, isoleucina, lisina.
Ácidos: linoleico, aspártico, oleico, palmítico salicílico y fólico.
Vitaminas: Vitaminas A, B1, B2, B3, B6, B9, E, A, C, K
Minerales: calcio, cobalto, boro, magnesio, zinc, potasio, hierro.
Azúcares: sacarosa
PROCEDIMIENTO
En este bio preparado he hecho una pre-hidrólisis de la calabaza y zanahoria, cociéndolas durante una hora con melaza para mejorar luego, en la fermentación, la disolución de todos sus elementos. También he hecho una pre-hidrólisis con la cáscara de camarón, esta vez he hecho una hidrólisis alcalina con KOH, que luego de dos horas añado a la mezcla final y además una disolución en agua, con mucha agitación, de los minerales.
Disuelvo todos los elementos y añado levadura de cerveza y fresca para dar comienzo a la fermentación. Coloco en una bolsa de malla los Microorganismos de Montaña Sólidos de mis dos semilleros, donde reúno los Microorganismos (Bacterias de la familia de los Actinomicetos, Levaduras y Hongos (Micorrizas), Microalgas y Protozoarios) de seis bosque vírgenes de mi zona.
Cierro el bidón herméticamente con válvula de escape de gases, como estamos en Enero y hace frío he puesto una cinta de calor alrededor del bidón para mantener una temperatura constante de aproximadamente 36°C, de esta manera el preparado puede estar listo en tan sólo 30 días, si fuera el caso de dejarlo a temperatura ambiente el preparado demoraría 2 meses más en estar disponible para uso. La fermentación comenzó a los 60 minutos y se ha alargado durante 25 días sin interrupción.
He abierto el bidón a los 45 días, el olor ha fermentado es muy agradable, el color fantástico, algunos Microorganismos se ven prosperando en la superficie, separo medio litro para ir usándolo y cierro el bidón otra vez.
Tengo varios cultivos incipientes donde voy a aplicar este fertilizante y observar sus efectos.
SALUDOS, SALUD Y GRANDES COSECHAS A TODOS!! 😁
===========================================
• CONOCE MIS TÉCNICAS DE CULTIVO Y FERTILIZANTES ORGÁNICOS AVANZADOS.... HACER ES COMPRENDER!! 😉
- ORGANIC GROWING TIPS!! 👇
3M • PURPLE BUD
SEMANA 17: Activación de Microorganismos Sólidos (MMA) y biol de frutas con minerales.
SEMANA 20: Agua de montaña y estructurada.
SEMANA 21: Abono sólido y mulch.
3M • Anubis y Auto Magnum
SEMANA 1: Super sustrato y aireación de macetas
3M • Frodo's & OG Kush
SEMANA 7: Elaboración de auxinas.
SEMANA 10: Humato potásico de leonardita enriquecido con minerales.
3M • Diesel bastard.
SEMANA 11: Sólidos y Mulch
SEMANA 13: Aireación forzada del sustrato.
SEMANA 14: Elaboración de un Lacto fermento de auxinas, nutrientes y minerales.
3M • Sweet Zkittlez
SEMANA 2: Agua estructurada, agua viva.
SEMANA 3: Ormus y agua de coco.
SEMANA 5: Compactación con luces Cool White.
SEMANA 6: Cicatrizante y protector de cortes o podas apicales.
3M • Sweet Clementine
SEMANA 5: Elaboración de Lacto fermento multi frutas y minerales.
3M • Fresh Candy auto
SEMANA 4: Recuperación de esporas de Microorganismos y Micorrizas.
3M • Tropicanna Poison
SEMANA 7: Elaboración de un semillero de Microorganismos de Montaña Sólidos (MMS)
SEMANA 10: Extracción de HBO con el método QWISO
3M • Black Domina
SEMANA 6: Reutilización de residuos: Mulch de palos secos.
3M • Monster Bud Kush
SEMANA 7: Elaboración de un Bocashi de Pasto ensilado enriquecido con nutrientes y minerales.
3M • San Fernando Lemon Kush
SEMANA 5: Reutilización de sustrato orgánico.
SEMANA 16: GD TIP: ¿Lente u objetivo?
3M • Magnum Auto
SEMANA 5: Aprovechamiento de residuos caseros. Cáscaras de frutas. Deshidratación y almacenaje.
3M • Quick Sherbet
SEMANA 12: Crema tópica de karite y HBO.
SEMANA 24: Como el agua -Like a water
3M • Purple Shot
SEMANA 18: Tierra a la tierra.😎
3M • Gorilla Glue
SEMANA 4: Fibra de coco con Microorganismos de Montaña Activados (MMA) para mezclas de sustratos.
SEMANA 7: Activación de Microorganismos de Montaña en modo líquido (MMA)
3M • Diesel S1
SEMANA 17. Humato PK. Hidrolizado potásico de leonardita con fósforo.
3M • Kalini Asia
SEMANA 17. Jabón potásico para control de plagas de insectos y ácaros.
3M • Sage n' Sour
SEMANA 13. Activación de Microorganismos de Montaña Sólidos con Calabaza, Zanahoria, Minerales y Quitosano.
SALUDOS, SALUD Y GRANDES COSECHAS!! 😵

Likes
15
Share


@Bluemels
Follow
An Tag 39 zeigt die Triple G eine winzige Vorblüte 😜
An Tag 40 habe ich die Triple G an 4 Zweigen getoppt.

Likes
6
Share

@Blackson
Follow
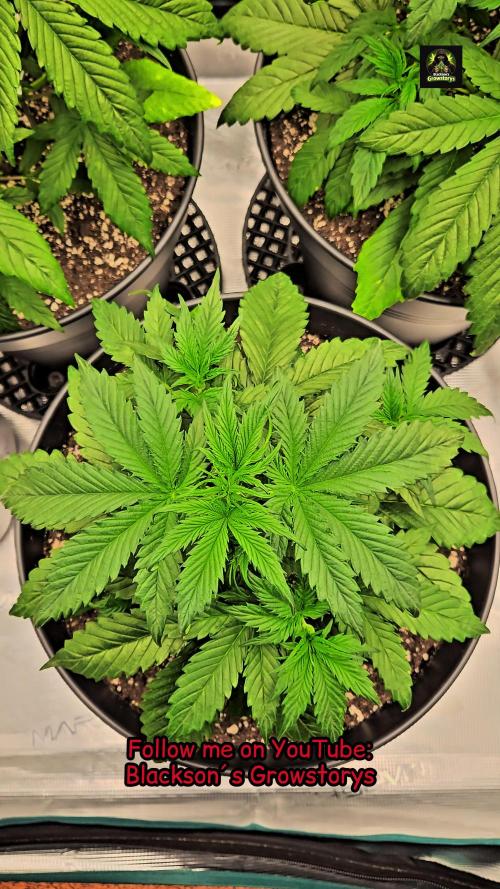
Week 4 update: Growth is accelerating! 🚀🌿 The leaf structure is recovering beautifully as the root zone stabilizes. Watching the canopy density increase daily. Ready to push the limits further! 💎🛡️⚓️


Likes
10
Share


@EastCoastGrows99
Follow
Week 7 now, growth slowed a tad, figured my soil mix would be running a little low on nutes now & started the feeding. Chose to give them a single feeding of Plant-Prod MJ Grow as it has some extra stuff they may have been missing but will feed bloom starting next week!
The bud sites where starting to get a little shaded from the larger fan leaves, removed them & the buds started swelling like mad!
Last day of week 7 update: They drank the grow nutes with vigour, fed bud filler last night (nov 3). The feeding greened up the leaves, now I can confirm my soil mix lacks enough flower nutes for sure.

Likes
12
Share


@littleboygrower
Follow
So just finished week 8 and starting 9 (from sprout), i still see new white hairs and the buds although they are getting there i think still need 1-2 weeks at least whats your opinion ?
Likes
Comments
Share

@rommyu
Follow
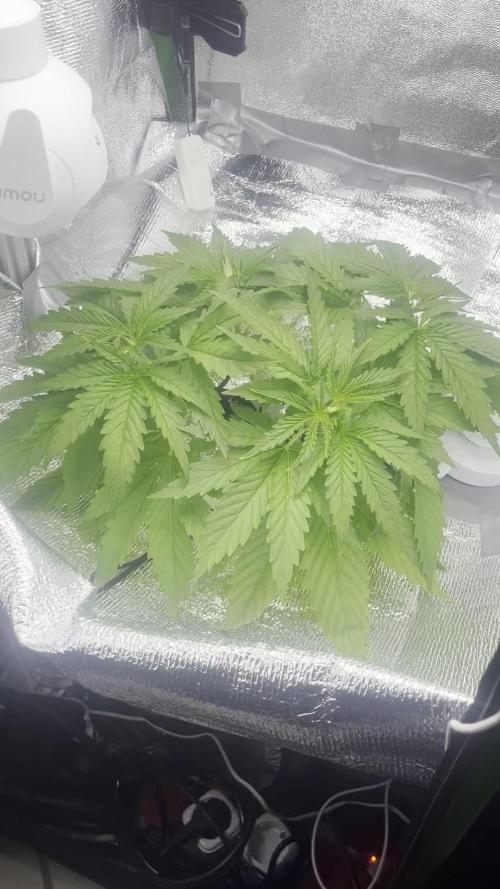
Leaf management has become an issue as the leaves are getting pretty big and if I were a plant, i'd be feeling a bit crowded.
added a reflector shield to protect the bottom area from getting too much light thereby reducing the temperature of the water.
moved pump outside of tent to get colder air.
insulated pot with a bubble wrap with reflective coating.
result: water temp from 28 to 23 degrees.

Likes
3
Share


@Easygrower
Follow
Hello growers we are back in the garden with stardawg sorry iv missed a few weeks been occupied elsewhere but we are at day 49 and she has got big she’s stand at 110 cm at the mo she starting to get frosty I’m loving it until next week be safe and happy growing
Likes
4
Share


@QixxGrows
Follow
Day36, 37, 38: Seems to be growing a set of leaves per day now. Super growth! Stretching to the top.
Day39: I had a hiccup with the camera. For some reason it stopped responding at 04:30 in the morning. I only realized it much later. I still don't really know why, but reseating the data ribbon fixed the issue.
Day40: After fixing the camera, I decided to take this view again. The Lady is starting to show some nice growth and this view will show it best. If you look carefully, you'll see that her branches are not green, but rather reddish. Definitely related to genetics :) Everything else is within limits. Plus, the leaves look super healthy.
Day41: Here you can see the stem colour better.


Likes
11
Share


@Organic473
Follow
The growth for 1 week is impressive....looking forward to a monster harvest and possibly pollinating half this girl.

Likes
1
Share

@Growfather1
Follow
Hello everyone,
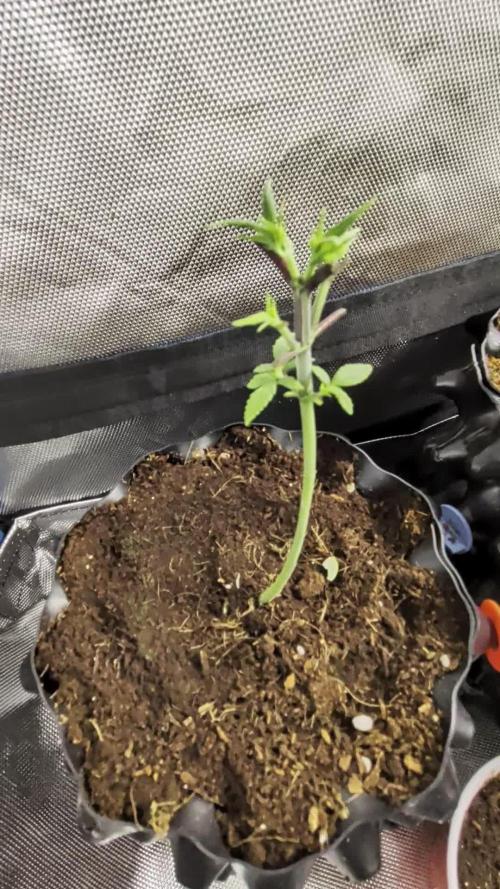
They are officially entering week three of veg!
And honestly, they are looking pretty bare right now and definitely not fine.
I just gave them a major, heavy defoliation.
Right now, there are practically no leaves left on them—just the bare branches and nodes staring back at me.
It looks a bit brutal, but it was a necessary step to finally get this thrips situation under control and ensure the light hits exactly where it needs to.
They look less like a lush garden right now and more like a bunch of green twigs trying to survive a storm, but we know the rebound is going to be massive.
The environment in the tent is still holding perfectly steady while they sit under the lights to recover from the shock:
Environmental Metric Value Range
Daytime Temperature 26°C
Nighttime Temperature 21°C
Relative Humidity 62% – 65%
So, let's see how they look next week and hope for a quick recovery!
Thank you for stopping by and have a nice day.
Best regards,
Growfather

Likes
2
Share


@Boomdrawfyah
Follow
Dia 91 la 4 semana de floración , la 1051 va mucho mas avanzada que las demás, hay algun problema con la mosca blanca aunque ya hemos pedido depredadores para combatir con ella de manera biologica, la Glow Starz y la White Noise van mucho mas atrasadas aunque se ven mucho mejor

Likes
22
Share


@donovanliam
Follow
Switching to 12-12 this week. Getting new lights next week. I wrote more comments but i closed it by mistake.


Likes
18
Share


@Canadian
Follow
The plant seem to have reach its highest peak of THC and I'm just waiting for other plant in my garden to catch up can't wait to try this one smell very strong and the plants are very large beautiful plant has a lot of purple colour showing through the flowers can't wait to harvest this one .
As a interesting note those buds seem to be very sensitive to foxtailing with the light to close to it.
thank you for reading I will continue to update have a happy grow

Likes
15
Share

@Oims_Finest
Follow
Servus all✌️
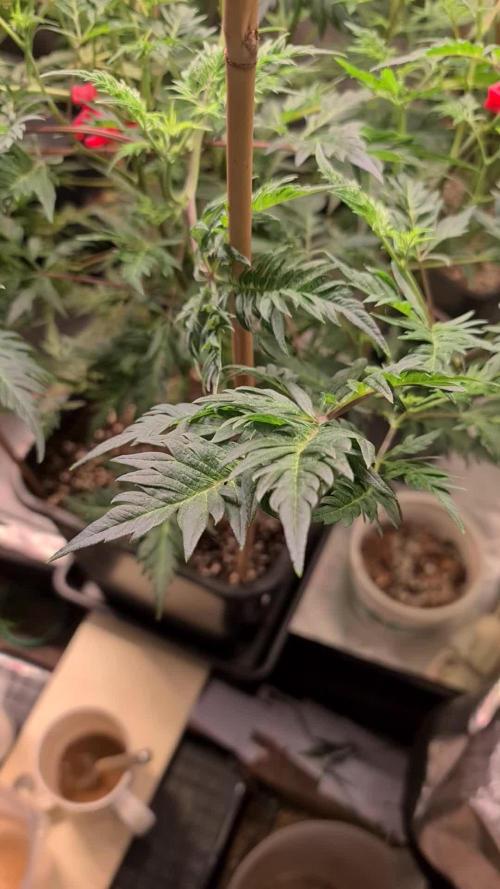
6 weeks of flowering are done. This wasn't the best run I have to admit, but we're entering the last chapter of this turn.
The Strawberry Guava will finish first. Buds are big and dense and covered in Trichs. The S1 line definitively took a more sativa-dominant Cultivar for pollination. Former plants had been clearly more on the indica side and had a different terpene Profile..
The Dulce de Papaya on the other Hand will reach the 10 weeks Mark. Buds are also tight and trippin in Trichs but due to her relatively short internodial distance and dense growth, maybe I'll have to harvest twice to give the third and fourth stage a little more time to mature.
That's all for the week, rest are the daily routines.
Have a good one!
Oim.


