
Likes
Comments
Share


@m99smith
Follow
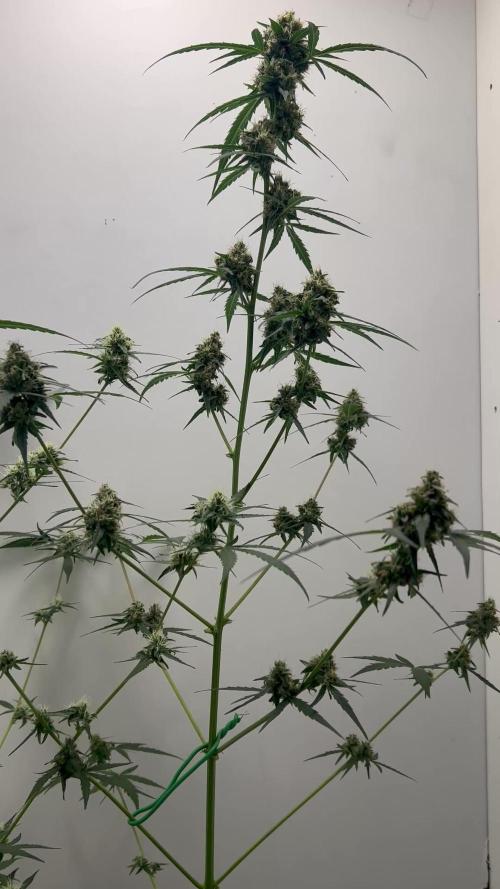
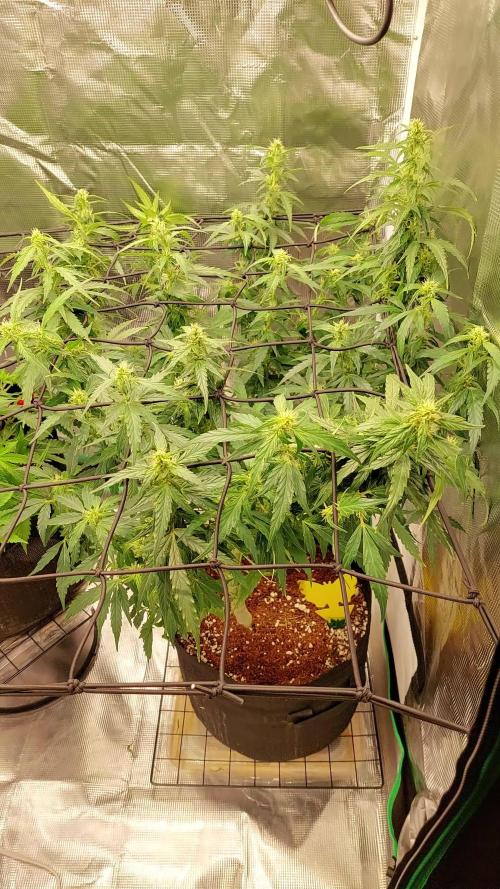
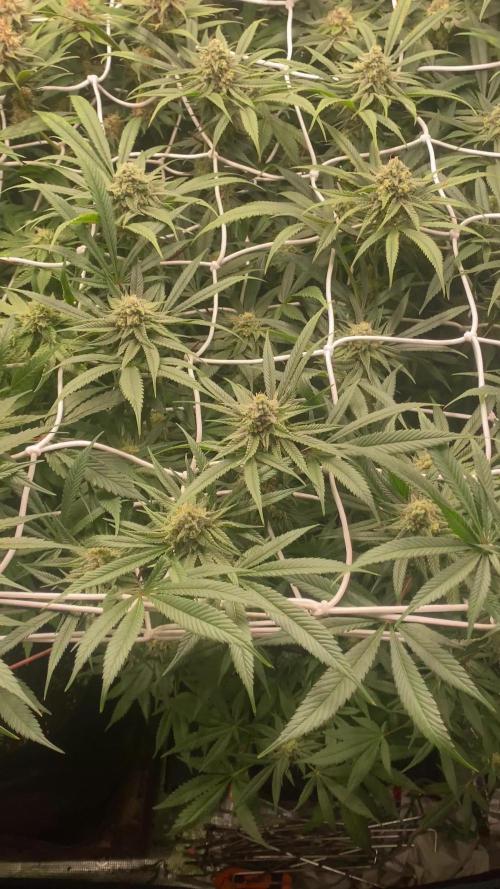
Week 8 for Mango Merengue, week 7 for Afghan Hash, and week 6 for Sour Diesel.
I'm taking down Pheno #1 of the Mango Merengue today, it was faster to mature then Pheno #2 & #3. Pheno #2 & #3 have around 1-2 weeks left of flower.
Mango Merengue - Small to Medium buds, strong Gassy/Melon smell, and packed with trichomes, average flowering time 8-9 weeks.
Afghan Hash Plant- Medium buds, packed with trichomes, and has a Sweet/Earty smell. Average flowering time 8-9 weeks.
Sour Diesel - Medium to Large buds, also packed with trichomes, really close bud formation, smells Gassy/Sweet. Average flowering time 10 weeks.

Likes
6
Share

@draco38
Follow
Settimana 9 iniziato ieri ma ho fatto il diario oggi. Spero le cose vanno meglio per le ragazze, non ho molto da commentare.


Likes
13
Share

@Lvnsource
Follow
[Feed log]
D: 89 - 10L - Si,[0ml],Vega[6ml],Flores [20ml],INPUT; [1.276 EC],[6.1 pH],Ca/Mg[4.8g & 2.8g]- RUNOFF; 3.5L pH [6.3] ,[2.070 EC] Previous irrigation: D85
EC is starting to come down 👍 should help the girl drink better; still looking to lower the EC further


Likes
1
Share


@BAM_BAM
Follow
The tent is filling very nicely. In my neut section it says Tsp or ml….. I am using powder so I am using Sensi pro A&B 6 grams ea. Also with the Big Bud it is powder so I use 4 grams in the solution I am calculating for 2 Gallons (American product converted to eu) but adding more water the plants are doing really well.
Started Overdrive this week this stuff really works the entire series grows awesome bud but Overdrive Pops those buds it really fills them out, it gives the buds weight makes them SOLID.


Likes
6
Share

@MaltedMadness02
Follow
Plant is responding really well to the change in conditions! I've noticed a rapid turn around in her vigor and overall growth day by day. Really glad I decided to ride this out. Next update should be a great one! Happy growing!
Likes
18
Share


@Grower_Of_Persia
Follow
my dry and cure style is this:
4 days of hanging upside down to get water activity lower to around 0.6 in 50% humidity and 26 C temp (i know its a little high but we are in a hot summer right now and i cant get it lower even with air conditioner) and then after 4 days of drying i remove leaves and stalks, trim buds and move them to jar for the rest of their life :D . and in the first 4 days of curing i open the jar door and let hem get some fresh air in the jar for about 5 minutes and close the jar door again, after 4 days of curing like that buds are smokable but they will get better as they getting cured about 1 month.
buds are one of the hardest as fucking rocks type of buds! very dense , compact , sticky , smelly , amazing at every aspect
growing stage was 56 days and flowering stage was 75 days total (harvested tops at day 64th)
the total weight of dry buds was : (plant #1 & #3 top buds 56 G + lower buds 22 G ) 78 G + (plant #2 top buds 47 G + lower buds 18 G ) 55 G + (plant #4 top buds 120 G + lower buds 67 G ) 187 G = 367 G

Likes
65
Share


@Roberts
Follow
Gold Sativa is growing well. Colas are starting to develop. Lotscof stretching is going on. Doing a solution change ever 4 to 5 days. She is in a New Level Hydro bucket, under a Spider Farmer SE5000 light at 80 percent. Thank you New Level Hydro, Spider Farmer, and Quebec Seeds. 🤜🤛🌱🌱🌱
Thank you grow diaries community for the 👇likes👇, follows, comments, and subscriptions on my YouTube channel👇. ❄️🌱🍻 Happy Growing 🌱🌱🌱
https://youtube.com/channel/UCAhN7yRzWLpcaRHhMIQ7X4g
SE5000
https://amzn.to/3qFpAML
Spider Farmer Official Website Links:
US&Worldwide: https://www.spider-farmer.com
UK: https://spiderfarmer.co.uk
CA: https://spiderfarmer.ca
EU: https://spiderfarmer.eu
AU: https://spiderfarmer.com.au
Coupon Code: saveurcash
Www.newlevelhydro.com
Www.hygrozyme.com

Likes
15
Share

@420DeepGrow
Follow
📆 Semana 7
El engorde continúa con fuerza y los cogollos siguen ganando volumen y densidad. Los cálices continúan hinchándose, los pistilos permanecen mayoritariamente blancos y la producción de tricomas sigue aumentando, dejando las flores y hojas de azúcar completamente cubiertas de resina.
Ambas plantas mantienen un elevado consumo de agua y nutrientes, respondiendo de forma excelente. La más vigorosa continúa marcando el ritmo de desarrollo, mientras la segunda evoluciona de manera uniforme, consolidando una floración muy equilibrada.
⚡ EC: 1.8–1.7
💧 pH: 6.2–6.5
🌡️ Agua: 21°C
🌫️ Humedad: 45–50%
💡 Intensidad: 1000–1050 PPFD
🔥 Nota de cultivo: Mantener un clima estable y una nutrición equilibrada será clave para completar el engorde y maximizar la producción de resina y la calidad final de las flores.
Seguimos creciendo fuerte 💪!
Processing
Likes
16
Share


@Fergie
Follow
Hey guys so the flush has begun. 2 days ago . Starting to get that pungent cookie smell off these girls and the buds are rock solid . Probably another few weeks at least . Til next week 😀
Likes
5
Share


@cookingwithninja
Follow
This is week 8 day 4 video. I have tried about 30g in testers rapid 1:05 dry. I’m waiting on seeds to finish. Plants are 7ft tall super cropped 3x on some branches and monsters just pop up. I highly don’t recommend super ripping or manipulating breaking stems. You will have jungles and delicious harvest. Some tops were touching doides so lights were raised to maximum tent ceiling. Every day is 2tbsp soluble pk into 5 gal water, 1/2-1tbsp folvic acid, sometimes humid acid, sometimes fishsh!t, sometimes microbial mass. 2 times only I added 1tbsp of magnesium phosphate into5gal. Every watering in 5gal has 2tbsp of carbs, I don’t use black molasses but it’s bluesky organic booster. Buds smell sweet, 2 and 3 are where the terps are but no1 is frosty af. 2 is og. As numbers left to right. Split between the middle bar. Running about 840w. 640is my reg along with 5x 20w blurples and my friends 100w “lm301h” but I beg to differ. My 640w is lm301h. I wish I had more light but I am not a facility. I just have a 4x8x7h. I’m very happy with this grow. Everything is to the max been flushing last week and it’s burning my plants lol. Just 1tbsp ph down. I have not been using ph down in my entire flower because the soluble pk 1-1.5 tbsp per 5gal water is enough to lower and make things happy. Every day is watering and every plant gets 1gal water daily. They could do a lot more but I don’t have the space as you can see ❤️

Likes
39
Share


@Weird_Jimmy
Follow
👉this is week start of week 8 and the switch to the 12/12 schedule. the plant is on the 6th week on the GH nutrient chart for its flora series drain to waste schedule.This is considered early bloom and the only difference from the transition nutrients is the reduction of FloraGrow and addition of Liquid KoolBloom. The water I use is RO water from a medical grade industrial machine (not on site). Its conductivity is .04ms. Its 98.5% pure water. I believe this is helping me mix my nutrients at full strength and achieve the middle to upper end of the recommended ec range. The volume of plant uptake has increased quite alot. I am averaging 2 liters two times a day, but as the week progressed a couple of high flow fertigations were needed to keep the run off below +30ms. I feed my Marigold plant the run-off after Ive measured it. The fertigation station is in a closet in another room and doorways wipe my memory so I fed 99 the runoff a couple days ago (9-16). So I fertigated 1.5 liter immediately. That runoff was close to 30+. The lights were going out so the next morning i fertigated with 4liters. That runoff was +10. That night was 2liters w/.9 liter runoff +10. I plant on keeping the flow a little high to help prevent any nutrient deficiencies while its doing the early flowering stretch.
👉The plant is lush and green and growing as a nice round bush. Stout main stalk and is 21". I began plucking lower leaves that were reducing airflow around the base. These could pose a mildew risk if left on because they are in contact with the pot and reducing airflow across the top of the media. They were shaded now by the expanding branches above so it was time to remove them. I like to take leaves gradually, one or two per fertigation event. I also have taken off the bottom 3 branches. They were healthy and had plenty of potential bud sites...but they would be in the shade and never meet the potential of the upper buds. I may take two more low branches, but I will keep them if they keep stretching outward and upwards and stay in the direct light. When they start flowering full time I will have removed as many of the potential larf bud nodes on the interior of each branch. Nothing extreme, just the basic lollipop on the bottom and reducing larf production up top.
👉I am using a cordless work light to make the pictures better. My phone camera flash isnt bright enough to over come the LED blurple and the addition of the very bright work light makes the picture way better. As you can see I will still be taking some of the pix with the LEDs on, but also use the camera flash and the work light and that helps bring out the green better. But lights out show a more detailed realistic image and I will include more pix this way.
👉Switching to 12/12 has been a challenge. I work varied hours and making it home before lights out is hit and miss. Also being a stoner I forget stuff if I get distracted by a movie, a sporting event or a shiny object, so visits to the tent during dark times will happen. I have green lights installed in the room and in the hallway. I have a good headlamp with green LEDs. I missed the first day and had to fertigate after hours...sigh. I took pictures with the green light on but no flash.

Processing
Likes
70
Share


@Teamdirtbag2
Follow
She has jumped to 28 inches. Impressive really. Defoleated A lot of useless bottom crap. Her stem has healed and is about 1 inch thick. She is looking and growing great.

Likes
3
Share


@Green_Dream
Follow
The first week of flowering went great! The girl stretched nicely and she is growing vigorously. The pistils started showing up quite quickly, only a few days after I flipped her. I increased the PK as she showed slight signs of deficiency.
She is packed with shoots, almost too much I would say, I hope she will have enough space for the buds to develop properly and healthily.

Likes
2
Share

@ebone4206
Follow
Had some setbacks as expected since this is my first grow. I had her to close to the light and she wasn't getting taller. Now that I lowered her she's stretching. I had lst problems ,I just over did it and fimmed to many times to close together. She's happier now. I accidentally gave her the wrong feeding but she's recovering from that.


Likes
38
Share


@DudeGrowsWeed
Follow
Baox got a transplant this week. Gave them just a little Recharge this week, I'll be increasing the dosage next week. So far they are both looking like happy and healthy little girls. 👍


Likes
19
Share


@eldruida_lamota
Follow
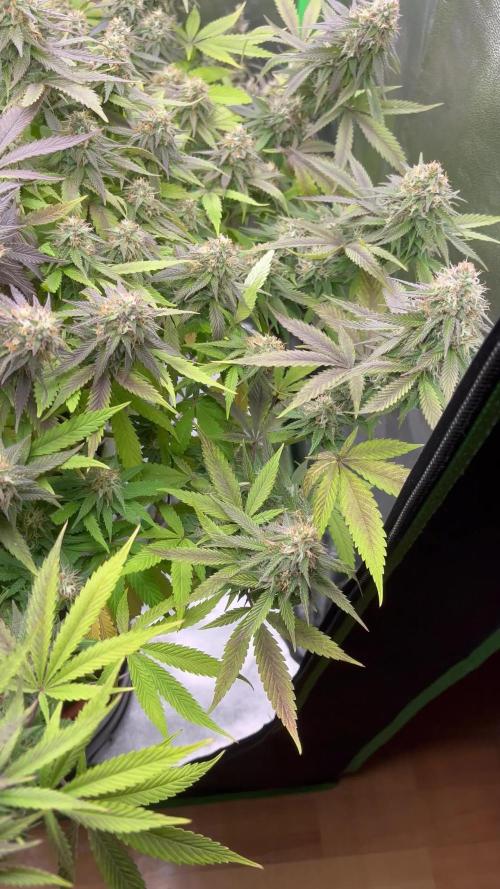
Bueno, empezamos por el final familia.
Gorilla girl, me parece una cepa BRU-TAL , ya partiendo de esa base, mi error, creo que e cometido , es poner estos ejemplares en macetas de 5L, que tonto... mínimo recomendado 7L y a ser posible 11L
Otro error fue no dejarlas una semana más. pero, escasez. (intentaremos curarla un par de semanas).
Cepa con flores muy compactas, hay bastante separación entre nudos pero compensa las flores de verdad.
Sabor muy dulzón a mi me recuerda a melón , es un pepino recomendado para amantes de la hierba que llevan tiempo en esto, un colocón muy fuerte, ahora mismo estoy bajo los efectos de esta vaina, aseguro que con cada frase, leo varias veces y detenidamente por que válgame.

Likes
25
Share


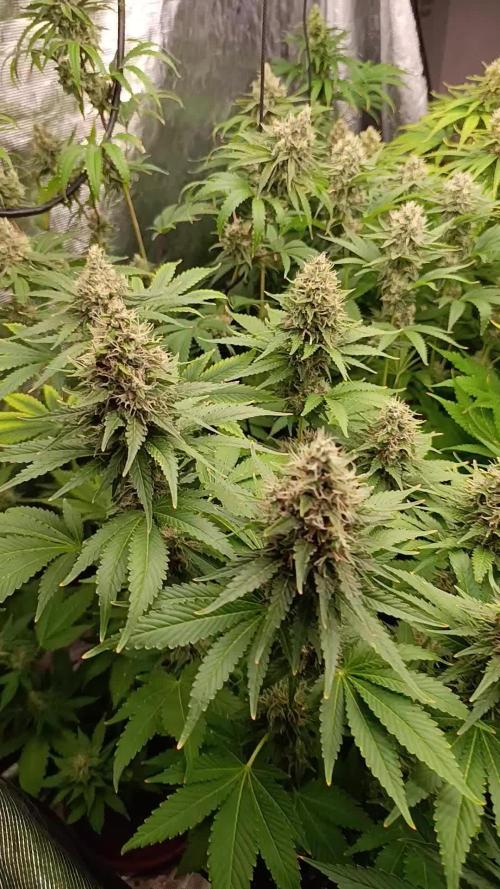
@Weedbadk
Follow
Me sorprende como van engordando súper rápido y la formación de resina es sorprendente. Están demostrando unos tonos muy hermosos ,se puede apreciar que van a ser cogollos grandes y compactos .


