
Likes
Comments
Share


Likes
7
Share


@Kirsten
Follow
💚 ORION F1 ORGANIC DRY AMENDMENTS 💚
The plant has well exceeded my 💚 ORION F1 LIQUID NUTRIENTS 💜
So far really happy, has taken very well to the topping.
She has shown good growth which I'm very pleased to see.
This is what I watered this week:
18.6.25:
I watered with 1.2L of dechlorinated water PH'd to 6.1 and containing the following nutrients per 2 litres;
♡ 0.5 ml Ecothrive Trace
♡ 1/4 Tsp Ecothrive Biosys
PH: 6.1
PPM: 373
23.6.25
I gave 3 ltrs of dechlorinated water PH'd to 6.3 with no nutrients.
PPM: 307
PH: 6.3
28.6.25:
I watered with 2ltrs of dechlorinated water PH'd to 6.5 and containing the following nutrients per 2 litres;
♡ 1/4 Tsp Ecothrive Biosys
♡ 2ml Ecothrive Trace
PH: 6.5
PPM: 418
Thanks for stopping in this week 💚😊🍃✌️🌱


Likes
2
Share


@Autorookie1984
Follow
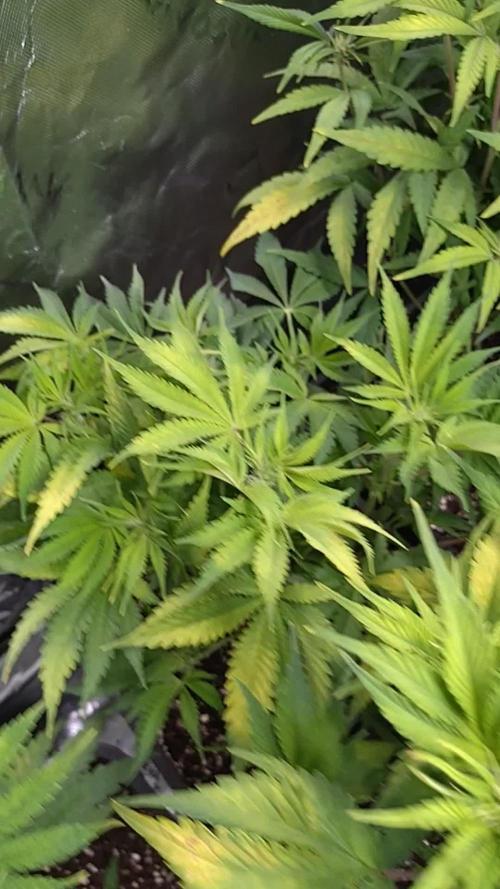
So i never ended up doing the nutes i had. I waited until seeing pre flower and top dressed with natures living soil autoflower concentrate. So far so good. I do think they were cal-mag starved prior to adding this because they did start to yellow a bit in between veins. Going all organic from here on out and doing super soil.

Likes
7
Share


@BushDoctor740
Follow
Jan-9-2025 So I decided to harvest lemon cherry cookies,Ztrawberriez,and Cherry cola.The Papaya cookies,Strawberry pie,and Pound cake are still going strong as they need some more time maybe another week or two before they are ready.


Likes
20
Share


@Robin87
Follow
Day 51! Had a week of some high temperatures, had them peaking at 33c, but they seem to of took it. The lemon cherrys will definitely be done first, the smell of 🍋 is beautiful, the 🦍 slowly starting to make its mark, each plant been averaging 5 litres of water every 2 days, thirsty girls, looking forward to the week ahead!
Likes
11
Share

@PhinolaGreen
Follow
7. Woche
Ich habe Platz gebraucht und dann hab ich den Mix Pack kurzerhand ausgelagert und in 11L umgetopft. Das schockt die Wahrscheinlich aber ich denke, es ist besser, wenn die in große Töpfe kommen. Auch bei den RF3 Seeds habe ich Probleme mit Mag aber ich bin mit Bittersalz dran. Außerdem sind sie sehr hungrig, kann bei den wohl einen ähnliches Intervall fahren beim Düngen, wie auch bei den anderen.
Der Mix Pack steht jetzt im Zelt, wo die Photos stehen. Ich habe mich dafür entschieden noch eine Woche Veg zu geben und dann auf Bloom umzustellen. Dann steht der Mix Pack zwar auch im 12/12 aber ist schon okay, habe schon gesehen das dass funktioniert und klappen kann 🤭😈
Likes
21
Share


@Big0zGrower420
Follow
Not much going on, just keeping things going and staying on track. Just been watering and checking up on them daily. Getting closer on the cookies.


Likes
10
Share


@Cr4zyElite
Follow
Second Week / 15. - 22.05.24
🌿 Week 2 of my grow and my little green friends are thriving! 🚀 Strong leaf growth this week, just sticking to watering with plain water as it's still early days—no nutrients added yet. 🚫💧
Everything's running smoothly and the autos are showing promising vigor. Loving this journey so far, fingers crossed for more lush growth ahead! 🤞🌱
Likes
1
Share


@Relentless-Pressure
Follow
Harvest in week 10 with a good amount 50g dry 😜😉
Smooth smoke not a couchlocker a good all day smoke for sure!

Likes
2
Share


@NoProbation4Weed
Follow
Prepared the soil 12 days ago and prepared the pots at the day i put the seeds into glass of water.
I used 50% Dope Light and 50% Coco as light mix for the top layer
I used 50% Dope Soil and 50% Reused Soild + Additives to reactivate my old soil.

Likes
8
Share

@Snipes420
Follow
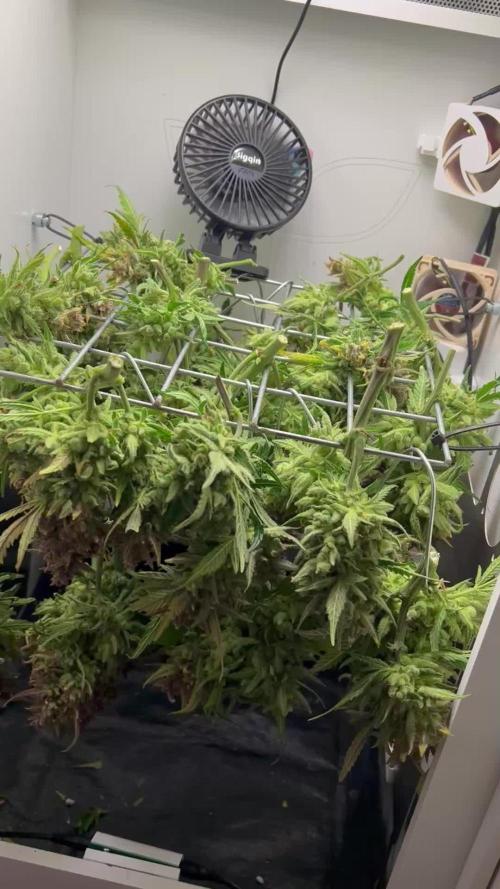
Today i chopped her! I didnt notice any new growrh and water intake didn’t change. I dont reallyhave anything to check trichomes in detail but i noticed the smell wasn’t as strong as couple weeks ago.
As a first time grower it has been an awesome experience. I made some mistakes but i have learned a lot! I definitely need to do some more training!
I chopped her don and hanged the budsites on the scrog net. At first glance the top canopy looks very nice, swollen and compact budsites. Rhe under canopy is less evolved. I assume this is because of the lack of lights. I will for sure have to add some under canopy lighting.
The plant was very forgiving for the mistakes i made and she probably could have been chopped earlier. For this reason i cannot give a proper review on the random seed that i got.
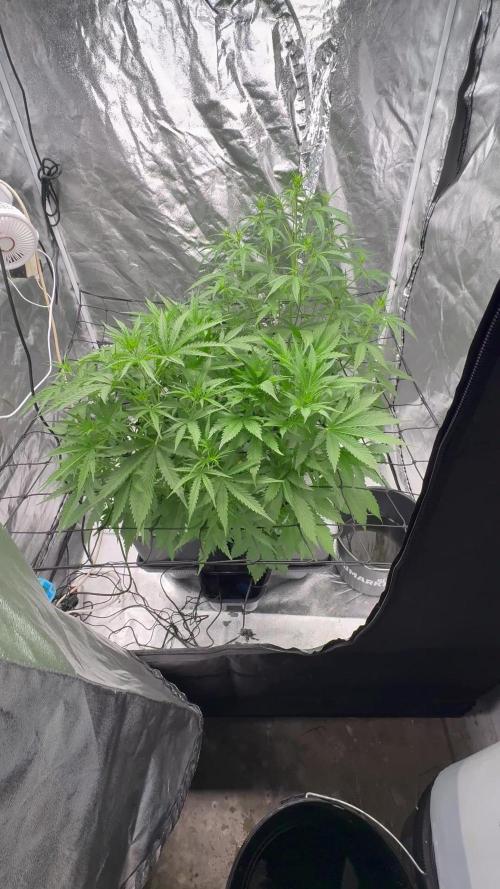
Once this plant has dried i will be moving my other plant in the box as this one is preparing to go in early flower
Likes
13
Share


@mr_smooke
Follow
Very nice plant with dense nugs. 3 days ago I gave her a last meal. in 2 weeks, I will harvest this nice smelling lady, till then only tap water. here is day 52 of flowering

Likes
151
Share


@PapaNugs
Follow
These girls are doing real well. Earlier in the week I found a few nut sacks on the far right plant I pulled them off as I found them. If anything, the right plant will be slightly seeded. But the other girls show no signs of slowing down. The left plant has a good smell going on already.

Likes
245
Share


@Nor_Cal_Kannabliss
Follow
June 14th : Didn't have a ton of time for photos tonight so I did a short video of the tent! Week 4 flowering is looking great! They are bouncing back from their defoliation with no problems!
June 15th : Watered tonight, Seeing some Good Growth on the bud sites. I think all this love I've been throwing at them is working!
June 16th : Was out of town and got home too late to take pictures. 😭
June 17th : Starting to wonder if I did something wrong. Been looking around at diary's and like everyone else has giant buds already formed by the end of the third weekish.. And mine aren't all that impressive.. Guess it's the cheap ass Amazon lights.. Fml..😕
June 18th : Welp now I don't know what to think. Lol Buds seem to be getting bigger every day.. Hope some of these large main stems start stacking bud sites. Come on girls!! Fat shout out to Crop King Seeds for some testers! 🙌 7 Dark Angel Feminized, 7 White Cookies Feminized, 7 NYC Diesel Autoflower, 7 Revolver Autoflower.
June 19th : Man the Crystals are starting to really show all over these leaves.. Beautiful just beautiful. Didn't do anything tonight other than admire them for far to long. Feeding tomorrow!
June 20th : Last night of the 4th week of flower. Did another nutrient feeding tonight at 2/3 recommended strength. Seems like they are starting to stack up on the bud sites. Loving how it's looking. Gonna start with some macro photo's next week I think. Loving this adventure!
Likes
9
Share


@DeepRootsGrowTrees
Follow
TRIPLE G by ROYAL QUEEN SEEDS
Week #10 Overall
Week #9 Veg
This week she's is doing good no issues it's hot outside but she's doing good dealing with the heat she's hasn't shown any signs of other stress.
Stay Growing!!
Likes
19
Share


@Brustwehr
Follow
2018-11-19 Flowering in full swing. Pulling slows down. In the morning, on the day of the compote replacement, my PPM-meter broke down. Therefore, the new solution was kneaded by eye. Tomorrow a new device will arrive and I will clarify what I have mixed there.
2018-11-24 Buds swell, there is time to figure out how to do time lapse video.
Likes
1
Share


@BonusPackage
Follow
Day 17
All good, big and healthy
Day 19
Her leaves are the largest and are touching the soil. I'm hoping her height catches up to her width
Day 21
Her main stem is really thick and I think she is struggling a bit with the weight of her leaves


Likes
2
Share

@Satax
Follow
Several issues stabilizing the pH, but otherwise nothing special – the grow is progressing well.
Waiting for the flowers
