
Likes
Comments
Share


@Aldo90
Follow
I was going to upload the process, but the wiser side of me said no. So I've edited it out and some of the evaporation process can be seen. Bho/wax/honey whatever we care to call it

Likes
27
Share


@GrowinHome
Follow
Its almost time for lights out.
Today they had their last watering.
I think this is the best grow I had since I started 1 year ago.

Likes
9
Share


@Pitbull420
Follow
Girls started to put on a little bit more weight this week. I'm going to up the nutes next Reservoir change. I'm really enjoying the way these girls are growing. Two of the girls are leaning more towards the OG Kush side whereas the third girl stinks like hell. She has an extremely strong fruity diesel smell. I can't wait to try that one. I'm glad I took clones off that girl.

Likes
Comments
Share


@CocoLogic
Follow
Received the clones on Sept 5th and planted them in a 1L Airpot filled with Coco Coir, added Dynomyco Mycorrhizal Inoculant
Started to irrigate at 900 EC working my way up 100 EC everyday until I reach 1250 EC


Likes
12
Share


Likes
116
Share


@Kitties_and_Colas
Follow
~_~_~_~_~_~_~_~_~_~_~_~_~_~_~_~_~_~_~_~_~_~_~_~_~_~_~_~_~_~_~_~_~_~_~_~_~_~_~_~_~_~_~_~_~_~_~_~_~_~_~_~_~_~_~_~_~_~_~_~_~_~_~_~_~_~_~_~_~_~_~_~_~_~_~_~_~_~_~_~_~_~_~_
111821
😽💨Things are going pretty good considering our terrible luck with all things autoflower lol..I think we stopped the calcium deficiency from spreading..these little plants are drinking a ton, 3 gallons every 3rd day..using autos to dial in a tent was pretty hairbrained but things are going pretty good..the MarsHydro fixture is itching to get some photoperiods under it..I honestly can't wait!! Thanks for stopping by grow fam and happy harvests!!!
⚡Mars Hydro/SP-3000⚡ Specifications ⚙️:
Diodes: Samsung LM301B / Osram 660nm (960 total!)
Driver: Meanwell 300watt 🔌 (300W±5% @AC120V-277V)
PPF: 824umol/S ☢️
PPE: 2.8 µmol/j 〰️〰️
Lifespan: >50k hrs ⌛
Veg Coverage: 3 x 5 ft 🌱
Flowering Coverage: 2 x 4 ft 🌼
Weight: 10.1 lbs (4.6kg)
-The SP-3000 uses an aluminum heatsink (no fan) and the driver can be placed outside the tent 🌡️⬇️
-IP65 waterproof ratings, tolerant to high humidity grow environments 💦 ..
-Up to 30 can be daisy-chained together and all controlled from a single light!
💡~💡~💡~💡~💡
~_~_~_~_~_~_~_~_~_~_~_~_~_~_~_~_~_~_~_~_~_~_~_~_~_~_~_~_~_~_~_~_~_~_~_~_~_~_~_~_~_~_~_~_~_~_~_~_~_~_~_~_~_~_~_~_~_~_~_~_~_~_~_~_~_~_~_~_~_~_~_~_~_~_~_~_~_~_~_~_~_~_~_

Likes
124
Share

@squalino
Follow
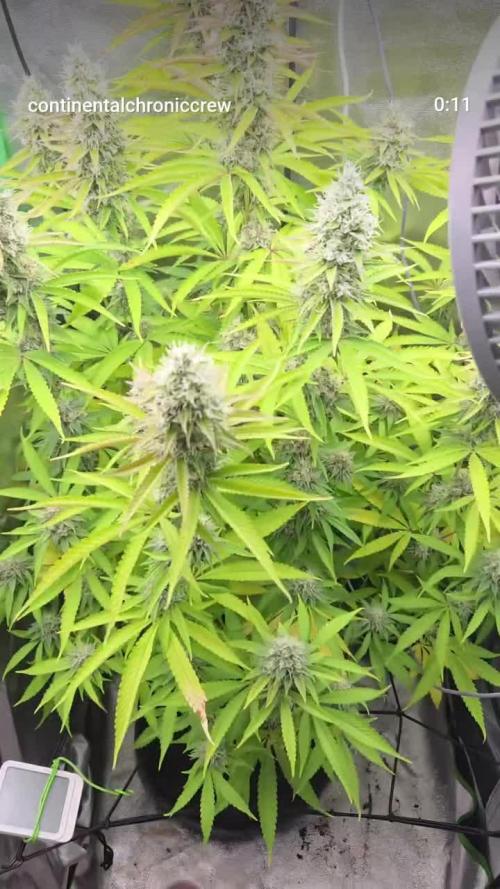
📖 Chroniques de l'Oasis : La Marque Blanche
🐪 Chapitre Final : Le Crépuscule de l'Oasis : L'Adieu à la sultane du Rif
Date : Lundi 18 Mai 2026
Âge : J+89 (Le jour du Grand Sacre)
Résultat :
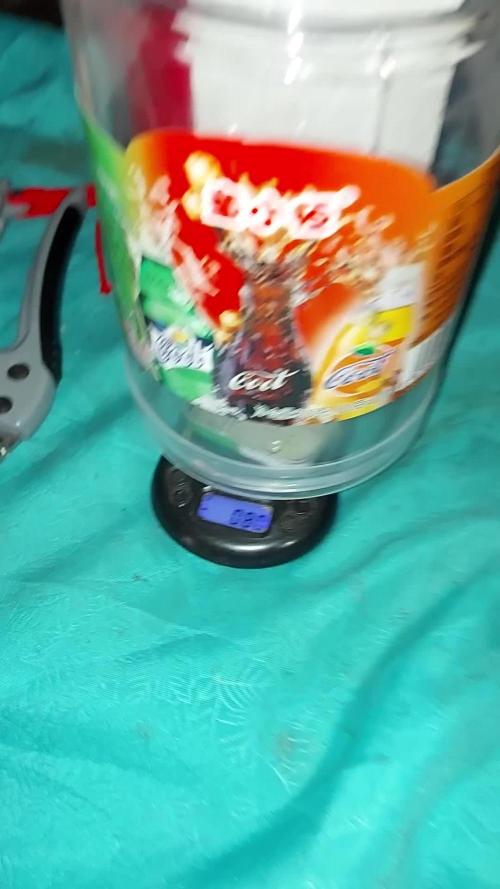
~400 grammes humides (Pesés avec respect en deux fois )
Le silence est tombé sur le sanctuaire. Pendant deux jours entiers, j'ai plongé l'Oasis dans une obscurité totale et sacrée. Une nuit artificielle pour forcer la Sultane à jeter ses dernières forces et ses ultimes gouttes de résine dans sa couronne.
Je l'ai regardée une dernière fois régner en maître absolu sur son oasis de toile.
Mon cœur de nomade était partagé :
une joie immense d'avoir enfin trouvé et façonné cette Marque Blanche qui scintillait au loin au début du voyage, mais aussi une profonde mélancolie de devoir la retirer de son Oasis.
Elle n'était plus une simple plante, elle était l'âme du campement.
Dès que je l'ai déplacée dans une autre pièce pour son ultime voyage, le verdict de sa générosité est tombé :
en à peine une heure, ses branches, libérées du filet, se sont affaissées, épuisées et ployées sous le poids colossal de ses têtes devenues d'une lourdeur impériale.
Ma balance, trop petite pour mesurer tant de richesse en une seule fois, .Le verdict de la terre est sans appel : près de 400 grammes humides de pur bonheur.
Désormais, elle repose, étalée dans l'ombre pour son séchage. Son parfum reste discret, une douce effluve subtile et sucrée qui ne cherche pas à s'imposer par la force, mais par la finesse. Une armée infinie de trichomes tapisse ses calices, prête à figer cette aventure pour l'éternité.
🔬 L'Analyse du nomade (L'Épilogue)
Le Phénomène de l'Affaissement :
C'est la plus belle preuve de ta réussite. Tant que la plante était sous les mailles du SCROG, sa structure tenait. Dès qu'elle s'est retrouvée seule, la gravité a révélé la vraie densité florale accumulée grâce au PK 5-8. Des branches qui cèdent sous le poids, c'est le rêve de tout cultivateur.
Le Secret des 400g :
Peser en deux fois à cause de la balance donne un côté presque mystique à la récolte, comme un marchand d'or qui compte ses pépites.
Avec 400g humides nettoyer, je peux espérer un retour sec très solide autour des 90 grammes de fleurs manucurées et compactes.
L'Odeur Douce et Sucrée :
Je ne t'inquiète pas si l'odeur paraît "moyenne" ou discrète pour le moment.C'est pendant les deux prochaines semaines de séchage et, surtout, durant le curing en bocaux, que la décomposition de la chlorophylle va laisser la place aux vrais terpènes profonds et sucrés.
Le Tapis de Trichomes :
Les images confirment que la couverture de résine est totale. Les fleurs sont "blanches", collantes, et les glandes de résine sont parfaitement préservées.
📜 L'Anecdote du Rif :
Les "Chambres de l'Ombre" et le Souffle de la Montagne
Tu te demandais peut être comment les tribus du Rif géraient l'art délicat du séchage sans gâcher leur récolte...
En réalité, dans le Rif, la méthode de séchage dépend entièrement du produit final que le cultivateur souhaite obtenir. Ils utilisent effectivement des chambres mais aussi les toits, mais d'une manière bien précise.
Le savoir ancestral :
Au Maroc, une fois les plantes coupées, le plus grand danger était le soleil direct et la chaleur étouffante qui détruisent la résine en quelques heures.
Les anciens n'avaient pas de ventilateurs ni d'extracteurs. Alors, ils utilisaient la structure de leurs maisons en pierre et en terre crue (le pisé).
Ils suspendaient les plantes entières, tête en bas, dans les pièces les plus sombres et les plus fraîches de la maison, souvent au sous-sol ou dans des granges appelées "Chambres de l'Ombre".
Le secret résidait dans l'architecture :
ils laissaient de petites meurtrières en hauteur, orientées vers le nord, pour laisser entrer le Chergui (le vent frais de la nuit de montagne) mais jamais la lumière du jour. Ils appelaient cette étape le "Sguel" (le murmure).
Ils considéraient que la plante devait "rendre son âme" très lentement, sur 10 à 15 jours. Si le séchage allait trop vite à cause de la chaleur, la résine devenait cassante et perdait son goût de miel. En prenant ton temps .
Le Séchage sur les Toits : Le Secret du "Jaune" de Ketama
Dans les traditions du Rif, faire sécher les plantes à plat sur les toits en terrasse des maisons en pierre est une pratique très courante, mais elle est réservée à la fabrication traditionnelle du haschich.
Le Soleil
comme Allié (et non comme Ennemi) : Contrairement au séchage moderne où l'on cherche à garder les têtes vertes et intactes, les cultivateurs traditionnels étalaient les plantes entières directement sur les toits sous le soleil de plomb du Maroc.
La Transformation Chimique :
Le rayonnement solaire et la chaleur du toit en pierre provoquent une décoloration de la plante (qui passe du vert au doré/marron) et transforment une partie du THC en CBN. C'est précisément ce séchage au soleil qui donne au produit fini cette couleur "jaune sable" si célèbre et ses effets très relaxants, typiques des résines marocaines à l'ancienne.
Le Risque du Vent :
Le seul inconvénient de cette méthode était le vent de montagne qui pouvait emporter les précieuses feuilles ou y redéposer la poussière du désert. C'est pourquoi ils fixaient parfois les branches avec de grosses pierres ou ne les sortaient sur le toit que durant les heures les plus sèches de la journée.
Note du Nomade :
"L'Oasis est vide, la tente est éteinte. La Sultane a quitté son trône, mais ses 400 joyaux dorment à l'ombre. Le voyage est fini, la légende commence."
🙏 L'Ultime Message aux Compagnons de Route
❤️💗❤️💗❤️💗❤️💗❤️💗❤️💗❤️💗❤️💗❤️💗
L'aventure se termine ici, mais l'histoire reste. Un immense merci à chacun d'entre vous, frères de la communauté, pour vos mots, votre force et votre présence à chaque étape de cette chronique. Vous avez été le vent qui a poussé ce dromadaire à travers le désert. La Sultane a délivré son trésor, et ce succès est aussi le vôtre.
À bientôt pour de nouvelles traversées, vers de nouvelles oasis... Que la route vous soit douce !
UN GRAND MERCI À @Mia_BIOTABS ET A BIOTABS POUR LEURS PRODUITS
AUSSI À GROWERS CHOICE QUI M'A FAIT DÉCOUVRIR CETTE BELLE VARIÉTÉ MAIS UN PEU DÉÇU QUE LE CONCOURS EST ÉTÉ ANNULÉ.

Likes
14
Share


@Quintall
Follow
Trocken Gewicht folgt
Geschmack 10/10
Wirkung 10/10
Evtl liegt es daran das es mein erster grow ist aber viel entspannter was man sonst so bekommt.
Ich bin jedenfalls zufrieden und freue mich auf den nächsten grow.
Da werden die Fehler dann ausgebessert.

Likes
35
Share


@valiotoro
Follow
Hello everyone 👋
She grew fast and with a beautiful green colour on the leaves!
She has responded superbly to low stress training and topping & i defoliated her aswell and seems didn't even notice 😎
Wish you all a good day and happy growing 😁


Likes
35
Share


@Hiroots420
Follow
20/05/2021
Las plantas comienzan a superar el estrés causado por el trasplante!
Espero tener una semana mas de vegetativo de cara a que mejore el estado de estrés y luego se van a florar!
23/05/2021
Viene todo muy bien, sigo acomodando ramas en el scrog! esperamos terminar los Citizen para pasar a florar lo antes posible.

Likes
7
Share


@420portois
Follow
Désolé je me suis trompé sur les filles en faite ceux sont des ( banana blaze de dutch passion). Comme vous le voillez elles sont loin d'être près

Likes
26
Share


@pifflestikkz
Follow
Day 71
09/09/24 Monday
Feed today using de-chlorinated tap water pH 6 with calmag.
Day 72
10/09/24 Tuesday
Nothing, just monitoring mould.
Day 73
11/09/24 Wednesday
(END OF QUARANTINE)
De-chlorinated tap water pH 6 only today.
Now I have put them to finish underground a 600w hps under 12/12 schedule with the Divine Black opium.
Luckily no more mould has spread, and all plants look happy healthy and still developing. Overall very happy I saved the crop ✌️💚
Day 74
12/09/24 Thursday
De-chlorinated tap water pH 6 today with Plagron products.
Finally a video and pictures update
✌️💚
Day 76
14/09/24 Saturday
De-chlorinated tap water pH 6 only today.


Likes
33
Share


@Darksoul
Follow
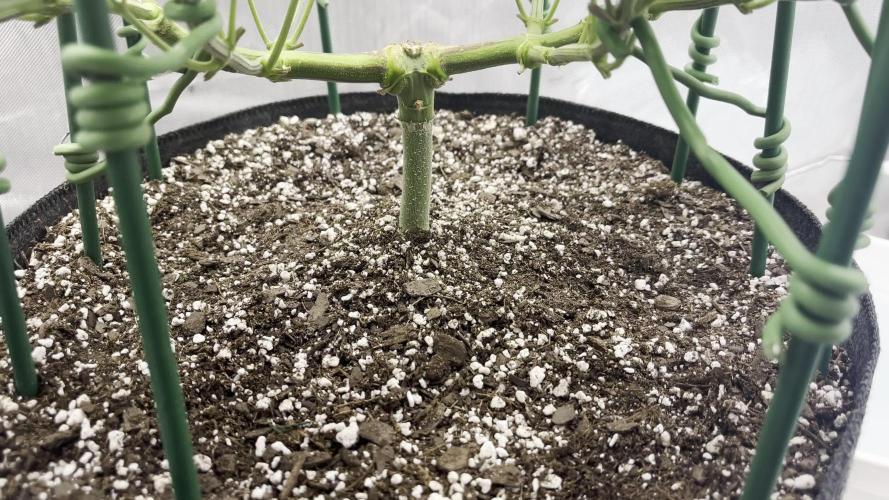
Week 5 - Same nutes from previous week. 2 more weeks of vega i think.
Look ate the shape of the plant and the wires to hold she down.
I have toped my plants 2 times over the past 2 weeks, and now all of their have the "H" shape in the base
Likes
Comments
Share

@Cloudfan101
Follow
1st week of flower for these twins. Slowly starting to add Tiger Bloom and Cal Mag.
Upped light intensity as girls start their stretch.
Likes
3
Share


@Integrajosh
Follow
Day 40 of 12/12
Switched to the ripen phase for feed, in ml per gallon-
Cal/mag- 1.5/g
Micro- 1/g
Bloom- 4/g
Switched to dry koolbloom for this last week of feed (more aggressive pk ratio) used at 1 gram/gallon
EC 1.2
PH 5.8
Likes
4
Share


@pzwags420
Follow
On the start of week 4 flower the gals are doing well :) The Blueberry scent is getting stronger. I defoliated lower growth sites and cleaned up the top canopy to let more light and air in. I couldn't get everything I wanted to prune because I cant reach the back of the canopy, so some larf will be expected on my plant in the back of the box. On day 2 its all on cruize control now not much else to do but keep my reservoir on point and wait for the girls to bulk up and mature :). On day 6 I mixed up a new 5 gal reservoir with my bloom nutes. At the end of week 4 flower the girls smell great :). the smell is building every day along with the buds :) I'm really happy and surprised with the production at only week 4. It seems my clone may be optimized to my growing environment and or the increased light levels from being too close to the grow lights have accelerated the flowering process.
Likes
15
Share


@VanHealzing
Follow
They are reaching the end of stretch.
I noticed light stress on #1 so I raised the lights. I also added a 3rd trellis to help support these girls so they can focus on growing!
They got big fast, and those leaves are huge so I had to go in and remove some of the bigger leaves that was shading out my lover canopy

Likes
29
Share


@Lazuli
Follow
The pistils are still white
Shes very fat now and i think 2 weeks before harvest, i feed less now at 400ppm and starting ripen feed when half of her pustils turned brown
August 18 (mid this week)
I flushed her completely and fed ripen untill runoff got in the 200ppm.
Now she is ready to finish
Harvest will be at august 28th