
Likes
Comments
Share


@el_cultivito_colombia
Follow
Semana 1 (18/7/22 - 24/7/22)
Se preparo una solucion de Mills Start R:
- PPM : 100
-pH : 5.8
Se submergio cubos de roca de lana dentro de la soulcion.
Cada semilla que se germinara se paso a un cubo de roca de lana y se mantuvo sin luz.
Cuando las plantulas salian del cubo, se pasaron a otra bandeja de germinacion con domo de humedad bajo una luz T5.

Likes
10
Share

@LJGRW
Follow
Week 8 has completed we are now going on week 9 of flower with this yummy frosty looking Papaya Sherbet she is throwing all sorts of different smells it goes from a sweet skittles then as well as a bubble gum (bubble yum) candy this is an amazing phenotype right here, come week ten it’s supposed to be 36 degrees on Thursday night that’s a gamble not sure if we should take it my wife and I are wanting to give her a full 10 weeks but might have to cut her down early :( but This morning we gave her as well as our Holy Grail (bag seed) each 1.5 tablespoons of Organic Coconut Sugar and a tablespoon of molasses and that’s it from here on out, water, water, and more water haha!! Going to let the soil dry out for most of the last week of her life to help send her into a bit of a shock Maybe some ice water prior to see if it helps pack on more trichomes!!

Processing
Likes
5
Share


@KratkyGrow
Follow
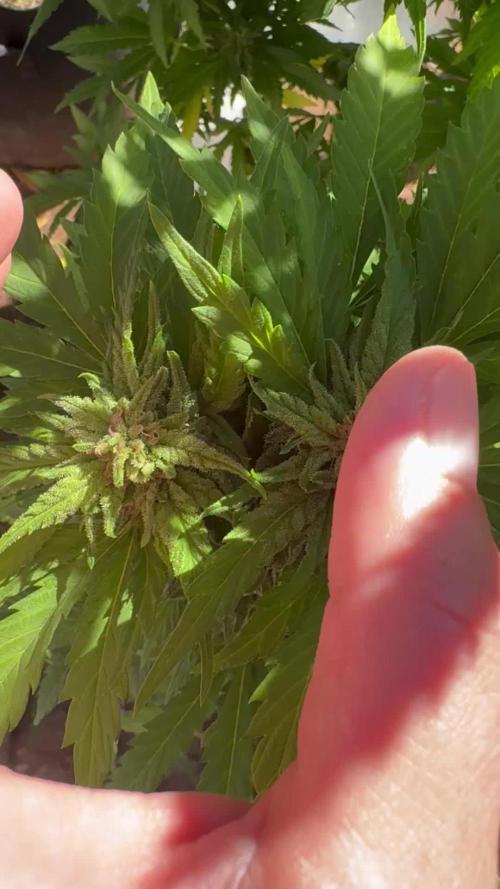
Some of the bottom leaves are starting to yellow a bit on the larger plant.
It looks like trichomes are starting to push through on some of the leaves.

Likes
6
Share


@Lovemabud
Follow
Really good week but the plant is still stretching. It really needs to stop otherwise I expect problems. Really loving the extra feeds made possible by the automatic watering, which will really be tested this week as I'm away for work. If anything goes wrong nothing can be done to rectify until Saturday.
Fingers crossed it's smooth sailing anyhow.
Bud sites a plenty anyhow, just hoping they continue to grow and finish off fat and juicy.
Likes
1
Share


@GlockAbuser
Follow
A lot of growth this week, decided to up the ppm a little with more rhino skin, plants looking pretty healthy, no signs of pest, nutrient burn, or disease. I do have a little wrinkles on the leaves but I’m not sure what causes that. Fan was blowing on it a bit so it grew slanted but sturdy, and I noticed the second set of leaves was pretty close to the first, don’t know whether I should pull the light a little further back. Noticed 2 bags around the tent, so I put cinnamon over the top of the soil and ordered fly traps.

Likes
5
Share


@RastaRick
Follow
Tok off large fan leaves on day 24. Seeing preflower starting. Decided to try out a natural shape instead of doing LST. I hope this doesn't backfire... The blackberry gum on the right is getting big. I like how autopotamus has natural shape... But he also has much more light haha

Likes
7
Share


@Baboon_Grows
Follow
The regular humidifier top up every 2-3days , so I have to run water distiller 2x per one refill which is pain 😂 , apart that nothing part sprouting some seeds for the SST , and the Super8 tea been brewing for over 2 weeks , should be readily available liquid feed hopefully , i use 600ml weekly , 3rd week this week and no stress so far , no deficiencies or toxicity .. probably gonna start feeding from week 4-5 see if there’s any difference . It’s all rocket science for me , custom soil blend from scratch, 80%coco coir brick, and using like 3-4 amends Overal , want to be as organic and as simple as possible
Likes
2
Share


@HobbyistJames
Follow
No surprises. Topping has been done at this point. Temperature and humidity controlled as much as possible. Some bending and light intensity increase. A 2x4 tent is actually too small to bring two plants to the height and spread that I would have liked. Ideal for one plant. Targeted not to have these 2 tent plants grow higher than 36” to avoid overcrowding.

Likes
25
Share


@eldruida_lamota
Follow
Vamos familia, actualizamos la cuarta semana de vida de estas Runtz de Seedstockers.
Va a ser la última semana de crecimiento ya esta semana cambió a 12/12 el foco
Temperatura par de grados por encima pero tampoco habrá problemas la humedad está en su punto.
Añado ya el crecimiento de Agrobeta, blue line A , y seguimos con el flash root.
También añadimos Gold joker y tucán de Agrobeta.
Vemos como avanza esta semana.
Mars hydro:
Code discount: EL420
https://www.mars-hydro.com/
Agrobeta:
https://www.agrobeta.com/agrobetatiendaonline/36-abonos-canamo
Hasta aquí todo, Buenos humos 💨💨💨
Likes
12
Share


@Fccfarms
Follow
So due to unforeseen circumstances I had to go away. This left me with no choice to harvest at the end of day 52, but I was only planning on running for 56 days anyway. In the end I had a good result in yield and quality.
Likes
114
Share


@TheFoxFarmer
Follow
Week 2 Flower
Both twins are looking very healthy, and are now showing clear differences in their structures after 2 weeks flower. Twin1 has beautiful big leaves and is becoming the taller girl, but she still has a nice strong structure with thick stems.
Twin2 has slowed down her stretch more than her sister, and has shorter node spacing too. With that being the case they both have their own pro's going into week 3. Either one could still be the winner, there's a long way to go yet!
They were both given another leaf strip and a slightly higher lollipop later in the week to slow their stretch down, and increase light penetration. Their base nutrients will be changed towards the bloom ratio now they're slowing their stretch and producing calyxs.
Thanks for following and happy growing! 🐺

Likes
54
Share


@Roberts
Follow
Gorilla Cookies is doing great. 6 days into flowering. She is growing fast. I increased light from 30 to 60 percent at switch. The G3000 is doing good. Some good stretching should start up soon. Everything is looking great. Thank you Spider Farmer, and Pure Instinto Seeds. 🤜🏻🤛🏻🌱🌱🌱
Thank you grow diaries community for the 👇likes👇, follows, comments, and subscriptions on my YouTube channel👇. ❄️🌱🍻
Happy Growing 🌱🌱🌱
https://youtube.com/channel/UCAhN7yRzWLpcaRHhMIQ7X4g
Spider Farmer G300w: https://amzn.to/3S2zvsd
Spider Farmer 10X20 Heat Mat Kit - https://amz.fun/lsa0J
Spider Farmer Amazon Store: https://www.amazon.com/spiderfarmer
Spider Farmer Official Site: https://spider-farmer.com
Discount code: saveurcash (stackable)

Likes
7
Share


@Growlax
Follow
So as I'm not home this week i will just update what i did on my last day home. I added another reservoir, put a pump in it and a fill hose up into my main reservoir (which is 4 feet off the floor to gravity feed my blumat system). Installed a JB and wired in my pump and 2 level switches. They are wired in series with the switches in the normally closed position so the water level will break or make the circuit. Switch 1 is in the main reservoir to call for water and switch 2 is in my spill tray to stop a potential runaway from happening. After getting everything filled to the levels i wanted i did a test run and it worked great. Unfortunately i didn't look closely enough at the specs on the switches and #1 burnt out because it's meant for dc power not ac. My bad , so i hooked up a timer set it for 2 minutes a day as i didn't have time to fix it.
I decided that it was a good time to flip over to flower and I'm going with 13/11 lighting schedule see if there's any difference.
Happy growing


Processing
Likes
10
Share


@samadhi
Follow
Week 8 saw the plant stack on some very nice starter buds. I can already see where the colas will stack and fill out to form lovely nuggets by the end of the run. They look to be dense already which is always a great sign!
Weather here in OK has been vacillating between overcast rainy days and full sun not-a-cloud-in-the-sky weather so she has spent an equal amount of time under an HID as she did the sun since the last update. Usually she is outdoors from 11am to sundown and then I move her inside under the HID for night hours. She gets a four hour lights off in early morning before setting her back out in time to catch the noon sun. It seems to have worked pretty well splitting her time in this way and I feel a lot better about it than if I just let her spend 24/7 outside. I feel her auto genetics would not benefit from the extra dark time associated with a pure outdoor run. She already doesn't get full sun for the entirety of her time outside due to trees and other houses blocking sun during certain parts of the day. This seems to be a nice balance but I realize it doesn't qualify as a true outdoor run.
Still doing daily checks for aphids and other undesirables as Oklahoma has lots of them that can devastate a plant in a matter of days if not monitored closely. I keep her a good distance from my other outdoor plants and she never touches the ground. So far so good.
I did lollipop her toward the middle of this week and proceeded the next day with aggressive defoliation to open up light penetration to the rest of the mid-section. As always, the cultivar responded well to my interference. I am seeing some rusty spots on otherwise green leaves and some very light yellowing of the plant overall. I hit her with another dose of nutrients and some recharge to hopefully correct. Not sure what the rusty spots are; hoping just some pH flux that will be easy to correct. Any insight from those who might have it, is welcomed!
Thanks for following along and please click "Like" below if you dig what I'm doing here. Cheers! 👊🌱☮️✌️

Processing
Likes
7
Share


@CityFarmer
Follow
Hello everyone,
The girls are finally outside in 20 gallon fabric pots. This season I have a greenhouse for them and I hope it goes good. Still have to build the first cages around them and start stretching them. 🎊🎉 finally, summer is here 🎉🎊
See you guys next week 🤞🤞🤘🤘👊👊👊

Processing
Likes
6
Share


@BossHogg6
Follow
A dehumidifier was added in the past week Since the grow box is in an open room, bought one that could bring down the humidity for the whole house. That room stays around 44% and the box around 50%. I took a few pictures and a video using a magnifying glass as well. Might be a week or two from flushing so that I can harvest.
Likes
283
Share


@love_2_grow
Follow
D21 - Start of week three of veg for the second girl, while it is only the start of week two for the first girl as I had to replant her. I will probably do the first topping on the second girl this week but I'll see in a few days where she's at. I gave both girls around one liter of water @ pH 5.9. A bit on the low side as I used too much pH down but it'll be fine for one watering.
D24 - Yesterday I switched my light from the seedlings program to the veg program, and I'm now reading around 500-600 PPFD across the canopy. On the high end for sure, so let's see how the girls handle it.
However, the daytime temp in the tent jumped up to around 30 degrees C after I switched the lights. #tinytentproblems
I also added some support to #1 as she has a relatively thin stem but large leaves, so the oscillating fan keeps knocking her around. The second girl also initially had a slender stem, so I guess it is their genetics. (#1 is 12 cm tall and 15 cm wide, while #2 is 20 cm tall and 35 cm wide.)
I will need to top the second girl this week as she grows a lot each day. I'm considering mainlining her but haven't made up my mind yet.
I gave both girls around one liter of water @ pH 6.5.
D25 - A couple of days ago, switching the lights to the veg program made the cover crop explode and turn into a jungle.
I decided to trim down the red clover to increase the airflow around the girls and reduce water use.
I watered the girls only yesterday, but they were already thirsty again, so I think that the clover was drinking quite a bit as well.
After cutting back the clover, I gave each girl around 1.2-liters of water @ pH 6.5.
D27- Today was the last day in week three of veg for the second girl and the last day in week two for the first girl. I really should have topped the second girl already, so that will need to be done as soon as possible. She is 26 cm tall and 38 cm wide, while the first girl is 13 cm tall and 27 cm wide.
Yesterday, I removed the support from the first girl as her stem had gotten more robust, so it was no longer necessary.
Today, I started brewing compost tea (worm castings, neem meal, kelp meal, biochar, rock dust, algal limestone, bentonite, and molasses) which I will leave overnight and feed to the girls tomorrow.


Likes
18
Share


@DeepRootsGrowTrees
Follow
PURPLE KUSH / KANNABIA SEEDS
WEEK #5 OVERALL
WEEK #4 VEG
This week this lady looking good she hasn't had any issues thus far additionally I topped her this week!!
Stay Growing!!
Thank you for stopping by and taking a look it's much appreciated!!
Thank you KANNABIA SEEDS!!
PURPLE KUSH / KANNABIA.COM

Likes
74
Share


@AsNoriu
Follow
Day 50. Was insane busy, so weak updates ...
Next week will be most of plants shown in separate photos.
Girls are happy, I am not ;))) some are almost at harvest and one still haven't started to flower ...
Happy Growing !!!

