


Likes
Comments
Share


@CannaPharma
Follow
The seedlings in their rockwool cubes were planted into high quality soil in clear (to monitor root development) 140mm pots. The seed raising soil was first sterilised with boiling water and cooled then Mykos root enhancer was added. The clear pots were then placed into a black pot to keep light from getting to the roots. Each plant was then placed into larger white pot to reflect light and heat, with a clear dome placed over them to maintain humidity. The lamp used was a cheap 1400 lumen warm white LED spotlight from the local hardware, set to 16-8. No watering was done for many days as the soil was saturated from the sterilisation.


Likes
50
Share


@AsNoriu
Follow
Day 82.
Its 81 day from seed touched soil ! If leaves would be healthier, i would run them at least one more week, but it is, what it is.
They spent 24 hours in darkness and now its Trim Jail !!! ;)))
Harvest Day !
Day 88. Tried bud from each, clearest weed straight from drying rack ! Only 3 feeds makes huge difference to harshness at the beggining. Still Queen is pure Tangie, can it be seed mistake ? ;)))
Day 89. Boy i am f@ckingly surprised !!! Heather - I love You, Your team, Your strains !!!! I still don't get how, but numbers are amazing, Thank You very much !!!!
Will update this diary as cure goes, but i feel so many nice words were unspoken, felt that FB will change my view about Autos - and they DID !!!
Amazing house !
Happy Growing !
Likes
38
Share


@trelorny
Follow
Day 64, 12.06.2024
Today marks the start of week 10. I just saw that some of the leafs of Erika I are clawing upwards. I double checked the light distance to the canope which seems to be fine at around 30cm.
I watered yesterday. As over watering might be the culprit as well I will watch closely wether it gets better during the next 24h. However, as we are approaching the finishing line I will not put too much effort in this issue.
Day 65, 13.06.2024
Another round of drinks is about to be served. As Erika I is tacoing (edges of the leafs are facing towards the light) I went into analysis: It could be
a) lights: after checking the distance again I an rule that out. Also the other plant does not show any clawing symptoms.
b) underwatering: I gave 500ml extra water yesterday in the morning in hopes of recovery by afternoon. But no sign of relaxation so I ruled out that as well.
c) overwatering: hard to believe as I only water 15% of the pot volume every other day and there is no drain
d) over fertilization: Thats a point - I gave both plants the exact same amount of nutrition during grow. I think this plant might have had enough for a while.
Because of d) I decided to not give Erika I any fertilizers today (she also did not show signs of low nutrition in the past). However, I will water both and keep an eye on them. No reason for panic though I guess.
Also: Being on the final lap towards harvest I recognized quite a lot of the pistils are getting orange. I would say currently over all buds around 50-60% of the pistils are orange. I will wait until ~90% of them are orange and then take a look at the trichomes, where I aim for 80/20 ratio (cloudy to amber).
Day 66, 14.06.2024
No action today.
Day 67, 15.06.2024
Today I will water and feed again - providing 4/4/4 Grow/Bloom/TopMax + 1,2ml CalMag to Erika II. For Erika I I am still waiting for the leafs to un-taco - but until now there is no sign of it. This is the last official week with nutrients anyway so maybe Erika I already had her last meal, but without realizing 😂
Tacoing did not went away. Didn't really change at all actually. So they both get water & nutes. Next time I might skip nutes on Erika I.
Amount of water: ~600ml each
Day 68, 16.06.2024
No action on the plants today.
Revised my timing and plans:
- BioBizz nutrient schedule is made for roughly 10 weeks of flowering with flushing instructions on the second to last week and harvest on the last week
- assuming the Erikas started flowering in their 3rd week that leaves me with facing the 8th flowering week up (which is also the last week they should get nutrition) right ahead
- Decision: will give them 3 times nutrients over the next 1 week. Then I will stop giving them nutrients and start flushing every other day (water then until water comes out below the pots).
- I assume/hope I will flush for at least one week until it is time for harvest
This period of the grow is unexpectedly exciting! I do not have any experience from other grows but until now I think it went quite good. There were no pests, no big time nutrient deficiencies, etc. and the buds look big and firm (at least from what I can tell anyway).
Day 69, 17.06.2024
- A round of drinks to the ladies: The usual 4/4/4 Grow/Bloom/TopMax in 600ml of water each. Will NOT skip nutes on Erika I.
- Humidity is starting to pose a problem again: During night time the humidity does not go below 68% for 6 hours. I surely hope this is not a problem - but I do not have any other choice: there is high humidity currently outside (lots of rain & warm weather). I will hope for the best I guess.
- removed 3 more leafs
Day 70, 18.06.2024
No action today but to experience high humidity (~69%) without being able to do something about that 😢
This concludes week 10. The breeder states this strain is ready for harvest after 11 weeks. Well.. I guess I am about to find out.

Likes
3
Share

@Thedibber
Follow
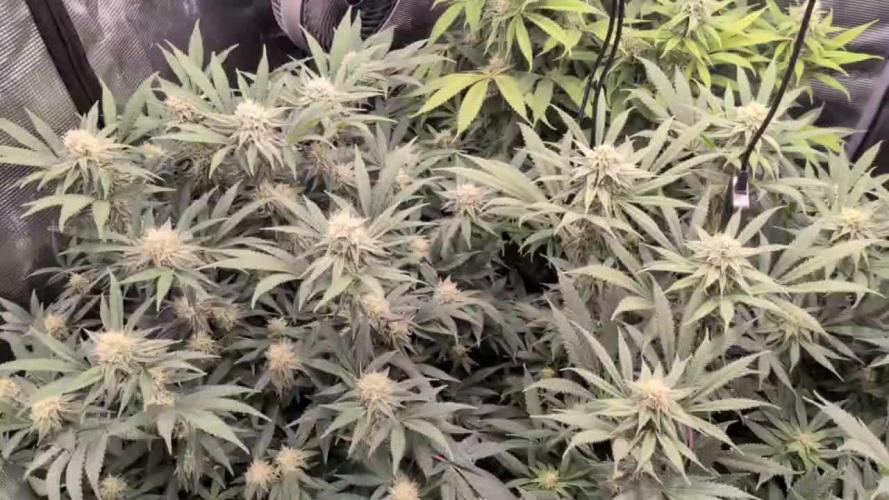
Bottom left is the badazz og cheese she's smelling dank and hopefully gives me some dank medicine

Likes
6
Share

@kevxyn
Follow
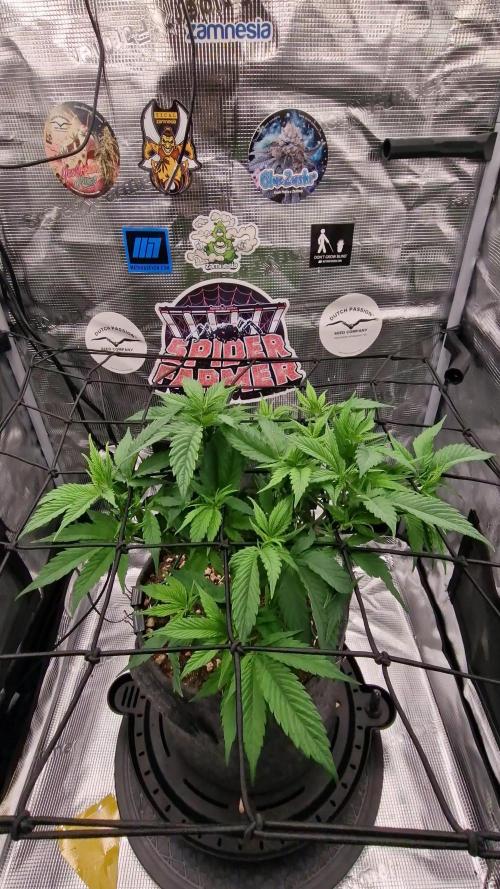
Die Kleine hat sich nach der Entlaubung letzte Woche wieder super gemacht! Ich lass sie noch ’ne Woche schieben, dann geht’s in die Blüte 😎🌱


Likes
46
Share


@LittleBigTrees
Follow
Stretching is slowing down now.
I defoliated reasonably hard 2 weeks ago , now I know I should have gone harder but this is my first time growing this strain.
I've got one pheno that's looking like it will be done in the next week or two .
I have one pheno that has very few stigma which is something I've only ever seen before on super lemon haze crossed with mimosa evo . You can see them in the video.
Keep growing 💚

Likes
19
Share


@3footgiraffe
Follow
Girls are all looking healthy... anyone growing blackberry she doesn’t like much N by the look of it...... C4 is doing well, structuraly she is set so just need to stack on those buds!... I’ve had my daylight bulb off for the last few weeks but as it’s 0.5c outside I’ve flicked her back on between the 2x 600 hps and turned off my intake fan, I have also removed the glass from my air cooled reflectors and temps are easily controllable, I think these are great supplementary lamps at the start and the end....... but this is my second grow so really I know f*ck all!! 🤭(all the gear no idea) just my opinion. Having fun and learning at the same time 😎 ....🖖🎄
Likes
29
Share


@nonick123
Follow
Día 6 (29/04) Spray solo agua el top del sustrato. DLI 13
Día 7 (30/04) Spray solo agua el top del sustrato. DLI 13
Día 8 (01/05) Spray solo agua el top del sustrato. Subo a DLI 17
Día 9 (02/05) Elimino la cúpula casera de humedad y empiezo a regar con 300 ml solo agua
Día 10 (03/05) Empiezo a luchar con una ola de calor inesperada para esta época, que me trae temperaturas exteriores de 30 ºC y humedad relativa del 30%...
Mantengo la cúpula casera de humedad
Día 11 (04/05) Hace muchísimo calor.. 30 °C. A ver como lo llevan
Hago un invento casero para aumentar la humedad
Día 12 (05/05) Primera alimentación con Aptus! 300 ml H2O + Regulator 0,15 ml/l + CaMg-Boost 0,25 ml/l + Startbooster 0,25 ml/l - pH 6.2
Creo que las plantas se ven un poco pequeñas para tener 12 días... esperando por explosión de crecimiento en los próximos días....
💦Nutrients by Aptus Holland - www.aptus-holland.com
🌱Substrate PRO-MIX HP BACILLUS + MYCORRHIZAE - www.pthorticulture.com/en/products/pro-mix-hp-biostimulant-plus-mycorrhizae
Likes
11
Share


@BudBeezy
Follow
Welcome to week 12 of my grow diary. There's not much new this week. The plant is growing as it should and is slowly starting to stretch. I have increased the watering quantity to 10 litres as the soil dries out too quickly. Unfortunately, my nettle slurry has now been used up. The stem is now 3cm wide.
See you next week ✌️
Likes
4
Share


@Backyardnewbie
Follow
Plant is recovering well from defoliation. No pistles yet but looks like beginning of flowers forming. Going to call this first week of flowers.
Plant doesn't seem to be getting any taller this is a genetic issue I think. Going to a different breeder next run. I think they are white label genetics which can be hit or miss.

Likes
1
Share


@alexb420
Follow
probably won’t work with these for a bit. BUT was fun to grow something out and soon i’ll be able to try it out.
Likes
24
Share


@Mr_Meeseeks
Follow
[Tag 6]💧💡
Zum ersten Mal mit Dünger (pH 6,0 / EC 0,8mS/cm) gegossen, ca. 5,5 Liter. Eventuell zu hoher EC- Wert, vielleicht ist ein EC- Wert von 0,4mS/cm am Anfang optimaler.
Beleuchtung 25% (80 Watt), Abstand 65cm, 18 Stunden (08:00-02:00 MESZ).
[Tag 7]💧
Hinten links etwas nachgegossen, ein paar hundert Milliliter.
[Tag 8]
-
[Tag 9]💧
Auf der rechten Seite wurde das restliche Gießwassers nachgegossen, ca. 0,5 Liter.
[Tag 10]💡
Beleuchtung 25% (80 Watt), Abstand 50cm.
[Tag 11]💧💡
Mit Leitungswasser (pH 6,0 / EC 0,4mS/cm) gegossen, ca. 10 Liter.
Beleuchtung 50% (150 Watt), Abstand 100cm.
[Tag 12]
Alle Sämlinge entwickeln sich sehr gut.

Likes
45
Share


@masterofsmeagol
Follow
8/21, 8/22 TOASTED TOFFY WAS TREATED WITH PLANT DOCTOR ON THE 22nd. It's been a few days of rainy dreary weather. This morning I went over and did some MORE defoliation on the toasted toffy trying to get all infected leaves off. I then used the rest of the k bicarb on the gmo in the middle. I haven't seen hardly any pm. So that seems to be working. However I don't want septoria to spread through my garden either. Hopfully the plant doctor will take care of the problem. If not I'll get something different. I can make a diy Dr. Zymes or I could just go to the store and buy something specific like trichodermia. The weather has been a fungus nirvana. The conditions couldn't have been anymore perfect for mold development. I'm super impressed with the k bicarb treating the pm. I took tons of pictures yesterday but I've been sick and couldn't upload them. I still need to sanitize and put my supports up. I'll keep this updated with what I'm doing.
UPDATE: AFTER UNCKES FUNERAL I WATERED THE SHERB PIE THAT I DIDNT LAST TIME AND THEN I FED. I DIDNT FEED THE TOASTED TOFFY DUE TO IT BEING TREATED WITH PLANT DOCTOR. EVERYTHING GOT A QRT THE 50GAL GOT MORE. TWO GALLONS TOTAL USED. I NOTÌCED SOME SLIGHT PM ON THE GMO IN THE MIDDLE. IT WOULD BE TIME TO TREAT AGAIN ANYWAY. I PLAN ON WATERING TOMORROW AND TREATING THIS PLANT AGAIN. IM HESITANT TO UsE PLANT DOCTOR (do to feeding tonight) RIGHT OFF SO ILL PROBABLY USE YHE K BICARD. IT WORKS GOOD. I SHOULDNT HAVE FED THAT PLANT SO I COULD APPLY THE PLANT DOCTOR INSTEAD. THAT SEEMS TO BE WORKING REALLY WELL. LAST TIME I USED IT WAS ON FUSARIUM AND THATS JUST A LOSING BATTLE. DID A QIICK VIDEO ILL UPLOAD TOMORROW.
8/23 I HAD A CRISIS SITUATION AND I FUCKED UP THE DIARY. I THINK I JUST DIDN'T RECORD WHAT I DID ON THIS DAY.
8/24 I checked the bags and they were heavy. I watered the sherb pie today as it missed the last watering. Everything but the toasted toffy got fed yesterday. I noticed some slight pm on the middle GMO that I've been treating with k bicarb. Just a couple leaves. Looks like a couple spots I missed. I was going to apply it again but I dodnt have time. I'll be back over soon and I'll treat it and do the defoliation needed. Maybe I'll even sanitize and get support up. Since I fed yesterday I don't want to use the plant doctor for a few more days. I'm thinking of treating everything with it. I need to read and see when the next application for toasted toffy is due. Things are really starting to flower. Once I get the work done I may add beastie bloom to my nute line up. I think I'll do another k-bicarb app on the plant with pm. It's doing a good job. Since the l bicarb I don't see any pm. I should've held off feeding it so I could've used plant doctor. I'm monitoring toasted toffy and if it keeps working good I'll treat everything preventatively.
WENT BACK OVER AROUND 11:30 BECAUSE IT HAD CLIMBED INTO THE UPPER 80'S. AS I SUSPECTED THE PLANTS NEEDED WATER. THEY COULDVE WAITED UNTIL TONIGHT BUT UNFORTUNATELY I HAvE TO DO THINGS WHEN IM ABLE TOO. EVERYTHING GOT A GALLON EXCEPT THE GMO IN THE MIDDLE IN THE 30, THAT GOT 1.5. SHERB PIE GOT IT YESTERDAY AND ISNT FLOWERING AS VIGEROUS SO IT USES LESS WATER. BEFORE WATERING I WENT THROUGH THE ENTIRE GARDEN AND DEFOLIATED WHAT NEEDED TO BE DEFOLIATED. I HAVE A FEW SMALL LIMBS I SHOULD PRUNE BUT THAT STUFF MAKES GOOD HASH MATERIAL AND ACTUALLY ADDS UP. I NOTICED A LITTLE BIT OF PM ON THE GMO I TREATED. Just a couple spots on a couple leaves and I removed them. I MIXED UP K BICARB AND ILL APPLY IN THE MORNING. I WANTED TO USE PLANT DOCTOR BUT SEEING THAT I FED ILL WAIT. ID LIKE TO GIVE THEM ALL PLANT DOCTOR AS A PREVENTATIVE. SUPPOSABLY IT STIMULATES AN IMMUNE RESPONSE WITHIN THE PLANT WHICH FIGHTS THE PATHOGENS THEN LEAVES POTASSIUM AND PHOSPHORUS BEHIND AFTER 4 DAYS FOR THE PLANT TO USE. I THINK ITS GETTING CLOSE TO TREATING THE TOASTED TOFFY AGAIN. ILL HAVE TO LOOK. I TOOK A VIDEO BUT ILL HAVE TO UPLOAD IT it.
8/25 I know the diary is fucked up. But I know I watered yesterday. Except the sherb pie. I didn't check the weight bit did a bunch of defoliation. I made another half gallon of k bicarb with a drop of dawn and sprayed all the gmos. I only saw a COUPLE spots with pm on them and I removed them. Still though I wanted to make sure it doesn't get out of control. I should've checked the weight of the sherb pie but I'm sure it's fine.. I took a video but I can't upload it yet.
WENT BACK OVER AROUND TWO. IT WAS A BLISTERING HOT DAY IN THE 80'S. THE BAGS WERE DRY. THEY HAD A LITTLE WRIGHT TO THEM AND MOST SOME LEAVES WERE PRAYING. SOME WERE STARTING TO DROOP THOUGH. I WATERED EVERYTHING A GALLON EXCEPT THE SHERB PIE I GOT THIS MORNING. I gave the gmo in the 30 1.5. THE EVENT HORIZON IN THE MIDDLE COULDVE WAITED UNTIL MORNING BUT AT LEAST I CAN KEEP TRACK OF IT EASIER THIS. MAYBE I SHOULD GIVE THE 50 MORE WATER AT A TIME. IM GETTING YELLOW LEAVES. I THINK ITS PROBABKY SENESCENCE. ITS ABOUT THE SAME TIME EVERY YEAR I START LOSING SOME LEAVES. IT SEEMS TO BE JUST THE SHERB PIE AND THE BIG ONE IN THE 50. THAT PLANT HAS QUARTER SIZE BUDS ON IT THOUGH. ITS AMAZIBG HOW MUCH THE WATER INTAKE CHANGES WHEN ITS 60 OR UPPER 50S WITH HIGH HUMIDITY TO WHEN ITS IN THE 80S ALMOST 90. I HOPE IM NOT WATERING TO OFTEN. ITS BEEN COLD AT NIGHT. IN THE 50S. THE EVENT HORIZON HAS TURNED A NICE PURPLE ON MANY LEAVES. THE GMO'S AND SHERB PIE ALSO ARE TURNING PURPLE AND OTHER FALL COLORS. I SAW WHAT LOOKED LIKE SEPTORIA SPOTS CRAWLING UP KY EVENT HORIZON IN THE BACK. IN GOING TO TREAT IT WITH PLANT DOCTOR TOMORROW.
8/26 Rainy day. I noticed some septoria on the toasted toffy climbing a bottom branch. But it is time to reapply plant doctor. I saw a couple spots on the event horizon and I treated it today with 1/4 gallon of 2tsp per gallon plant doctor. I sprayed the leaves then I used the rest on the soil. The k bicarb is still keeping any pm at bay. I haven't seen a spot. I hope the plant doctor helps the event hotlrizon. I'm not even sure if it has it but I want to be cautious. I'm thinking of treating them all with plant doctor. I'm also going to use beastie bloom on some of the more advanced plants. I wasn't expecting it to rain but it wasn't for at least a couple hours after I sprayed. I ran another support line across the cage. I need to lst both event horizons and defoliate the sherb pie. It's weird but it seems like EVERY day I go over the flowers are bigger! I see birds darting out when I approach. Maybe that's why i haven't been finding pillars. I found ONE hairy one this week trying to escape to the soil on a string. I got him though. We'll see how it goes. If not I have other options for treatments if needed. That plant in the 10 is HUGE. I'm suprised it got that big in 10gals! Trying to upload videos but they are LONG so I don't know if they

Likes
3
Share


@Jointjourney
Follow
The little ones are developing well, unfortunately there are a few minor nutrient problems in the direction of Calmag with the Morello Cherries and also slight signs of this with the TerpyZ Punch. I counteracted this with a foliar spray. The pH value of the hydrosystem has unfortunately dropped a little to 5.5, which I have equalised with ph up from Plagron. The plants are currently getting light between 800-900 ppfd and as soon as the stretch starts, l'll increase this to 1000 ppfd. Both ladies are slowly starting to smell.


Likes
1
Share

@A-C-H
Follow
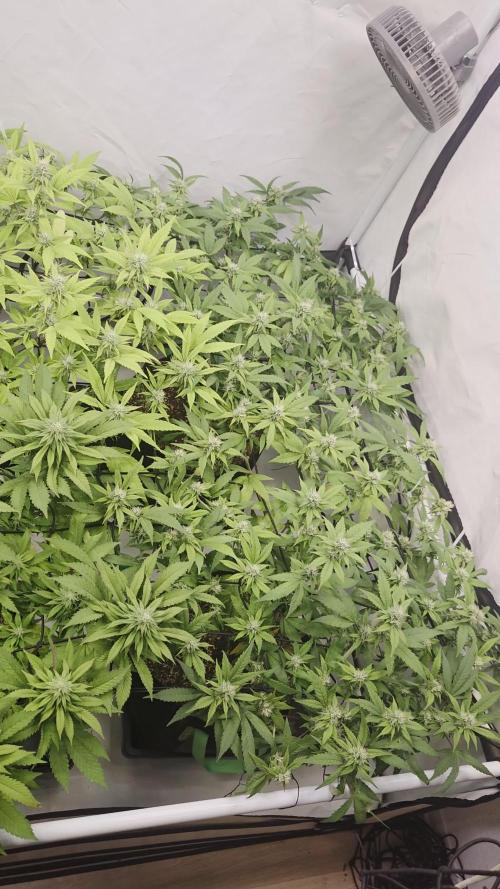
Die Blüte schreitet gut voran, auch wenn es etwas kühl ist...
Einige meiner ICE rink Pflanzen fangen bereits an, ihre Farbe zu verändern, und bei einer Pflanze auf (wild cherrie) der rechten Seite stelle ich immer noch dasselbe Problem fest
Processing
Likes
12
Share


@Fleetwood
Follow
Trying to keep away as I fear my meddling caused my hermie's. I found a light out, luckily I have 2. Looking for an upgrade now. Will use the remaining light as a backup.
End of week, I have 3 x "600w" LED lights. Total draw is about 360w. 2 white (with added red) and one blurple in between them. I need to fix hanger system to keep them close, but not too close to affect cooling.


Likes
24
Share


@Grnhead
Follow
This was a fantastic plant to grow, and although it doesn't have the strongest resistance to mold, I think that if I were to grow it again I could avoid the issue.
I am starting to figure out how to maximize my grow space! Come check out my next grow when you get a chance!

