
Likes
Comments
Share


@GrapevineGrower2
Follow
Overall, this is 9th week of flower for the entire F'22 grow season. With French Macaron beginning week 7 flower and Afgooey #1 and #2 in mid-week 5 of flower. The Afgooey #3 is just starting to form tiny budlets after an extensive defoliation as she's squatty with lots of foliage.
Updates & Observations - a lot of maintenance this week from continual ph'ing and flushing as Afgooey #2 has joined the French Macaron with low ph runoff readings. Given I'm growing in a living soil mix with periodic top dressings and teas every 7-10 days, I'm stumped. So, no more feedings for the French Macaron until harvest. Decided that next watering I will flush both girls with fresh rain water captured/stored which I have stored outside in 30 gallon barrels. Rain water tested at 7.2 ph, which to me is good enough for the flushing. It's raining for 3-4 days next week, so this will exhaust existing supply and replace with fresh rain water. Perfect timing. Will update next week.


Likes
4
Share


@AestheticGenetix
Follow
12/20/24 chopped at day 55 with 80% cloudy and 10%amber and 10% clear or so
hung for a couple days and noticed white fuzz forming at the base of the fan leaves coming out the tops colas. so thats a disaster. but these buds are so ridiculously dense that im not surprised. it still sucks. but i bucked everything else off and the stems and now am drying each bud out on a rack and trying to keep the humidity down and to save what i can.
1/4/25
saved a bit over an ounce. 30 grams dry. shes super triched out and hashy feeling when trimming. has deep black peppery notes when smoked but smells creamy and fruity/ tropical especially while

Likes
18
Share


@VI_Cannabis
Follow
June 7 - We ordered some new lights last week, they are 240w kingbrite samsung lm310h with uv/ir, 3000k, and meanwell drivers.
We setup the new room and moved the girls into there. After a bit of LST and a watering (with nutrients) at roughly 7ph, they were ready to go under the 2 new lights and the same SF-1000 we have been using in this grow.
The new room is a 12 ft enclosed trailer. I moved everything from the small tent into this. I put clear poly on the walls, floor and ceiling. I put poly on the shelf I am going to be keeping in there as well. I bought 50ft of 6mm mylar and lined the floors, roof and sides with it. I plan to get some reflective tape to seal everything and to cover the wood. I did not get much of a chance to watch temp's today as they it was later in the evening after all was said and done. The inline fan blowing in air from outside.
June 8 -
9 AM i checked the plants, they were at 25.2 and 50% RH. Late through the day I had checked and we had gotten up to around 32 degrees. So I moved the inline fan to the closer vent, hooked up to that, and had the air blowing out of the trailer with the inline fan sucking it from above the lights.
I then added oscillating fan and had it blowing air on the left side of the room so it would somewhat circulate once I closed the doors. I then checked at about 9pm and we were at 22 degrees. Definitely noticed a decent amount of growth already. I have the lights on a 22/2 cycle as I was worried about the heat at night time.
June 9 -
Some great growth from the girls, still having problems controlling the temps in the afternoon. I decided to prop the door open a bit to have a constant breeze throughout the day while I am at work. Decided to do some more LST and also a bit of defoliation. I took about 25% of the leaf's that were blocking the new growth as it was getting a bit bunched up. I was then told the leaf's are almost solar panels for them. So from now on I will be trying to just do some tucking unless needed. The leaf's I removed were most of the damaged leaf's, I am not to sure if that makes much of a difference. I gave them a watering with only water as there is a potential I am getting a bit of a nutrient buildup along with the PH problem. Or potentially the reason for the ph problem is nutrient buildup. After watering with A PH of 7 I got some run off and tested it. The smaller plant gave me a PH of about 5.5 where the bigger one is around 5.0.
June 10 -
Plants are looking happy and showing tons of growth. Seems to be trying to stretch outwards. Not a ton of sign of PH issues showing so potentially getting it under control. Still a bit of damage to previous leaf's but it is what it is! The last few days I have been leaving the door open a bit in order to keep the temps down. I decided to test something and turn the lights off (automatically) at 11AM and back on at 5PM so light schedule has now changed to 18/6 and it seems I may have figured out the issue. We haven't had lots of sun the last couple days so it hasn't been to hard and I have yet to know if it truly fixed the heat issue for now. (I will be looking into a ac unit as well since it typically gets to around 30-35 around here.
June 11 - Pulled some of the branches back down and added a few more LST spots. Seems we have a good amount of growth from the smaller plant out of the 2 topped spots. Unfortunately it looks like I fucked up on the bigger plant and only one of the nodes seems to have new growth. I will continue to monitor that but I think I cut the node to low and also to soon. Other then that, the girls are doing great. They seem to be absolutely loving these new lights. I gave them some nutrient water today as well. roughly 3L each. They seem to be A hell of A lot more thirsty under these new lights.
June 12 - The girls are doing great , they are still just doing growing away. Lots of progress everyday. I am going to be getting a go-pro so I can set-up a time-lapse for the rest of this grow. I received my new inline fan, I got A ac infinity CLOUDLINE T4 with the temperature humidity controller. I am going to be having one fan pushing fresh air in and one fan pulling out the hot air. I will be doing that tomorrow since I have to work today.
June 13 - I ordered another 50ft of mylar and that showed up today. I have decided to remove the shelf and add another 3+ feet to the grow space. So today I installed more poly, mylar, the ac infinity fan. I have it set-up to pump in air if it gets to warm. I am thinking of switching it to the output that way if it gets to hot or to humid I can have that air pulled out of the trailer. Right now my other inline fan is the outtake and I just have it set on full. Overall I think everything is set-up a bit better and more accessible. I will be putting my 2x2 tent in there at the left of the doors so I can have a veg room when these 2 are in flower. I plan to have 4 in veg and 4 in flower for the next grow. Still waiting on JOTI seeds, ordered 3 weeks ago and still have not been shipped. I will be getting those going the moment they arrive.
The girls seem to be happy still, did a bit more LST to try to keep everything even, mainly I'm just pulling down on the spots I already have tie wire on.


Likes
5
Share

@Mosquito_Haarlem
Follow
Dit was een zeer positieve week waarin de toppen flink zijn opgepompt.
Ze ziet er prachtig uit.
Ik zal haar nog enkele dagen nutriënten meegeven voordat ik overstap naar alleen water met flawless finish.
Dit zal de smaak ten goede komen omdat de grond word schoongespoeld van mineralen.
Laten we kijken hoe ze zich verder ontwikkeld, ze is echt supersnel.

Likes
Comments
Share

@Chucky324
Follow
Hello. This is the end of week 5 and the beginning of week 6 of veg.
This girl got topped last week, getting ready for training.
I hope to repot this plant this week and it will get a tomato cage too.
I can spread out the branches and tie the branches with the big buds to it.
OK. Be Great.
Chuck.

Likes
49
Share


@hawkeye_diesel66
Follow
The week went well. She has a funk to her now that as soon as I kill the fan it smacks you right in the face. Some of the pistils are beginning to amber. Just waiting for her to fatten up and finish. I believe this will be my biggest producing auto yet.

Likes
61
Share


@Esoteric_growing
Follow
They have stretched a lot more than I anticipated for the first week of 12/12. Very happy so far and have about 19 cuts ready to test the strain in coco in my spare two grow chambers. I have numbered all the cuts in relation to which plant they came off so I will be keeping only the best two out of the 5 plants.
Very happy with the growth structure so far, I normally top and train or scrog my canopies but want to just let them go to see their natural growth structure. In the next 5-12 days I will swap out the metal halide for my sodium bulb depending on how much they stretch.

Likes
5
Share


@Do_it_Dan
Follow
Been a great germination week with plenty of growth, let's hope the next 2 weeks will provide enough growth, it will be interesting now I've amended the ph over the whole garden, ph was at 6.6 run off on other strains in the same medium, started to see some deformities, let's see if this fixes them issues before they arise with this baby 👶

Likes
Comments
Share


Processing
Likes
7
Share


@rainman
Follow
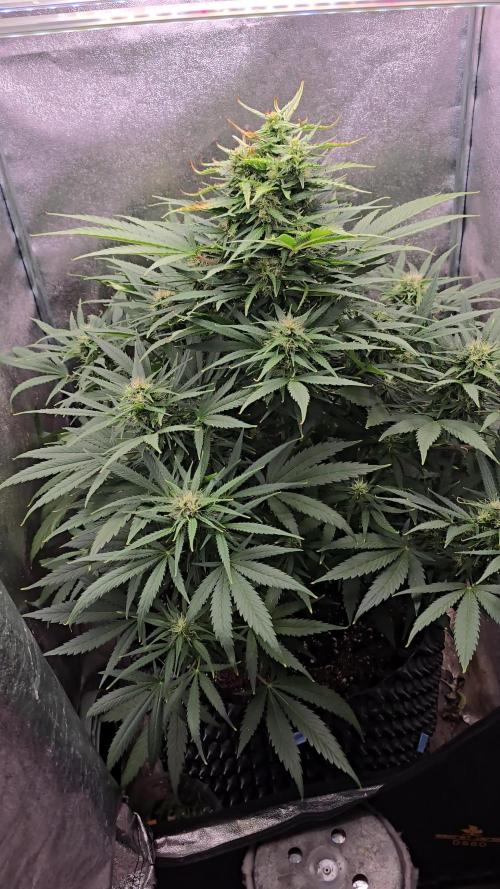
Week 9 starting, plant is doing good, buds are growing fast. Will cut leaves in coming days.
Day 59 - Cut a few leaves, gave her 5L with nutrients. Increased amount of BigBud, getting ready for last weeks. Buds are maturing by hours.
Day 63 - Cut a lot of leaves. 6L water. Buds are looking very good. Noticed a lot of sugar leaves.
Peace.
Likes
7
Share


Likes
21
Share


@Smokey89
Follow
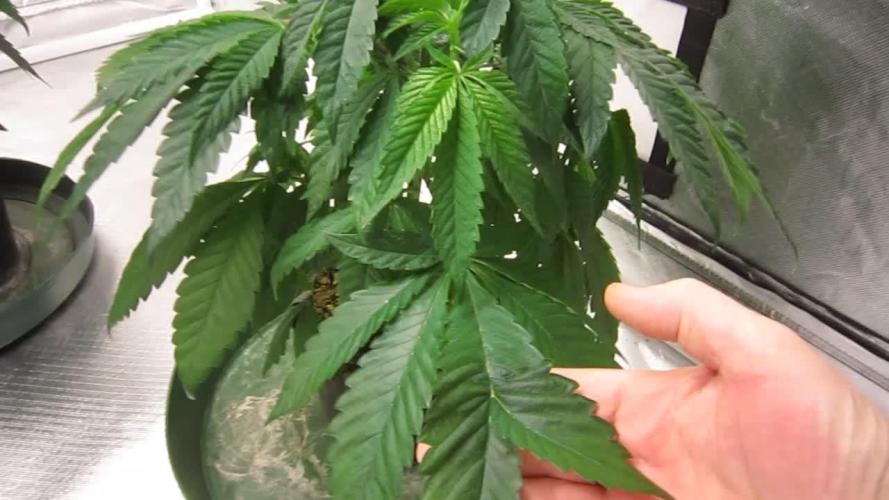
So as you can see my girls suffered a bit in week 3 but are on the mend. I've continued to LST them tying down the new growth sites and either tucking or removing the fan leaves to allow light to penetrate to the new growth sites I'm going to veg for 2/3 more weeks then flip them
Just did a complete water change and stripped down the whole system to clean the water pipes air pipes and air stones. After visiting my local hydroponics shop they recommended a organic ph up and down which I thought sounded good less chemicals in my grow what's not to like about that. However once I had used them I quickly realised they had issues I was constantly checking and adjusting my ph levels as they would drop to 5.3 and over the course of a few hours would rise to 7.4 upon checking my water pump I found my filters where completely blocked so I flushed them and put them back in and it seemed to work fine until the next day when I checked again and yet again they where blocked. I think they had reacted with my other nutrients and caused a brown funky sludge. I have scrubbed each bucket and reservoir to get rid of the gunk then used disinfect on all the equipment and the grow room. I've uploaded a video so you can see the condition my girls where living in. Hope this helps anyone in their future grows

Likes
1
Share


@Olduffybastard88
Follow
Nice and frosty next to no effort was put into tbis plnt just let her do her thing and she turned out a beauty really easy to grow and no problems so far
Likes
7
Share


@Mrg7667
Follow
Actually week 33! Outdoor update got Ac going in tent rust fungus under control all plants LST
Processing
Likes
7
Share


@x_grower
Follow
Very fast seedling process, seeds stayed soaking for 24h and in the water they were already showing the first white root hair, another 48h in the paper towel and the day I potted them up they showed cotyledons. They took around 11 days to reach third node and complete germination but honestly I belive it could be faster if in better enviroment, mainly the humidity which was low and I transplanted them a day late. From day 5 I started feeding them exact same nutrients and ratio from the first vegetative week but starting at 0.4EC and increasing by 0.1EC/day until 1.1EC

Likes
89
Share


@nonick123
Follow
Dia 20 (05/02) Han pasado 8 días desde el ultimo riego. El sustrato de PRO-MIX HP se encuentra esponjoso al tacto a pesar de que está seca la parte superior
Riego 1 Litro H20 + Wholly Base 1,25 ml/l + Solid Green 0,5 ml/l + Rise Up 1 ml/l de Gen1:11 - pH 6,23 TDS 660 PPMs
Día 22 (07/02) Vamos a probar a hacer este ciclo con LST
Día 23 (08/02) A +24 horas la planta ha reaccionado muy bien al LST. Se han estirado las ramas inferiores y la rama apical se sigue estirando
Día 25 (10/02) Sigo con ajustes de LST para abrir la canopia. La planta está reaccionando con mucho vigor 😍💥
Este día añado a la carpa el sistema TrolMaster TCS-1 Tent-X
Día 26 (11/02). Riego 1 Litro H20 + Wholly Base 1,5 ml/l + Solid Green 0,75 ml/l + Rise Up 1,25 ml/l de Gen1:11
TDS 780 PPMs - pH 6,36 (mínimo ajuste con pH+ para subirlo desde 6,2)
La planta avanza vigorosa. En una semana pasamos a 12/12 😁
Nutrients by Gen1:11 - www.genoneeleven.com
Substrate PRO-MIX HP BACILLUS + MYCORRHIZAE - www.pthorticulture.com/en/products/pro-mix-hp-biostimulant-plus-mycorrhizae
Controlled by TrolMaster TCS-1 Tent-X System Main Controller - https://www.trolmaster.com/Products/Details/TCS-1


Likes
98
Share


@DogDoctorOfficial
Follow
And my army as arrived lol its IPM time with in this case is not preventive but its attacking a situation !!!!
In my humble opinion wen growing in organics one fight life with more life and in this case i broth the big guns, i am talking about applying nematodes (steinernema faltiae) with you cant see at naked eye but will do they’re job on the soil and take on a microscopical way, i also am introducing some beneficial bugs to be more exact the stratiolaelaps scimitus they are machines killing trips, soil flies and a bunch of other plages we dont want around our girls and i also invited some Noseilus Californicus as a preventive for Any kind of non beneficial mites. With this i recipe i have faith my girl will be in control until the end of the run were i can clean it all up good !!!
Appart from the bugs situation and that this girl is always starving dont ask me how but just in case i start adding NPK in liquid mineral way lol she is doing amazing to my eyes, i mean the bud formation its amazing , i can already see a canopy full of golf balls , she is not an easy one to grow but i believe she will compensate me with amazing fruits, lets see … <3 <3 <3
As always thank you all for stoping by, for checking my journey , for the love support and for it all, i am blessed and humble with you all.
Just a reminder , all i grow is medicine for myself, for me and for my best friend with is me nothing to sell, so don’t even ask.
All info and full product details can be find in can find @
https://ganjafarmer.com
https://aptus-holland.com/
https://marshydro.eu/
#aptus #aptusplanttech #aptusgang #aptusfamily #aptustrueplantscience #inbalancewithnature #trueplantscience #Ganjafarmer #growerslove
With true love comes happiness 💚🙏 Always believe in your self and always do things expecting
nothing and with an open heart , be a giver and the universe will give back to you in ways you could not even imagine so 💚💚💚
More info and updates @
https://growdiaries.com/grower/dogdoctor
https://instagram.com/dogdoctorofficial
https://youtube.com/channel/UCR7ta4DKLFMg2xxTMr2cpIg
💚💚💚Growers love to you all 💚💚💚

Likes
17
Share


@ButterfliesLittleFarm
Follow
Hello Diary.
The first week of flowering is over, the plants have branched out nicely, the Purple Punch has grown more than 60cm and has now become crowded on the Farm.
Specifically, Purple Punch # 1 grew 66 cm, Purple Punch # 2, which sprouted a few days later, grew 54 cm, which surpassed roommate Watermelon, who keeps them company on the Farm.
Along with the height, there are a lot of leaves throughout the plant, but this time I'm not sure if I would do defoliation.
The plants normally look healthy and satisfied, they did not reflect as much as on Watermelon, that they were harmed by too many nutrients. They’re obviously a little more resistant to that. Except for the yellowish tips of the leaves, which I believe is genetics, everything else seems fine.
The flowers started to form, so I have new motives to photograph. At the beginning of the week, I also changed the light regime to 20 hours of the day and 4 hours of the night.
I water every two to three days, when each plant gets about 2 liters of water. I add food at about every other watering. Sometimes biobizz and sometimes I put Easy Grow or Easy Bloom tablet, depending on the stage the plant is in.
p.H. I always adjust the water value to a value between 6.2 and 6.5.
Conditions on the Farm are more or less satisfactory, the temperature is about 25 degrees while the humidity is slightly lower than satisfactory, varying between 40% and 50%.
Here’s a brief overview of the past week.
18/02/2021 - Day 23.
Watering. I adjusted the water to 6.3 p.H with Plagron’s Lemon Kick and added 1.5 mL / lit CalMg preventively.
Temp / Humidity on the farm - 25 degrees and 41% humidity.
20/02/2021 - Day 25.
Watering. I regulated the water to 6.4 p.H, I added 1ml / lit CalMg and BioBizz as scheduled for the first week of flowering.
Temp / Humidity on the farm - 24.4 degrees and 43% humidity.
22/02/2021 - Day 27.
Watering. This time I watered only with water which I regulated p.H at 6.3.
Temp / Humidity on the farm - 24.6 degrees and 40% humidity.
23/02/2021 - Day 28.
Photography and height measurement.
Temp / Humidity on the farm - 25 degrees and 42% humidity.
That’s it for this week, a big hello and thank you to everyone who follows the diary and thanks for the comments. See you soon.
