


Likes
Comments
Share


@R_Dub
Follow
Easy week, began with CalMag and began LST, at this point FoxFarm 1 and 2 and Recipe420 #1 have been topped, not topping Recipe420 #2 just LST. FoxFarm #2 is showing droopy leaves (it's going to get worse) the first sign of a lockout I think.

Likes
50
Share


@Rwein93
Follow
Ciao ragazzi e bentornati qui con me e le sorelle Limonose 🍋
Tutte 3 hanno smesso di crescere, la numero uno ha una struttura incredibile,💪 mi sono pentito di non aver fatto Lst su tutte le sorelle.🤦♂️
La numero 2 è alta e ben strutturata ma ha una sola cola bella grassa.
Mentre la numero 3 sembra più avanti delle altre con quasi tutti i peli arancioni e i buds di media grandezza.
Le cole principali delle altre invece misurano circa 3/4 cm, ma sono ancora parecchio indietro👍
Il colore è standard! Niente di particolare bei buds verde chiaro e pistilli bianchi ma sembrano molto gelide🤙
L odore delle sorelle sembra diverso tra di loro. La numero 1 ha note accentuate di diesel e nocciola, la numero 2 ha un profumo aspro tipo mapo e la numero 3 ricorda un dolce cremoso al limone 😋
Eh niente ragazzi! Aspettiamo che loro ingrassino per bene!👊
Grazie a tutti per aver guardato e restate sintonizzati per nuovi aggiornamenti.🙏
Buona settimana e felice crescita 🌱 🌱 🌱

Likes
23
Share


@420DeepGrow
Follow
Toda esta fantasía se hace realidad gracias a Royal Queen Seeds y @James por confiar en mí. 🚀💥
Fiel a su linaje genético, la Hyperion F1 ofrece un aroma intenso que está dominado por notas frescas de pino y hierba, junto con un trasfondo terroso y un delicioso toque especiado. Aunque todos nuestros híbridos F1 producen excelentes concentraciones de cannabinoides y terpenos, no hay duda de que la Hyperion destaca entre el resto. Sus cogollos alargados y escarchados producen una resina rica y cargada de cannabinoides (sobre todo THC), y terpenos como mirceno, ocimeno, farneseno, terpinoleno, cariofileno y humuleno. Esto no solo da lugar a un aroma muy fuerte, sino también a un efecto bien equilibrado que combina una relajación física (en gran parte gracias al mirceno y al farneseno) con la euforia, risa y efecto motivador de otros terpenos. Al igual que el dios de la luz del mismo nombre, la Hyperion F1 causa un subidón esclarecedor que se puede disfrutar a cualquier hora del día.
🌻🚀 Consigue aqui tus semillas:
https://www.royalqueenseeds.es/semillas-de-marihuana-hibridas-f1/622-hyperion-f1.html
🍣🍦🌴 Xpert Nutrients es una empresa especializada en la producción y comercialización de fertilizantes líquidos y tierras, que garantizan excelentes cosechas y un crecimiento activo para sus plantas durante todas las fases de cultivo.
Consigue aqui tus Nutrientes:
https://xpertnutrients.com/es/shop/
📆 Semana 6:
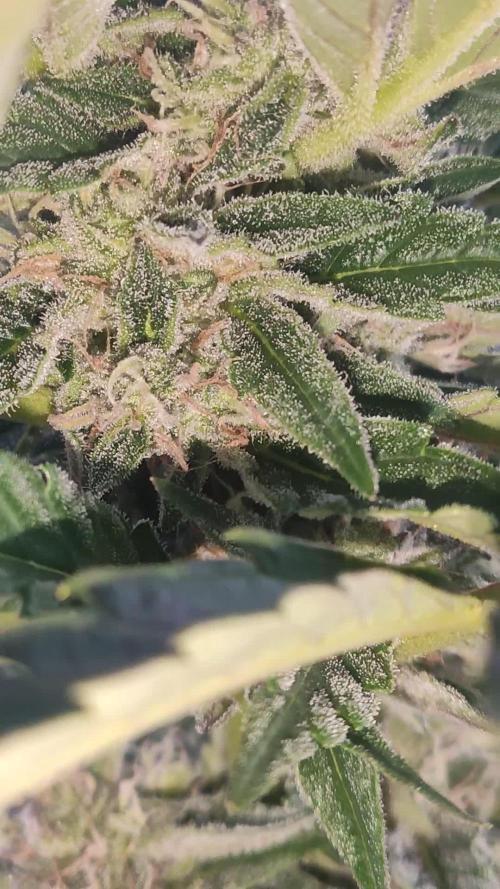
Parece que el temporal por fin se va a pasar esta semana, todo esto le ha afectado y se va a quedar algo mas pequeña de lo que debería.
Se aprecian las primeras preflores ☺️.
Voy a empezar a aplicar abono de floración 🔥



Likes
216
Share


@Ju_Bps
Follow
Hello my friends 👨🌾👩🌾,
Back again in GD Jail, hope will be solved asap.
Can't reply you my friends
The cherry cola 🍒🍒 looking good, still slow 🐌 but healthy 💜💜.
This start week I've found sign of insect, silver on the leaves, and several micro spot, so I've make a treatment .
I've given
1 l water + rhizo + canna tera
1 l water + cannazym
PH@6
Lamp 75% and 55 cm above the canope.
I don't think up the lamp to 100% temperature are already hot.
See you next week and have a good week end my friends 🔥👨🌾👩🌾
Thank to Mars Hydro and @marshydrococo2 for sponsoring the FC3000 ❤️❤️, as well as @Fast_Buds for sponsoring the Seeds ❤️❤️
If you want a litle discount on your Mars Hydro order, add this coupon to your cart,
Ju_Bps
Thanks community for follow, likes, comments, always a pleasure 👩🌾👨🌾❤️🌲
Mars Hydro - FC3000
https://www.mars-hydro.com/fc-3000-samsung-lm301b-led-grow-light
42 Fast Buds - CHERRY COLA 🍒🌲
https://2fast4buds.com/seeds/cherry-cola-auto

Likes
47
Share

@DE_BW
Follow
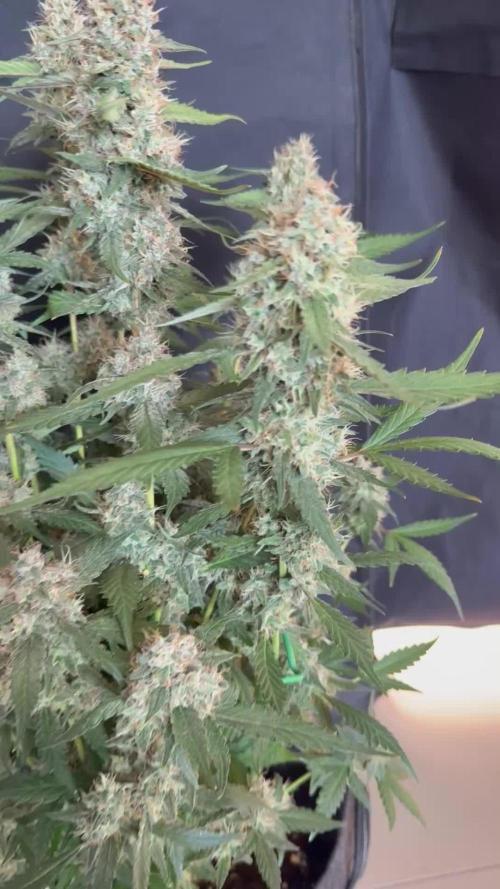
Flower Week 8: The plant is looking truly impressive now, with an above-average resin production and heavy frost across the buds. I flushed her this week, and she’s entering the final stretch with only a few days left. If everything stays on track, harvest is planned for this weekend.
Likes
24
Share


@BB_UK
Follow
She's the one on the right at the front and is stood at 39"+ she has such a beautiful fade on her leaves from early of purple red pink and already is letting off some deep tones, so she's going to be a powerful strain!


Likes
25
Share


@Ganjeiro420
Follow
Eai família GD, como estão?
Essa semana tive alguns problemas com o PH, mas graças a algumas dicas daqui consegui reverter e a planta já está engordando novamente.
Mantive a mesma quantidade de nutrientes pois acho que e o máximo que elas estão aguentando.
Estou muito feliz com o resultado, o cheiro está incrível e elas estão com muitos tricomas e engordando a cada dia.
Acredito que vou precisar de mais 3 a 5 semanas pra atingir a maturação ideial, não vejo a hora de saborear essas maravilhas 😋✅☘️
Likes
53
Share


@DogDoctorOfficial
Follow
Week 2 Flower Report: Blackberry Auto's Swift Blossoming!
Greetings, fellow cultivators! Week 2 of flowering marks a significant milestone in the journey of my Blackberry Auto, and let me tell you, this one's moving at lightning speed – the fastest I've ever witnessed in an auto. Let's dive into the unfolding botanical saga and witness the blossoming beauty firsthand.
Burgeoning Buds and Floral Symphony: As the second week of flowering commences, the once-timid buds of Blackberry Auto are now burgeoning into floral marvels at an unprecedented pace. Each bud tells a story of promise and potential, with delicate pistils reaching out like fingers, embracing the essence of bloom.
Hydration Harmony and Nutrient Nourishment: The AutoPot Aquavalve continues to be a steadfast companion, ensuring the plant's hydration needs are met with precision, crucial for this rapid growth. Coupled with a nutrient regimen tailored to support flowering, Blackberry Auto thrives in a symphony of hydration and nourishment, laying the groundwork for robust bud development.
Aromatic Euphoria and Visual Splendor: As the flowers unfurl, they release an aromatic symphony that fills the air with notes of sweetness and delight. Meanwhile, the visual spectacle is equally captivating, with hues of green giving way to vibrant shades of purple and indigo – a testament to the genetic lineage of Blackberry Auto.
Tender Care and Gentle Guidance: Amidst the flowering frenzy, I continue to provide tender care and gentle guidance to Blackberry Auto, ensuring she stays on track despite her rapid pace. Low-stress training techniques are employed to ensure optimal light penetration and bud development, shaping the plant's canopy into a tapestry of floral abundance.
Anticipation and Gratitude: With each passing day, anticipation grows for the bountiful harvest that lies ahead. I extend my heartfelt gratitude to @fastbuds_official for bestowing upon us this botanical marvel. To Aptus Holland, my main sponsor, your support fuels this green journey and enables the flourishing of Blackberry Auto's potential. Kudos to Grow Diaries for providing the platform to document and share this journey, and a shoutout to the community for the camaraderie and shared passion that enriches our collective cultivation experience.
As we embark on the second week of flowering, I invite you to join me in celebrating the beauty and wonder of Blackberry Auto in bloom, moving at a pace that leaves us all in awe. Together, let's revel in the magic of nature's artistry.
Genetics Blackberry Auto @Fast_Buds
Food - @aptusholland @aptus_world
As always thank you all for stopping by, for the love and for it all , this journey of mine wold just not be the same without you guys, the love and support is very much appreciated and i fell honored and blessed with you all in my life
Likes
8
Share
@420DeepGrow
Follow
📆 Semana 4
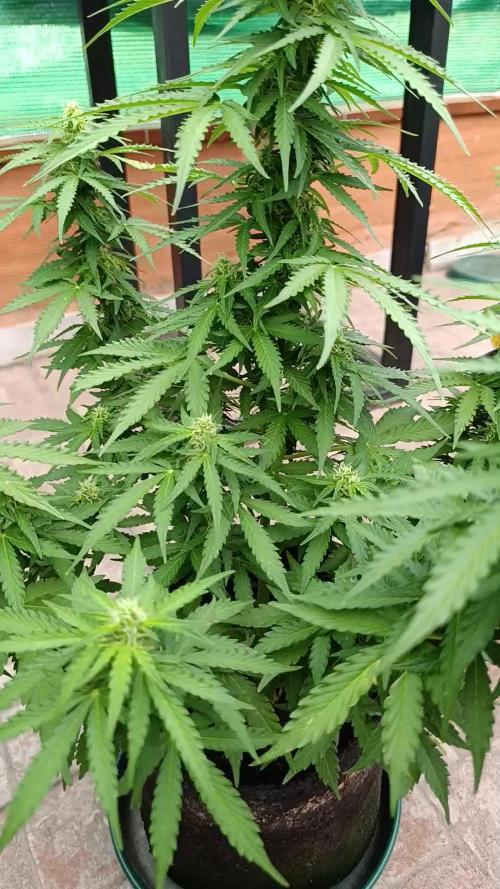
La floración avanza con fuerza y los cogollos comienzan a ganar volumen en todas las puntas. El estiramiento prácticamente finaliza y la planta concentra cada vez más energía en la producción de flores y resina.
La estructura se mantiene estable, permitiendo una buena penetración de la luz y un desarrollo homogéneo de los sitios de floración. El consumo de agua y nutrientes continúa aumentando, acompañando el inicio de la fase de engorde.
⚡ EC: 1.5–1.7
💧 pH: 6.2–6.5
🌡️ Agua: 18–22°C
🌫️ Humedad: 40–55%
☀️ Luz: Fotoperiodo natural, abundante sol directo
🔥 Nota: La planta deja atrás la fase de estiramiento y entra plenamente en el engorde de las flores. A partir de este punto, cada semana aporta más densidad, resina y peso a los cogollos.
Seguimos creciendo fuerte 💪!
Likes
16
Share


@Syriusz
Follow
Hello! Another week of vegetation is behind us 💪🤪 this week I did LST and Defoliations on all plants. Unfortunately, while bending one of the plants, I broke a branch. Although it heals, I made a mistake that is worth noting. I have to be more careful when working with the plants. The photos show how the plants are bent. Due to the differences in plant sizes, I decided to extend the growing season by one week. Next week I'll be focusing on branching down and observing. I will do the next defoliation in the first weeks of flowering. Greetings to everyone !!
Likes
22
Share

@The_Holy_Herb
Follow
Hello to everybody, we are at the end finally.
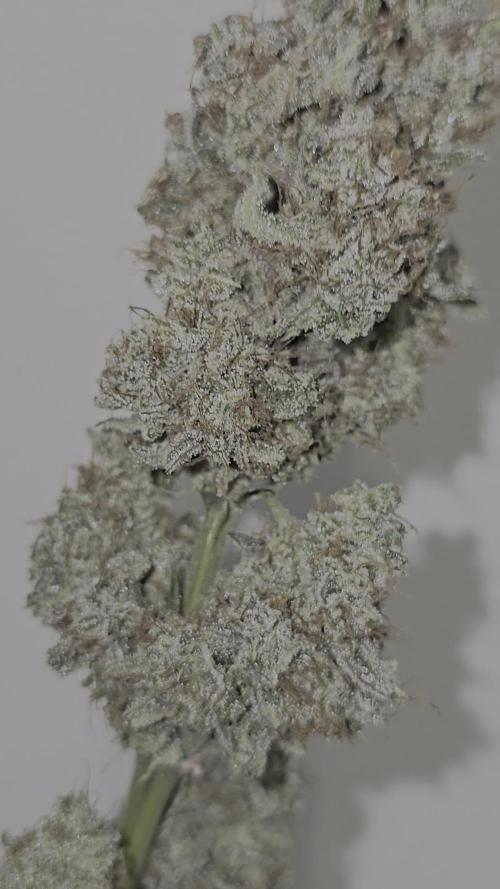
The plant gave me 29.2 gr of dry flowers. Not a bad result for such a little plant.
Overall was quite easy to grow it, no major problems.
The smell is truly amazing!
The main buds are thick af but the little ones are very airy and empty.
My target was 30 grams so im super happy of the results.
The plant dried for 10 days and today after dry trimming the material was jarred together with some Boveda 2-way humidity pack. At 62%.
I believe i dried a little bit too much my buds unfortunately, let's hope the pack will mitigate a lil the issue.
Overall im satisfied, now the buds will cure for about 1 month or 2 and then I will smoke the shit out of it ahahhaha.
Today I will smoke my first gram not cured, I saved 2 grams for a trial.
I will smoke one gram in the joint and one gram inside the Volcano. I really want to try it properly.
Thanks for the company on this journey. Now full focus on my new grow. Thanks.
The Holy Herb.
Likes
Comments
Share
@Wierie
Follow
Day 45
Good day frens...
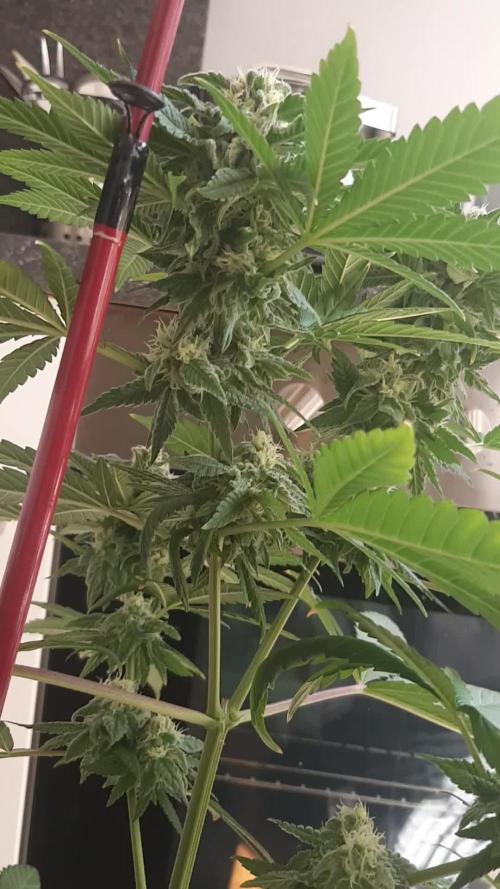
I think i had gave a bit to much nutes lol
She was not drinkin a lot and she turned a bit light green here and there...
I let her dry out for a couple days and she is fine again..
She is starting to add weight puffing up nice here and there..
We have some good weather this week so she will be verry happy...
Other then that nothin has changed ...
Have a look 👍🌴
Good day ladys and gents

Likes
28
Share


@Roberts
Follow
Melon Gum is not doing so good. I got root rot and she is struggling to finish. It's summer here and really hot. It's hard to keep water temps down. She will likely finish. Just not in all she could do. Thank you Pure Instinto, Spider Farmer, and Athena nutrition. 🤜🏻🤛🏻🌱🌱🌱
Thank you grow diaries community for the 👇likes👇, follows, comments, and subscriptions on my YouTube channel👇.
❄️🌱🍻 Happy Growing 🌱🌱🌱
https://youtube.com/channel/UCAhN7yRzWLpcaRHhMIQ7X4g.

Likes
8
Share


@Hylex
Follow
12.10 Neue Woche und Letzte geplante Vegi Woche danach ist die Blüte geplant Netz ist gespannt Maul schauen wie es läuft.


Likes
24
Share


@DeepRootsGrowTrees
Follow
SWISS DREAM ROSE 🌹 CBD AUTO
KANNABIA SEEDS
Week #10 Overall
Week #7 Flower
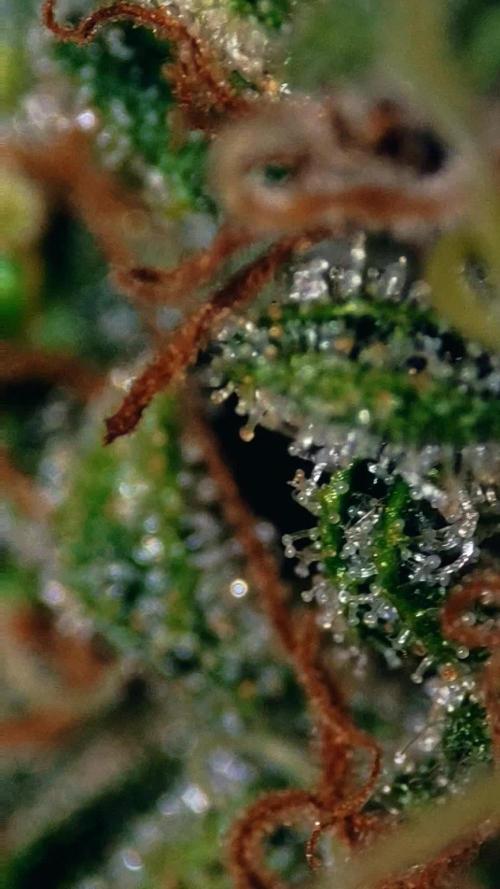
This week she continues to shine ✨️ 😎 her buds are a beautiful purple color then you see the sparkle of the trichomes against her purple buds that have white and orange hairs throughout. Once again another example of the great genetics from KANNABIA SEEDS!!
Honestly just blessed to be growing CBD organic medical marijuana. Thank you to KANNABIA for all the support 🙏!! Additional thank you to FOOP!!


Likes
55
Share


@valiotoro
Follow
FBA2507 Light mix finito✔️BANG
To the guy behind this strain : THANK YOU it's a one-way to the past when I was harvesting peaches in my grandpa's garden👨🏻🌾
Once again the quality of the buds 😳!!!
In coco she s huge🚀
Same feeding + Green Sensation
RoOoOaAaaADDD I've ever been down👻
Take care 💚


