Likes
Comments
Share
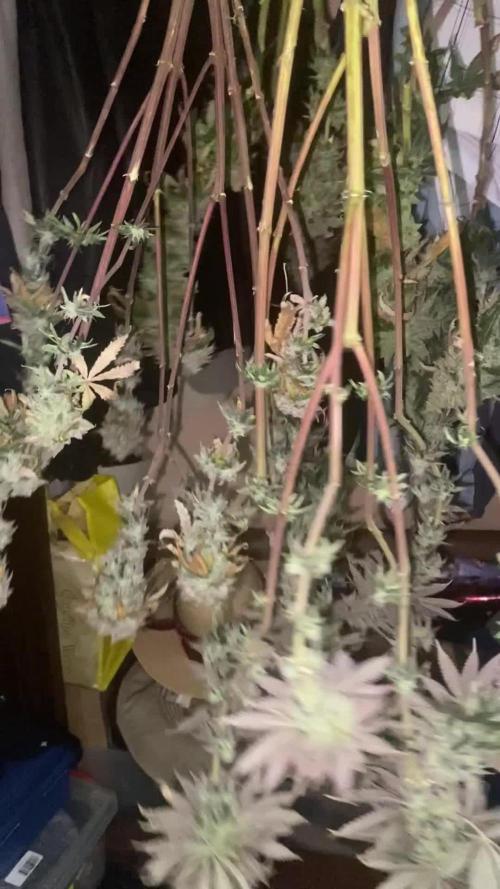
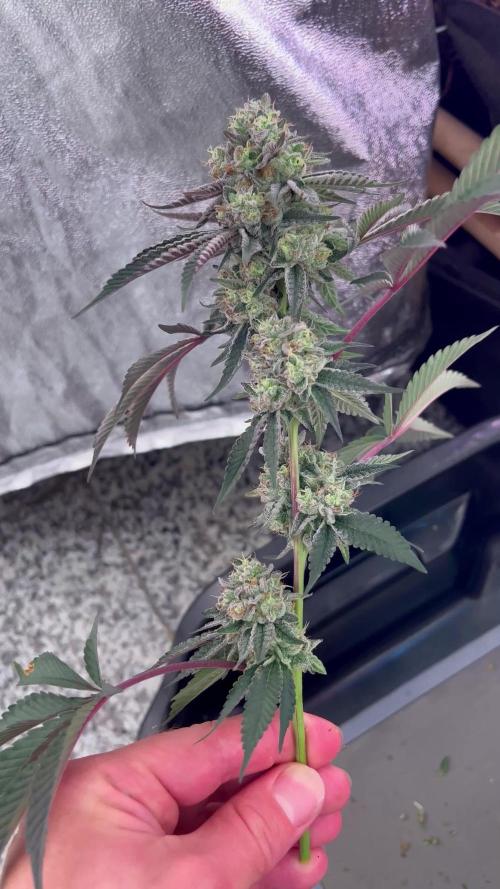
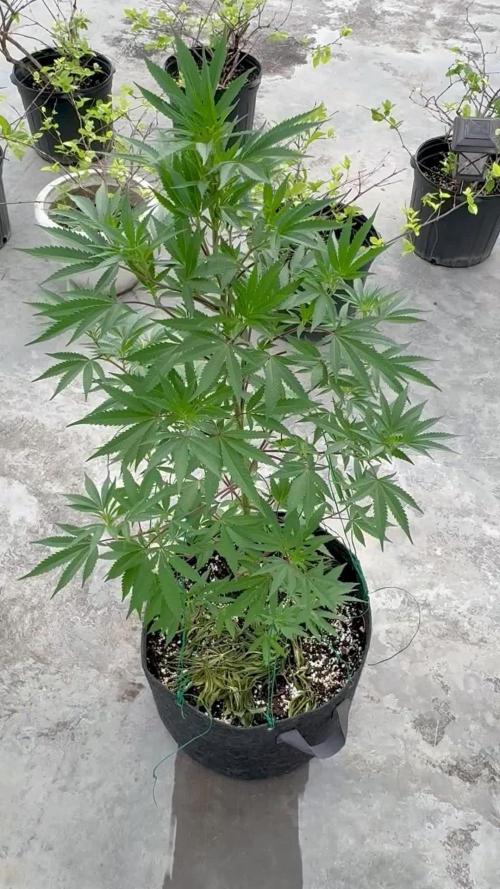
Pretty happy with the outcome so far. This style of growing will not yield the the most or greatest stuff due to all the stress but it's for the looks. And this girl looked awesome. Very happy with this grow and looking forward to doing something else. Think I will do a photo period next so I have more control. Thanks for following!!
Likes
67
Share
Day 83: After being in the dark for like 4-7 days, they where ready to harvest. All plants getting cut by the machine, big buds are cut by hand. I never weight wet buds because that doesnt make any sence. I will update soon on how much it is dry weight. My friend helped me with the harvest since it takes many hours of work. I have many buds that are as big or bigger as my hand. Quallity so far looks promising even thought there are shitty buds as well, but thats normal and oke. They have been cut freshly so I won't lose much weight when cutting. This will happen when cutting dry buds. The remaining small leafs on the wet buds will dry in with the buds and will be barely visible. More info soon.
Likes
14
Share
She’s starting to stretch and flower nicely. I removed a few leaves for better light penetration. On day 29 another small defoliation day 34
Likes
44
Share
@Saint
Follow
Welcome to the first flowering week Day 29 Growth is promising. Day 30 Started with a bad news. Main stem, center, got broken due to lst. Lower rope got released, and it made upper one to snap quickly... I noticed quite late sadly. I gotta admit, it's like tradition that main stem breaks whenever I grow 😂 I still tried to fix it back. I don't know if it's gonna work or not, but Jeffrey was through A LOT, and hopefully she will get through it aswell. I will update photos later today What's most important, hopefully it won't stunt my plant. Update. She seems okay. Day 31 Reviving center top is not working as I see. If it gets worse I will remove the tape and check it out, if no luck, it will be removed. Added 5 liters of fresh water, balanced out pH and added nutrients. Something is telling me I will see difference by tomorrow. Day 32 Added brick under the pot, so when I need to completely drain reservoir, it's gonna be on higher level, which will make the cycle easier. Did some defoliation, and took photos 2-3 hrs later. Center did not survive, so completely removed it. Duct taped the snapped open top. Day 33 All good. She's drinking almost 2 liters +- a day Day 35 So final day of this week. She is bushy. She is drinking like 2.5 liters a day. Quite appetite she got with those PPM-s 😀 I didn't defoliate much this week, but I will make a good one next week. I have no idea if this lights I am using gonna be enough or not. Let's see, maybe I can get her additional 240 watts? Let's see ❤️☘️
Likes
9
Share
@GrowerGaz
Follow
So I have started the plant in a rockwool cube. Updates to follow
Likes
2
Share
Black Jack nació en el año 2006, junto con la aparición al mercado del banco Sweet Seeds, de nacionalidad española. Al comprender dos mundos extrañamente dispares, conseguiremos una planta muy estable y homogénea, ideal para aquellos que cultivadores amantes de híbridos poco ramificados. Esta cepa marcó un antes y un después ya que el poder de la Black Domina se puede notar sobre todo en la sensación física ofrecida. Surgen de ella dos fenotipos claramente dispares, ya que uno tiene a la Black Domina con su resinado extremo y el otro se alarga bastante en altura dando un aspecto de Jack Herer
Processing
Likes
9
Share
Gelato been really glowing these last few days. :) just bent her over today and stretched out the lower arms. I'll leave it like this for awhile eventually the arms will all go upwards towards the light along with the main cola to make and even canopy. Or atleast longer arms has worked many times in the past. Check out my blue dream by fast buds I'f you havent :) Update on day 24/25 mid week she been blowing up lately nice size fan leaves going be a nice indica dom for sure :) bent over just like Colorado cookies:) again all ppms had be bumped up close to thousand bitches are hungry this round:)
Likes
Comments
Share
@Arthur99
Follow
Installation et essai de la tente de culture.
Likes
6
Share
@jkadabra
Follow
Esta semana le encontré araña roja, cómo está en prefloracion apliqué fórmula antiacaros
Likes
Comments
Share
Things have been cruising along at this point. Clones have been taken. I’m about ready to put them in 5 gallons and flower them out.
Likes
16
Share
“The Thrown” which is my tallest plant gave me some issues this week due to the fact that I had to suppress the plant because of the height. Broke a few branches that I had to tape up which is not a problem. I break branches on the regular around here purposely for growth 😈. Heavy rain this week, so I had to watch out for humidity issues, which I took care of. On top of that my basement flooded, had to break out the water pump. This transition week i’m glad I was able to have more time at home to monitor my plants. Hey guys sorry I’m not on here all the time if you like more pictures follow me on my Instagram a bigbankbossshit. I believe the link is at the top. They are about to be some really awesome pictures I’m hoping in the near future. With the six strains I’m sure to Jane some awesome pictures. So follow me on Instagram.
Likes
7
Share
These girls are impressive! There in 485ml pots (solos) and have grown to an impressive 24” the flowers are developing famously and can see fft7 has fades coming through on the leaves so expecting some flavours on her! She also has one main stem shorter than the other by a considerable amount! As for fft10-11 they both have great structure and have even tops and the flowers are developing with finesse! Loved all these testers can’t wait for the release so I know what strains they are!
Processing
Likes
12
Share
@Piablo
Follow
Lessons learned from week 1 of my first grow so far: the best watering solution I found so far is a mix of distilled water from the store and filtered tap water. with a final ph of 6 and ppm of 20-40. a little ph buffer goes a bloody long way. Use with caution. performing tasks like mixing solution and potting a germinated seed are best performed without a phone (camera) in one hand. the seed germinated within 24 hours using paper towels. I planted after 36 hours. After 24 hours of potting, the stem was already shooting up, and I turned on the lights, set to an 18 hour schedule. I wasn't quite ready for this, so it took me some time to research and get the desired humidity and temperature. At this point I added more nutrient in even quantities of FloraGro, FloraMicro, and FloraBloom, according to instructions. Perhaps a little early though, although after just one 18 hour light cycle this plant is shooting up like a rocket and showing leaves. I bought a fan for the inside of the tent and propped it up on a box, and a humidifier to bring the humidity from 40-50% to around 70%. Since it's a winter grow, I have to periodically increase the temperature to keep it at 25 °C. The intake fan, humidifier, and inside fan are significantly lowering the temperature. I'm also experimenting with finding the right humidifier settings since the humidity seems to increase a lot when the lights go out, and the machine is still new.
Likes
2
Share
@Aleks555
Follow
⚠️ MOMENT OF IMPACT — RUSSIAN SHAHEED DRONE HIT OUR APARTMENT ⚠️ Hello everyone. Please watch the video until the end. The footage captures the exact moment of the explosion and the aftermath inside and outside of our apartment. We survived by pure miracle. 🔊 Watch with sound on. ⚠️ Warning: the video contains strong language and distressing scenes.
Likes
38
Share
Utopia Haze is a rare heavily sativa dominant hybrid (90% sativa/10% indica) strain created through back crossing Brazilian Sativa strains. This tasty little bud took home 1st Place for Best Sativa in the 2008 High Times’ Cannabis Cup and for good reason – with its potent 18-22% average THC level and long lasting cerebral effects, Utopia Haze is one powerhouse smoke. The Utopia Haze high comes on soon after you finish your first toke, hitting you with a strong cerebral lift that infuses you with a sense of hazy relaxation. Type: Feminised/Photoperiod Cultivation: Indoor/Outdoor Flowering Time (days): 70-75 Indoor Yield (g): Up to 650 Feminised Outdoor Harvest Month: October Feminised Outdoor Harvest Month Week: 3rd-4th week Aroma: Citrus, Woody, Pungent, Mint Effect: Cerebral Lift, Hazy Relaxation, Sleepy Welcome Everyone to the Final Entry of my Utopia Haze Grow ! There is so much to discuss ! I have been extremely busy as of late trying to get this Harvest together, but i am happy to have it here for you now ! I Seriously under estimated the amount of time, help from others, and my own necessary skills to pull this off.. and i still kind of screwed it up lol ! But its worth noting i have never actually done this before and trying to document it during....was extremely hard. It is next to impossible to work an iPhone with rubber gloves on ! First I want to discuss everything step by step so before you jump straight into the comments on how the end product is so small in "quantity" Rest assured i am happy with its"quality"...and thats all that matters to me because Life is a journey not a destination! and i have learned so much from this grow that I couldn't be any happy even if i messed some things up :) But at the very least I hope you read through this entry in its entirety with an open mind and focus more on the process, rather than just the outcome! I ran out of Ice & i was only able to wash three times..(normally I've heard you should go sometimes 5-6 washes) Preparation is Key & things will be much better next round :) Photos 1-22 These are pretty self explanatory but for those of you just tuning in now.. this is what happens to a very happy plant when you don't have the necessary tools to monitor key components of growing cannabis.. Ph, as well as EC levels play a very key role in the outcome of your grow lol that being said I was just able to save this plant by purchasing both tools but that doesn't mean the plant didn't suffer because of the prior events.. This was a Huge reason behind me choosing to turn this harvest into what i would consider "Solventless Hash Rosin" from "Ice water extracted Bubble hash". Pictures 23 The idea here is the process of using "fresh Frozen Cannabis" this has been discussed many a time online on such sites as instagram and here on grow diaries as well.. I personally have Never tried the process so i decided to try it out and make a judgement for myself.. Video 24 The Cannabis has now been in the freezer for 72 hours making it very well frozen.. as you can tell i struggled getting it all into the 25u Screen Wash Bag. One thing of note i would do differently is i will de-stem my next batch as i also believe this played a part in the amount of plant matter that escaped through the sieves. Photo/Video's 25-28 The idea here is "ice water Seiving" & especially with the bags that I am using here that are only have screen material on the bottom portion of the bag it is very important to have spaces in-between the screens to allow the water to pass directly through the screens into the bottom bucket with the least amount of resistance.. because the hash is so extremely temperature dependant if it gets warm on the side of the bag.. it will stick there and not make it to the bottom to become use able product.. 29 You do not need to use as much Ice as i used here lol... the idea is to keep everything very cold..i certainly achieved that but at the sacrifice of using so much that i ended up grinding product and producing "contaminants" but in the end they are just plant matter that i would be smoking when i rolled up my joint either way so.. I'm not super disappointed.. But it should be noted that what you want to achieve here is a Layering effect where you have the wash bag between two small layers of ice while the "water current" washes the Trichomes away allowing them to be separated by the screens setup below :) Before Starting the machine you should allow some time (i.e.;10-12minutes pre soak to allow the product to become saturated) before the first cycle. By video 32 I have just ran out of ice lol.. Video 33-34 Here I have a tip for you.. to separate the screens that you sieve through.. cut 5 gallon buckets to stretch them across nice and tight.. it'll make scooping your Bubble that much easier ! i learned this from the many "Frenchy" videos I have watched :) Picture 35 Here in lays the problem for most people.. drying your hash without loosing vast amounts of "Terpenes" whilst also stay ever vigilant against mold ! Thanks to all those videos I've watched on youtube.. id like to think this was one of my most successful parts of this process.. Things to Note; Terpenes start to seriously evaporate at temperatures 68F or 20C you need to stay as cold as possible whilst bringing the Relative Humidity in the space down into the 40-30% to stay away from that nasty mold ! I used my cold storage room in the basement.. with a dehumidifier running to keep the space at 45% RH & staying at a constant 15c. All while spreading the hash as thin as possible across parchment paper, on top of the white screens with a fan moving air across both sides of the paper. Pictures 36-38 These are some macros i took in the middle of my drying session I fell in love with the colour. Yes i know the black spots are plant material but they will get caught when i bag the hash & squish the oil out. Thing to Note; at this stage it is important to ensure you 'micro plane" the hash down as fine as you can whilst staying weary of the temperature... any "chunks" will hold pockets of moisture.. that lead to potential problems..ie; mold ... Picture/Video 39-41 Successfully planed bubble hash ready to be bagged and Squished ! Picture 42 Ive decided to follow Pedro.. from Pedros Grow Room and double bag to be on the safe side so i don't have any blow outs. So thats One 25u bag inside one 160u bag ! :) Pictures 43 This is almost 3 grams of the bubble hash from above, already melting in the bag.. this is where i ran into trouble again lol things started getting to warm in the house and i was only able to get one of the three squish's i did on video :( things started getting sticky. Picture 44 This is basically just a photo of the equipment I'm using; 3x5 LowTemp Cage in the frame I built myself, with a 20Ton bottle jack. Something to note here is this is an older Lowtemp model with only a single heating zone which is which i have it closed here heating Both sides of the press :) As well as the importance of having adequate pressure on your plates.. my rig is very overkill for the size of hash bags..lol Video 45 Here is the lovely press video.. its didn't quite work the way i wanted either lol my directional folding wasn't quite tight enough for a big "drip" :) &the Press was set to 65°c Photo's 46-50 are pretty self explanatory :) I had a blow out.. but still managed to pull an 80% return from the hash once squished...& yes it tasted amazing :) Was it worth it in the end... that could be debated.. for some..i understand..its not your thing, but for those of us that are interested in making our own concentrates.. free from Solvents... I wouldn't make it any other way :) If even ONE of you reading this diary finds it helpful to reference for ANYTHING.....even if its "what not to do" ill consider it a success ! Thanks again for tagging along on this garden adventure.. its been one heck of a journey ! Much Love from B.C. Canada, Until Next time, Cariboo
Likes
53
Share
@buddha61
Follow
7/29 - Week 9 of veg is starting. At this point, it is just let them grow up a few inches, and also fill out the pots some more with roots before transplanting to 5 gallon fabric pots (their final homes). I also plan on mixing a 'flower blend' soil to fill up the 5g pot around the rootball that is transplanted. This recipe for the soil is taken from MaximumYield: Enhanced fruit/flower potting soil recipe This soil recipe is designed for plants that are ready to fruit or flower. In particular, this recipe works great for ornamentals that are already in bloom and for fast-growing annuals that are entering their fruiting or flowering stage. Parenthesis indicate small changes or products I'm using. 1/2 cu. ft. (60 cups) sphagnum peat moss (Promix BX) 1/4 cu. ft. (30 cups) coco coir (Mother Earth Coco Peat) 1/4 cu. ft. (30 cups) compost (either compost or manure) 1/4 cu. ft. (30 cups) perlite 10 cups pumice (likely to just use perlite here) 5 cups worm castings 3 cups bat guano (high phosphorus) 1 cup fish bone meal (using regular bone meal, got Jobe's Bone Meal) 1 cup oyster shell 1/2 cup seabird guano (likely to just add as the high phosporous guano) 1/4 cup alfalfa meal 1/4 cup fish meal (Down to Earth Fish Meal) 2 tbsp. langbeinite (Down to Earth Langeinite) 1 tbsp. glacier rock dust (Azomite ordered from Amazon) 7/30 - While technically the morning of 7/31, lights haven't gone out yet, so it is still the 30th ;) It almost hurts posting pictures today, because they were really thirsty, but I honestly hadn't looked at them for a couple days. Anywho, the plants were watered with ~1.25 liters of water each, about 90 minutes before lights out. Will be interesting to post the 7/31 photos after a couple hours of lights on, and see the difference in appearance. I also mixed the soil for flowering, and it will now have a couple weeks to 'cook' and become ready for the plants. I did make a mistake and accidentally added 1 cup of fish meal instead of 1/4 cup (oops), and the alfalfa meal just smelled too good, so I added 1/2 cup instead of 1/4. Hopefully those 2 'changes' don't add too much nitrogen for flower, but I imagine it won't. I also instead of adding perlite (didn't want to buy a 4 cu ft bag when I needed at most 2.5 gallons (1/3 cu ft), so I opted to add 1 gallon of pumice. Since the coco peat and promix both have perlite in them, I didn't want too much added. There were also some worms from the compost that made it into the tote that is now storing the mix, so life has already started in the soil. 7/31 - It wasn't just after lights on, as I didn't have time to photo earlier, but this is just about 24 hours after watering, and praying/looking good. I had noticed that it looked like the fan had slipped down the pole a bit, and was causing some wind burn/clawing of the leaves yesterday, which probably attributed to poor looks, but looking better today! I am not that versed in checking preflowers, though I know the difference for sure once flowering starts, but it appears both of these may be ladies! 8/4 - After getting home from work, and realizing I hadn't checked on the plants in a couple days and I knew they were due for water either yesterday or today, I saw some THIRSTY plants. They each got ~1.2L of water, and also a quick trim back. Also, as shown in the pictures, and while still under 18/6 light, DC#2 has developed balls, and is definitely a male. I have been contemplating growing any males out for pollen, but that just might be further down the road for me. He will likely get the plug soon. On the plus side, DC#1 definitely has hairs!
Likes
9
Share
Per me è stata la prima esperienza nella vita nel mondo della coltivazione di cannabis. E si sono soddisfatto e molto contento. Mi sono divertito, acculturato, e ho cresciuto in me una passione. E spero un giorno un lavoro. La mia vita. È una soddisfazione enorme avere il tuo prodotto fatto da te e basta. Non dover fare soldi alle mafie. La zkittlez x og lo scelta perché fumandola a Barcellona mi ci ero innamorato e quindi ho detto faccio questa. La pianta e cresciuta con molta calma però appena è entrata in fioritura è esplosa ahaha è diventata quello che avete visto. Ho imparato molto bene e sto imparando sempre di più per le prossime coltivazioni. Ho adottato l’LST per motivi di visuale dei vicini così restava bassa e compatta ma devo dire che avendolo fatto la prima volta sia venuto molto bene. Devo dire che sono estremamente felice e con ansia aspetterò il mio box da 4 piante Saluti e buoni coltivazioni a tutti 💚
Likes
7
Share
@MrPott
Follow
Trying out another sativa. Hopefully more luck this time around. Things are looking much better than the previous ones (Selena and Halle Berry). Let's hope for the best!