


Likes
Comments
Share


@UrbanFog
Follow
Plants continued to grow well some plants show signs of nutrient deficiencies, trying to address it without burning all the other plants.
But besides that all looks good and we ready to flip to flower. 12/12 cycle to start.
Clones looking strong and ready to be replanted as mothers for the next batch of clones / SOG





Likes
7
Share


@ChitownCannaChica
Follow
Just trying to keep it watered! Dries out very quickly! Been a hard one to stay on top of! ✌️💚🌿💨

Likes
10
Share

@JoExotic
Follow
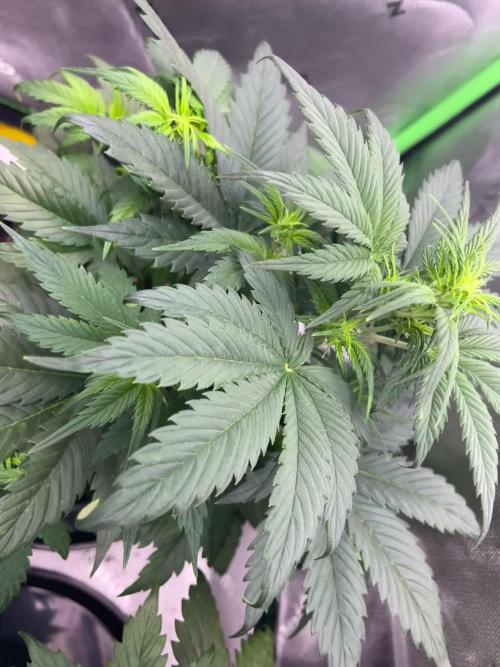
Week 5 - This strain remains a mystery not to sure if my CalMag was too low or the temp was getting to cold ! Temps were in between 60-70 this week. Other seem sensitive to nutes while others lack nutrients. I have no idea what the trifecta plant is doing at this point seems to be all over the place. I watered each plant with .5ml CalMag to half gallon. I’ll see how they respond and update next week.
Likes
22
Share


@DeepRootsGrowTrees
Follow
GSC BY KANNABIA
WEEK #18 March 15th-22nd
Week #8 Flower
This week she is looking good. Buds continue to gain weight with a tight bud structure that is covered with trichomes.

Likes
9
Share

@PPFDaddy
Follow
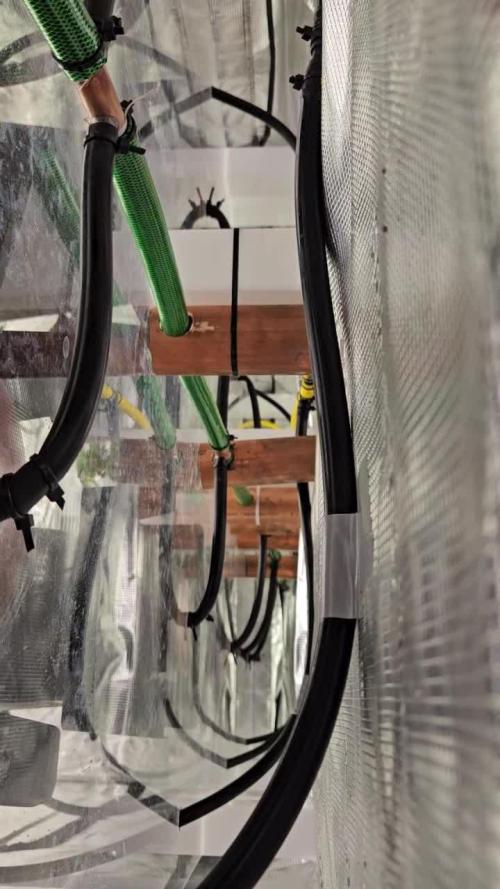
Hey Growers! The girls have officially packed their bags and moved into a much fancier place.
The new setup comes loaded with perks: an automated controller that keeps the environment dialed in 24/7, managing every device so the VPD stays exactly where it should be (because apparently plants are picky like that). Drainage? Automated. Irrigation? Also automated. Basically, the grow room is now smarter than most of us on a Monday morning.
Thanks to multi-frequency fertirrigation, the girls are getting up to 6 daily watering cycles, keeping the substrate pH stable and nutrient-ready at all times. Less babysitting for me, more thriving for them: a deal I'm very happy to sign.
Now, onto the Mental Rainbows, and things are finally looking up. After slightly bumping up the Calmag base to 0.6 EC and doubling the daily watering frequency, something seems to have clicked. The new growth is no longer twisted and curled, and honestly, that's enough to give me hope. Now that I'm pushing irrigation up to 6 times a day, I can only expect things to keep improving.
A few of the smaller, slimmer plants don't seem to have developed a main cola: their internodes are all growing at roughly the same pace. So while I'll be topping the bigger, more advanced girls that do have a clear main shoot, I might skip the topping on the slimmer ones and let them take their time catching up in height instead. No point rushing what doesn't need rushing.
That said, even though these plants had a bit of a rocky start (likely due to a slightly more delicate genetics), I'm still very confident in them. As proven in my last run, plants that struggled early on ended up delivering even better results than the ones that looked bulletproof from day one. So, as they say: never judge a book by its cover, or in this case, by its baby seedling! 🌱
Tips, tricks, and roasts are always welcome. Happy growing everyone!

Likes
12
Share


@Jays_Not_Here_Man
Follow
Temps have been good and RH has been steady between 60-65%. I have good airflow all around and don’t worry too much about it the higher RH at this point in the grow. Transplanted the ladies from their starter pots to their 2 gallon pots. They did not seem to have any transplant shock. A few more weeks and we will go to their 4 gallon final pots.

Likes
4
Share


@Cannabot
Follow
So they've switched over to flowering,the one ak doing very well,I'm happy.The lil runt is growing ,who knows maybe she turns out decent,only time will tell.Carrying on with lst

Likes
11
Share


@TherealNICOGREEN
Follow
Alle 3 vokser som de skal, jeg har valgt tage en i 12/12 telt:) og en 18-6 telt:) og den 3 er i 18-6 telt også men , er i en 3.5liter potte. Også ser vi på forskellen igen om en 5-7 dage :) Jeg er SIKKER PÅ DEN I 12-12 telt giver størst uds men mindst ud bytte! Og om vendt ved 18-6. Timer! Håber i nyder at følge med og godt nytår husk NU DE SMP BANGE DYR ! Og HINDANDEN OG JER SELV OG LAD NU VÆRE TÆNDE KRUDT MED JERES JOINTS DET SMADER DEN BARE;) JEG taler DESVÆRRE AF EFARING ;)

Processing
Likes
11
Share


@ganjaman24
Follow
It’s bern roughly two months these guys have been growing! Lst’d Both but untied the gg because I wasn’t sure she was benefiting from it so I’m going to do it over. These ladies (I hope) will start their flower journey next week when I revive my new flower tent 😎..stay tuned for some epic buds..I hope!!

Likes
9
Share


@Dark_Shadow_420
Follow
Fue una exelente cosecha, esta planta en un principio se tuvo en imddor y posteriormente sacada al exterior. Es mi primera experiencia plantando en suelo.
La planta llego a un gran tamaño de la cual se cosechó una gran cantidad superando la cantidad promedio.

Likes
2
Share


@jardinprimitivo
Follow
El sabado 7 arranca una nueva semana de vegetativo, las plantas crecen con vigor, la Ztrawberry esta mas bajita que las Full Gas.
Se esta regando solo con 2 litros de agua con ph 6.3 dia por medio solamente para mantener la humedad.
10/9 Se aplica poda apical a todas las puntas y se retiran hojas que tapen la luz.


Likes
28
Share


@Ferenc
Follow
Day 58, 7th of November 2020:
The 6th day since the lamp switched to be 12/12...
I raised up the nutrition intake as it can be seen above only the BioBizz family 2ml/l and removed some LST because the plant remains in shape or just set a bit but nothing significant....
Amazing really really beautiful lady this one....strech is on the way..... 😅
Nice smell Inreally like this strong stable genetics.
Nothing really to report there is crazy 2-3 weeks from now ;)
;)

Likes
109
Share


@Prototype0181
Follow
Flipped on 17-7 to flower🌺 and the first issue came 🤷 the sativa dom cookie ( stretchy girl ) couldnt handle the feed and got a little burned, nothing to bad. She's going on a water only diet next two rounds.


Likes
32
Share


@Doubleb84
Follow
Great week again with this plant! Going to let her go as long as she takes, waiting for a little more amber in the trichomes.

Likes
8
Share


@The_Good_Twin
Follow
7/3/22
I was a little rushed today, and didn’t have the chance to take any new pics for todays log entry. 🤷 It’s not like I’m not going to add a bunch more photos later in the week.
This week we’re starting with the Mid-Bloom, step 3 nutrients on our feed chart. I mixed two separate gallons to feed my 4 girls as usual.
Each plant received half a gallon of water with the following:
CALiMAGic - 2 ml
FloraMicro - 4.7 ml
FloraGro - 3.8 ml
FloraBloom - 8.5 ml
Floralicious Plus - 2 ml
Liquid KoolBloom - 2 ml
Each of the 2 gallons had a pH of 6.4, and wasn’t adjusted. My tap water has been exceptional lately!
Each of the plants had plenty of runoff with the following pH level:
#1 & #3 - 5.9.
#2 - 6.1.
#4 - 5.8
My girls are super tall, and have bodes all over the place. They are all developing nice pistils everywhere, and should each yield quite a bit. I’m looking forward to watching them mature!
Happy 4th of July to all of you in the USA 🇺🇸! Independence Day!!
Happy growing everyone!
7/5/22
These 4 Ladies are going to be the death of me, I swear!
I know you all HAVE to be sick of reading about their growth, but damn! These bitches could be super models!
I last measured them on 6/29/22, and was astounded then by their growth. Now, I’m just blown away. Since 6/29/22:
#1 has grown 12 inches, and is now 55 inches tall.
#2 has grown 11.5 inches, and is now 54 inches tall.
#3 - 12.5 inches, now 49 inches tall.
#4 - 14.5 inches, now 51.5 inches tall.
I had to do some mild LST today. I tied a bunch of the branches on #1 & #2 today. Loosely, but closer in in order to improve stability, and open up space in my tent.
Some of their branches have become so long that they are being pulled apart by gravity. I used some rubber coated, malleable metal poles to tie loose circles around branches, and then wrap the other end around the other branches on the opposite side. I also defoliated #1 & #2.
It’s not pretty, but it seemed to work. I need to do the same to the other two, but time, and supplies didn’t cooperate.
Enough about the maintenance. Let’s get to the feeding.
We’re keeping with the mid-bloom nutrients mixed into a pair of gallons full of water.
The pH of both gallons measured at 6.4. #1&2 share 1 gallon, and #3&4 share the other.
Each gave back plenty of runoff with the following pH levels.
#1 - 5.9
#2 - 6.1
#3 - 6.0
#4 - 5.8
The tent was 83F, with humidity at 65%. I’m hoping the adjusted fan helps with the humidity, and I also hope my girls react well to being tied up.
Happy growing everyone!
7/7/22
Today, Stella’s Cuatro ended up getting the same treatment as their mother. Each of them were the recipient of some serious High Stress Training (HST). All of them have super long branches that were making them almost unmanageable, so I got to taping and bending branches today until nearly all of their branches had been bent over 90*. Sorry for the asterisk, but I didn’t have a degree icon to use.
Bending their branches made space in the tent to some degree as well. They don’t look so crowded anymore, but later on I’m going to have the same issues that I’m having with their mother now. Branch weight!
It seems silly to complain about all the time, but damn they are all huge plants!
I know that some of you may be thinking that you’d probably rather stay away from this cultivar, but that would be a mistake.
I bitch, and moan a lot about these plants, but regardless of the headaches they give me, they are still absolutely wonderful plants. They grow strong and healthy regardless of what I do to them. They develop ginormous buds, and the effects of this cultivar are still my all time favorite.
They are resilient giants that produce a lot of bud! The first cultivar I ever grew was this one, DarkStar, and 1 plant produced almost half a pound of top shelf bud after everything was dried and jarred up. I’m looking forward to another wonderful haul from these 4, their mother, and another 2 younger siblings.”
Each plant received 1/2 gallon of solution with a pH of 6.5. Each has sufficient runoff except #3. She didn’t have any runoff. The others were as follows:
#1 & 4 - 5.8
#2 - 6.0.
The tent was 83.3F, and humidity was 56%.
Life is good. Happy growing everyone!

Likes
8
Share

@StonedSteve
Follow
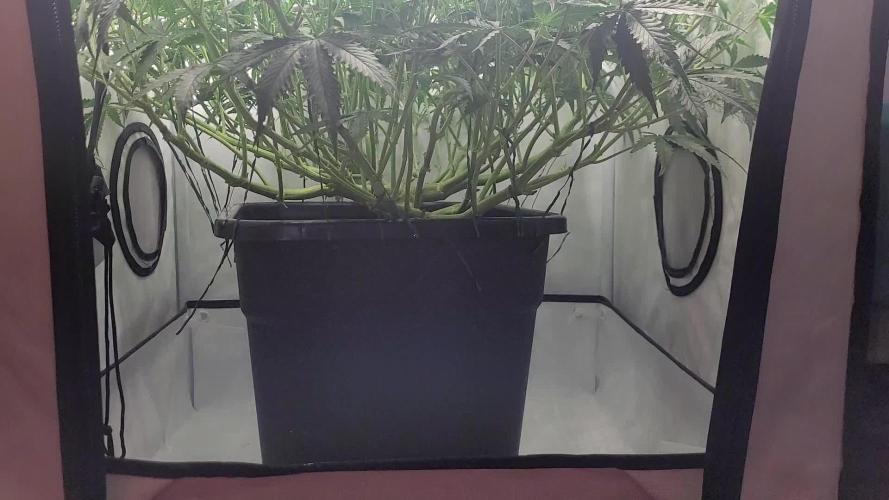
Today's last 5 liter watering. I will have to increase it to 7 liters.

Likes
17
Share


@Hoodoo
Follow
2020-06-13 Going heavier on nutrients now, I went too high with my initial amount. After pH, it was a whopping EC=2200!! Too much for these ones. I had to dilute this weeks nutrition down, so I have to estimate the nutrition levels as I had to add water and pH it. I started with a whopping 7.6 mL/Liter but probably ended up with about 6.5 mL/gallonI EC=1800/ now keep calimagic constant at 3.79 mL/gallon to help buffer the solution and keep the solution stable. The additional calimagic has stopped the spread of the rust spots and new leaves are a lighter green and have stopped turning dark! Success.
2020-06-14 Thinking about doing the last topping and LST session this week and then transitioning to bloom. Thoughts on that? I have them on a 'transition feed' right now that is very nutrient dense! Started about 950 ppm for the healthier looking plant. The 2nd plant is still getting slightly less nutrients but the magnesium deficiency hasn't appeared in the newest growth.
Roots are growing crazy amounts every day! You can see that the 2nd bucket plant started making tons of roots out of the side of the bucket again. Nice to see the bounce back once given adequate nutrition. I have reduced expectations for that plant but it was definitely a lesson in how to prepare and interpret feeding schedules AND how your plant is reacting to them.
2020-06-15 Did some light defoliating today, removing a lot of the lower fan leaves and sucker branches/growth tips... Going to veg for the rest of the week and then change both over to flower.
2020-06 19 Day before nutrient change, they are growing too fast now!! ahhhh!!
2020-06-20 Day of nutrient change! Took them out of the grow tent while I swapped out the buckets.


Likes
8
Share


@Appoldro420
Follow
Today, I spent some time tying down branches under the net again. It’s still a tricky task as the branches are quite brittle and break easily. Fortunately, the plants recover quickly, and so far, I’ve mainly noticed new growth sprouting from where the branches broke.
Watering Experiment: Too Much or Just Right?
Two days ago, I decided to give each plant an additional 2 liters of water to test the effects of what felt like overwatering. The results were interesting:
High Humidity: The relative humidity spiked to 74%, which I consider a minor downside.
Lower Temperature: Dropped to 29°C.
Explosive Growth: The plants responded with vigorous growth!
Given the humidity increase, I’ve decided to water the plants heavily only once a week. This approach should give them time to rest and prevent the growth of more mushrooms in the soil—yes, I’ve spotted a few popping up from the pot’s surface.
Monitoring pH and Nutrient Reservoir
I’ve also noticed that the pH has crept up to 6.2, indicating that the nutrient water hardness is decreasing. This suggests it might be time for a full reservoir refresh. Tonight, I plan to inspect the reservoir and clean it out. Thankfully, my hydro pump makes draining it a quick and easy process.
Observations & Next Steps
Continue training and monitoring branch recovery.
Stick to the adjusted watering schedule.
Refresh the nutrient reservoir and recalibrate the pH if needed.
The grow is progressing nicely, and the plants seem happy despite some of the challenges. Let’s keep it going! 🌱
Cheers
30/11: Added some pictures, not to much to say because I didn't look at them the last 2 days and they just went crazy..
01/01/25:
Happy New year!!
Leaving them alone is not an option... If they keep growing like this, I'll take it! This weekend, I'll do some heavy pruning. For now, I’ve snapped a few stems and tied some others to see which method gives better results. I’ve done about half so far, but I need to head to bed because of work. Tomorrow evening, I’ll tackle the other half. Also, I’ll look for some more subtle zip ties.


