
Likes
Comments
Share


@Roberts
Follow
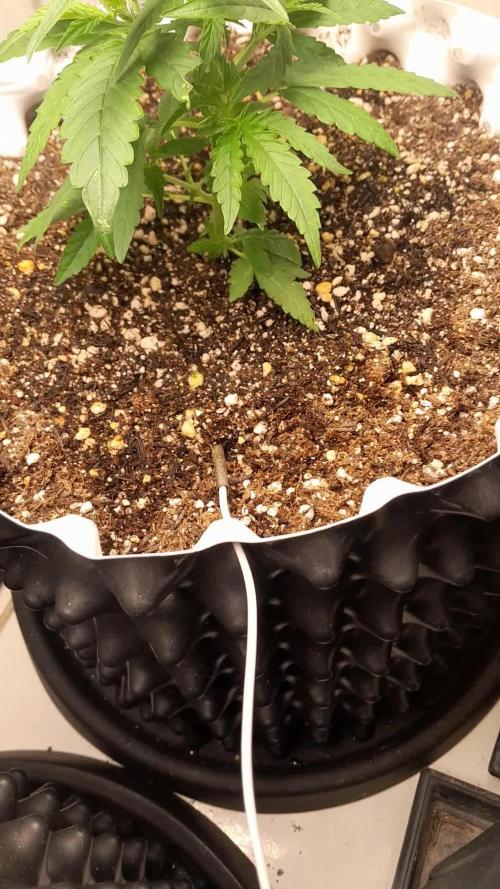
G13 auto appears to be doing good beside the slight leaf damage from the neem oil spray. I had russet mites in a grow space 2 over. So I treated everything that was in vegging. I would rather have a little leaf damage for a moment, and have a better chance of being a successful grow. The new growth looks fine. She is under the Medic Grow Mini Sun 2. Thank you Medic Grow, and Weed Seeds Express. 🤜🏻🤛🏻🌱🌱🌱
Thank you grow diaries community for the 👇likes👇, follows, comments, and subscriptions on my YouTube channel👇. ❄️🌱🍻
Happy Growing 🌱🌱🌱
https://youtube.com/channel/UCAhN7yRzWLpcaRHhMIQ7X4g

Processing
Likes
13
Share


@Cheesefarmer420
Follow
This plant has a solid stench of pure ripe lemons. So much aroma and color in every bud, purples, to dark green, to lime green, to solid frost. This one definitely a fun strain to watch grow and tend too for the last few months. She’s definitely a hungry girl, seemed to be the only strain out of the three that accepted and thrived with full feed nutrients. Would definitely recommend this Strain to someone For a nice uplifting day smoke, also seems to do me good for some pain and stress relief.
Likes
36
Share


@GrumpyOldKev
Follow
As week six comes to an end, plant one is looking really good, very bushy and lots of nodes growing. Where it was topped a week ago there is very healthy growth on the two new shoots and the stem is looking nice and fat, so have decided to start week seven with this plant in LST.
As for plant two, that is starting to look much better. The roots have come out of the bottom of the pot and are crawling down the capilliary matting. They should reach the solution any day now. So for for now this plant is being fed on its own schedule. At least a couple of weeks away from LST though.


Likes
13
Share


@YOUNGSTERBR
Follow
acho que ainda consegui produzir uns tricomas com as correções da água, mas como o estágio da floração já estava bem avançado, as folhas começaram a descolorir muito cedo, tive que colher 3 plantas precocemente, as outras 3 menos vou tentar seguir mais 2 semanas, não estão mostrando tricomas Ambar ainda!

Likes
16
Share


@Mr420
Follow
Scope shows 80% or more cloudy so I decided to chop 596 wet grams was easy to harvest start at 1:00 ended 3:30. Wet trim then when dry I will dry trim to perfection. Got finished dry yield 150grams of nice bud.
Processing
Likes
8
Share


@JaGrowzAuto
Follow
Still having an issue with watering. They don't seem to be drinking as much as I thought... Sometimes it's 36-48 hours between waters, and yes I am watering til a little runoff dribble out.


Likes
202
Share


@CrazyHorse
Follow
Hello my beautiful friends 😊 😊 😊
2nd week arrived and he is here 💪 💪 💪
Girls looks very happy and I am happy with them 🙂
Day 9- like you can see on picture a humidifier was temporarily removed. I have to clean and maintain it, so humidity is low but tomorrow unit going back inside 😇 😇 😇
Please have a beautiful day and I wish you all to have a fantastic Christmas 🎄 ♥️ 🌲

Likes
4
Share


@IndicaVibeMe
Follow
Phenotype #4 & #5 Female plants = Pollinated successfully by brother Phenotype #1 Male
Also mixed this Mystery Purp Male Pollen w/ a Jackpot Seed i found in my weed bag from a Lume Dispensary.
☆First & Probably last time, only found 1 Single Fat seed ☆ Going to ne excited to grow these cultivars. Going to plant immediately the F2 Genetics when seeds are ready for harvest.
Phenotype #4 is mostly sinsemilla
except for the very bottom branch successful pollination by brother Phenotype #1


Likes
5
Share


@DrShotzUK
Follow
Wow well we’re do I start.
Absolute dream to grow
Smelt strong of citrus and oranges , was amazing to smell ,
After just 5 days of drying and 1 week of curing the result was imense.
Absolute knockout weed with an orange taste and a smooth on the throat.
One of the best I’ve taste. Highly recommend
Likes
4
Share


@SamDo
Follow
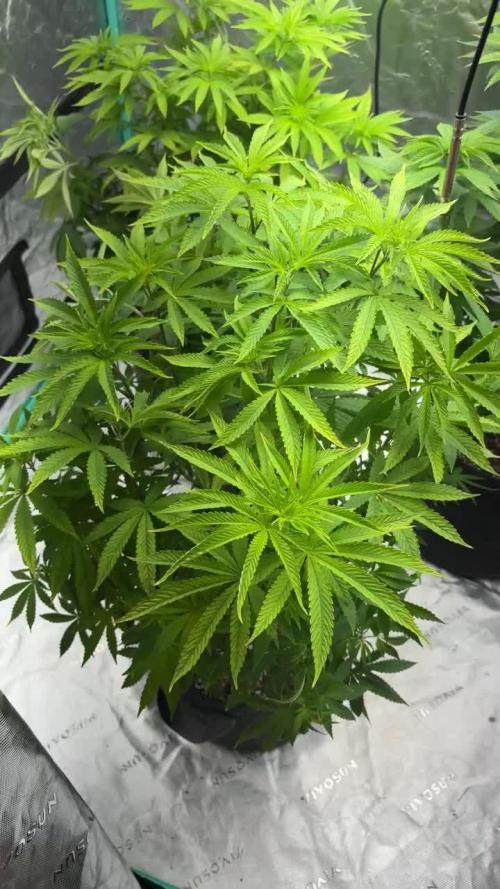
Week 15 of veg for the Pineapple Upside Down — and she’s still cruising!
Nothing dramatic happening, but that’s actually great news. She’s been pushing healthy leaves, good colors, zero stress signs. Nutrients are still on point, temps stable, lighting unchanged — a very chill week in the grow room.
Right now, the goal is to keep her in good shape while we wait for the flower tent to be ready. It should take around 3–4 more weeks before she can move in there and start her real stretch. So I’m thinking about doing one last topping soon — just to keep that structure compact and avoid a skyscraper situation later.
She’s showing that nice balanced growth I like: strong side branches, good spacing, and she reacts really well to training. For now, we just let her enjoy the ride, keep monitoring, and avoid rushing the process.
So yeah — a simple, smooth week. Exactly what we want at this stage.
Next stop: one final haircut (maybe), then a big move to the flower tent soon.
See you in week 16!

Likes
26
Share


@Hawkbo
Follow
Soaked 7.27 for 36ishhrs, into paper towel for 12 hrs then into a solo cup with greentree garden supply pro ultra (coco/perlite). No plan on veg time I dont know when I'll have an open tent for flower but it could be a very quick veg kinda pheno hunt deal. First feed was a diluted leftover feed from my auto youngins. Basically about 1 ml/g of grow, 7ml/g humid acid, 1ml/g more roots, 1ml/g orca, cannazyme, hydroguard and a sprinkle of living organics in the nutes and on the top of the coco. Usually the ppm will be higher than I want it so I just dilute with r/o water until I'm down to 200-250. It makes it so I cant be accurate on ratios so that's why I'm tellin ya, but it's how I always do it no matter what nutes I use.
Processing
Likes
21
Share


@LittleBigTrees
Follow
Switched from 24/0 to 12/12 at the end of day 14, also switched the 730nm Led's on. Its been 7 days the plants have started growing a lot faster but there's still no pistils showing.
I started feeding biobizz grow @ 2ml/l
At the moment there getting watered every 3-4 days.
The light is showing 25000lux on a lux meter app.
Processing
Likes
2
Share


@dubmusicrocks
Follow
One plant looks like it needs cal mag...the one with the biggest bud development so far, actually. the other 2 are doing good. I think these will yield more than the outdoors ones I grew. Humidity has been high, damn basement!!
Likes
54
Share


@RastaGrow
Follow
Сорт 707 проста шок, во время веги при хорошых условиях растение чустаует себя прекрасно . С 1 дня роста проважу много процедур LST Cropping Topping . Что касаеца перевода в цвет ну очень долго переходит жду ужэ 7 дней :)

Likes
2
Share

@Jardineiro_Br
Follow
Planta com uma bela cor verde forte , sem sinais de excesso ou deficiências, encontrei um pequeno gafanhotos que veio junto quando trouxe as plantas do quintal. Já retirei ! Fiz uma leve desfoliação.
Likes
5
Share


@lalee
Follow
hello. this is the first plant I have used big bud and bud candy but I don't test the water and the plant was damaged with high PH so I had to buy a PH meter and TDS meter so wish me luck with other plants


Likes
37
Share


@All_our_small_plants
Follow
Heute ist der 02/07/2025 und es ist Tag 101 der Triple Chesse. Wir habe sie nun Geerntet, alle Triebe tragen sehr Schöne Blüten und diese riechen auch sehr intensiv nach Käse 😁
-Das einzige was uns leider sehr weh tut ist das einer der Haupttriebe, da wo die Mutation ist, die wo wir immer wieder auf den Bilder gezeigt haben, ist leider Blütenfäule entstanden, wir haben ein paar Fotos und ein Video hochgeladen wo man es sehr gut erkennen kann. Das liegt wohl daran das an dieser stelle sich die Großen Buds berührt haben und keine Luft dran Kamm.
-Der Rest der Blüten wurden natürlich auch sehr gut Kontrolliert aber keinen weiteren Schimmel gefunden.
-Wir haben insgesamt 414 Gramm Nassgewicht nach dem Trimmen aber noch die Stängel dran, nun wird alles in das Zelt gehängt und die Luftfeuchtigkeit auf unter 52% getrieben. Und jeden Tag nach Schimmel Kontrollieren.
-Nach der Ernte haben wir die Wurzel mit dem Kompletten erdballen aus dem Topf gezogen wie man auf den Fotos und Video erkennen kann, waren die Wurzel im kompletten Topf Verteilt. Das gibt der Pflanze eine Solide Basis um zu wachsen.

Likes
23
Share


@BarrieGrower
Follow
Plant is darkend up a bit more and more hairs are truning darker. Seems to be ripening up sooner than expected. Smells great and frosty, love it. Seems to slowing down on drinking too.
The humidity in the tent has dropped dramatically, can't say I mind.
I have been watering a bit everyday and not waiting until the plant drys totaly out. Been giving nutrients every watering, seems to need it. Tomorrow I will give it a good soaking and leave it for a few days until I think it needs it. This may be the start of the flush. If I dont see any new hairs grow out in the next few days then its flush time for sure.
Cheers
Processing
Likes
19
Share


@BigBuds95
Follow
Day 56, taller tent I ordered off Amazon is stuck in transit, tops are really starting to turn yellow even with lights at half power(red only), no bud bleaching yet, lower PAR full spectrum cobs should be here tomorrow so ill keep those on her til harvest! Very hardey plant, beautiful purple/violet, with a wonderful fruit diesel gas scent with chocolate undertones