


Processing
Likes
Comments
Share


@swaygrower
Follow
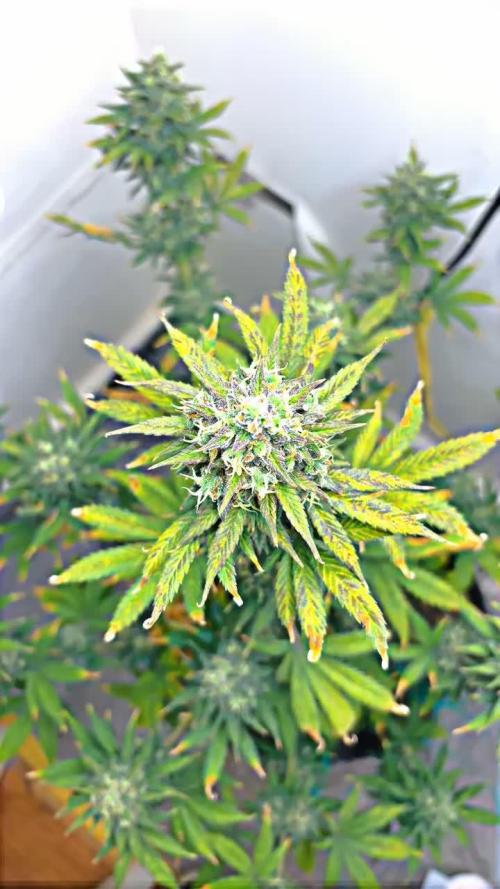
แช่น้ำ 10-12 ชม. และบ่มในทิชชู่ 10-12 ชม. ก็พร้อมลงดิน



Processing
Likes
9
Share


@Kushizlez
Follow
Everything is coming along nicely. I had some major hiccups in early flower that will probably be detrimental to my yield but at least now I know better. The two blackberry breath plants are by far the best plants in the tent. The garlics aren’t filling out like I was hoping they would and the I don’t think the cheese is going to fill out either. Getting some good terps but it’s just so airy. The slurricane looks ridiculously frosty and has some beautiful gas terps but she’s a runt, isn’t going to yield much and the powdery mildew is getting worse. I’m going to rearrange the plants in the tent to see if the pm is being caused by cold night temps or genetics. I gave one last synthetic feed to everything. I might give one more half strength depending on how done they look around day 48. I see some nice purpling and fading start.
I started a new round of seeds for my next run. I’m popping the rest of the blackberry breath’s and some other random beans I had lying around. Check out my other diary if your curious.
I just ordered a 12 pack of gelato 41 x dosido from Archive genetics for $290cad!!! I knew these elite Cali breeders were pricey but come on...

Processing
Likes
62
Share


@DudeGrowsWeed
Follow
Transplanted the girls into larger containers with fresh soil. The soil is a blend of Peat Moss one Perlite. I then mixed some older soil with the new Peat/Perlite blend. After the transplant I watered with Recharge to help get some healthy microbes starting to develop in the soil.
The Baox clones did not make it, I threw them away and started some fresh seeds. The new seeds started are Blackberry, DinaMed and Cherry. It should be interesting to compare how these new seeds develop compared to the seeds that have struggled so far.
I'm hoping to see some nice improvements over the next few weeks. Stay tuned...


Likes
3
Share


@Earthsower
Follow
She has started to move again with no further deficiency so I will continue her draught and see if she improves more!
Likes
2
Share


@Poptart25
Follow
Decided to add all the photos i have currently the timeline of my grow is kinda off im sorry :( im in week 6 at the moment!

Likes
24
Share


@Jays_Not_Here_Man
Follow
Week 7 of Veg for these beautiful Apple Betty ladies! It was a stressful week for the girls but they made it❤️
Day 44 - I decided the girls had outgrown their 2 gallon nursery pots and were ready to move on. After a quick cleanup of the stems close to the base, they were ready to go.
I like to keep my soil in a Rubbermaid bin, either with a fan lightly blowing, or the exhaust line from my tent blowing at it. Since I started doing this, I have not had any gnats or pests in my grows, of course with regular cleanings and IPM…my mix is Promix HP with about 20% worm castings added to it.
This time around, I decided to use some Dynomyco to increase the mycorrhiza count of my Promix HP. This will increase root development by adding all kinds of interconnected webbing and allow for better uptake of nutrients overall. Within an hour or so all of the ladies were transplanted ❤️ x2 in 7 gallon fabric pots, and 1 in a 5 gallon fabric pot ( the 5 gallon will finish in my 2x4 tent)
Once the girls bounce back and take hold of their new forever pot, I will be setting up my custom “floating” SCROG net and allowing them some time to get bent and tucked all nice snug before I flip to a flower schedule. Happy Gardening ❤️🇨🇦🌱😎

Likes
16
Share


@Chocolopeison
Follow
Comenzando la semana 4 de floración y a las nenas le dimos una bienvenida para que comiencen de lleno esta fase de engorde.
Estos día bajamos a 2 riegos por día. Normalmente hacemos 3. Ya a mitad de semana volveremos a los 3 riegos.
A las nenas le sacamos prácticamente toda las hojas de abanico, ahora tenemos muchísima más penetración en la planta. Quizás tengamos problemas de altura pero ya estamos buscando la manera de resolverlo.


Likes
Comments
Share


@jeremyb616
Follow
so i just have a short video, camera isnt working so well, good growth same as last week, should have a better camera as it comes to harvest to show off the ladies better
UPDATE
so like the genius i am i did some math and realized that today is literally the end/start of week 9 so im adding the pics i took last night thinking that it was week 9 pics lol
Likes
1
Share


@GreenLupinCWB
Follow
Planta ficando robusta e gorda com a nova alimentação com plant prod Finisher,muito bom ,muitos tricomas e o cheiro está incrível.
Likes
2
Share


@Livetimegrower93
Follow
Started of week 3 and she is doing well, introduce beatrice the ladybug she do what she dose best clean and kill lol as for the special kush #1 only given maxicrop seaweed very diluted. Now just keep the humidity up and making shore she dont burn up in the carzy heat 23c / 24c outside temp during her downtime but other then that all steam ahead
Likes
12
Share


@CanarianGrow92
Follow
This week we gave some more guanokalong nutrients, more specific for flowering the buds are starting to form and getting bigger slowly day by day! We see lot pf bud sites everywhere! Also applied a small amount of foliar bio insecticide just in case before the plant is too advanced in flowering
29 august: nothing
30 august: water
31 august: nothing
1 September: nothing
2 September: water and guanokalong nutrients ( powder, black pellets, palm tree ashes)
3 September: nothing
4 September: nothing
Likes
9
Share


@xmackobox
Follow
Semillas regulares Alioli de Dr. Ganjah
Simplemente alucinante la calidad a pesar del pesimo cultivador xd
Likes
14
Share


@Simsim
Follow
Hey Guys ! 😁
Buds are coming !
We are in the last week of feeding, next week, I will start flushing for about 10 Days before the Harvest.
This week was quiet, the plant ate a lot : EC in at 1.8 out at 1.4 > 2 times per days.
This week I will increase the EC at 2.0 to finish her.
She beginning to smell good and to make tricomes !
There is only one thing : I got 3/4 branches that seems to be less developped than the rest of the plant > Light reflection problem ??
See you soon, keep growing !🕉️

Likes
49
Share


@masterofsmeagol
Follow
8/1 Took another video but didn't upload either videos when I was in town. I'll have to upload later. I have a lot going on and I need to consult my diary more often. The Temps dramatically changed. I watered yesterday just a few that were light but then it poured all night. This morning things looked SUBSTANTIALLY better. I think as long as I can get some sunlight the next few days things will be alright. That streak of weather in the 100s really did a number on me and my plants. Everytime I go they seem to be looking better so I hope that they bounce back and I don't lose anything after all this work. Plants seem "strong" though. They appear very healthy. This just seems like a mistake I made that was substantially worsened by severe thunder storms we weren't supposed to get. If they don't come back before rain I may move the plants that haven't recovered yet inside the barn for the night. It really depends. I want them to dry out. I'm thinking of going and putting a fan in the cage on the smart pots. I just need to keep an eye on them.
UPDATE: I was worriedly watching my plants from the cams and got a message from my father saying my plants were "REALLY DROOPY." I got there and noticed they were WAY worse then earlier and it was sunny and 70's. I got my dude on the phone and sent him several pictures. Luckily I had a second opinion also from my father. A 3cu ft bag of 707 is 22 gallons. These pots were light like that. They just have a seven foot plant in them lol. I'm so happy. I was planning on bringing them Inside tonight in case of ANY rain, luckily I was able to ascertain THE REAL problem, consult my diary and askother growers. Things are looking good. I'm so happy I'm not overwatered.
8/2 Thank the Lord! And my father for his constant vigilance and my commercial buddy for always being there for me. I went over this morning and everything is back up. Plants definitely got stressed though. I think I was OVER and UNDER watering during those days where it was 100 degrees. It'd 68 today. I say this because as soon as I watered the plants they started picking right back up. Luckily I had a dry bag of 707 to pick up and compare with my 20 gallon grow bags and had my father check the weight as well. He's a forester and told me the weight was about tge same. I gave the big blue cheese in the back closer to 2 gallons until I saw some water coming out the bottom. The reason I think I may have overwatered is that the water evaporated as i had watered during the day or at night but not the 10% that they needed. I didn't QUITEgive them all their 10% last time more like I split the difference and did a gallon amd half. Some did get two though. I noticed some light yellowing going up one of the plants that I've watered the most. These plants are transitioning fast to flower. I think I've got the watering schedule down better and that's "don't water them on a schedule". I'll have to individually take note of the plants. Also on that plant and a few others I see minor nute deficiencies so as soon as I can feed I'm going too. I'm going to show my buddy all my info and ask his advice before i take the next step though. I can't believe they made it through this. Talk about anxiety. Wow.
UPDATE: Talked to my commercial buddy. He advised to pick off any of the dead leaves, (which I mostly already have there weren't many) and to wait until next water to feed. He broke it all down in a way i could understand. Then he broke the feeding down further for me so I now know where to start. He did say he thinks my only problem this year will be, "finding a place to store it" lol. I thought he was joking but he went out back and brought out five gallon buckets with screw top lids lol. This back and forth dialogue (with a professional) is seriously lowering my anxiety and giving me confidence that im doing the right thing. Hes never led my wrong and hes always been there. So has my dad. He said to take the old man out for coffee because he saved my ass! I opted for the bottle of whiskey instead. I'll be checking them later. I'm waiting to feed until next watering and I'm waiting to apply BT. I don't want to do anything to a plant that has been that stressed. I'm giving them a few days to chill. Then the twenties will get a quart of grow big, big bloom and calmag and I'll convert that measure to the same amount for the 30's, and 50's. I'm not sure EXACTLY how big that tote is but I think it's closet to 30 than to 40. So I've got a solid plan for the week. I think what I'll be looking to do next is get my supports up. The wind has been crazy but these plants (even when stressed) seemed super strong! Still no fungal stuff knock on wood.
UPDATE: Had to take the car to the mechanic and snag my wheeler to make it home. I sefoliated quite a few bog yellow fan leaves and some smaller leaves down low. Plants went through some stress thats for sure. I HAD to leave my phone with the wife as she had a telehealth appointment so I couldn't take pictures. I wish I could've because things are looking great. I can't wait until things dry out a bit and I can feed! I'm STILL in awe of how my plants look RIGHT NOW and how the looked yesterday. Another buddy said If I didn't see it (and I didnt know you) I wouldn't have believed it was even the same garden! I'll check AGAIN later if my car is ready. I'm anxious to feed and get my supports up. Plants are STRONG though.
8/3 Plants looked great this morning. I did notice what looked like nute deficiencies on the plants I've watered most. After speaking with a few local growers I decided to water. I watered everything a gallon. The containers got more. The 10 got less. Then i mixed up a feeding solution of 1 tsp grow big 2 big bloom and .5 calmag and fed the 20s approx 1.5 pints. A little less for the 10 and a little more for the bigger pots. I'm going to go back over and if I see no negative effects from earlier I'll use the rest of the solution. I'm hoping this was the right decision. It hasn't been enough time but the bags were light. Not SUPER light but last time I waited it didn't work out well for me. Two local growers have told me theyve been watering daily and they have plants in raised beds and right in the ground. I want my watering to be in the morning anyway. Hopefully this works out. I'll update.
UPDATE: Went back over and everything was standing up nice. They loved that water and the small dose of nures hasn't burned them so ill be able to use more next time. I used a Gatorade bottle thats 1.25 pints amd went from there. A total of two gallons was used on the garden. Things look amazing. Things are changing on the daily. I'm losing some leaves now. Well they aren't dropping off but I'm plucking them before they yet that far. I need to water in larger volumes I think. Plants are drying out too quick. Others are saying they are watering much more often as well. It really hasn't been raining and these plants are huge. I have lush green leaves but this transition and the added watering I think has leeched a lot of the nutrients from the soil. Since I have the fox farm that's what I'll be using. I still have a couple leaves that are destroyed by a fourkined plant bug. It's very identifiable so theres another I need to find. Also seeing chunks missing from leaves. I need to up my ipm game. I don't want to do more than one thing at a time though so I know what happened if anything goes wrong. Since i did the nutes today the spraying of BT or captain Jack's I'd going to have to wait. Despite losing these old fan leaves my plants are dense. Defoliating really helped with airflow. I also noticed some chlorosis on a few leaves. That's why I'm going to start doing the 10% minimum. I'm waiting until they are real dry then I'll give everyone (but big blue) their 10%. I got run off from big blue just from like a gallon amd a half today. I hope my 2 minute video uploaded. It says it dis but u bet it didn't. I'm trying again and I'm at 12%. Let's see if my patience lasts. Looks like it doesn't want to upload
8/4 Thunderstorms and heavy rain all night. It's supposed to rain steadily all day. Plants werent drooped or blown around looking or anything after this storm and I only have minimal supports up. I defoliated anything that needed it. Just a few yellow leaves on the bottom interior. More like nitrogen deficiency. I am watering to frequently though. Im noticing some chlorosis (minor) on old far leaves. Could just be that the soil is getting depleted but "if the brown surrounds your plant is drowned" and I noticed a few leaves like that. Just a couple bit i know what to look for. I hate to say it but i think ive almost got things dialed in for this grow. I will need to put up further supports. These are some STRONG plants. I shook them all off today. The seemed to love the nutes. Plants looked way better this morning than I was expecting. I need to up my watering volume to 10% everytime. I DID fine more pillar damage when defoliating and a four lined plant bug mark on the purple punch in the ten.
8/5 It's not raining right now but it Rained all day and night. Plants really seemed to likecthise nutes. I'll up it to a quart next feed. I defoliated what needed it. Found my FIRST totally yellow leaf of the season. Big old interior leaf i must've missed earlier. Smell has greatly increased. Seeing that these plants seem to have no ill effect from all this water I feel more confident about my ability to fully water them their 10%. Especially since they are massive plants. I have one daln near 8ft and it's damn near as wide. Real good airflow. I think this is gonna be my year. I certainly hope so. I need to get rid of that fourlined plant big but more importantly I need to deal with pillars proactively so next nice night I'm going to treat with bt. Super proud of myself so far.
8/6 Didn't rain much yesterday. In fact I stepped out my door and the sun was fully visible and bright while rain poured down around me. It wad a cool experience but the plants dodnt get much for water. I checked the weight this morning (heavy) and shook off the plants and did my normal morning inspection. I news to remove a pallet so I have more room. Plants are really trying to flower. Next week I'm gonna yet them with a stronger dose of nutes. Last year this was about the time I lost my crop. Knock on wood but this is the healthiest crop I've ever had. I MAY apply BT tonight. Haven't decided yet. I'll keep the diary updated.
UPDATE: Went over to check the plants that were WET and HEAVY this MORNING because of the windstorm. If dried the bags out completely. Everything but the 10 was drooping right over like before. Good thing I've got some pretty good intuition. I took two videos. I gave everything their 10% 2 gallons each and for each container plant. Plants were back up by the time I was done adding supports.
8/7 Sunny this morning. Plants looked good. Had to defoliate some dead leaves. I can't believe those grow bags dried out so fast yesterday! Its just the wind was so strong! Plants were right sideways! They got some syrong roots thats for sure. One of them (my canary) seemed light this morning! But we are getting an inch and a half of rain starting tonight into tomorrow so im not watering ANYTHING. I'm not sure what I'm going to do IF anything. I added to my supports. I COULD put EVERYTHING in the barn where we put heavy equipment. I'll probably at least bring a couple inside in case something horrible happens. Things arecreally doing good. Flowering up nice. Found a cicada on one yesterday. First time I've ever seen one. I'll update with what I decide to do.
UPDATE. My canary seems a little light and is losing lots more leaves im not sure if it's because of the transition to flower but I assume that has something to do with it. Plants still have MORE than enough leaves. Found a couple pillars and killed them. Took a video. I have one blueberry cheese that I hope doesn't have a fungal infection as it's losing more leaves. But it takes more water and is greener and fuller up top. I think I'm just worried because of last year. I've done what I can gor the storm so let's see what happens if I NOTICE it get too bad I can bring some indoors.

Likes
47
Share


@terpproducer
Follow
👇 This week:
---
Watered again as usual with the standard Plagron scheme + Calmag (last feeding with Alga Grow) (PLEASE CHECK YOUR WATER BEFORE USING CALMAG)
Phosphorus foliar spray - red stems pretty much gone now
PPFD at canopy height approximately 350-400, VPD ~1
Performed a major defoliation again
Ordered more Autopots 😂
---
Happy growing and thanks for checking out my report! I really appreciate you! 😁💪🙏

Likes
5
Share


@BenChasinBigBudz
Follow
Initiated flower with a 48 hour period of darkness on the 35th day from seed.
#SFgrow

Likes
8
Share
@squalino
Follow
frost banger
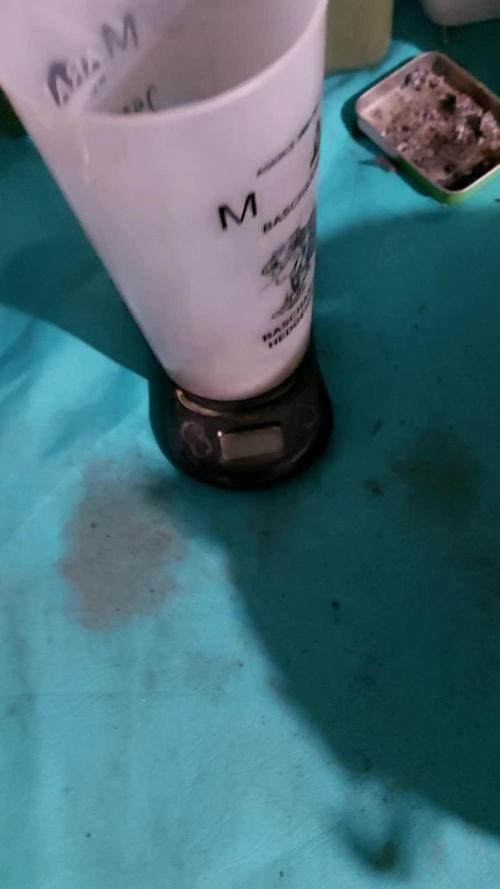
la plante m'a surpris. je pensais à vue d'œil recevoir dans les 250 grammes .
mais les tête sont dense et lourde .
donc resultat final 370 grammes humide . le nombre de trichome visible et impressionnant super plante à première vue . plus que le séchage et la dégustation
la deuxième plante est plus grosses.
donc 1er conclusion
elle a l'air d'être exceptionnelle attendre la suite
Likes
16
Share


@NatureSolutions
Follow
So this is purple punch from #fastbuds. I started a very early batch for outdoors to see if anything managed to survive to extend/add the outdoor growing cycle, out of 4 seeds only this purple punch managed to survive 3° nights during veg🤗 as small as she is she has a very nice structure and expresses great purple colour on both the leavestems as the buds. Harvesting in may is definetely my earliest ever outdoors