The Grow Awards 2026 🏆 


Likes
Comments
Share
@Robbaus
Follow
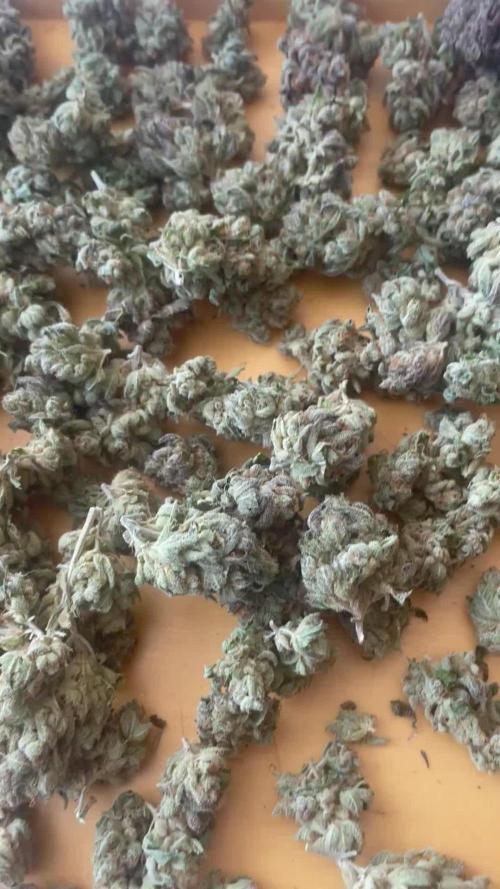
Siamo alle battute finali finalmente, due settimane/20 giorni e dovrebbero essere pronte. Devo dire di essere soddisfatto, anche se speravo si gonfiassero ancora i fiori, magri nel tempo che rimane.. Ho sfiorato i 36 gradi, forse è anche dovuto a questo. Sicuramente non la farò più in pieno giorno in piena estate 🤣.. Rimane comunque il raccolto migliore nell'ultimo anno e mezzo, in attesa di pesare tutto.. Spero di arrivare al mezzo kg, sembrerebbe di sì..


Likes
24
Share
@DeepRootsGrowTrees
Follow
GORILLA COOKIES 🍪 FF / FASTBUDS
WEEK #12 FLOWER
WEEK #4 FLOWER
This has been another good week for this lady her buds are getting bigger with decent trichomes coverage! Stay Growing!!
Gorilla Cookies FF / FASTBUDS
Likes
7
Share
@baxpace
Follow
Day 1 - 03/31/2022
Hello, World! 34th Street AK-47 Autoflower from OCS.ca germinated in 1 day after placing seeds in the freezer over night before planting. This was my 3rd attempt and the freezing method seemed to have done the trick!
Sprouted on day 4. I placed the seed in the Aerogarden sponge pod and didn’t press it down too much. When the tap root started, it had nothing to grip onto, so I solved this by cutting a small portion of another sponge and placed it above the seed securing it in place with a loose “lid” on top so the sprout could easily push through.
-----------------------------------------------------------------------------------------------------------------------------------------------------------------------------------------------------------------------------------------------------------------------------------------------------------------------------------------
Day 3 - 04/02/2022
Hygrometer is in. Was drier than a popcorns fart in the closet so I got the humidifier going and it’s looking good. Went from 22% to 38% humidity in ~1 hour. pH, water temp and EC/PPM all seemed high so I added ~0.5 mL of pH Down that brought the levels to 5.4 (too low).
I added ~2 cups of Brita filtered water (water was getting low anyway) before I went to bed from the fridge that helped raise the pH, lower the EC/PPM, and the temp by a few degrees as well. In an attempt to cool the water down a bit over night, I took the “cap” off of the Aerogarden reservoir to let the water ‘breath’ while the light was off between 2 am and 6 am – that did not work...
-----------------------------------------------------------------------------------------------------------------------------------------------------------------------------------------------------------------------------------------------------------------------------------------------------------------------------------------
Day 4 - 04/03/2022
Water temp remains high at around 28 c. I replaced about 1/3 of the tank with new water and added ~1ml of Miracle Grow. Didn't effect the water temp at all.
-----------------------------------------------------------------------------------------------------------------------------------------------------------------------------------------------------------------------------------------------------------------------------------------------------------------------------------------
Day 6 - 04/05/2022
Levels appear the same. Tomorrow I’ll change the water out and start adding FloraMicro, FloraGrow and FloraBloom with some CaliMagic. Might pick up some Root inoculate of sorts or at least some preventative root rot formula – better safe than sorry. I’ll have to start seriously taking care of the water temp as well. Having it always around the 30 degree mark is not good.
On a side note, I inadvertently found a great way to bump up humidity and air temp quickly: add boiling/hot water to the humidifier. My humidifier ran out of water over night while I was asleep. At 6:30 am I was lucky enough to notice since the humidifier rattles when empty. Humidity was down to 38% at that point. I went back to bed, woke up at 8:30 and it was down to 28%. As luck would have it, there was some left over boiling water on the stove in a kettle and I needed something easy to pour with. I checked back 30 minutes later and the air humidity/temp was up to 60% / 30 C respectively. Perfect conditions for our little lady to get big and strong.
-----------------------------------------------------------------------------------------------------------------------------------------------------------------------------------------------------------------------------------------------------------------------------------------------------------------------------------------
Day 7 - 04/06/2022
First water exchange went smoothly. This was also the first time I added nutrients other than the NutriGrow formula. I mixed everything together in 16 cups of water. NOTE TO SELF: 16 cups is not enough for 1.1 gallons! I had to add another 5 cups of water/nutrients to get the water volume right. I added a bit of NutriGrow only in the last 5 cups with ~1mL of pH down (didn’t measure; kept applying in small doses until pH was around 6). Excited to see how she reacts to her tasty new treats! 😀
-----------------------------------------------------------------------------------------------------------------------------------------------------------------------------------------------------------------------------------------------------------------------------------------------------------------------------------------


Likes
70
Share
@Santica_Garden
Follow
Things are abit hectic at the moment in the garden as all my tents are currently occupied so these guys have to share for the next few days.... More information on the video I have uploaded.... Sorry I couldn't give you guys a better update

Processing
Likes
5
Share
@Mr_nugs_lover_David
Follow
She's looking very healthy and strong after the transplant and I'm starting the lst on her too try to make a very nice and rounded bush full of tops. Let's see what happens with beauty, don't miss it! 💚 🌱 ✌️ 👨🌾

Likes
12
Share
@MrGrowDiarie
Follow
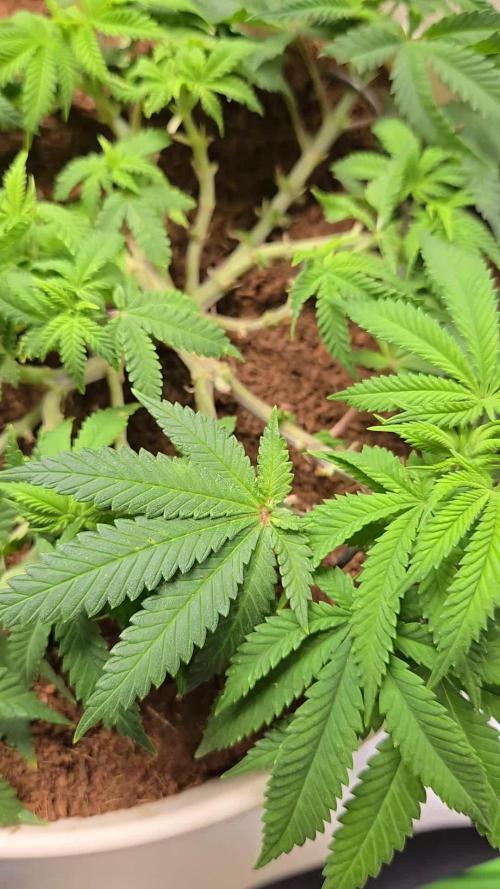
Day 49
This smaller plant is at day 49 and has clearly been topped earlier in its growth cycle. The topping has encouraged a bushier structure, with multiple main branches now developing evenly. Instead of a single dominant top, the plant is pushing out symmetrical side shoots, creating a wider canopy and setting the stage for multiple bud sites.
The new growth is lighter green, showing healthy development, while the older fan leaves are darker and strong. The plant looks compact and well-structured, with tight internodes and balanced growth. The topping has slowed vertical stretch compared to an untopped plant, but the overall result is a sturdier, more manageable shape.
There are no clear signs of stress or deficiency — leaves are healthy, edges are smooth, and the color is consistent. The canopy is lower and denser than the bigger plants, but that’s expected after topping. With some time, the side branches will continue to catch up, forming a nice even top layer.
This plant is on track for a strong transition into flowering, with the topping already setting it up for a more even distribution of colas and better light penetration.


Likes
4
Share
@distant_lights
Follow
4th vegetation week.
in this this week, plant goes slowly :(
looking forward with big hopes.

Likes
18
Share
@eldruida_lamota
Follow
Que pasa familia, vamos con la primera semana de vida de estas Tropicana Cookies Fast Flowering, de FastBuds.
Agradezco a Agrobeta todos los kits obtenidos de ellos 🙏.
Vamos al lío , las 3 semillas que germinaron con éxito se colocaron en macetas de 0.6 litros y asomaron las 3
El ph se controla en 6.2 , la temperatura la tenemos entre 21/24 grados y la humedad ronda el 60%.
Mars hydro:
Code discount: EL420
https://www.mars-hydro.com/
Agrobeta:
https://www.agrobeta.com/agrobetatiendaonline/36-abonos-canamo
Hasta aquí todo, Buenos humos 💨💨💨


Likes
8
Share
@Hawkbo
Follow
Soaked 7.27 for 36ishhrs, into paper towel for 12 hrs then into a solo cup with greentree garden supply pro ultra (coco/perlite). First feed was a diluted leftover feed from my other auto youngins. Basically about 1 ml/g of grow, 7ml/g humid acid, 1ml/g more roots, 1ml/g orca, cannazyme, hydroguard and a sprinkle of living organics in the nutes and on the top of the coco. Usually the ppm will be higher than I want it so I just dilute with r/o water until I'm down to 200-250. It makes it so I cant be accurate on ratios so that's why I'm tellin ya, but it's how I always do it no matter what nutes I use. This seed is also 3 years old like the pineapple Express.
Likes
63
Share
@Ganjagrandaddy
Follow
Day 7 Veg: A great start for the ladies has been slowed slightly by leaving them a few days too long in their germination pots. I usually plant into the final.pot from seed bit uad to wait this time for space. They took a hit with transplant shock I think and a few deformed leaf sets have resulted. I think this will sort itself once the plants resettle bit with time being precious on autos , I hope its soon. One of the Banana Mash is a real mutant it seems with two odd looking leaves and a tiny bit of new node showing through.
The Purple monkey are all doing very well so far and rhe transplant has not hit them so hard. i also think I have a mango cream growing from a seed that popped out of the mango crop I did. lets see.
Be safe and free Growmies.

Likes
12
Share
@ELPIRATA
Follow
13/05/2020 Ha comenzado una nueva semana; día a día aprendiendo del proceso, analizando las condiciones del clima.
+Se sigue apreciando el desarrollo lento de la #3AutoLemonKix, una diferencia notoria con sus hermanas, pero se seguira insistiendo 💪
*El día de hoy 18/05/2020 se han regado 3 plantas en macetas de 11 litros:
X2 Semillas Auto Lemon Kix= 500 ml[2mlKnactive+2mlDeeperUnderground+1ml/L ATAGrowth-C] PH 6.0 / EC=1.15 Tº=22 + Riego foliar [2mlxlitroKnactive+0.5MlDeeperUnderground]
X1 Semilla Auto Tutankhamon= 500 ml[2ml/LKnactive+2ml/LDeeperUnderground+1ml/L ATAGrowth-C] PH 6.0 / EC=1.15 Tº=22 + Riego foliar [2mlxlitroKnactive+0.5MlDeeperUnderground]
*El día de hoy se han regado 1 planta en macetas de 7 litros:
X1 Semillas Auto Lemon Kix = 250ml [2mlKnactive+2mlDeeperUnderground+1ml/L ATAGrowth-C] PH 6.0 / EC=1.15 Tº=22+ Riego foliar [2mlxlitroKnactive+0.5MlDeeperUnderground]
(Hasta el momento se esta ocupando Intraccion Pasiva + ventilador Pinza (Temperatura Controlada)
QUE LES PARECE ?


Likes
Comments
Share
@Aussiegreenthumb82
Follow
Really starting to frost up and beautiful smells ranging from sweet earth to danky dank. Struggling 2 keep humidity down and had 2 cut a small amount of mold from Finnish frost:( added trays of moisture crystals 2 combat but need a dehumidifier.

Likes
136
Share
@Qutro
Follow
Ran 2 seed from both, all popped easy. Veg stage was smooth—Candy Store RBX with medium long internal soacing, Marshmallow OG compact and sturdy. Topped, LST’d, ScrOG’d, both responded like champs.
Flowering hit week 4: Candy Store kept those fluffy buds, sweet berry/candy smell blasting. Marshmallow stretched like crazy until week 4. Had to lift the Candy to keep the canopy even. Marshmallow OG went full compact, colas dense, straight gassy with a heavy chemical punch— diesel vibes in the mix. Trichomes frosted early, looked insane by week 6.
Harvest week 9: Candy Store RBX gave frosty, a bit fluffy buds, pure candy/berry flavor, uplifting and social. Marshmallow OG delivered tight, dense nugs, straight gas, chemical-heavy flavor, relaxing body buzz creeping in. Both fire, but totally different vibes. Candy = fruit bomb, Marshmallow = full on gassy chem punch.
Visually and flavor-wise, the two perfectly complement each other. I’m super happy with this round. Both turned out purple at the end of flowering.👌


Likes
224
Share
@Ju_Bps
Follow
Hello growmies 👩🌾👨🌾🌲🌲,
👋 Flowers continue maturation,
End is close, i've started flush, Harvest for next week.
💧Give water each 2 or 3 days
1,5l Water + Nutri NPK Bloom Boost
1,5l Water + Flash Cleaner
PH @6
- Nutri NPK
Bloom Boost
1/4 tsp for 1 gal.
💡Mars Hydro - SP 3000
100% 41 cm.
🔥 Thanks community for follow, likes, comments, always a pleasure 👩🌾👨🌾💚🌲.
Mars Hydro - SP 3000 💡💡
https://www.mars-hydro.com/sp-3000-samsung-lm301b-greenhouse-led-grow-light
NUTRI NPK 💥🔥
https://www.nutrinpk.com/product/npk-mix-pak-for-4-to-5-plants-cannabis-fertilizer/
Pure Instinto - Strawberry Shortcake Auto🌲🌲
https://pureinstinto.com/product/strawberry-shortcake-autoflower/

Likes
114
Share
@Natrona
Follow
This week, my Titans are sleeping in a cooler dark room until harvest.
So for your viewing pleasure, I've loaded some videos made of the Titans during there time with me.
I'm wondering what to serve at my Queens Tea Party... I made some butterscotch pistachio bars and modified the recipe for less sugar. 😋 We experimented with topping the bars with black cherry spread, orange marmalade and a mango jelly. All are very tasty as the bit of sour/tart enhances the butterscotch sweet.
A few solar eclipse pics.
Processing
Likes
4
Share
@Snuffys_garden
Follow
Into day 30 and I have some flowers starting. The girls look healthy and I am only using some LST and defoliation. Backed off the Foxfarm Big Bloom and I am now just using Ph balanced water between 6.3 and 6.5 Very pleased with their progress so far🌱🤙
Likes
16
Share
@nonick123
Follow
Día 36 (17/02) Riego con 500 ml H2O EC 0,45
Un stretch espectacular!
Día 37 (18/02) Riego ligero con 250 ml H2O EC 0,45
Ha disminuido un poco el consumo de agua
Día 38 (19/02) Riego con 250 ml H2O EC 0,45
El stretch es increíble y precioso 😍💥
Día 39 (20/02) Riego con 500 ml H2O EC 0,45
Hoy se muestra más sedienta después de unos días con menos demanda de riego
Día 40 (21/02) Riego con 350 ml H2O EC 0,45
Día 41 (22/02) Aplicación foliar con Sales de Epsom a 4 g / L (La planta presenta carencia de Magnesio con manchas necroticas en las hojas de abanico inferiores)
Riego con 350 ml H2O EC 0,45
Día 42 (23/02) Lollipopping y defoliación ligera!
Debido a que tiene un stretch espectacular (alrededor de 57 cm de altura) elimino todas los nudos / ramas que no superan el 50% de la altura de la planta
Elimino un par de hojas de abanico grandes
Riego con 400 ml H2O EC 0,45
🚀 FastBuds 15% DISCOUNT code "NONICK" 2fast4buds.com @fastbuds.official
💦 BioTabs 15% DISCOUNT code "GDBT420" biotabs.nl/en/shop/ @biotabs_official
🌱Substrate PRO-MIX HP BACILLUS + MYCORRHIZAE @promixmitch @promixgrowers_unfiltered
💡2 x Mars Hydro FC1500 EVO Led Grow Light (2024 NEW FC 1500-EVO Samsung LM301H 150W LED) - https://marshydro.eu/products/fc1500-evo-led-grow-lights/ - https://www.amazon.de/dp/B0CSSGN5D8?ref=myi_title_dp