


Likes
Comments
Share


@Crashoverite
Follow
Hi everyone 😁
I would like to thank you all fellow growers and breeders for such a great support on this journey. Thank you Grow Diaries and Green House Seeds. Without you all this wouldn't be possible. Love you all
First ever recorded diary so don't know where to even start 😅
I am returning to growing after many many years of break. This is my first ever experience with autoflowers, scrog, lst, led and such tiny grow space.
Choice of strain - Big Bang Auto from Green House Seeds. I have run so many strains from this seed bank in the past and I was always happy with the final outcome. Was looking for indica dominant strain, fast flowering cycle and very important heavy yields on small spaces. Again thank you GHSC in very happy of choosing this strain.
Little bit about my cabinet.
External dimensions:
64 x 50 x 114 cm (W x D x H)
Growing area:
55 x 47 cm cm (0.26 m2)
Panel based on SAMSUNG LM301B diodes
Spectrum:
Samsung LM301B – 5000 x72
Samsung LM301B – 3000k x136
Samsung LM301B – 660nm x9
Samsung LM301B – IR 760nm x1
Regulation in the range of 20W - 110W - Meanwell XLG 100-H-AB
PPF 300 umol/s
PPFD 890 mol/m2/s @30c
Total of 6 adjustable fans, 4 exhaust fans 4 modes - silent/drying, vegetation, flowering, full power
Active carbon mass in the filter 2kg
Absolutely love my grow cabinet. Thinking of next build already.
My grow
3 beautiful ladies - Nuna, Luna and Sweet Mary Jane.
This was a pleasure experience growing autos for the first time. All 3 ladies on the end developed perfectly.
Nuna, left corner lady- tall and beautiful. She had some problems to switch to flowering and was even considering removing her but very happy that I was patient enough and turned great.
Luna, right corner lady - have to say she is the queen. She has the most heavy buds from all, the most. colorful. Her wet weight was 420g, can't say how much of dry but guessing approx. 100g
Sweet Mary Jane, front seat lady. I think she was the most pleasant to grow of her location but due to no other spare space for drying I belive that I have harvested her at least a week to early. If keep longer I belive she could be the most yielder from all 3.
Thank you all for all the support, help, comments, likes, messeges.
Love you all 💚💚💚
Will update this diary in some time and when puff perfectly cured 😎
Peace and love ✌️💚

Likes
5
Share


@Woodz
Follow
Flushed 9 days ppm back to normal drinking water. Trichomes very cloudy 10 % Amber. Week of drying then will give yield #. Maybe 100g fingers crossed last same strain b4 this one produced 125grams of dryed good nug.

Likes
4
Share

@GREENPHOENIX6262
Follow
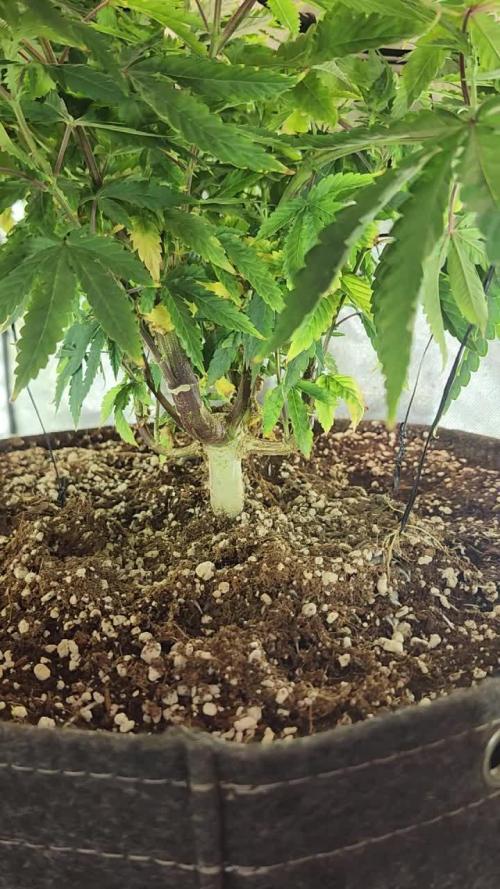
01/07 - Transplant into 7 gallon pot successful - nute feeds have increased in doses - AC infinity supplement lights added to 2x2 tent working in combination with Marydro light for under canopy coverage😎😎😎

Likes
2
Share


@Ninjabuds
Follow
The Skunk Apple Run plant is still tiny, unfortunately. It's got a serious problem with its leaves – almost all of them are burnt. I'm not sure what's going on there, but I'm going to have to figure it out before it's too late.
The new year is off to a frosty start! We've had snow falling for what feels like forever. My kids are loving it, of course. They're building forts, having snowball fights, and turning everything into a winter wonderland. It's been a lot of fun to watch them enjoy it.
All this snow is really making me think about how quickly time flies. It feels like just yesterday we were celebrating the holidays, and now here we are knee-deep in winter. I'm looking forward to warmer weather, but for now, I'm enjoying the quiet beauty of fresh snow.
Likes
4
Share

@Hylex
Follow
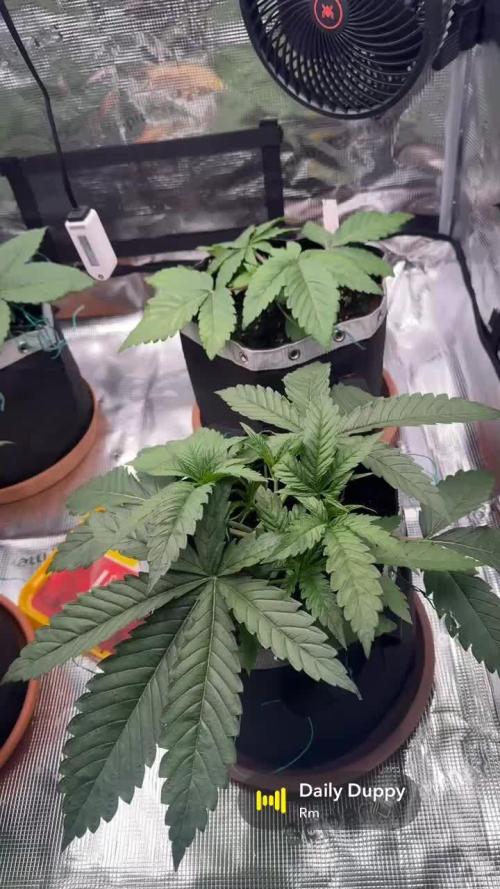
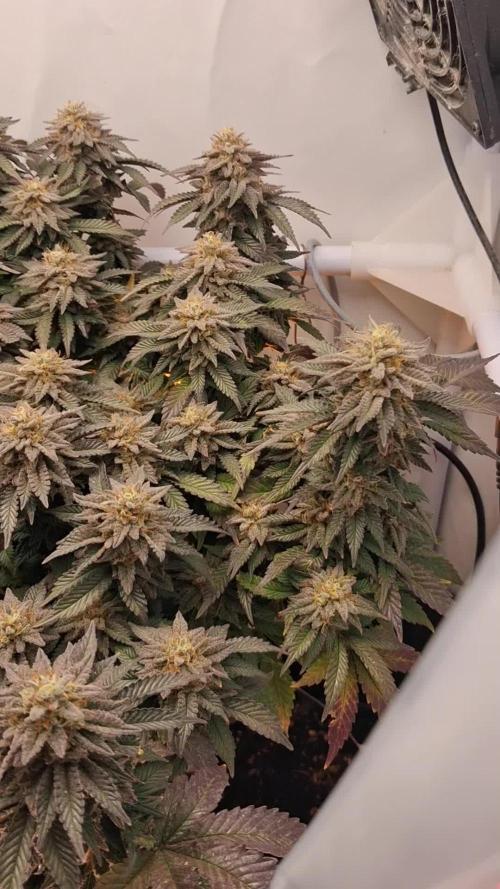
28.09 Neue Woche, neues Pech.
Ich denke das ich die neue dünge menge beim mischen verkackt habe naja passiert.



Likes
4
Share


Likes
37
Share


@William137
Follow
Pleased with the progress! Had a few leaves curling up but seems to have been sorted with and extra fan and lifting the lights slightly. The pots seem very heavy and mosit so im not sure if im overwatering them

Likes
18
Share


@EaRtH
Follow
24.10. - Today I've switched the LST technique. I've drilled a few holes to the pots and tied down my plants. One of them is significantly stronger and bigger. I'm wondering if it's because of genetics or if I did something wrong that slowed down the others.
26.10. - Plants started to show first signs of pre flowering stage. I've decided to completely untie the smallest plant as I don't think there will be much yield at all. Other two are growing pretty fine, branches are getting longer and thicker. I will slowly decrease the amount of Bio Grow and start to add a bit of Bio Bloom to the mix.
30.10. - All plants are showing nice improvements. Branches gained on height and got thicker. I can already see some bud sites developing, so I've decided to completely replace Bio Grow with Bloom.
24.10. - 30.10.2023
Likes
9
Share


@Willy_Balls
Follow
I think she did not produced any more bananas. She is frosty as a northpole though :) One of the the most intense oily trichome production I have ever seen. Terps are amazing, AMAZING. wish she was a bit more stable. Candy Lemon Banana, to die for.
Likes
34
Share


@SalocinSpecial
Follow
D68 (28/01/2021): First official day of week 6 in bloom and first official day (second in reality) of pre harvest flush. The smell is strong when I open the tent! It does not take long for the whole room to smell dank and even outside the room.
- temp: 24-25C light ON ; 20-22C light OFF
- no water
- RH: 49-52% light ON ; 49-50% light OFF
D69 (29/01/2021): I did a first proper flush today by running approximately 2.5 gallons of water trough the medium. There is still a lot of nutrients in the medium. I might do the exact same flush tomorrow. The PH of the run off is high (around PH7-7.1). This is an other reason to flush again tomorrow. I also reduced the light ON schedule by two hours. So now 18h hours ON and 6 hours OFF. I will continue reducing the ON period until they are ready for a complete dark period. I also try to reduce the air temperature.
- temp: 24-25C light ON ; 19-20C light OFF
- water: PH6.4, 135PPM, 2.5 gallons each
- run off: PH7 and 680PPM for Glue Gelato ; PH7.1 and 560PPM for Banana Kush
- RH: 47% light ON ; 48-53% light OFF
D70 (30/01/2021): I did a second flush since I was not satisfied with run off PPM of yesterday. Today, the run off PPM is under 300 which is what I wanted. The run off PH is still high with 7.1. Banana Kush is ripening with the pistils slowly turning brown. Glue Gelato look sooooo yummy and I can't wait to harvest it. There is a small color change in some leaves but I'm expecting more in the next days.
- temp: 23-24C light ON ; 19C light OFF
- water: PH6.4, 125PPM, 2.5 gallons each
- run off: PH7.1 and 260PPM for Glue Gelato ; PH7.1 and 250PPM for Banana Kush
- RH: 46% light ON ; 46-48% light OFF
D71 (31/01/2021): Glue Gelato is changing color. I'm checking trichomes everyday on both girls and no amber yet.
- temp: 23-24C light ON ; 19C light OFF
- no water
- RH: 45% light ON ; 49-50% light OFF
D72 (01/02/2021): Well well well...the clock is ticking for those girls. Glue Gelato is now having a couple of amber trichomes. Banana Kush don't have any. Overall Banana Kush has less trichomes and fluffier buds. This girls is not ready yet but I will need to chop her down at the same time has the Glue Gelato because my drying space is the tent I'm growing in. I will try to push the Banana Kush to ripen faster by lifting up the lamp at 16 inches from top bud and by reducing of 2 hours the day period for a 16 hours light ON and 8 hours light OFF. But at least all Banana Kush trichomes looks milky.
- temp: 23-24C light ON ; 18-19C light OFF
- water: PH6.2, 123PPM, less then a gallon each
- run off: PH7.4 and 200PPM for Glue Gelato ; PH7.4 and 287PPM for Banana Kush
- RH: 45% light ON ; 40-45% light OFF
D73 (02/02/2021): I gave water probably for the last time today. Trichomes on Glue Gelato are starting to amber on top buds. Not a lot of amber but you can see that all the trichomes are starting to degrade by curling down slowly. Trichomes on Banana Kush are not amber at all but they all look milky. Glue Gelato is ready to harvest but Banana Kush need more time. It's tough to make a decision to chop or not since they are not at the same stage of growth. I want to place them in a complete 48 hours of darkness before harvest. 1h less light today for a 15h light ON and 9h light OFF. The lamps are now at 20 inches.
- temp: 23-24C light ON ; 18-19C light OFF
- water: less then a gallon each
- RH: 45% light ON ; 40-45% light OFF
D74 (03/02/2021): Glue Gelato is ready for 48h of darkness. I will take her out of the tent and place her in an other room without light. I will try to maintain a proper environment in this room and if it smells to strong or if the condition are not good I will replace her in the tent and both will start the 48h darkness. The idea is to give Banana Kush 2 more days to ripe and swoll more. After 48h, I will chop Glue Gelato and place her in the tent to start drying. Banana Kush will then start her 48h darkness. I don't know if this strategy is good but I will monitor everything closely and react if something is wrong.
- temp: 22-23C light ON ; 19C light OFF
- no water
- RH: 47% light ON ; 43-45% light OFF


Likes
Comments
Share


@Mr_nugs_lover_David
Follow
Another beautiful black cherry punch pheno but this one is one of the 2 which are completely purple, beautiful sweet aromas, I'm just in love with this strain man 🍒💎💚👨🌾🌱✌️

Likes
21
Share


@DeepRootsGrowTrees
Follow
SATIVA DREAM by KANNABIA
Week #6 overall June 11th-18th
Week #5 Veg
This week she recovered from the break in her stem and was doing well so I topped her towards the end of the week.

Likes
14
Share


@Toughpuff
Follow
Very good plant to grow 8/10 for me 💯💯🔥 very high yielding with a crazy yield of 131grams of 1 plant very tall and skinny but dense buds 🙏🏽


Likes
5
Share


@Rko41
Follow
10cm de stretch en 1semaine et c’est pas fini vu la génétique et que c’est seulement le début de Flo


Likes
Comments
Share


@jonathanlinares
Follow
Its about to explode introduced silica blast and slf-100 going to act like a dwc set up with my set up i got and already boosted soil that is packed with live benefits plus had it cycling months before so no bugs I also everyfeeding add great white slf100 and silica blast to every watering this is packed full of living organisms plus my living crop these are going to explode watch
Likes
12
Share


Likes
21
Share


@NorthernMonkeyzInc
Follow
Im so happy with how these girls are turning out..these are both photoperiods and are in grape containers from the supermarket. They are taking the training very well and im very pleased with the development and growth

Processing
Likes
23
Share


@KenSpliffeyJr
Follow
So all my stuff arrived this week. Will be using fox farm ocean floor soil for this grow. I have blue dream going for this grow. My seeds are germinating and I don’t have pics of them from the paper towel and from when I first put them beneath to soil in the dixi cups. The soil I used was miracle grow bloom potting soil for my initial planting (now I know was probably not the best choice) but I actually noticed some great results to start with the grow. I’ll keep updating as I go and hope to get some great feed back and comments while I go along. Happy growing everyone.
