
Likes
Comments
Share


@420DeepGrow
Follow
Gracias al equipo de AnesiaSeeds y al de MarshHydro, sin ellos no seria posible esta hazaña.
💐 🍁 Jealousy Dankness es el resultado del cruce de dos cepas excepcionales, súper sabrosas y de gran potencia: nuestra Gelato Dream, que destaca por su alto contenido en THC y su sabor celestial que recuerda al helado y la vainilla, y la Blueberry Sherbet, una cepa híbrida equilibrada que tiene un dulce sabor afrutado a arándanos y también mucha potencia.
Inmediatamente después de la primera calada, se pueden sentir los potentes efectos de Jealousy Dankness . Un subidón cerebral recorre todo el cuerpo, culminando en un estado que parece un sueño. Al subidón eufórico de la cabeza le sigue una explosión de energía y concentración mental, que estimula los proyectos creativos o las salidas a la naturaleza. A continuación, el subidón evoluciona hacia un colocón corporal que elimina por completo el estrés y relaja los músculos.
Debido a su alto contenido de THC de hasta el 33% y a sus propiedades sedantes, esta cepa es útil para las personas que sufren de estrés crónico, náuseas, insomnio o falta de apetito.
El tiempo medio de floración de esta variedad es de unas 9-10 semanas. Los cultivadores de exterior pueden esperar su cosecha a mediados de octubre. Jealousy Dankness ofrece unos rendimientos sólidos y grandes de 400-500g/m² en interior y de hasta 900g/planta en exterior. Las flores son muy compactas, densas y alcanzan un tamaño y un peso considerables.
🌻 🚀 Consigue aquí tus semillas:
https://anesiaseeds.com/es/product/jealousy-dankness/
💡 Mars Hydro TS 3000, como la lámpara de cultivo LED más grande de la serie TS, ofrece suficiente cobertura para un área de 4 × 4 pies con un precio asequible y rendimientos de calidad; a cambio, se puede aplicar tanto al cultivo doméstico como al cultivo comercial.
Potencia - 450w
Cobertura Vegetal – 5×5 pies
Cobertura de flores - 4 × 4 pies
La opción abrumadora para la mayoría de los productores que la aplican en tiendas de campaña.
Consigue aqui tu lámpara:
https://marshydro.eu/products/mars-hydro-ts-3000-led-grow-light/
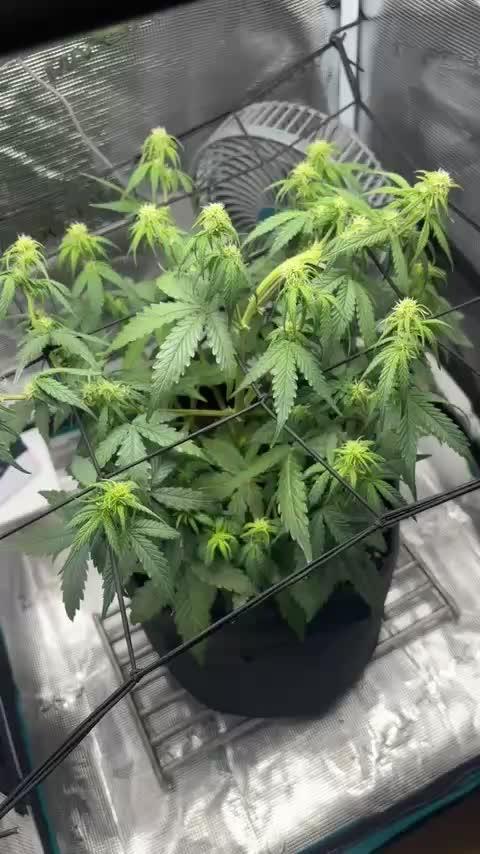
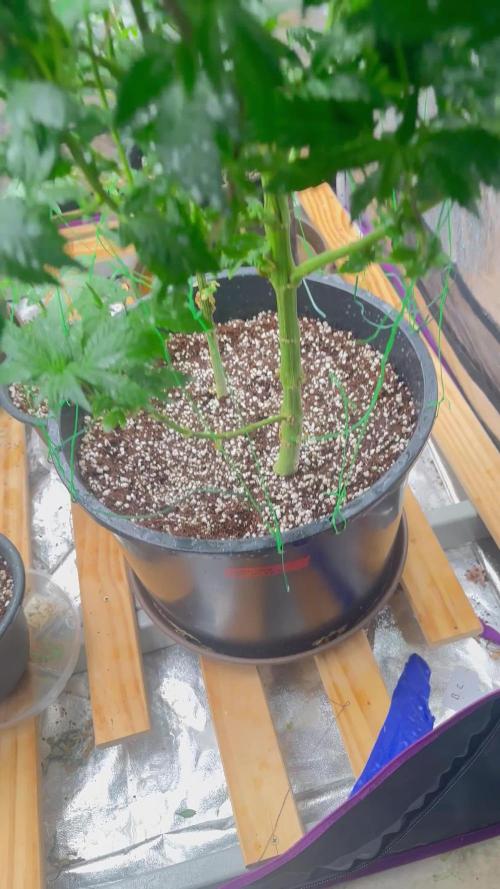
📆 Semana 9:
Finalizando la etapa de engorde, esto va que vuela 😍, la resina esta cada vez mas presente ❄️ , los cogollos comienzan a engordar
Esta semana estará el TS-3000 de MarshHydro al 100% y 30cm de distancia.
Se estan desarrollando mejor que nunca, con una floracion mucho mas rapida, noto una gran mejoria gracias al Marshydro TS-3000.
Se que va bien porque empiezan a clarear las hojas.
Continuo con defoliaciones
Aplico una solución con nutrientes EC 1200 y otra con agua del grifo reposada y PH 6.6

Likes
24
Share


@DeepRootsGrowTrees
Follow
COLOMBIAN JACK by KANNABIA
Week #17 Overall
Week #6 Flower
This week she's doing good as she continues to flower no issues this week to report. She's smelling great!!
Stay Growing!!
Kannabia.com COLOMBIAN JACK


Likes
15
Share


@Shizzlemanizzle
Follow
First week of flower started with a bit downs :/ leaves were hanging and I didn’t know why but some guys helped me here ❤️ changed the watering habit now. Started watering with feeding when pots were dry/light and watered until I got 5-10% runoff - next watering when pots are dry/light

Likes
36
Share


@Ganjagrandaddy
Follow
Day 29 Flowering: Hi all.
As another week passes these exotic ladies are impressing the hell out of me. They have all really put some energy into forming long colas with really bulky little budlets along their whole stems.
Herz o.g is by far the chunkier of the three but not by a big margin at all. her crown is forming nicely from above and I can clearly see her future potential colas. She looks a very nice colour of green on her leaves whichnis down to the Megacrop and its amazing chlorophyll building properties. This will help to really power those fan leaves to pump the nutrients and essentials to the forming buds I am now trying to stress her as little as possible to allow her to keep her focus on that alone and not dealing with uneeded stresses.
Strawberry Cola is beginning to build some nice stacks too. Her stretch helped to keep her in the canopy but she is at present overshadowed by a huge mimosa Lemon due harvesting. it has stolen some of her light over the past week or so but this will be corrected as I begin harvesting the other strains running shortly.
Monster mash isnrhe biggest surprise... she came up out of nowhere over the last few days. She now towers the whole grow rooms strains. Her cola lengths are looking very positive with the nodes reaching to low in the canopy too. She will also benefit from a move around as I harvest the other strains. She will get a prime position to keep those colas stacking up long. They have all had a defol at day 21 and the air can get around their frames really easily to keep the chance of mould right down.
So far so good and very happy days ahead .
Be safe and well growmies.

Likes
8
Share

@Firstautos
Follow
So have had to to use the trellis the top bud was making me move the light to far away from the others I hope I haven't done harm doing this but I felt it was starving the others of light :).. this is my first grow and first diary entry.. all and any help is appreciated this video is where I'm at today :) happy growing :) 31/8

Likes
6
Share

@Skynets_Growing
Follow
The bud‘s smell like lemon and they are small but this was my fail i think. Elsa was doing a Great Job and I will take every product again in Grows in the Future. Thx

Likes
3
Share


@xipo86
Follow
streching started . they didn't show any sign of stress after going from outdoor to indoor.. from this week streching should be more visible... first pistols showing on F1 versions.


Likes
9
Share


@Chubbs
Follow
420Fastbuds
FBT2308/Week1
Week 1 update on these new sprouts. Been a week since they sprouted and so far seems good. I did switch from misting the top soil with my sprayer to feeding 500ml of water and 1/4tsp/gal strength General Hydroponics Calimagic. Over all Happy Growing
Likes
9
Share


@I_Identify_As_A_Dan
Follow
Week 12 for Black Lebanon by SSSC
She's really filling out nicely compared to last week I've had to bend some of the tops that were getting taller than the rest but nothing crazy.
I went through a period of barely feeding her... well this week she's been fed 5-7L of water plus heavy heavy sprays every night😂 so a bit of a change up she doesn't seem phased either way.
Currently having issues with crickets... keep eating my leaves not sure what to do about it if anyone can suggest anything? 😎

Likes
14
Share


@Terpyboyz
Follow
So this grow came to a finshed but I had a. Few issues that’s held me up from finishing up the diary, but in due time I will reupload it all in order soon. But over all I will also update with a final weigh in of each strain produced so stay tuned 🤙🏻🔥


Likes
12
Share
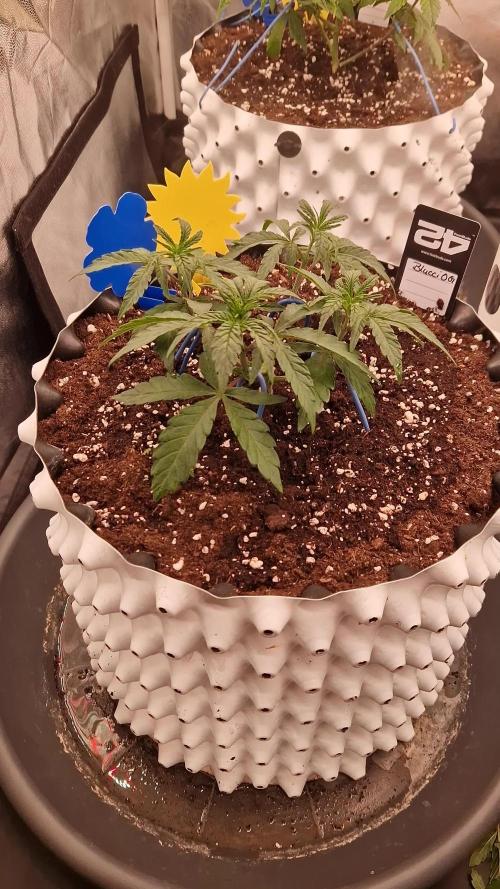

@TrickzGrowz
Follow
Servus Moin!
Die erste Woche im neuen Topf lief super. Die Blucci OG hat direkt wieder Wachstum hingelegt, was sich sehen lassen kann.
Am Sonntag wird die Zeit auf 12/12 umgestellt
Likes
13
Share


@XanHalen
Follow
Apr 20:
They hanging out at 65% rh and 65F..
Going for 7-10 day dry…
No wet trim, cut plants in half and hung…
Very happy with density and resin production…
Can’t wait to jar and test in 2-3 weeks…
I feel comfortable with this strain, I think it’s time to move on…
Really wanna run some Mephisto seeds….

Likes
17
Share


@Bigonet
Follow
Hello friends, this is my first indoor Growing . Please give me some guidance. This girl is 2 days old.thank you.
king's kush Green house


Likes
Comments
Share

@mihixd
Follow
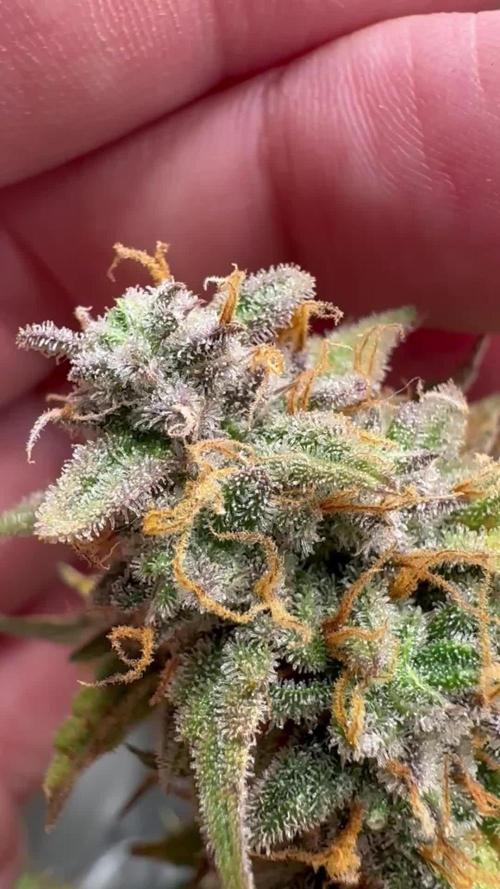
124.5 grams DRY WEIGHT on plant 1
When I removed the plant stakes, all the branches started hanging super low to the ground. Satisfying feeling.The buds foxtailed, which is such a pain in the ass to trim. Nice smoke tho tastes good etc.
This one was a big stretcher which caused large canopy heigh differences, bit annoying.
76.3 grams DRY WEIGHT on plant 2
More density than on plant 1, these didnt foxtail. Nothing too special
118.2 grams DRY WEIGHT on plant 3
This plant has the best nugs out of all 4. Super dense (see vids) and they smell so fruity. Super sticky, i had to switch trimming scissors after every bud.
Also have 100g of trim that I'll sift and mess around with.


Likes
16
Share


@nonick123
Follow
Día 22 (03/02) Se está desarrollando estupendamente!
El sustrato sigue húmedo, así que el suelo vivo siga haciendo su trabajo!
Día 23 (04/02) Riego con 500 ml H2O RO
Se muestra sedienta!
Día 24 (05/02) Un desarrollo espectacular en estos 24 días de vida! 😍
Día 25 (06/02) Riego con 500 ml H2O RO
Se ve radiante!
Día 26 (07/02) Riego con 150 ml
Día 27 (08/02) Riego con 350 ml
Día 28 (09/02) Flip to 12/12! 💥💨😁
FastBuds 15% DISCOUNT code "NONICK" 2fast4buds.com @fast_buds_official_ @fastbuds.official
💦 BioTabs 15% DISCOUNT code "GDBT420" biotabs.nl/en/shop/ @biotabs_official
🌱Substrate PRO-MIX HP BACILLUS + MYCORRHIZAE @promixmitch @promixgrowers_unfiltered
💡2 x Mars Hydro FC1500 EVO Led Grow Light (2024 NEW FC 1500-EVO Samsung LM301H 150W LED) - https://marshydro.eu/products/fc1500-evo-led-grow-lights/ - https://www.amazon.de/dp/B0CSSGN5D8?ref=myi_title_dp
Likes
33
Share


@Titoff
Follow
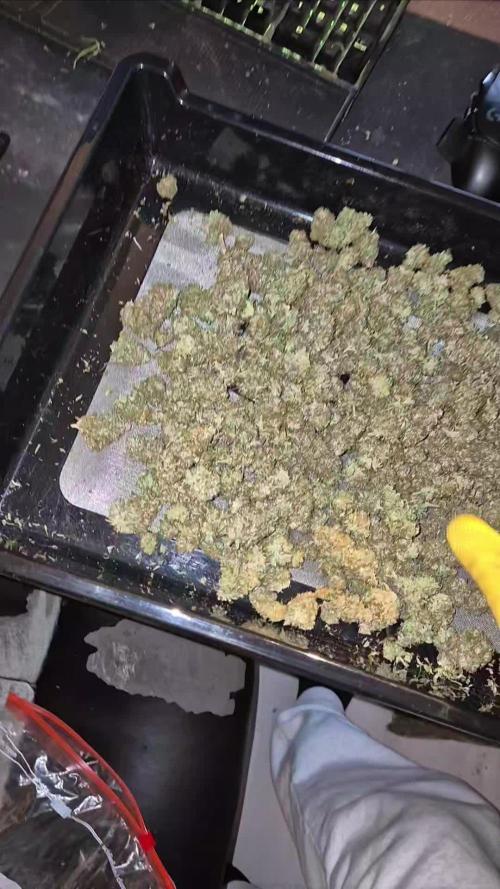
Cette semaine grand changement, une de mes tentes étant enfin prête à être coupé, après bien entendu avoir eu au moins 10 jours de rinçage, a donc subis une petite permanente, suivis d’une coupe été. Un travail de titan, commencé à 14H et finis à 6h du matin ! Je pense pour la prochaine session à investir d’un appareil de type trimmer pour faciliter le travail. Par contre étant un peu dépassé par ce travaille, je me suis un peu emmêlé les pinceaux et je me retrouve donc à présent avec les filles coupées mais impossible de dire qui est qui ! La poisse, petit manque d’organisation, je l’avoue, ferais mieux la prochaine fois. Je me pose tout de même la question de comment estimé au mieux le poids mouillés car sur la balance, j’ai pour l’instant 2kg, je vous donnerais donc le poids final sec par la suite qui correspondra donc plus au fameux gramme par watt que tout le monde recherche. Bon Grow à tous
J’ai laissé semaine de floraison car j’ai toujours une tente en floraison et ma semaine de récolte sera donc compléter de manière plus juste et plus précis par la suite.
Likes
28
Share


@GaiaGreenGiant
Follow
Gave them their monthly feeding a few days into first week of flower with Gaia Green organic dry amendment slow release fertilizer. It really has allowed me to focus solely on watering technique and grow environment without worrying about over/ under fertilization. Plants and I love the product! Posting an update tomorrow of end of week 1 flower pre-flower. Cheers 🍻

Likes
19
Share

@Flavors
Follow
🌱 Week 14 Update (Veg)
The girls are holding strong 🌿💪 with steady, lush growth 🍃✨. Canopy is filling in more each day 🌳🕸️ and they’re responding well to training ✂️
