
Likes
Comments
Share


@GrapevineGrower2
Follow
Straightforward with nothing to report out of the ordinary. I top watered on day 56 then let them dry back prior to harvest (day 61). Nice mix of milky and amber trichomes. Harvested early morning prior to lights on.

Likes
Comments
Share


@braxat420
Follow
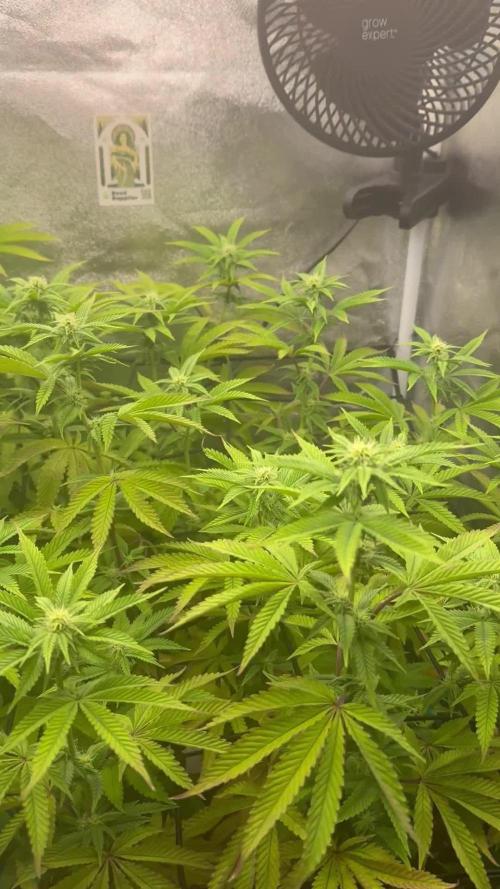
My other grow was growing into the light, so I had to switch them. This light doesn't have the greatest coverage, but it had to be done. The humidifier is still down, and I'm going to have to move house with it on one of the coldest days of the year, so this grow does not have everything going for it. Smells strong, like candy apples and the buds are getting very dense.

Likes
3
Share

@Bowser45
Follow
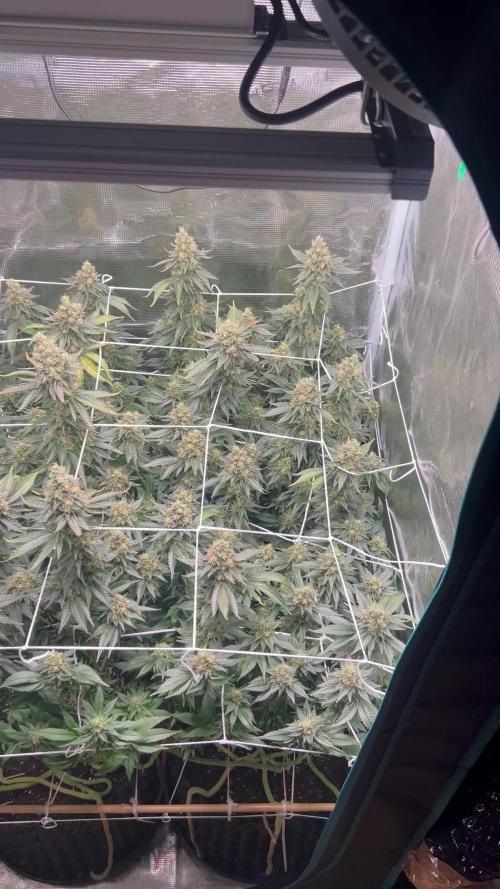
This week the strech reached almost 70cm , and the ladies almost grew into the growlight one day so i moved it higher up to stay at a distance if 30cm. i alo defoliated more this time and started strecheing some branches out so everything gets enought light down. they seem to really like the feeding schedule too. The werent any nutrient issues anymore. trhichome production also started and is already about to cover the surrounding keafes. they are going to be pretty frostyy🍀❄️❄️
Likes
14
Share

@tuzeus
Follow
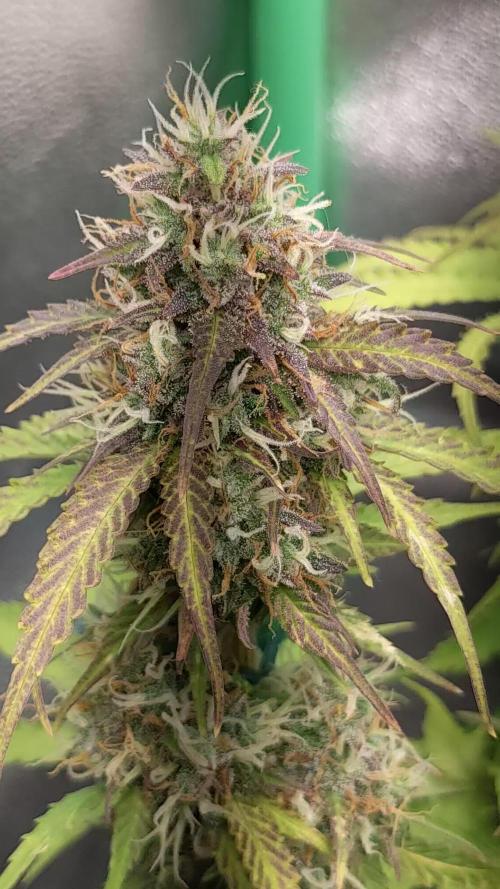
This is maybe the last week. Trichomes are milky but also clear, I’m still waiting for the amber. Even though I don’t want much amber. Maybe I will chop this weekend, I’ll decide in the next days. I fucked up a bit with the light. I see some foxtailing even though it’s not really concerning. I changed to the Athena fade to eliminate nitrogen. I’m expecting way more fade in the next days. The end is near. Cheers.


Likes
8
Share


@Chronicbastard
Follow
Well it seems one of my girls are about half the size of the rest.i guess we will see how things go.lol

Likes
6
Share


@Mismatas
Follow
UNOS 14 DIÁS DE FLORACION, EMPEZAMOS CON EL BIG BUD, Y NUESTRAS PLANTAS ESTÁN RADIANTES DE ENERGIA

Likes
10
Share


Likes
2
Share


@GRow_M8s
Follow
Leave's edges have turned yellow and it was fed with a good amount of 6.5 ph water to give her a break.
Watered for second time this week with just 6.5 ph water.

Likes
24
Share


@SaulGoodman420
Follow
Hot dry weather, so having to water every other day. Harvesting the StarDawg this week :)


Likes
7
Share


@BucketHathead
Follow
3/28/23
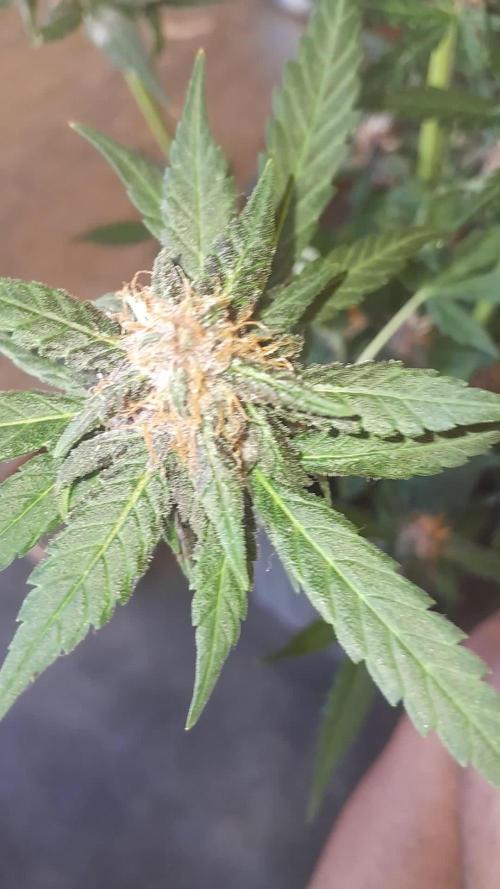
Keep finding pm in different places and having to spray it down. Added a few more fans just in case and it’s just everywhere. I think I’ll need to do a full tent clean before the next run to get everything clean.
I trellised the ackbar twins. They’re huge and putting out so much bud. Took awhile to get it all right and ended up bending a few branches but I have a feeling it’s gonna be great when it’s finally done.
Blueberry got topped and is starting to grow exponentially. Hoping it will have some stretch to it when it gets its chance to be the canopy but I don’t think it’s gonna be the plant that ackbar is because it hasn’t gotten proper light.
White widow is flowering as well but it’s so minimal because the plant is also getting no light. Going to let it run its course but it’s just not getting what it needs at the bottom of the canopy.
I should’ve known better but putting too many plants in one box but I didn’t know they would get this big.


Likes
4
Share


@adam_pawloski87
Follow
@twenty20mendocino Ateam R&D Update ~ Let’s Go day 18 of 🌸almost 3 weeks in an we are looking great! Gave em another aggressive trim up some lollipops this week hopefully wasn’t too early but hey it’s we learn as growers, but they are bouncing back super nice, praying a looking happy y’all! Can’t wait to see what these girls do over the next few weeks, y’all have to keep them eyes peeled for next weeks update. Y’all have an amazing productive rest of your day as well as great rest of your week! Hope y’all enjoy, peace love an positive vibes to all y’all Cheers an blaze on 😶🌫️💨💨💨💨

Likes
13
Share


@Flowers_By_Irene
Follow
Partially drained the tank at the start of the week and topped up with ro water and 1ml of final solution per Litre. Last 2.5 days were in darkness.
I trimmed the majority of fan leaves before hanging up to dry in the tent today. Started out trimming with the plants in the tent and soon realised it would be much easier to just cut them down whole, hang them upside down outside the tent and trim them up a bit.
I have a small dehumidifier and a small fan heater setup in the tent and they have been keeping a humidity level of about 60% and a temp of 16 Celsius for the last few days while the lights have been off. I figure that's a good starting point for drying and I can increase the temperature if needed, that will drop the humidity also.
Intake fan at the bottom and extract fan at the top are running constantly as they have been since the grow started (low power 4" fans).
I might add back in a fan for circulation depending on how the drying goes, or maybe even trim or hang the plants better to get more airflow around the buds


Likes
5
Share

@GerHardGrows
Follow
Buds keep ripening.
Purple color is spreading.
First trichomes sighting.
Random day entry of the Week:
11 March - Day 77
- 2 ml CalMag
- 2 ml Grow
- 4 ml Algamic
- 10 ml Bloom
- 8 ml Overdrive Booster
- 4 L
- PH 5.5


Likes
8
Share

@Jardineiro_Br
Follow
Começou a janela de colheita das tres plantas a mais adiantada ja colhi as outras duas achonqie em uma semana mais poderei colher as duas uma esta bem robusta a outra ficou pequena .
Likes
4
Share


@Nutrient_gro
Follow
Day 148. Veg just transplanted her to a 5 gal and lst with scrog net helpfully she takes off.
Likes
Comments
Share


@Skinnytalls420
Follow
So 3rd time and so happy again this is the best auto I’ve ever grown I think that’s about 50 chemdawg seeds I’ve planted and it always comes out the same very strong genetics this has
Processing
Likes
6
Share


@Ferenc
Follow
All good flowers are coming along nicely and getting thicker. 500ml water per day 12/12, fertilization happens on Monday, Wednesday and Friday with the mix above. All good so far I just keep removing the bottom leaves that are yellowish. Fruit Tree will be the quickest to be harvested all of them are nicely maturing needs some more time. Some more weeks and we will see.


Likes
16
Share


@Marijuanaisland
Follow
Analisando com lupa 60x,80x,100x, está próximo o grande dia mais 3 dias e faca