


Likes
11
Share


@Lazuli
Follow
This week i feed 1000ppm to get 800runoff. She was hungry the past 14days now i keep the ec more in chek


Processing
Likes
23
Share


@Alchapocanna
Follow
Harvest time for the gorilla glue. Very nice solid buds. sMellsnstrong but only when you smell the bud... tryed wet trimming half and drying and trimming the next half to see results
Gorilla bombs doing well tris are still mostly clear. Couple Amber and few cloudy. She smells so strong. She super sticky. Put the cool tube in today to get her closer to the light. Can switch the ballast up to 600 in cooler days .
Will doing a auto run next. Probably under 2 400
. Thinking about ;
3 or 4 Blks. Auto chemdawg
3 feminised seed auto blue treacle
1 fast buds stardawg
2 sensi seeds auto early skunk
Never had any merging good come from fast buds. I find there buds are very airy and foxtail like structure but iv only grown a hand full but maybe the stardawg will be different
Thinking about starting the flush got the g bomb in a round 3-4 days. Let her go another 2-3 weeks.
I have heard a few times that MH lights in the last week of flower increases trihcome production?
Had anybody had any experience with this?


Likes
20
Share


@Master_weeda
Follow
Bonjour à tous les padawans et maîtres jedis
Pour cette semaine ce sera le début du rinçage j'arrose donc la plante avec 5 fois le volume du pot avec de l'eau ph6.3 pour bien drainer la terre
Les prochains arrosages s'effectueront normalement et ce pendant une dizaine de jours
Le rinçage ce passe bien le pot est vite devenue léger (3 jours) je continue à arroser à l'eau claire toujours avec un quart du volume du pot soit pour celui ci environ 40 centilitres
Au jour 76 la sénescence commence à bien ce voir


Likes
10
Share


@CanadianFillmore
Follow
Harvest time for Green Crack. This strain was a pleasure to grow, low maintenance, minimal fade until the last week, and amazing bud development during the last 3 weeks of growth. I'll update in 7-10 days with dry weight and smoke report.
Thanks for stopping by and checking out this grow 👽🌳🔥💚
Update - 73 grams dried, a bit disappointing but for a first run of this strain, not horrible either. Earthy pungent smell and flavor, relaxing strain good for chilling on the couch.

Likes
55
Share


@Max1973
Follow
omg, another week has passed...... :)
Day 100 - and then there was 11 Buds ....... lol
Switched over to normal water on both ... smaller has been on water 1+ weeks .....
Endoscope arrives this week i hope..... harvested afew buds to fit it all in the tent and setup lights properly...
trimmed em, wired em abit to support the weight of the buds....
I'll see how the endoscope results show, as to harvest...... i think growth slowed abit over last week or 2,
because of poor light setup, not enough room in tent, and other grow 6400k led....
got a new tent on the way... 😎
Day 101 - Pics - edoscope, usb arrived... it's very good, but hard to stabalize / focus, i'll have to work out how to use it better......
the pics i posted were of a younger bud from the bottom..... i'm happy with the cloudy with amber, and harvesting.... 😎
Day 103 - vid of all trimmed and drying out upside down in tent.
Day 105 - pics vids of drying and into curing....
i'll list all the test buds and buds i trimmed in the final harvest report.....😎
Likes
3
Share

@DonEspas
Follow
Nous sommes maintenant à la 4 ème semaine et pour nous proche du passage box de floraison 🌺
Arrosage TCO cette semaine
Topping de la plupart des apex de chaque branche
Soin des coupures avec la cannelle
Installation du filet de LST
Les orties les plus vigoureux ont été tordu pour ralentir leur croissance et faciliter l'installation u plant de canna


Likes
15
Share


@qoodwater
Follow
Big autoflower!
Defoliation and prunnig during this week!
More and more buds!

Likes
5
Share


@k0nz1
Follow
One plant has some calcium deficit
Defoliation
Smell slightly getting stronger
Buds getting bigger


Likes
114
Share


@Anonymous_2022
Follow
Thanks for stopping by.. Please hit the like button if you like what you see and ill be sure to check you out too Growmies 🌱
First of all would like to give a BIG shout out to my sponsors for providing me with the necessary items for this grow 👍
🌟🌟🌟🌟Mars Hydro FC4800🌟🌟🌟🌟
Powered By Samsung LM301B Diodes: The Mars Hydro FC 4800 480-watt LED grow light is installed with high-performance Samsung LM301B chips, the top-bin horticultural diodes, to provide a high Photosynthetic photon efficacy efficiency of 2.85 μmol/j and a long-lasting color rendering capability, supporting indoor plants to grow and thrive.
High PPF Output and Uniform Light Distribution: FC4800 provides a high PPF of 1,366 μmol/S. The multi-light bar design and the dense diode layout facilitate an even distribution of grow lighting making PPFD optimized for Photosynthesis to achieve consistent growth in every part of the coverage range.
Exclusive Recipe Of Full Spectrum Lighting: The full spectrum is enhanced with blue and red light, in which the blue light stimulates plant growth and promotes the accumulation of plant-based phytochemicals; the abundant red light improves the maturing process and flower quality of the plants.
🌟🌟🌟 FastBuds Purple Lemonade FF ⭐️ ⭐️⭐️
Arising from a cross between purple and citrus Cali genetics, Purple Lemonade FF (Fastflowering) offers a complex high made up of perfectly balanced cerebral and body effects that are ideal for daytime use. Expect an extremely enjoyable high that boosts your mood while deeply relaxing your whole body and getting rid of muscle pain. This meticulous cross produces up to 550 g/m2 of some of the most beautiful purple buds, with pinkish and reddish hues that will catch everyone’s attention. The beautiful purple buds are ready for harvest in 7-8 weeks and come hand-in-hand with unbelievably sugary citrus terps that are just as refreshing as a cold lemonade on a hot Summer day. It’s the ideal variety for the sweet-tooth stoner seeking strains that deliver both in quality and quantity of resin
——————————————————————————————
👊👊👊👊Down to Business 👊👊👊👊
Week 5 from seed .. So this will be the last week veg for the tent and ill be switching to 12/12 flower power 💪
She’s moving great and all is good 👌
Will keep it short and sweet for this week .. Thanks for stopping by 🙏🙏🙏
Likes
64
Share


@GERGrowDesigns
Follow
🥦Flowering Week 3 Structural Finalization & Early Bud Stacking
Eternity Grow Cup 2026 Sticky Broccoli Feminized
Stage: Flowering Phase Week 3
Day: ~23 since 12/12 switch
🌡️ Environmental Stability
Environmental conditions remained highly stable, allowing the plants to fully transition from stretch into early bud development.
-Temperature: ~26°C
-Humidity: optimized for early flowering
-Light: full intensity (720W)
-Airflow: strong and consistent
🌿 Plant Development / End of Stretch
The plants are now approaching the end of the stretch phase, with energy shifting into bud formation.
Observations:
-Vertical growth slowing down
-Strong development of upper canopy bud sites
-Uniform structure across all four plants
-Healthy, vibrant green coloration
-Bud sites across the SCROG are now clearly defined and actively developing.
✂️ Final Lollipopping & Defoliation
At the beginning of the week, lollipopping was completed, largely up to the SCROG net.
Objectives:
-Eliminate lower, non productive growth
-Redirect energy to top canopy buds
-Improve airflow and light efficiency
Additionally:
-One structured defoliation session
-Ongoing removal of individual shading leaves
Plant response:
No signs of stress were observed. Recovery was immediate, confirming strong plant vitality.
🌸 Bud Development & Early Stacking
Following canopy optimization, the plants began to show clear early bud stacking behavior:
-Formation of dense bud clusters in the upper SCROG layer
-Vertical stacking of flower sites
-Improved bud alignment and structure
While full swelling has not yet begun, the response to training and pruning is clearly visible.
🍵 Nutrient Strategy / Early Green Sensation Introduction
Feeding continued using the Hy-Pro nutrient line (excluding Spraymix), with a key strategic addition:
Plagron Green Sensation introduced early at 1 ml/L
This was applied one week earlier than manufacturer recommendations to:
-Enhance early flower development
-Support metabolic activity during transition
-Prepare for upcoming bud swelling phase
Plant response:
Excellent , no signs of overfeeding, deficiency, or stress. The plants remain in perfect health.
🌱Strain Observation Sticky Broccoli
Sticky Broccoli continues to impress with:
-Exceptional genetic stability (all four phenotypes highly uniform)
-Strong resilience to stress and training
-Efficient nutrient uptake even under shared root space (4 plants / 30L soil)
-Balanced and symmetrical canopy development
The consistency across all plants highlights the quality and stability of the genetics.
🧠 Weekly Reflection & Forward Plan
Focus this week:
Final structural optimization and transition into early bud stacking.
All interventions were executed successfully, with the plants responding vigorously and without stress.
Next steps:
-Monitor onset of bud swelling
-Continue evaluating response to Green Sensation
-Maintain optimal canopy conditions
-Transition fully into Main density and resin production phase
📸 Weekly Summary
Flowering Week 3 marks the end of structural work and the beginning of true flower production.
With lollipopping completed, canopy optimized, and early bud stacking visible, the plants are now entering the most critical phase of the cycle.
The early introduction of Green Sensation, combined with strong plant health and genetic uniformity, sets the stage for a high-performance flowering phase.
See you in Flower Week 4 Bud Development Intensifies 🌸✨
Likes
2
Share


@TowersD
Follow
In the beggining of week 4 of flower the phenos are showing differences.
Nanaz x BBC are way toller that the Headbands.
Also, Nanaz x BBC #2 has no pistils but it is a female plant. I have that happened before when I grew the Banana Butter Cups S1


Likes
109
Share


@buddha61
Follow
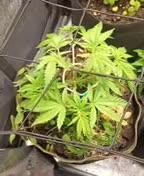
Day 141 - Made the decision I am going to chop Sunday morning, and giving 24 hours of darkness before. The net was cut out of the plant, and the light removed from the tent. I wanted to wait a bit longer, but there were bright yellow tipped sugar leaves trying to poke out of the buds, so I figure it was time. She was set to be watered Saturday, but that will be foregone and chopped Sunday morning. The tent is going to double as the drying chamber.


Likes
6
Share


@CannaHorse
Follow
EN: Week 6, lemon cherry cookies is the furthest. The super lemon haze plants, along with the gorilla cookies, take the longest
DE: Woche 6, lemon cherry cookies ist am weitesten. Die super lemon haze Pflanzen brauchen zusammen mit der gorilla cookies am längsten


