
Likes
Comments
Share


@1Prinz
Follow
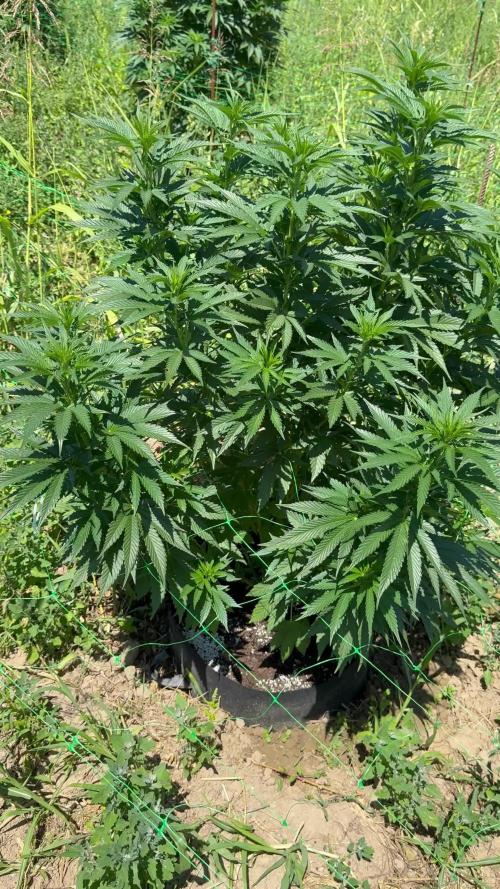
The week started with spider mites. I saw them on the frosted guava and decided to take all of my plants outside to separate them a little even if the temperatures dropped under 10 degrees Celsius. Also I found a cockchafer in the room which had obviously time to spread his eggs.
After I did this, the amount of spider mites reduced.
I ordered some predatory mites and nematodes which I will use as soon as the will arrive.
11.06 I watered the plants with 150+150+150 ml pure water. It’s the last bottled water. From here the plants will get only tap water.
14.06 released the nematodes with around 1-1,2L for each plant.
15.06 released the predatory mites on a wet kitchen paper towel
16.06 LST Frosted Guava

Likes
13
Share


@Robeeriegenetics
Follow
Ooooooweeeeeee they’re all doing so good even the extras that I threw in flower with out cloning are doing great .. in just 2 more weeks I’ll throw the donor plants into flower
Likes
15
Share


@YOZYY
Follow
Did some defoliation very light just made sure nothing is blocking the lower nodes to much but other than that been feeding heavy then watering with just cal mag for two waterings then heavy. Next watering will be a 900 to 950 ppm mix.

Likes
3
Share


@brpet
Follow
Plants are exploding. Seeing the power of RDWC now :-) Also found some mutants - leaves are growing in the the middle of the fingers.

Likes
6
Share


@Cannabot
Follow
The 3 amigos doing well.My 3 baby sharks starting to grow teeth lol.Very uniform growing to each other.Smells are coming through.Happy plants.They loving the lst

Likes
147
Share


@MrJones
Follow
MrJones Black Berry OG
🔹🔹🔹🔹🔹🔹GOALS🔹🔹🔹🔹🔹🔹
🌞Flowering Environment - 75/80℉ and 50% Humidity
💧 Feeding - Advanced Nutrients Bloom Regiment - Great APP!
🍃Training / Added the second trellis last week, it is doing a great job with support, SCROG process makes it hard to defoliate the plants.
🕷️ IPM - Will be using Green Cleaner" 1 OZ per Gallon, and CannControl from Mammoth alternating between product each month for Integrated Pest Management.
💡Mars Hydro LED / Veg TS-1000 / Flower 480W FC 4800, this light is just performing very well!
🔹🔹🔹🔹🔹🔹🔹🔹🔹🔹🔹🔹🔹🔹🔹🔹🔹🔹
📝 Rambling - With week 14 here, will be the last week of nutrients and will be starting with PH H20, the buds continue to get fat!
🔹🔹🔹🔹🔹🔹🔹🔹🔹🔹🔹🔹🔹🔹🔹🔹🔹🔹
▶️ Friday - 04.16.21 / Feeding 40 OZ of Advanced Nutrients
▶️ Saturday - 04.17.21/ Starting to Flush with H20 PH 6.2
▶️ Sunday - 04.18.21/Just feeding H20 PH 6.2
▶️ Monday - 04.19.21/Just feeding H20 PH 6.2
▶️ Tuesday - 04.20.21/Just feeding H20 PH 6.2, the buds are still getting fatter, they are looking amazing!
▶️ Wednesday - 04.21.21/ Just feeding H20 PH 6.2, the buds are still getting fatter, they are looking amazing!
▶️ Thursday - 04.22.21/Just feeding H20 PH 6.2, the buds are still getting fatter, they are looking amazing!🔹🔹🔹🔹🔹🔹🔹🔹🔹🔹🔹🔹🔹🔹🔹🔹🔹🔹
📜 Cultivar Information - We have created this strain by crossing the best Black Domina available with Very Berry and our own Lost Coast OG Kush, this plant produces large colas with a super intense sweet berry flavor with a sweet-smelling aroma that varies from fruit and berries to sweet candy. This lady offers tight internal stacking giving a perfect structure for those super heavy colas, which is perfect for growth both indoors and out, if grown outside she is fairly resistant to mold and powdery mildew which is a real bonus with such large colas.
🔹🔹🔹🔹🔹🔹🔹🔹🔹🔹🔹🔹🔹🔹🔹🔹🔹🔹

Likes
9
Share


@Atom_x_Andromeda
Follow
Going Steady i have stunted both plants so I’ll get less yeild but they’re growing and growing good I love this grow it’s my first indoor and I have put a lot of work into it I hope everybody enjoys the pics and videos they will keep coming we should see bud in about 10 days they are defiantly in pre Flower


Likes
84
Share


@Van_Terpen
Follow
LIVING SOIL & TCO
DEMETEARTH SYSTEM
⚡CODE PROMO : VAN-TERPEN420⚡
-15%+2 Seeds THE HIGH CHAMELEON 🦎
https://linktr.ee/vanterpen


Likes
2
Share

@Daves_Garden710
Follow
🌿 Week 4 — Bushy & Thriving! 🌿
#PermanentMarker #ZamnesiaSeeds
The girls really filled out this week — super bushy and thick growth all around! I topped them once and gave them a good defoliation to open things up, as they were getting quite dense.
I bumped the feed up slightly to 600 ppm @ pH 6.0, still running the Aptus Clean Program with R.O. Water Conditioner, Regulator, and All-in-One Liquid. 💧
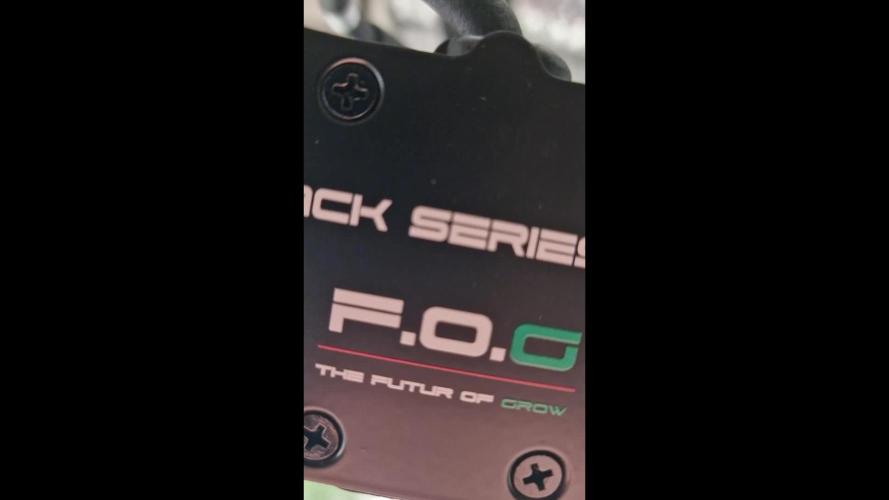
Raised the Future of Grow Black Series 600 a bit to encourage some stretch before the flip. I’ll be adding an under canopy light (UCL) as soon as it arrives, and later this week I’ll set up a trellis/net for support. The plan is to flip them after week 5.
So far, they’re looking really nice and healthy — one pheno is even showing a bit of color on the tops already. Excited to see how they develop from here! 🚀
Likes
8
Share


@Ladyblazed
Follow
Alright, this is the best sativa ever tried, actually my first purple coloured buds. The smell is a lot like pineapples and berries. The effect so uplifting!!💜
Likes
37
Share


@Zurban_Poison
Follow
Hi all. I finally decided to plant a little defoliation this week... a lot of buds are hidden under leaves that are difficult to develop. I think before the end of flowering they will receive enough light to become stronger and covered with trichomes.

Likes
84
Share


@Terp1
Follow
01.07.2023
Tag 57
Was soll ich sagen? Schaut sie eucht an.
Ich bin bisher sehr zufrieden mit den Zkittlez und Beide haben sehr gut auf die Entlaubung reagiert.
Weil das Licht bis zum Boden kommt, habe ich weitesgehend auf Lollipopping verzichtet.
Die Triebe haben sich ziemlich schnell gestreckt und sind deshalb noch recht dünn.
Aber je dicker die Knospen werden, desto dicker werden auch die Triebe.
Ich füttere sie jetzt gut und werde auch ein wenig Grow beibehalten
Jetzt kann ich nichts weiter tun, als auf die beiden Damen aufzupassen, sie hegen und pflegen und ihnen Liebe schenken.
Wieviel Bud dabei wohl rauskommt?
Likes
16
Share


@Marijuanaisland
Follow
Alguns ataques de bottritis e corte no top Bud mais consegui controlar com desumidificador alimentando com( ripen ) GHE desde o dia 50 caminhando para a colheita

Likes
15
Share


@northern_rookie
Follow
Week 7 Flower - Notice that the tops of some of the Tops are pretty hard. Think they got a bit cooked by the LED...
Hifi 4G & Blueberry Pics are missing from this week...I thought I had taken some footage, but seems that I got distracted. Work has been nuts so not surprising that I gapped on that.
Hifi 4G is needed more support. Looks like a blue ribbon chaos around it.
Blueberry looks fantastic.


Likes
13
Share


@FlavoursUk
Follow
Since sprouting above ground I've been top watering RO water until the roots hit the water.
I also covered the net pots with reflective film to avoid any light leaking into the rdwc system to avoid any issues later on in the grow.
Day 5 - Roots are starting to touch the water so I'm expecting the growth rate to pick up soon 😏
Trol master unit is set up and connected to my light at 40% and on a 18/6 lighting schedule. Very handy unit if I must say.
Until the next update


Likes
24
Share


@Kountryboi90
Follow
And here we are! CHOP DAY! This strain has been impressive and smells like a bag of oranges! Oh so lovely! This girl packed on the weight. Several branches are hanging and has caused some side branching to separate from the main stalk(my fault for cutting the scrog net). Will definitely be growing this strain again!


Likes
18
Share


@Green_Blood
Follow
Really enjoyed growing this one out.
Super frosty, dense, and beautiful structure.
In my garden the Blueberry Cookies had the smallest buds, but they were pretty uniform, pretty, and frosty.
You open that jar and the terps are there. Would grow again to look for a pheno with a better yield.
Likes
13
Share

@Radagast_
Follow
19.07.
Girl Scout Cookies
Day 85#
I don't have much to write, the plant was at the end of its twelfth week yesterday, it's progressing well, it's happy, it's healthy, we pray to the sun and so on :D
Stay High and Keep Growing!!!