


Processing
Likes
Comments
Share


@CityFarmer
Follow
Hello everyone,
Well these girls are doing good, starting to flower really nice and the smell is outrageous. Growing these outside made them get a smellier and growing some beautiful colors, lets see how they go...
See you guys next week🤘🤘🤙🤙👊👊👊

Processing
Likes
53
Share


@Beans
Follow
Day 1- watered
Day 2- 😴
Day 3- 😴
Day 4- I need to feed tent 1 tomorrow. Gonna up the nutes from last week since they dont seem to be getting caught up. Can see 1st signs of flowering so I'm gonna experiment a bit with additives and see if I can see a noticeable winner or possibly no difference at all.
Day 5- Fed tent#1 14ml advanced trio, 1ml floralicous +, .6ml mammoth p. 1/8tsp flower fuel per/gal. Tent#2 got 2.5ml armor si, 5ml tiger bloom, .6ml mammoth p/gal. Pulled each plant out and cleaned up the bottoms and middles, washed trays and gave a very light dusting diatomaceous earth on underside of leaves. Hoping that will keep any spider mites that think fucking with me again this year will be fun, dead as shit and disappointed. Got a bunch of cuts for clones now too. That's gonna be tomorrow me's problem though lol.
Day 6- 🚫
Day 7- well I'll be a son of a bitch...guess what I found? Spider mites. Got to try out my new eradication method I thought up months ago using diatomaceous earth and an air compressor. (Almost a week later and I cant find a mite anywhere 😁)
STEP 1- Turn off your carbon filter so u dont plug it up then dust the hell out of everything with diatomaceous earth. I wanted it to look like a thick fog and let the fans blow it all around. I'd go fog it back up every 10-15 minutes for an hr or so.
STEP 2- Starting with the worst, pull each plant out of the tent and blow off with 60psi (4bar) compressed air(see video)
STEP 3- Inspect the plant and blow off any mites u find with the air gun. I used a LED flashlight to make it easy to see them.
STEP 4- After the plant appears mite free give another dusting of diatomaceous earth.(see video)
STEP 5- clean tent. Vacuum up all the DE and blow dust out of lights.
STEP 6- Put plants back in the tent and start your carbon filter if u have 1. In theory this should take care of current mites and any eggs that hatch. Check daily and repeat steps 2-4 as necessary.

Processing
Likes
38
Share


@STAYINGONMYMAINCBATORUNTWO
Follow
Still forming her delicious buds had a lot of heat problems can’t seem to keep them down below 34 reaching 36c highest! 😮 I’m trying different things everyday but I think if I don’t fit ridge vents or tile vents I’ll be having more dramas with this heat! Unless typical UK gives us rain then I’ll be happy lol
I’ve added some examples of my heats in the tents the blue one (blue illuminate) is the bananan glue the first yellow one is the fast flowers second is the autos! I have 2 coolers an extraction fan and another fan to blow the heat towards the extractor but still can’t bring it down! I think I’ll go back to my old way until the summer passes on the next ones which are in germ btw! Looking to rotate a harvest every 4 weeks from when I harvest the autos! Wish me luck please buddies the struggle is real!

Likes
20
Share


@SirDucksAlot
Follow
This week my leaves have started yellowing and claw footing. Not sure what is gonna on... Any help?

Likes
6
Share


@JustGrowWithIt420
Follow
Was a little bit of a picky strain to grow but overall I am happy with the way everything turned out and the yields look phenomenal, would be nice to get 1 gram/watt, buds are dense, frosty and smell absolutely delicious! Will post pics of final product when she's done! 👊👌🔥

Likes
5
Share


@Elmakka
Follow
suuuuper flowers really strong an good smell, let it dry and curing then ill enjoy it

Likes
1
Share

@Ninjabuds
Follow
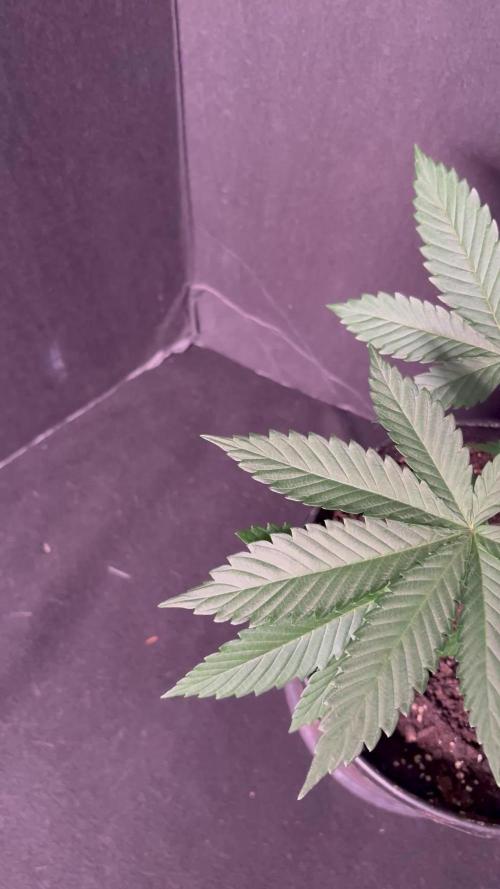
It’s day 27 from seed for all the plants in the photo sea of green. Let’s call it the battle of the strains summer 2025. All of the plants are starting to have visible differences. I’m already starting to tell witch plants are more sensitive than others.

Likes
Comments
Share

@Hempel420
Follow
Weekly Update: Leaf Tugging, Taping Accidents & Fresh Nutes
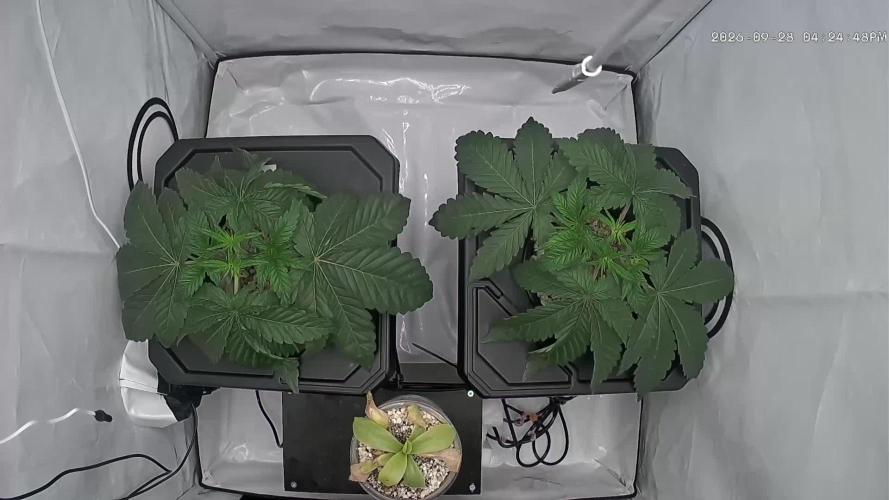
Another week down! Since my last update on October 4th, the plants have been moving along, though Plant #1 remains a magnet for drama. Here is how the week played out inside the tent:
October 5th – October 7th: Smooth Operations & Topping
Nothing too major to report during the first few days of the week. Just routine maintenance like removing a few fan leaves here and there to improve airflow and canopy light penetration. I also went ahead and topped the main side shoots above the 3rd node on both plants to continue building out our mainlining structure.
October 8th (Thursday): The Care Bears Under Pressure
Decided to do a little bit of leaf tugging. Working with only one hand struck again. I managed to split a side shoot clean down the node on the already heavily battered Plant #1. I quickly wrapped it with some tape and braced it up. At this point, the Care Bears sitting in the pumice are working overtime… and honestly, doing a much better job than I am with my single hand!
October 9th (Friday): Full Reservoir Change
Time for a fresh start. Drained the buckets completely and mixed up a fresh batch of nutrient solution. Dialed in the parameters right on the spot: EC 1.5 mS/cm and pH 5.5. The roots welcomed the clean drink immediately. Good thing the buckets were already half empty from the girls drinking them down.
October 10th (Saturday): Zero Intervention
Life got busy and I didn't even get a chance to open the tent. Honestly, leaving the plants alone for a full 24 hours is probably the best gift I can give Plant #1 right now to let those taped nodes heal in peace.
October 11th (Today): Spontaneous Topping & Heavy Defoliation
I opened up the tent today to take photos for this weekly log and had a sudden change of plans. Seeing how much Plant #2 is outstripping Plant #1, I made a spontaneous decision: I topped Plant #2 again to aim for 16 main tops instead of 8!
This serves a dual purpose: it slows down Plant #2's vertical surge and buys much-needed time for Plant #1 to recover from her injuries and catch up. While I was in there, I also gave both plants a generous defoliation session to open up the canopy for all the new tops.
What do you guys think, when is the right time to switch to flower? Hopefully next week's post will mark the switch to 12|12!

Likes
69
Share


@nonick123
Follow
Día 108 (16/09) Tras el flush las plantas muestran tímidamente nuevos pistilos blancos! 😍
Hoy no es necesario regar!
Día 109 (17/09) Me he encontrado a OnionOG #1 y a Purple Punsh completamente sedientas! Con las hojas caídas!
Riego con 1,25 litros de H2O a cada una de ellas (el resto no necesitan riego)
Día 110 (18/09) Riego con 500 ml H2O
Las plantas con el bloqueo empiezan a mostrar nuevos pistilos, sobre todo en las partes inferiores
Día 111 (19/09) Riego con 250 / 500 ml H2O
Se vuelven a formar pistilos blancos en todas las plantas que han sufrido el bloqueo! 😍💥
OnionOG #1 va como un cohete formando y apilando flores 💪 🚀 😍
Día 112 (20/09) Día lluvioso. Riego ligero 250 ml H2O
Día 113 (21/09) Otro día lluvioso. Riego ligero con 250 ml
Día 114 (22/09) Detecto algunas moscas blancas apoderándose de las plantas y decido hacer una aplicación foliar de piretrinas (Spruzit a 15 ml / l)
Riego con 1 Litro de Té Floración de Lurpe Solutions. Preparación: 24 horas con bomba de aire (oxigenación) con ingredientes:
Healthy Harvest 8 ml/L + Insect Frass 16 ml/L + Kelp Hidrolizado 0,3 g/L
💦Nutrients by Lurpe Solutions - www.lurpenaturalsolutions.com
🌱Substrate PRO-MIX HP BACILLUS + MYCORRHIZAE - www.pthorticulture.com/en/products/pro-mix-hp-biostimulant-plus-mycorrhizae

Likes
18
Share


@BrownsBuds
Follow
Plants were left for 8 days between watering, the soil was very dry and plant leaves drooping. Watered them with 1 litre each yesterday but have noticed yellowing of leaves on the bottom. Thinking this might be due to under watering I am not sure. Apart from that the flowers themselves are looking fine. Night temps are now 18 deg and 24 daytime and humidity at 50% I have also now put in a small fan at floor level in the space of where the 4th pot was so this now gives lower air movement.

Likes
9
Share


@Drtomb
Follow
We begin week 4.i have finished all the rearranging of the colas and adjusted the net after trimming all the branches. Focusing the plants to produce to the top buds.
Likes
3
Share


@Chubbs
Follow
What up everyone. Weekly update on these ladies. This week they've done good, seeing growth and new leafs. I did see some white spots on a leaf or two so I'll up my ipm to twice a week until I know they're pest free. Over all I'm happy for the weeks to come as the outdoor season is in full swing.
Likes
11
Share


@EvilStevil
Follow
Sunday, January 17
Fed 1/2ga to one plant and 3/4ga to the other two. 7tsp of Grow Big and 2.5tsp of Bud Candy mixed in 2ga of water @6.4pH. Plants continuing to stretch, fed Grow Big to try and add some nitrogen.
Thursday, January 21
Fed about 3/4ga to each plant. At a ratio of 2 teaspoon per gallon of Bud Candyat 6.4 pH.
Saturday, January 22
Fed plants 3/4 ga @6.3pH 2tsp/ga of Bud Candy. I did a defoliation of all 3 plants and decided to flip to a 12/12 light schedule to see if I can trigger blooming. I began last night and I will continue to do so and hopefully see results sometime soon. I’ve looked up the issues of auto flowers not flowering and being “stuck” in the process. I did these two techniques(defoliation and light schedule)to try and trigger flowering. Hopefully we’ll see some results🙏 As always, stay safe and happy growing💚✌️🌱

Processing
Likes
6
Share


@macrocefalo
Follow
With great joy I will start my second season growing cannabis. I hope to learn from some small mistakes from the first season where I was surprised by my performance as a first-time sailor cultivating the BlueDream strain. This season I left the 4 seeds of GorillaGlue 36hrs in a pot of water to break the dormancy. After that I used the napkin technique for more 42 hrs. So I put each one in a 5-gallon airpot, as they are automatic and go to harvest in the same pot. After 24hrs in the vase the first 2 little leaves came out. I made a homemade dome with a 2-gallon water bottle, cutting it into strips and lining it with plastic with some holes to keep the humidity high during this initial phase. We entered the first week of cultivation and unfortunately due to an oversight I got confused in the fertilizer table and clearly the dreaded overfert happened. I did a watering only with water to try to remove the excess fertilizer let's hope it works.

Processing
Likes
4
Share


@Hisknibbs935
Follow
day 7 first time and first time using set up so had a few problems getting environment right,seems to be okay now they are coming on,eager to see how the take in the next few weeks gonna start terra vega by end of next week possibly.terrapro+ soil


Likes
75
Share


@Dedon
Follow
Hi everyone !
Everything is ok, no disease, no carrency. 👌
they start to smell a little and pistils appear everywhere 😍
i change the nutrient solution and start with PK 13/14
See you next week ;)


Likes
1
Share


@spanish420pasiongrow
Follow
Muy caros los productos, efectivos pero me sigen pareciendo caros, probaré nuevas gamas! Un saludo
Likes
13
Share


@KAPT_SAVE_Da_HOE
Follow
Defoiliated and aggressive lollipoping. She started her stretch and budding.
Likes
58
Share


@GreenHouseLab
Follow
143gr for the Larger pheno and 97 for the shorter, very respectable yield in total for 3 Wk Veg. Total 240gr even they each had 1.5’x1.5’ of space. Big yielder, buds are 10/10 & very easy to grow . Could be prone to mold in an uncontrolled environment.