
Processing
Likes
Comments
Share
@
Follow
Likes
11
Share
Had some hair style and off to get fat lol
Likes
2
Share
Week3! moving out of early veg and into big boi weeks. Probably within the next week or so we will be doing our first topping. 6+ growth terminals will be my metric and I will be taking the best 4 and running 4 mains per plant. I also decided to edge up the nutrients, they look like they responded to the boost last week so Ill see if I can run them off of the Vanilla chart from TPS 10+ week extended chart. I usually run the nutrients at 70% strength A/B so we will see if we can push more in the late veg area. Also To deal with the possibility of future Root Gnat issues before I Transplanted the seedlings into 7 gal containers, I made sure i ran boiling water through my premade soil mix before hand. that way if there was any larvae in the soil it killed them off beforehand. I did replace soil microbes that I ended up killing off as well by adding in recharge after the fact when the soil cooled down a bit, even if the micro-bio stuff in the soil was not compromised I made sure to have a backup plan. I will also be spraying the ladies with Crop Defender 3 soon for mildew and spider mite prevention. CD3 is compleately organic pesticide/fungicide which is OMRI listed.
Likes
5
Share
5. Woche Sie wächst richtig schön Buschig, gefällt mir bis jetzt 😊
Likes
Comments
Share
🌿 Frosted Guava Auto by Zamnesia | Pheno B | Week 8 (Flower Week 5) 🌿 Small Plant. Big Personality. And Now… A Little Less Green. There are plants that follow the plan. And then there are plants that write their own story. Frosted Guava Pheno B has been doing the latter from the beginning. She has never been the biggest plant in the room. She hasn't chased height, hasn't tried to dominate the canopy, and hasn't demanded much intervention. Instead, she has quietly developed her own personality. Compact. Elegant. Beautifully structured. And increasingly covered in flowers. Now, entering her fifth week of flowering, she has reached another important moment in her journey. This week, she joined the group receiving a selective flowering defoliation. Not because she was struggling. Not because she was unhealthy. And certainly not because every plant needs to be defoliated. Quite the opposite. She was looking fantastic. But after looking carefully at her structure, her development, and the way light and airflow were moving through the plant, I felt that removing some unnecessary foliage was the right decision. So we went in. We cleaned her up. And now we're going to see what she does with the extra space. 🌸 Week 5 Flower – Her Own Story Frosted Guava Pheno B is currently around 108 cm tall. That still makes her one of the more compact plants in the room. But honestly? I don't think she cares. 😂 She has found her own architecture and she's sticking with it. The flowers continue developing beautifully, with increasingly visible frost and those characteristic white pistils reaching outward from the developing buds. Her foliage has remained lush and healthy, with that beautiful deep green colour we've been following since the beginning. The plant looks comfortable. The flowers are developing. And now we're starting to see more definition between the different parts of the plant. This is exactly the kind of moment where stepping back and looking at the whole plant becomes important. Because sometimes the question isn't: "Can I remove this leaf?" The better question is: "Does this leaf still have a useful job to do here?" And that's where this week's defoliation came from. ✂️ Defoliation – What We Actually Did This wasn't a complete strip. It wasn't a race to make the plant look naked. And it wasn't about removing leaves simply because they were large. The approach was selective. I removed most of the fan leaves carrying their own petioles, particularly where they were contributing to unnecessary shading or creating congestion inside the plant. I also cleaned the lower and interior portions of the plant where some flowering sites were positioned so far below the productive canopy that I didn't expect them to develop into meaningful flowers. Those areas are what I would consider the true bottoms on a compact plant like Frosted Guava. And that's an important distinction. Because this plant is small. Her lower sites really are lower. Even with the Lumiflora under-canopy lighting helping bring additional photons into the lower canopy, the primary productive zone of the plant remains higher up. So rather than allowing the plant to spend resources maintaining foliage and very low sites that are unlikely to contribute much, I decided to clean those areas selectively. But I didn't remove everything. Some lower flowering sites remain. I want to see what they can actually do. That's part of the experiment. 🌿 What Is Defoliation? For anyone new to growing: Defoliation is the intentional removal of selected leaves from a plant to alter the structure of the canopy. The goal isn't simply to have fewer leaves. The goal is to create a better balance between: light penetration + airflow + canopy structure + productive flowering sites. Leaves are extremely valuable. They're the plant's solar panels. So removing them should never be treated as something automatically beneficial. Every leaf removed is a piece of photosynthetic machinery removed. That's why I don't approach defoliation as: "Flower started. Time to strip the plant." Instead, I look at the plant in front of me. Is the canopy becoming too dense? Are leaves heavily shading developing flowers? Are there congested areas where airflow is poor? Are there leaves that are doing very little because they're buried underneath several layers of foliage? Are there lower sites that realistically have very little opportunity to develop? If the answer is yes, then selective defoliation can make sense. If the answer is no... Leave the plant alone. 🚫 What Defoliation Is NOT This is probably even more important. Defoliation is not: ❌ Removing every fan leaf ❌ Trying to expose every single flower to direct light ❌ A substitute for good plant structure ❌ A guaranteed way to increase yield ❌ Something every plant needs at the same time ❌ An excuse to strip a healthy plant simply because you can The objective isn't to make the plant look clean for the sake of appearance. The objective is to improve the functional canopy. And there's a big difference. A beautiful green leaf isn't a problem simply because it's a beautiful green leaf. If it's healthy, receiving light, contributing to photosynthesis and helping the plant, I have no reason to remove it. But when the canopy becomes crowded and certain leaves are contributing more obstruction than productivity, that's when selective removal becomes interesting. ✂️ How I Approach It My approach is simple: I observe first. I don't start with a predetermined number of leaves that must disappear. I start by looking at the structure. Then I work from the outside toward the interior and from the top toward the lower portions, looking for unnecessary congestion. Leaves that are heavily shading productive flowering sites can be candidates. Leaves buried underneath several other leaves can be candidates. Leaves occupying congested interior areas can be candidates. And lower growth that is so far beneath the productive canopy that it has little realistic opportunity to develop can also be considered. But I always keep the plant's overall health in mind. The goal is balance, not maximum removal. That's why Pheno B still has plenty of green. She's not naked. She's simply better organized. 💡 The Under-Canopy Question This is particularly interesting with Frosted Guava Pheno B because we're running Lumiflora under-canopy lighting. Someone might reasonably ask: "If you have light underneath, why remove the lower growth?" That's a very fair question. And the answer is that under-canopy lighting doesn't magically make every lower flower equal to a top flower. On a compact plant like this, the very lowest parts are still extremely low relative to the main productive canopy. The under-canopy lighting is helping reinforce the lower and interior areas, but I still want to observe where the plant naturally allocates its energy. That's why I deliberately left some lower flowering sites behind. I don't want to assume. I want to watch. Will those remaining lower sites develop? Will the extra light make a noticeable difference? Will the upper flowers continue dominating? That's exactly the kind of question this project allows us to explore. And the harvest will eventually give us the answer. ☀️ More Light Where It Matters The Future of Grow Black Series LED continues providing the primary light from above, with approximately 1,000 PPFD across the upper canopy. Frosted Guava may be compact, but she certainly isn't short on photons. She's been sitting underneath that light throughout flowering, converting those photons into leaves, flowers, structure and now increasingly visible resin. And with the selective defoliation, we're changing how some of those photons move through her architecture. We're not creating more photons. We're simply trying to make better use of the ones already available. That's the idea. Don't waste energy chasing light. Build a canopy where the available light can actually do its job. ❄️ And The Frost Is Getting Serious The name Frosted Guava continues becoming more appropriate every week. The flowers are developing beautifully, and the resin production is becoming increasingly visible. Those white pistils are still everywhere, creating an incredible contrast against the deep green foliage. And underneath all those hairs, the flowers are beginning to gain more structure and density. This is the stage where I love looking at the same plant from week to week. Because the change isn't always dramatic overnight. But compare the plant to where she was a few weeks ago... And suddenly you realize: She's building. She's filling out. She's gaining flower volume. She's becoming increasingly defined. She's becoming Frosted Guava. 🌿 Small Plant. Big Character. I've said this about her before, but this week makes it even more obvious. Frosted Guava Pheno B doesn't need to be the tallest plant in the room. She's already found something more interesting. Character. Her sister Pheno A has followed a different path. And that's one of the beautiful things about running phenotypes together. Same genetics. Same room. Same light. Same nutrition. Same philosophy. Different personalities. Pheno B has chosen to remain compact and elegant. And now, as flowering progresses, she's showing us exactly what that compact structure can become. 💧 Nutrition & Hand Watering We're continuing with hand watering throughout the room. Current feeding remains centered around the Plagron flowering program: Terra Bloom — 2.2 ml/L Power Buds — 1 ml/L Sugar Royal — 1 ml/L Green Sensation — 1 ml/L Lemon Kick — 0.03 ml/L Current recorded parameters are around: pH: 6.0 EC: approximately 2.0 mS/cm Solution temperature: 21°C Root-zone temperature: 21°C Watering: approximately 1.2 L per 24 hours Hand watering has also given me another opportunity to observe this plant closely. Every time I water her, I get another chance to look at the flowers, inspect the leaves, check the structure and notice those tiny changes that are easy to miss when everything is automated. It takes more work. But it also brings you closer to the plants. And sometimes that's where the best observations happen. 🌡️ Environment The room continues running under stable conditions: Day temperature: 29°C Night temperature: 25°C Relative humidity: approximately 72% Solution temperature: 21°C Root-zone temperature: 21°C CO₂: approximately 639 ppm With the canopy becoming increasingly dense, airflow and humidity management become even more important. That's another reason selective defoliation can be useful at this stage. Not because leaves are inherently bad. But because a dense flowering canopy can create small pockets where air movement becomes less effective. Opening selected areas gives the room a little more breathing space. And that's particularly valuable as the flowers continue developing. 🔭 Looking Ahead Now comes the interesting part. We've changed the architecture. We've removed some unnecessary foliage. We've cleaned the lower sections. We've opened some of the interior. And now... we wait and observe. I want to see how quickly she responds. I want to see how the flowers develop with the improved canopy structure. I want to see what happens to those lower sites we deliberately left behind. And most importantly, I want to see how Frosted Guava Pheno B continues writing her own story. Because she's already made one thing very clear: She doesn't need to follow anybody else's timetable. ❤️ Final Thoughts – Let Her Shine Frosted Guava Pheno B has been one of those plants that quietly earns your attention. She didn't arrive in the room demanding the spotlight. She didn't become the tallest. She didn't become the biggest. She simply kept growing. And week after week, she became more beautiful. Now she's entered another chapter. A little less foliage. A little more breathing room. A little more light moving through the canopy. And plenty of flowers left behind to show us what she's capable of. The important thing about this week's defoliation isn't how many leaves we removed. It's why we removed them. Because good cultivation isn't about following a recipe blindly. It's about looking at the plant in front of you and making decisions based on what she's actually telling you. And Frosted Guava Pheno B was telling me: "I'm ready." So we listened. Now let's see what she does. A huge thank you once again to Zamnesia for these beautiful genetics, Plagron for the nutrition, Future of Grow for the Black Series lighting, Lumiflora for helping illuminate the lower canopy, TrolMaster for environmental control and of course to everyone following this 8×8 Adventure on GrowDiaries. Every week, every phenotype tells us something different. And that's exactly why I love this project. Until next week... Let her shine. She has earned her spotlight. ✨🌿❄️ Growers love and happy growing! 🌱💚
Likes
63
Share
@Natrona
Follow
Strawberry Cadillac – STRNG Seeds W13 F4 2/1-7 I am following the TPS1 feed schedule for 9-10 weeks, reducing the PPMs until they reach 850-950. 2/2 PPM 1001 Ph 6.6 68.7 2/5 PPM 934 Ph 6.5 67.4 TPS1 13ml/g Silica Gold 3ml/g CalMag 3ml/g I must move Strawberry Cadillac1 out of the tent to water the others. I stood on a step ladder to get a top view of her. The top after super cropping the four tops is about 2.5 feet across. The buds are really stacking. We had our first big snow this week following a light dusting last week. Pics show my kitties investigating (but not for long). Stay green, growers love 💚🌿 💫Natrona
Likes
83
Share
@yan420
Follow
FERMAKOR BARREL MIX – BASE IN USE (Testing on the Fantasy Feast girl we pulled out of another diary https://growdiaries.com/diaries/274722-grow-journal-by-yan402 ) (FERMAKOR BASE SYSTEM KOH VERSION diary https://growdiaries.com/diaries/278391-grow-journal-by-yan402) (Urea & Micros on the way — first week running without them) 🍶💧🍶💧🍶💧🍶💧🍶 💧 30 L Barrel – Current Working Mix 🍶💧🍶💧🍶💧🍶💧🍶 Step 1 – Calcium Nitrate (Part A) 7 L warm water (~35–40 °C) → added 45 g Calcinit, stirred until fully clear. That’s the calcium + nitrogen backbone for the feed. Step 2 – FERMAKOR PK Base (Part B) 15 L water in the main barrel → added 30 ml FERMAKOR PK Concentrate, mixed well. This forms the main P + K part of the formula. Step 3 – Combine Solutions Slowly poured the Calcinit mix into the barrel while stirring — no reaction, still crystal clear. That confirms the mix is stable and precipitation-free. 🌿 Step 4 – FPJ / FFJ Batch Added 30 ml homemade FPJ (fish + veg batch) ≈ 1 ml/L. Color shifted to a light-amber tone — looks alive and active. 🍋 Step 5 – Citric Acid Balance Added 1 tsp citric acid after everything was blended to fine-tune pH and help chelate micros later on. 📦 Step 6 – Top Up & Check Filled to the 30 L mark with plain water → pH tested with drops, showing yellow-green — roughly 5.8 – 6.0 range. Nice clean look, stable smell, no residue. 💧 Current Base Ingredients (Active Mix) Warm Water ≈ 22 L total Calcinit 45 g → N + Ca foundation FERMAKOR PK Base 30 ml → P + K support Citric Acid 1 tsp → Chelation + pH balance FPJ / Fish Emulsion 30 ml → Organic enzyme booster Result: clean amber mix, mild and balanced. I’ll let this version run for a week before adding anything. 👀👀👀👀👀👀 Observations and changes 👀👀👀👀👀👀 27.10.25 VW27 noticed some min burnt tips so I decreased Calcium Nitrate 45 to → 40g, decided to add two more elements micros and Epsom salts just to make sure they got everything, Fetrilon Combi 1 (Micros): 0.5 g, Epsom salts: 8 g 28.10.25 VW27 she seems devoid of any deficiencies, seems ready for the flip to 12/12 02.11.25 VW27 girl is looking good so I decided to stop making daily videos and do a standard once a week update. 09.11.25 aVW28 7 days since flip,stretch in full swing, first pistils showing, leaf color deep and healthy. Slight tip burn early week → gone after pH stabilized. Feed stayed clear, no residue, roots clean and sweet-smelling, did what I hope is a last cleanup and pruning🎥 10.11.25 VW29 added Phosphoric acid pH down to the schedule for flowering stage. 14.11.25 FW1 FERMAKOR PK Micros 40 → 50 ml 23.11.25 FW2 got some burnt tips, observe and act accordingly in case it worsens, diluted by 25% for this week. 05.12.25 FW3 about 2 weeks ago Calcium Nitrate 35 g → 25 g, FERMAKOR PK Micros 50 ml → 60 ml 12.12.25 FW4 Calcium Nitrate 25 g → 20 g, FERMAKOR PK Micros 60 ml → 80ml 16.12.25 FW4 Calcium Nitrate 20 g → 17 g, FERMAKOR PK Micros 80 ml → 110 ml 20.12.25 Calcium Nitrate 17 g → 15 g 26.12.25 Ffj fpj 30 →0ml 05.01.26 last feed LST and trimming, harvest is end of the week 09.01.26 🌱💦🌱💦🌱💦🌱💦🌱💦🌱 🌿 Day to day tasks & actions 🌿 🌱💦🌱💦🌱💦🌱💦🌱💦🌱 Fed about 5l a day of #1 and on the weekends I do a pure FERMAKOR PK flush 2l runoff (*RUNOFF reused for tomato plants) 💧💧💧💧💧💧💧💧💧 🌱 Nutrients in 30 L #1 – FERMAKOR (progression kept) 💧💧💧💧💧💧💧💧💧 Calcium Nitrate (Calcinit / Nitcal): 45 → 40 g → 35 g → 25 g → 20 g → 17 g → 15 g = 1.50 g/L → 1.33 g/L → 1.17 g/L → 0.83 g/L → 0.67 g/L → 0.57 g/L → 0.50 g/L = 207 ppm N / 253 ppm Ca → 184 / 225 → 161 / 197 → 115 / 141 → 92 / 112 → 78 / 96 → 69 / 84 PK Concentrate (FERMAKOR Base): 30 → 40 ml → 50 ml → 60 ml → 80 ml → 110 ml = 1.00 → 1.33 ml/L → 1.67 ml/L → 2.00 ml/L → 2.67 ml/L → 3.67 ml/L → balanced 1:1 P:K + light micros (from extract) Home-made FFJ/FPJ (Fish + Veg): 30 ml → 0 ml = 1.00 ml/L → 0.00 ml/L Epsom Salt (MgSO₄·7H₂O): 8 g = 0.27 g/L → ~26 ppm Mg + ~35 ppm S Fetrilon Combi 1 (Micros): 0.5 g = 0.017 g/L → Fe 0.7 ppm · Mn 0.7 ppm · Zn 0.3 ppm · Cu 0.3 ppm · B 0.1 ppm · Mo 0.02 ppm Phosphoric Acid (pH down) + Citric Acid (chelation): as needed → First set pH with phosphoric acid, then add a little citric only if you want extra chelation Target pH: 5.8 – 6.0 (drop test yellow-green) 📦 TOTAL (corrected): Liquids (PK + FFJ/FPJ): 60 → 70 → 80 → 90 → 110 → 140 → 110 ml per 30 L = 2.00 → 2.33 → 2.67 → 3.00 → 3.67 → 4.67 → 3.67 ml/L Solids (CaNO₃ + Epsom + Fetrilon): 53.5 → 48.5 → 43.5 → 33.5 → 28.5 → 25.5 → 23.5 g per 30 L = 1.78 → 1.62 → 1.45 → 1.12 → 0.95 → 0.85 → 0.78 g/L YouTube Link: https://youtube.com/-m8h?si=A7x4Zlr2kj-_ga31
Likes
44
Share
🌱: the mild deficiency symptoms grow out slowly, Trichomes are developping 💧 : 2l, 10l SIP 💡 : Dli: 45 mol/m²/d, 🤔:
Likes
16
Share
@willertex
Follow
📅 D77 - 16/01 📜 Almost ready, Waiting for final flush ✍️ 1.5 EC ♒ 9 pH 🌊 10 L 📏 90 cm 📅 D80 - 19/01 📜 Final flush started ✍️ 1.5 EC ♒ 9 pH 🌊 10 L 📏 90 cm 📅 D83- 22/01 📜 Not yet ready - 3-4 days more I think. Suggestion accepted ;) ✍️ 1.5 EC ♒ 9 pH 🌊 10 L 📏 90 cm
Likes
Comments
Share
Gonna go watch alien vs predator and smoke this cross of ripleys og x hubbabubbasmelloscope
Likes
4
Share
Started seeing first pistils , everything going smooth, continue training through net . It's a big job scroging, all that plant training through the net can wear you out! Just ask the Urban Grow Cat, he's absolutely worn out from helping me in the garden, as you can see from the photos. I have noticed a mistake on my diary, it say's that she is still in veg. However she is currently entering week 3 of flower, i have edited it to flowering. ( Sorry about the mistake , Grow cat is still learning how to use a laptop!
Likes
43
Share
Likes
5
Share
@Ninjabuds
Follow
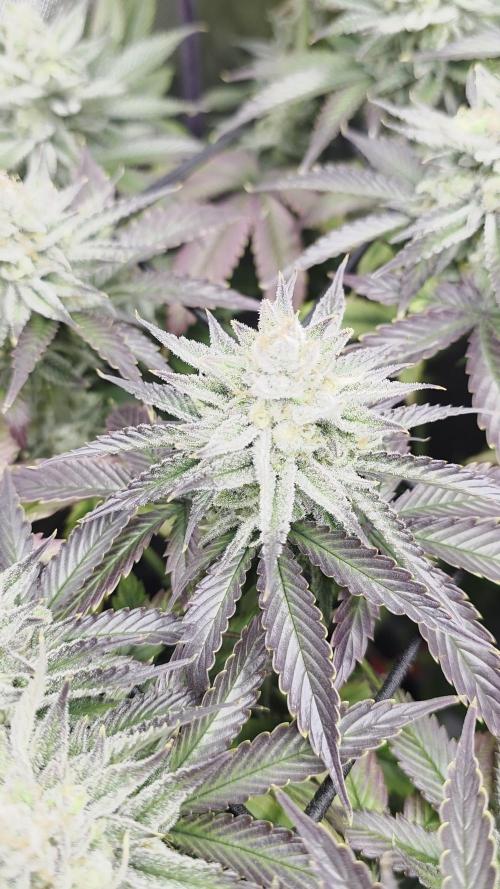
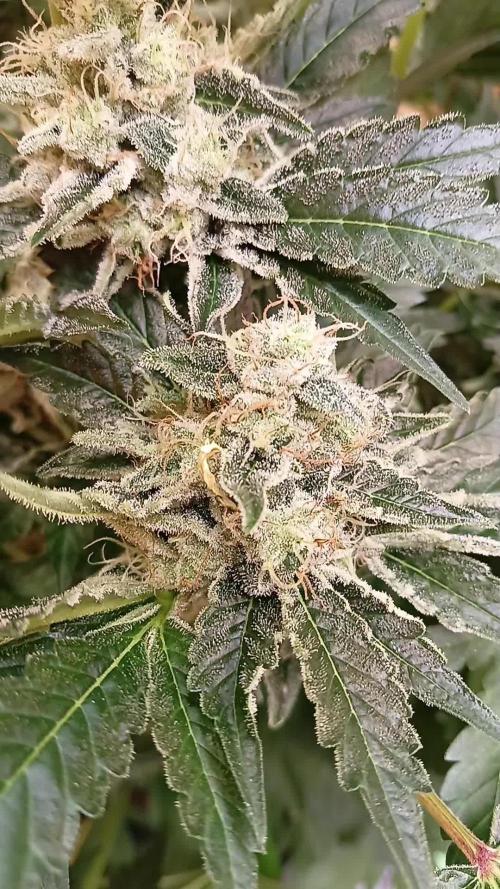
Turing into some fire it’s a small compact plant but has big buds and there are covered in tricombs
Processing
Likes
32
Share
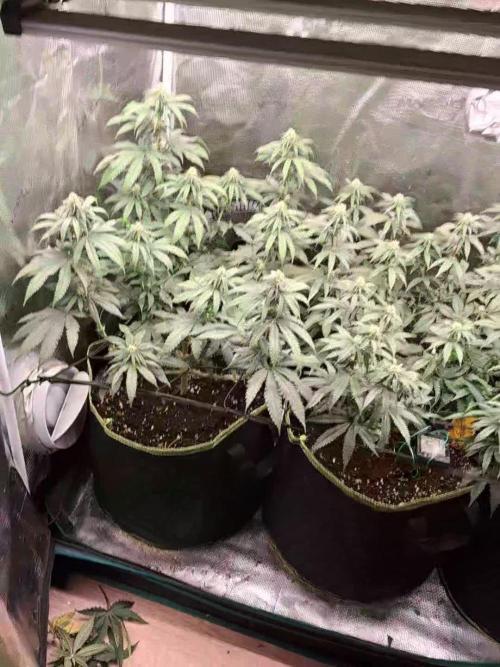
Plants are going into flower. I took night time pics so you can see them sleep. They are a all looking great. This girl is shorter at the moment at 18 inches. Very nice branching on all three plants. I should defoleate and remove some of the bottom branches now.
Likes
7
Share
In der vierten Vegetationswoche wurde bei der Blue Lobster durch ein gezieltes Topping die apikale Dominanz gebrochen, um eine flache Struktur und eine bessere Energieverteilung in die Seitentriebe zu forcieren. Mit dem Umzug vom 3-Liter- in den 15-Liter-Pott bekommt das Wurzelwerk jetzt den nötigen Platz, um das neue Substrat voll zu erschließen und ordentlich an Masse zuzulegen. Trotz des Stresses steht die Pflanze mit ihren tiefgrünen Segeln top im Saft und geht nun in eine kurze Erholungsphase, um genug Stabilität für das anstehende LST zu sammeln, mit dem die neuen Triebe dann final in Form gezogen werden.
Likes
26
Share
Likes
15
Share
They survived the nutrient burn pretty well that they got from early transplanting. All have been connected to the autopot tank. The Mango Sherbet has been topped, the Apple Blossom and one OCP have been mainlined. Especially the Apple Blossom is growing like hell. Never had better genetics so far. Even though I topped/mainlined them there hasn't been any slow down or still stand in growth at all. Also I've connected the pump to the airdomes on the first 3 in the lower row as the leaves already reached the edges of the pots.
Likes
1
Share
My favourite out of all GHS genetics from this grow. Just fucking WOW. Basically u can see everything yourself:) but u can't smell , and that's where this strain excell and gets 11 out of 10 in my rating.
Likes
15
Share
This is a Siberian Ruderalis (Khalifa) crossed with a Hokkaido (rizraz x Ace seeds) F1 hybrid. Just started flowering. It exploded out of the ground faster than you could ever imagine. I’ve never watered it, never gave it nutrients. The seeds sprouted out of the ground naturally after a cold northern Ontario winter. Long months, -30 celcius type stuff! Pretty damn cool! I expect very little modern quality from the buds but it’s still super fun!
Likes
152
Share
@BioBuds
Follow
The end of the fourth week. Only 2,5 to 3 weeks to go, since this is the FAST version of Gelato 33 by Advanced seeds. Last week temps were better, so that was a lot better to manage. The smell is a different story. We are trying to combat it as we speak with a double filter which my friend still had from a previous grow. The ladies are performing, however, because this is a monstercrop with many budsites, none of them will be very big. We anticipate a lot of cutting come harvest time. The stickieness and smell (cookies, dough, herbs, spices, gingerbread, vanilla) promise a lot to make up for that hopefully!! The middle plant that seemed to go fastest, now looks like to have the hardest time flowering. Her more advanced stage of flowering as a bigger clone, made it harder for her to return to veg, which she never really did. This seems to make her want to rush to the finish, as she is already browning the pistils. Also these buds seem more flakey, popcorny. As if the many flowers and grapelike bundled growth was too much for her. I put the light a little closer, to help her fatten up in the time she is given. I never expected the two 'runts' to outperform the mighty middle clone, but hey seem to fatten up and age much more nicely. So for now, prelimenary tip: make sure all your plants are completely revegged before flowering and consider that faster flowering species might have some ruderalis ancestry that might siderail all your lighting intentions and remains in flower what ever the growers lighting schedule. So with at least two more weeks for the two outer plants, and well see how many for the middle one, we are going to make them as comfortable as possible the final push of this flowering. Thank you for following and see you next week!!
Likes
3
Share
@xipo86
Follow
Day 35 of Bloom. They are looking very good entering the late week of flowering... buds are gonna be huge 😋😋😋 terps profile are so diferent on each strain... so delicious.... wow mouth watering....