
Likes
Comments
Share


@Le_Duc_Du_Bud
Follow
Salut amis cultivateurs ✌️✂️🌿
Aujourd'hui je pose la nouvelle semaine 🗓️
Comment vous dire que je suis impressionnée ❗
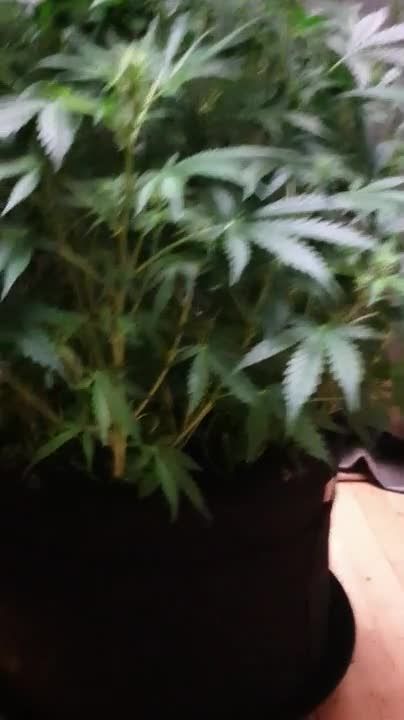
Les plante ce développement a merveille voyait par vous même 🙏
Elles ont fortement grandi, je suis monter a 1.5L par plante, elle consomme la totalité des nutriments et me le montre très très bien 😍🤗
Merci Kannabia 🙏 encore des variétés merveilleuses 😊
J'espère que dame nature sera me récompense 🌿🍁
Pour plus d'informations par rapport à ces génétique, je vous laisse cliquer ici :
https://www.kannabia.com/fr


Likes
16
Share


@CampExotic
Follow
Ready to flip soon! Using 6.9 Autopots for this run. I think a smaller pot would have been just as cool for this 4x4. These plants are trees.


Likes
15
Share


@SkunkyDog420
Follow
Hallo zusammen 🤙
So das war es für Sie habe sie heute geerntet.
Wir sehen uns in 3 Wochen mit dem Erntebericht wieder.
Bis dann 🤙


Likes
29
Share


@Belverde
Follow
Welcome growers
The first week of flowering is ended for this nice PINK KUSH 🌳
A couple of days ago I have done a slight defoliation, the day before 12/12 and she reacts well 🍃
At the beginning of the week I was away from the garden for a few days and the self watering system I have didn't work at its best 💦👎
But she still looking good 💪
Anyway..
About the lights cycle 💡
Like i have already sayed before, we are now in a 12/12 on / off..
Always under two SP3000, from Mars-Hydro, at 75% of the power..
About nutrients 👇
I still giving their always organic/veganic nutrients..
A little bit of silicium (Bionova) / Activator (Biomagno) / Crescita (Biomagno) / Activera (Biobizz) / Grow vegan (Bionova) / The Missing Link (Bionova) / X-Cell (Bionova) / Bioheaven (Biobizz) , a little bit of P-K 3-5 (Bionova) {in spray solution } and for the firsth time a little bit of Fioritura (Biomagno) and Bloom vegan (Bionova)
Like i usually do, a little bit of everything at any watering 💧
And that's all..
See you at the end of week n°7 📆
Thank you so much for stopping and watching 😎👍👍
FC ✌️
🇮🇹

Likes
4
Share


@lotero
Follow
Puse a germinar una amnesia, una haze y una Rocky, en una servilleta mojada en enraizante de lentejas dentro de un tupper.
La Rocky nunca llegó a germinar, así que entonces puse la segunda amnesia.
Las plántulas se han pasado a la maceta, con tres días de retraso para la haze y la segunda amnesia.

Likes
2
Share


@TTerpz
Follow
4/22/25: last flush 2 tsp of sledgehammer with 1 gallon of water used 2 gallons between all three plants…more cool colors coming in with the fade
4/24/25: fed with recommended dosage for week 11 on my schedule card (day 31 of flower)
4/27/25: watered with plain ph water at 6.8

Likes
22
Share


@Spliffi
Follow
Heya🤙👍🤙🌱
This diary is going to show you guys my journey being a contender in a local Cannabis Cup🏆
22 Jan 2024
Got the tracking number for the seeds and packaging this morning. LET'S GOOOO!
Jon Dabs
Check them out here:
https://jondabs.com
@jondabs Instagram
The Sponsors
Check them out here:
Dutch Passion
https://dutch-passion.com/en/
Hydroponic.co.za
https://hydroponic.co.za/hydroponic/harvesting-and-growing-accessories/
Bud Juice
https://www.gohydro.co.za
The Best Grow
https://thebestgrow.co.za
Dynomyco
https://www.dynomyco.com
Nuclear Roots
https://www.nuclearroots.co.za
Photronic
https://shop.photronic.net
Special Thanks to Hydroponic.co.za. I buy all my products from them. Best service.
Daily updates coming...

Likes
43
Share

@UnorthadoxDude
Follow
Hello and welcome to week 8 for the quite amazing Nesia. She is growing as if there were no tomorrow... being the largest plant in the series.
Please check last week which is now complete.
Day 50: Fertigated 5l. Height: 56cm.
Yes you read that correctly. 6cm stretch in 1 day. Oh dear.
Also added a couple of carnivorous plants to take care of the odd fungus gnat.
Day 51: I've taken a long video and some better photos to demonstrate Nesia's size. She now measures 60cm tall that's another 4cm in a little over 12 hours. 😔 What a plant!
Day 52: Lazy day no measurements.
Day 53: Fertigated 5l - height 62cm
Day 54: Fertigated 5l - height 65cm.- Nesia is already my largest plant. Larger even than her majesty the Queen. She's not done yet. 3cm vertical stretch in 24h. It is Nesia's turn in the middle so I've trimmed all leaves that extended outward.
Day 56: Height 72cm. Nesia has continued to stretch and is extremely thirsty. She's taking about 5 litres a day at the moment. I fear she is not finished yet.
End of week summary: Nesia has continued to stretch fast and gained 22cm in height this week. She's now putting out a lot of pistils but the stretch hasn't slowed yet.
Likes
9
Share


@Chucklebrother1
Follow
Week 6 of flower now not really getting the gains i had hoped for but, the buds are nice and dense and as you can see not short of crystals looking frosty, the smell is amazing very pungent. It's going to be a nice smoke no doubt about that, just not a lot of it. I've put the EC up to 1.3 this week see what difference that makes and boosted my light to it's max 600+ I'm assuming this will be a long flower. Any constructive info would be much appreciated.
Processing
Likes
1
Share


@magicjohnson
Follow
so week 11..
The gorillaz are carrying on beautifully, however I realised having 5 plants sharing one reservoir is now quite a bad idea.. 2/5 of them look to be well into flower, fattening up and some tri's starting to turn cloudy but look like theres still plenty of fattening up to do. The other 3 are now just beginning to fully pistil up so will still be requiring flowering nutes when I should be beginning a flush on the other 2.. any comment or advice on this would be greatly appreciated!?
The Stardawgs have basically grown into tennis balls. Such a vast majority of bud sites all the way down look so much larger than I could ever have hoped and i've had to tie some of the buds to the main colas!! I will Be starting the flush this week as most Tri's are now cloudy i'd say around 4/5 currently but more throrugh macros will be taken as the days progress. The only problem i've had is some of the sugar leaves on 2 of the plants have really taken a beating and show some strange signs. I think the LED's aren't to be under estimated and i've battled some burning and what seems to be calmag issues through the grow.
Likes
20
Share


@blady1989sqn
Follow
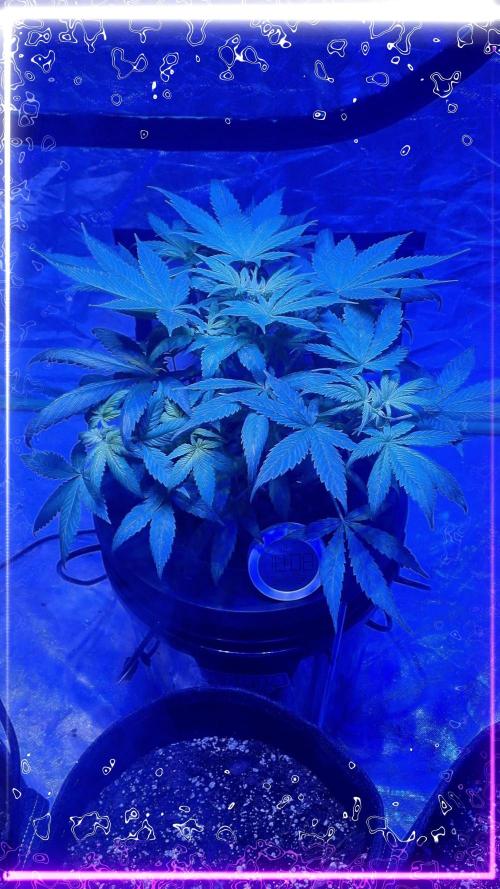
Plants looks healthy, they are really in good shape and cover aproximietly 1m2 each plant. They looks amazing :)

Likes
22
Share


@SolitudeCorners
Follow
So impressed with all these amazing colors and terpenes cant wait to smoke!
Feeding💪
10/3 Water32L+Rootdrip10ml+Calmag@150ppm
Ph6.1
Ebb
Repel 9.30/10
Refresh 11.30/14
Average runoff ph6.4 ec2.8
Clone
Repel 10.05/10.25/10.50/11.05
Refresh 12.30
10/4 Water34L+Rootdrip10ml+Fultilt50g+
Ec0.8 ph6.2
Ebb
Repel 10.15/10.48(3min)
Refresh 12.30/14.30
Average runoff ec2.4 ph6.4
Clone
Repel 10.30/10.45/11.20/11.50
Refresh 14/14.30/15.30
Average runoff ec3.3 ph6.3
10/5 Water32L+Purpinator60ml+Calmag170- 240ppm ph6.1 ppm240
Ebb
Repel 10.2/10.32
Refresh 12/13.30
Average runoff ec2.4 ph6.4
Clone
Repel 10.2/10.30/10.50/11.05
Refresh 13/14/14.30
Runoff ec2.6 ph6.4
Keeper 400ml
10/6 Water32L+Rootdrip10ml+Fulltilt36g+calmag ec0.8 ph6.2
Ebb
Repel 10.10/11
Refresh 12.30/14
Average runoff ec2.2 ph6.4
Clone
Repel 10.10/10.30/11
Refresh 12.30/14.15/15
Average runoff ec2.6 ph6.4
Keeper
300ml
10/7 Water35L+calmag@150ppm+Purpinator80ml
0.3ec ph6.1
Ebb
Repel 11.05/11.48(3min)
Refresh 13.20/14.50
Average runoff ec2.2 ph6.4
Clone
Repel 11.15/11.35/11.53/12.33
Refresh 14.20/15.20
Average runoff ec2.5 ph6.4
10/8 Water35L+Rootdrip+Fulltilt40g ec0.8 ph6.2
Ebb
Repel 11.38(3min)/12.20
Refresh 13.30 /15
Average runoff 2.3ec ph6.4
Clone
Repel 11.35/11.55/12.10/12.40
Refresh 14/16
Average runoff ec2.4 ph6.3
10/9 Water35L+Rootdrip30ml ppm40 ph6.1
Ebb
Repel 9.05(3min)/9.55
Refresh 11.35/13.35
Average runoff2.1ec ph6.3
Clone
Repel 9.35/10.10/10.35/11
Refresh 12.35/14.30
Keeper 400ml per [email protected]
Likes
16
Share


@DrShotzUK
Follow
Sugarlato really starting to come on well now.. small compact plant only around 50cm in height so far in 15 litre pot.
Looking like its flowers will be nice.
All round the best out of the 3 strains in the tent. Smell is moderate right now but filter is on inside the grow tent.
Updates will be coming again in a few days
DRSHOTZUK


Processing
Likes
7
Share


@Learntogrow818
Follow
Autos transferred to 1gl pots.. Looking good so far.. Going into 4 weeks and soon ready for LST. 🌱🎋


Likes
56
Share


@Master_weeda
Follow
Bonjour à tous les padawans et maîtres jedis
Jour84 arrosage avec 2 litres d'eau ph6.3
Jour86 arrosage avec 2. 5litres d'eau ph6.3
Jour89 arrosage avec 2 litres d'eau ph6.3
LE MEILLEUR MOMENT POUR RINCER SON CANNABIS
Le rinçage commence en général deux semaines avant la récolte. Si le plant a une période de floraison de huit semaines, le rinçage doit commencer six semaines après le début de la période de floraison. Il est préférable de regarder de près les trichomes sur le plant pour déterminer quand votre cannabis est prêt à être récolter. Si les petits trichomes commencent juste à passer d’une couleur transparente à une teinte laiteuse et blanche, c’est une bonne indication que les plants peuvent commencer à être rincés. Il faut s’arranger pour que la majorité des trichomes aient changé vers la couleur désirée pour la récolte après deux semaines – ça devient plus facile à faire avec l’expérience, alors accrochez-vous !
Le rinçage peut également être un bon moyen de remettre à zéro la terre quand un plant est toujours en phase de croissance végétative. Parfois, un cultivateur suralimente par accident son cannabis, ce qui provoque un changement de couleur et un flétrissement du bout des feuilles. Ceci est appelé une « brûlure par nutriments ». Rincer la terre peut éliminer les nutriments excédentaires, ce qui aide à résoudre le problème. Cependant, c’est une mesure drastique à ce stade de la culture, alors assurez-vous que le problème soit bien une brûlure par nutriments et non quelque chose d’autre.
Le rinçage ne concerne pas que le moment de la récolte. Cette technique peut aussi être mise en place durant la phase de croissance afin de débarrasser le sol des nutriments. Bien évidemment, les nutriments permettent à votre plante de rester en bonne santé et vous assurent des rendements maximaux, mais une trop grande quantité peut causer une accumulation et un état statique durant lequel la plante ne peut plus y accéder.
Le blocage des nutriments peut être causé par une accumulation saline ou des niveaux de pH incorrects. Ces deux causes peuvent être résolues par un rinçage de votre plante à l’eau claire. Les fluides viendront pousser les nutriments en dehors du substrat et le débarrasseront de l’accumulation, permettant ainsi aux racines de pouvoir accéder à nouveau aux nutriments.
EMPÊCHER LE BLOCAGE D'ABSORPTION DES NUTRIMENTS AVANT QU’IL NE POSE PROBLÈME
Au mieux, le blocage des nutriments peut être un problème, au pire, il peut être un vrai désastre. Comme le dit l’adage, il vaut mieux prévenir que guérir. Il vaut mieux prendre de l’avant pour empêcher le blocage des nutriments plutôt que de s’y atteler lorsque c’est trop tard.
Empêcher le blocage des nutriments peut se faire par le biais d’un rinçage de routine. En rinçant vos plantes une fois avant la floraison et une fois au milieu de cette dernière, vous minimiserez l’accumulation de nutriments.
LES ENZYMES À LA RESCOUSSE
Après le rinçage pour contrer l’accumulation ou le blocage des nutriments, vous remarquerez peut-être que vos plantes ont une apparence vert foncé, c’est le signe d’un excès de nutriments. Dans ce cas, certains cultivateurs choisissent d’ajouter une formule riche en enzymes à leur substrat.
Au cas où vous auriez oublié vos cours de biologie, les enzymes sont des protéines qui catalysent les réactions. Elles aident à rincer le substrat en décomposant l’amidon, les glucides et les nutriments. Il existe sur le marché toute une variété de produits qui contiennent des formules d’enzymes très efficaces.
Si l’eau ne suffit pas à vos plantes, ces petites protéines ne feront qu’une bouchée de l’accumulation de nutriments !
COMMENT BIEN RINCER SON CANNABIS
Rincer votre plant de cannabis est un processus simple. À chaque fois que vous apporteriez normalement des nutriments, vous rincez à la place. De l’eau du robinet non traitée est tout ce dont vous avez besoin pour rincer, assurez-vous juste que son pH est sans danger pour le cannabis. La plupart de l’eau de puits a un pH sain et ne nécessite pas de traitement, mais s’il est nécessaire de traiter l’eau de rinçage pour avoir un pH adapté, faites-le. Les ajustements du pH seront donc la seule chose à considérer.
Inonder la terre avec autant d’eau fraîche qu’elle puisse contenir. Laissez l’eau durant quelques minutes pour qu’elle puisse absorber les nutriments, puis inondez la terre encore pour rincer les nutriments loin du plant. Si vous cultivez en intérieur dans des pots, notez la couleur de l’eau qui s’échappe du fond des pots. Elle sera tâchée et aura une couleur sale. C’est à cette étape qu’un appareil de mesure des TDS (Total des Solides Dissous) est utile. Si vous récupérez et mesurez le TDS de l’eau « évacuée », elle devrait avoir un taux de 1300ppm, ce qui est assez élevé. Il est important de rincer le plant jusqu’à ce que total baisse à un niveau de 50ppm, ou du moins qu’il s’approche du TDS de l’eau fraîche que vous utilisez pour rincer le plant. La couleur de l’eau d’évacuation va s’éclaircir et apparaîtra plus propre. Vous devez tirer autant que possible de minéraux dissous du plant.
Comment et Quand Rincer les Plants de Cannabis
Rincer les plants de cannabis avant la récolte peut faire la différence entre les meilleurs têtes ou la plus rude pour la gorge. Cette petite tâche est simple et facile à faire. Ajoutez juste de l’eau ! Attention car le moment du rinçage joue un rôle critique.
Le b.a.-ba du rinçage de ses plants de cannabis.
Sommaire:
1. Qu’est-ce que le rinçage ?
2. Le meilleur moment pour rincer son cannabis
3. Empêcher le blocage d'absorption des nutriments avant qu’il ne pose problème
4. Les enzymes à la rescousse
5. Comment bien rincer son cannabis
6. Comment rincer ses plantes en hydroponie
7. Les résultats du rinçage de son cannabis
8. Quand éviter de rincer son cannabis
Vous avez enfin fini vos cultures et vous vous retrouvez avec un magnifique plant couvert de super têtes, maintenant sèches, vous avez fait le curing et vous êtes prêt à fumer – et pourtant quelque chose ne va pas. La weed semble ne pas vouloir se consumer et quand vous tirez une bouffée, c’est comme si on vous avait donné un coup de poing dans les poumons et vous toussez en craignant pour votre vie ! Le goût est rude et décevant. Si c’est une situation que vous avez vécue, il y a des chances pour que vos plants n’aient pas été rincés correctement avant la récolte.
Cette fumée bien loin d’être agréable est provoquée par la présence dans le plant des nutriments et minéraux utilisés lors de la culture, ce qui altère la façon dont le plant se consume. Rincer le plant élimine ces nutriments restants, ce qui améliore la qualité des sensations. Heureusement, le rinçage des plants de cannabis se fait facilement et sans effort, et cela vous permet de produire des têtes douces et délicieuses en un rien de temps.
ARTICLE LIÉ
Comment Utiliser les Nutriments pour Cannabis
QU’EST-CE QUE LE RINÇAGE ?
L’acte de rincer un plant implique d’utiliser de l’eau pour éliminer tout nutriment présent dans la terre. Une grande quantité d’eau est passée à travers la terre et drainée sur une base régulière. Tous les minéraux et nutriments présents dans la terre sont rincés avec le temps avec l’eau, ce qui laisse une terre propre.
Mais pourquoi vouloir éliminer tous les minéraux de la terre ? N’est-ce pas mauvais pour la récolte ? En fait, cela aide à la récolte de manière significative. Quand les nutriments sont éliminés de la terre, ceci force le plant de cannabis à utiliser tous les nutriments toujours présents dans le plant. C’est comme pour le corps humain. Quand on consomme beaucoup d’aliments, ce que nous n’utilisons pas est transformé en graisses. Dans les situations extrêmes où la nourriture est rare, le corps s’appuie sur cette graisse stockée pour tirer de l’énergie.
Comme rincer force le cannabis à utiliser tous les nutriments restants dans le plant, aucun ne devrait rester et altérer les têtes récoltées. Cependant, si vous le faites trop tôt, cela peut nuire à la santé du plant, le moment est donc clé.
LE MEILLEUR MOMENT POUR RINCER SON CANNABIS
Le rinçage commence en général deux semaines avant la récolte. Si le plant a une période de floraison de huit semaines, le rinçage doit commencer six semaines après le début de la période de floraison. Il est préférable de regarder de près les trichomes sur le plant pour déterminer quand votre cannabis est prêt à être récolter. Si les petits trichomes commencent juste à passer d’une couleur transparente à une teinte laiteuse et blanche, c’est une bonne indication que les plants peuvent commencer à être rincés. Il faut s’arranger pour que la majorité des trichomes aient changé vers la couleur désirée pour la récolte après deux semaines – ça devient plus facile à faire avec l’expérience, alors accrochez-vous !
Le rinçage peut également être un bon moyen de remettre à zéro la terre quand un plant est toujours en phase de croissance végétative. Parfois, un cultivateur suralimente par accident son cannabis, ce qui provoque un changement de couleur et un flétrissement du bout des feuilles. Ceci est appelé une « brûlure par nutriments ». Rincer la terre peut éliminer les nutriments excédentaires, ce qui aide à résoudre le problème. Cependant, c’est une mesure drastique à ce stade de la culture, alors assurez-vous que le problème soit bien une brûlure par nutriments et non quelque chose d’autre.
Flushing
Le rinçage ne concerne pas que le moment de la récolte. Cette technique peut aussi être mise en place durant la phase de croissance afin de débarrasser le sol des nutriments. Bien évidemment, les nutriments permettent à votre plante de rester en bonne santé et vous assurent des rendements maximaux, mais une trop grande quantité peut causer une accumulation et un état statique durant lequel la plante ne peut plus y accéder.
Le blocage des nutriments peut être causé par une accumulation saline ou des niveaux de pH incorrects. Ces deux causes peuvent être résolues par un rinçage de votre plante à l’eau claire. Les fluides viendront pousser les nutriments en dehors du substrat et le débarrasseront de l’accumulation, permettant ainsi aux racines de pouvoir accéder à nouveau aux nutriments.
EMPÊCHER LE BLOCAGE D'ABSORPTION DES NUTRIMENTS AVANT QU’IL NE POSE PROBLÈME
Au mieux, le blocage des nutriments peut être un problème, au pire, il peut être un vrai désastre. Comme le dit l’adage, il vaut mieux prévenir que guérir. Il vaut mieux prendre de l’avant pour empêcher le blocage des nutriments plutôt que de s’y atteler lorsque c’est trop tard.
Empêcher le blocage des nutriments peut se faire par le biais d’un rinçage de routine. En rinçant vos plantes une fois avant la floraison et une fois au milieu de cette dernière, vous minimiserez l’accumulation de nutriments.
LES ENZYMES À LA RESCOUSSE
Après le rinçage pour contrer l’accumulation ou le blocage des nutriments, vous remarquerez peut-être que vos plantes ont une apparence vert foncé, c’est le signe d’un excès de nutriments. Dans ce cas, certains cultivateurs choisissent d’ajouter une formule riche en enzymes à leur substrat.
Au cas où vous auriez oublié vos cours de biologie, les enzymes sont des protéines qui catalysent les réactions. Elles aident à rincer le substrat en décomposant l’amidon, les glucides et les nutriments. Il existe sur le marché toute une variété de produits qui contiennent des formules d’enzymes très efficaces.
Si l’eau ne suffit pas à vos plantes, ces petites protéines ne feront qu’une bouchée de l’accumulation de nutriments !
Comment et Quand Rincer les Plants de Cannabis
COMMENT BIEN RINCER SON CANNABIS
Rincer votre plant de cannabis est un processus simple. À chaque fois que vous apporteriez normalement des nutriments, vous rincez à la place. De l’eau du robinet non traitée est tout ce dont vous avez besoin pour rincer, assurez-vous juste que son pH est sans danger pour le cannabis. La plupart de l’eau de puits a un pH sain et ne nécessite pas de traitement, mais s’il est nécessaire de traiter l’eau de rinçage pour avoir un pH adapté, faites-le. Les ajustements du pH seront donc la seule chose à considérer.
Inonder la terre avec autant d’eau fraîche qu’elle puisse contenir. Laissez l’eau durant quelques minutes pour qu’elle puisse absorber les nutriments, puis inondez la terre encore pour rincer les nutriments loin du plant. Si vous cultivez en intérieur dans des pots, notez la couleur de l’eau qui s’échappe du fond des pots. Elle sera tâchée et aura une couleur sale. C’est à cette étape qu’un appareil de mesure des TDS (Total des Solides Dissous) est utile. Si vous récupérez et mesurez le TDS de l’eau « évacuée », elle devrait avoir un taux de 1300ppm, ce qui est assez élevé. Il est important de rincer le plant jusqu’à ce que total baisse à un niveau de 50ppm, ou du moins qu’il s’approche du TDS de l’eau fraîche que vous utilisez pour rincer le plant. La couleur de l’eau d’évacuation va s’éclaircir et apparaîtra plus propre. Vous devez tirer autant que possible de minéraux dissous du plant.
COMMENT RINCER SES PLANTES EN HYDROPONIE
Le rinçage des plantes en hydroponie est bien plus simple que de se débarrasser des nutriments en terre. Les cultivateurs en hydroponie pourront simplement drainer leur système et le remplacer par une eau au pH neutre.
Le rinçage des plantes en hydroponie est aussi un processus bien plus court. Une fois que la réserve d’eau aura été modifiée, les plantes en hydro n’auront pas accès aux nutriments externes. Pour cette raison, un rinçage de deux jours suffira.
LES RÉSULTATS DU RINÇAGE DE SON CANNABIS
Après la récolte des têtes, prenez du temps pour bien faire le curing pour atteindre le potentiel le plus élevé. Un affinage correct par curing permet de réduire encore plus le côté rude des têtes, en éliminant des choses comme un excès de chlorophylle. Vous serez étonné de voir la différence que ce petite effort peut avoir sur votre produit. Tout votre travail se sentira dans la première bouffée de cette weed douce comme de la soie, qui caresse la gorge comme du miel. Le plus doux de la nature. Vous pouvez donc améliorer la qualité de votre cannabis en ajoutant juste de l’eau !
QUAND ÉVITER DE RINCER SES PLANTES
Le seul moment où nous recommandons d’éviter le rinçage de son cannabis est lorsque l’on travaille avec une terre biologique amendée ou un super soil. Ces substrats ont été développés avec précaution afin d’héberger des micro-organismes bienfaisants tels que des bactéries ou des champignons. Cette délicate biodiversité pourrait être éliminée et endommagée par le rinçage.
Une fois de plus, l’absence de rinçage ne devrait pas poser de soucis, car aucun nutriment externe ou synthétique n’aura été ajouté au substrat. À la place, les plantes comptent sur les micro-organismes pour décomposer la matière organique et la livrer aux racines.
May the force be with you 💪
