The Grow Awards 2026 🏆 


Likes
Comments
Share
@Still_Smoq
Follow
📆 Harvest Week, 19-25 August 2024
19-22 Aug - Observed and let the plant grow.
23-24 Aug - Flushed with RO water, turned lights down to 40% power.
25 Aug - Harvested the plant, began the curing process.
💚 Thank you Divine Seeds for this sponsored grow!
📑 The final week of flowering for Pablo Escobar! I gave her a good 71 days as recommended by the breeder. She grew using every one of them until the end. Another genetic hit by all means. A pleasure to grow. This is a sativa dominate variety so expect a longer flower time. You will be rewarded with thick dense buds, covered with resins and trichomes, with a sweet herb, earthy smell, nice and danky.
Began the curing process in a climate controlled closet with a RH of 53% and temp of 71deg F. The main leaves are removed before the branches are hung upside down for 7-10 days for drying. From there the buds are removed from the branches, separated, and are trimmed to remove as much leaf as possible. Then placed in quart mason jars with a 62% Boveda TerpShield packet, burped daily for about a week or until 62% RH is maintained. Then labeled and placed in a cool, dark closet for long term storage for up to about 8 months or so.
🔥 Smoke Report:
It took Pablo 10 days to slowly dry out. I cut all the buds off the branches and used my 19” Bud Trimmer for a quick finished product! I’m really impressed just how fast this trimmer works. It can take about 1/2oz or 14g at a time and with 4 or 5 turns of the handle it’s finished. Nice beautiful manicured buds in about 10 seconds. No more trim jail for me.
As for the smoke. The taste definitely is the same as the smell. Lemony or citrus. The high is definitely that of a sativa. Comes on slow, then creeps up on you hard. Stays with you for a couple of hours, needing only a hit or two to recharge the high afterwards. No doubt this strain is very high in THC, and should be taken into account for the beginner. Another genetic hit Divine Seeds!
🍶 19 Aug final nutrient solution change
🍽️ 19 Aug final feeding schedule update
💧 Using reverse osmosis water with EC/TDS at 0
🐉 Nutrient Solution EC 1.1 at 74 degree F
🔆 Light power at 50%, DLI 35 canopy coverage at 12hrs
😤 Using PYPABL, Air Pump, 400GPH
That is it for this grow. Thanks for the all the looks, reads and stopping by.

Likes
13
Share
@TheeLemon
Follow
Had some issues with extreme humidity, but I've managed to bring it all back down now with plenty of dehumidifiers lol. Was at 99% now I'm at around 60%.
I removed the netting as I had to take all the plants out the tent, as run off water was collecting at the bottom and contributing to the high humidity.
I haven't watered atall this week, as the high humidity has been keeping the soil moist on it own. Once it's dried out a little more I will water again.
The plants seem to be handling it fine, I think I caught it early enough.
Starting to see pistils forming now.

Likes
42
Share
@AutoCrazy
Follow
BEAST has done well this week. She is really starting to stack up the buds and the frost is already coming on strong and she already smells quite potent.
I am watering with 10 gallons every 2-3 days. She is a thirsty beast!!
I am willing to bet this plant will put what sweet seeds says it yields to the test!!
Onward!!
😎🍿🍻🌱


Likes
Comments
Share
@Blast
Follow
07.02 Попытался делать LST. Главный стебель довольно толстый уже, особо не выгибал. Посмотрю далее на реакцию
12.02 — Проведение LST (с клипсами)

Likes
23
Share
@goodcall
Follow
My god she is getting chunky, I've stepped up the bio Diesel to fatten her up this week.
Plenty of trichomes forming now and she has started to put out a very sweet but chemical smell.
I have had issues with humidity this week due to constant rain, I will purchase an air-con to dry out the air next week if I can't keep it under control.

Likes
22
Share
@NanoLeaf
Follow
End of Week 10 (Third week of flower)
The ladies are frosting up slightly and there are trichomes developing on the fan leaves, this can only mean that they are happy, the genetics are fire and that we are in for a treat!
The main top-sites are swelling up by the day. Trying to keep the training to a bare minimum and ONLY removing fan leaves that are blocking bud sites. The lower part of the canopy is denser than I would have liked but I do not want to stress the plants too much by removing it at all.
I will now try to keep a cooler average temperature in the following couple of weeks to promote healthy flower development and hopefully bring out some beautiful colours - and also keep the relative humidity lower to ensure that the plants aren't susceptible to mould and mildew.
Pest Report: None


Likes
57
Share
@Salokin
Follow
Week 2 Veg Update on Epic Buzz by Anesia Seeds
As we enter the second week of vegetation, our Epic Buzz seedlings are embracing their new home with vigor.:
One of the seedlings has been carefully moved to the 20-liter reservoir. It has adapted well to its new environment, showcasing an impressive array of roots throughout the net pot, indicating healthy and robust development. Both plants are progressing as expected, with no significant issues to report. The steady growth and absence of complications suggest that the conditions in my indoor setup are well-tuned to the needs of Epic Buzz. The images captured this week show that the roots are not only healthy but thriving. They have begun to colonize the net pot, which is a strong indicator of the plant's potential for nutrient uptake and overall growth. With the transplant successful and the roots establishing themselves, I'm keen to see how the increased space and resources will accelerate growth. I expect that the coming week will bring even more visible progress as the plants continue to mature. Watching the Epic Buzz seedlings transition smoothly into the vegetative phase is both rewarding and exhilarating. The absence of any noteworthy problems speaks volumes. I'm looking forward to observing their journey and sharing their growth milestones with the community.
Stay tuned for next week's entry, where I hope to report on the continued prosperity and vigor of Epic Buzz in its critical vegetative stage.

Likes
27
Share
@ButterfliesLittleFarm
Follow
Hello Diary.
Finished and the third week of flowering, Haze Berry looks really impressive. Tall and stocky :). 😎
The flowers apparently bloom and begin to cover entire branches. The smell is not as intense as that of his roommate Fat Banana, but on my small farm there is a real fruit fantasy. 😋
In the Growbox to his left is his brother, another Haze Berry who is a little late but by all accounts will not catch up with his big brother.
Watering is approximately every three days when I prepare 7 liters of water and with that amount evenly water all three plants. I preventively add CalMg and add BioBizz every other time.
Here’s what he looked like all week.
02/11/2020 - Day 39.
Watering. I added BioBizz and prevention CalMg. p.H. I adjusted to 6.5 with Plagron’s Lemon Kick.
Temp / Humidity on the farm - 26.7 degrees and 42% humidity.
05/11/2020 - Day 42.
Photographing and watering. This time I just regulated p.H. at 6.4 and I didn’t add anything else. The plants look really beautiful so I took photos on a black background at the beginning of flowering.
Temp / Humidity on the farm - 25.6 degrees and 41% humidity.
For now, everything is going great, the plants look happy and I look forward to following further development. See you soon.
Likes
7
Share
@wascanna
Follow
👹 Oni Seed Co.
🍭 Dub Trop BX1 // Dubble Trop x Tropicanna Cookie F1
🍓 Straw-Picanna // Strawberry Bananna x Tropicanna Cookies
🌿 Tropicanna Kush // SFV OG x Triangle Kush
🔥 Sunburn // TKT (Triangle Kush x Tangie) x Tropicanna Cookies
🍁 BLOOM WEEK 8
Final push for the 3 bushes (Sunburns and the Dub Trop) this week.
Likely chop this week and another week or 2 for the tall Strawpicanna's and Tropicanna Kush.

Likes
12
Share
@Luke_Lee
Follow
-18.07.2024
The fourth week of the vegetation phase begins today. The plants are showing the first "white hairs", so they are in their pre-flowering phase.
A few of the lower leaves have been removed and light LST applied.
From this week onwards, 1-2ml Top Max is added to the water in addition with 2-3ml Bio Grow.
The lamp is 70cm above the plants and runs at 60%.
the measured values with the Photone App:
Ppfd = 700 DLi = 50
-19.07.2024
Visual control
Soil felt dry, the plants were watered with 500 ml of water each.
-20.07.2024
Visual Check
Soil still felt moist
-21.07.2024
Earth felt dry
3ml BioGrow and 2ml TopMax to 1 liter of water
both plants were watered with 500ml water
the Skywalker haze worries me a bit when you look how big Mango smile is
-22.07.2024
Visual check
Surprisingly the Earth felt dry after one day so both plants were watered with 500ml water
-23.07.2024
Visual Check
Soil still felt moist
For the next watering,i will increase the amount of water per plant to 750 ml
-24.07.2024
Last day of the vegetation phase / pre-flowering.
The plants were watered with 500ml of water per plant.
(2ml Bio Grow + 2ml Top Max per 1 liter of water)


Likes
10
Share
@RivenWaters
Follow
This is the first greenhouse grow I’ve done. I’m using a shelter logic 12’x20’ translucent portable garage, because we store a car in it for the winter. I’m growing 5 Ethos genetics plants, 1 DNA genetics plant, 2 clones from my winter grow, and 3 unknown autoflowers.


Likes
38
Share
@Hashy
Follow
📋 Comments
Lemon cherry gelato by MNSL Is a good plant to grow. She has produced some nice flowers and is a very forgiving plant.
📋 Data
Seed to havest=113 days.
Veg time=35 days.
Flower time=78 days.
Wet weight=917g
Dry weight=104g
📋 Smoke report
After 11 days of drying i trimmed half the plant (trim jail) and finished trimming the day after, it. Not the easiest to trim and not as dense buds as the other plant in the grow but damn this lemon cherry gelato is absolutely dripping with trichomes and has a really fruity smell. There is a decent amount of trim to run some bubble hash.
This is an excellent smoke, quiet sweet with citrus/lemon and slight cherry or fruity taste to it. Quiet strong maybe 25%THC.
📋Grow stats for GDG 22
#1 Lemon cherry gelato=104g
#2 Zoap=79g
Total=183g
Lights on.
20hrs×7days=140hrs
18hrs×33days=594hrs
12hrs×78days=936hrs
Total hours=1670hrs
Light power=211.09Kw
Rad power=415.73Kw
Extractor=43.5Kw
4 gang=56.62Kw
Top fan=27.82
Total electricity=754.76KW
Electricity cost @£0.25/Kw=£188.69
Average light power a day=1.78Kw
Average watt per hour=106w
g/watt=(183÷106)=1.72g/w
£/g=£1.03/g
📋Final word.
Considering how cold it's been i have managed to get a decent VPD throughout the grow, I'd go as far to say the extra money spent on electricity was definitely worth it. I didn't run into any major problems and the Plagron nutes were excellent, I'm thinking these are going to be my goto from now on. I combined the trim from both plants to make a hash run and managed 14g of hash. That takes my total to 197g for the grow. Very happy.
Back soon.
Take it easy.
********************************************

Processing
Likes
20
Share

Likes
4
Share
@Aeonium
Follow
Día 37: Riego con Sensizym 2ml/l
Día 39: Riego con Base Sensi Bloom A+B 2,5 ml/l, Big Bud 2 ml/l, Bud Candy 2ml/l, B-52 2ml/l y Super Silver de Agrobeta 0,1ml/l.
Día 41:Riego con Base Sensi Bloom A+B 2,5 ml/l, Big Bud 2 ml/l, Bud Candy 2ml/l, B-52 2ml/l y Super Silver de Agrobeta 0,1ml/l.


Likes
3
Share
@Chubbs
Follow
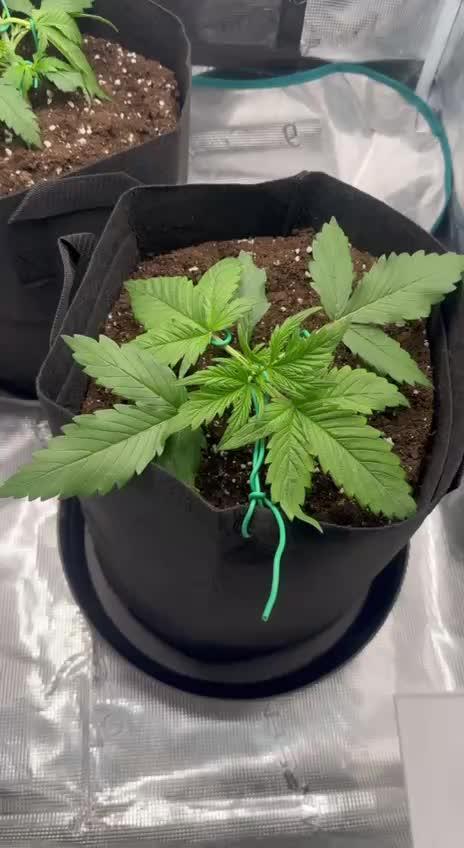
Weekly update for these gorgeous girls. They've definitely started taking off and doubled in size over the past week. I started feeding nutes at 5ml/gal of Athena Calmag,Grow A & Grow B. Ppfd still at 350-400 at the canopy level and watered 250-500ml daily. All in all Happy Growing
Likes
37
Share
@Roberts
Follow
Mandarin XL auto is experiencing a solution that is too strong. She has mutated some. I diluted out a gallon of solution and brought the tds down some. Hopefully enough. I will find out in the days to come. Nothing else to report beyond that. Thank you Gen1:11, Medic Grow, and Ganja Farmer. 🤜🏻🤛🏻🌱🌱🌱
Thank you grow diaries community for the 👇likes👇, follows, comments, and subscriptions on my YouTube channel👇. ❄️🌱🍻
Happy Growing 🌱🌱🌱
https://youtube.com/channel/UCAhN7yRzWLpcaRHhMIQ7X4g
