
Likes
Comments
Share


@DeepRootsGrowTrees
Follow
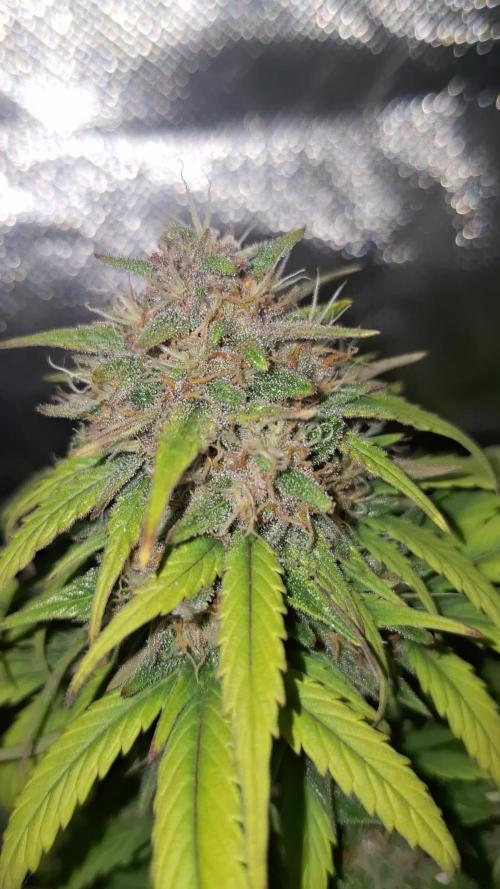
PURPLE KUSH / KANNABIA SEEDS
WEEK #12 OVERALL
WEEK #11 VEG
This week she's doing great no issues she's healthy and looking good. She's still under training to control her size. She's be getting flipped to flower soon. Stay Growing!!
Thank you for stopping by and taking a look it's much appreciated!!
THANK YOU KANNABIA!!
BUDTRAINER.COM BUD CLIPS
KANNABIA.COM / PURPLE KUSH

Likes
6
Share

@BunnyBud
Follow
I smell exotic fruits! My mouth is watering! I can't wait to delight her! ❤️🏻♂️
3 Nov. Start Flush

Likes
15
Share


@Korinthius
Follow
Veg Week 4. Excellent week. 6th node appears. Looked at the leaves, and my guess, we are good to top.
Topped plant on the 16th. As of 5 days later, the plant appears to have recovered and has started growing nicely again. We should be completing the 2nd topping within 10 days at most if I am correct.
Likes
105
Share


@WhiteWidow
Follow
Hello friends, I planted this plant as an experiment as you can see but today in day 17 from seed i decided to share this growth here coz it surprised me with the so far growth. Sorry for lacking photos from week 1 but i didnt take pictures.. she is under the sun whole day and 4 hours 250w HPS... and as you can see some leaves curled in coz she is too young for 250W hps 25 cm from her..
So far I foliar fed her and regularly watered, dilluted 2ml/L of B-52, 2 ml/L fitobacillus (essential bacterias and enzymes) and foliar sprayed her. With every watering so far i put 2ml/l fitobacillus and 2ml/ B-52 and mycorhizae in the very first and second watering.
As you can see her main stem is already fatter than average for that time of growth and the root mass is so dense and thick, also many many hairs ready to absorb some nutes so tmrw will be her first nutes dosage, day 18 that will be from seed.
I am hoping only that the pot size will not restrict her growth, as the roots already reached the bottom and started to curl back in.. but their colour is bright white and i have no worries bout rot or similar, at least so far so good :D
Stay tuned brothers and sisters, all my grows are for you in order to learn ultra fast all the interesting and mind intriguing stuff by following only one grower. @James drop an eye here, you did a good job with genetics on this one..
Kisses to all from white and Team Wolfpack 😎✌️
UPDATE same day LOL
I decided to transplant her to a 3 gallon fabric pot coz those roots got me so surprised and i prepared a good nutes mix for them.. you can
see the health potion in the video that contains myco and nutes
UPDATE 10.10.2107.
Today i applied some more lst to maximally expose side branches to the sun. You will see some interesting pics and vids explaining my low stress training technique. I blv this plant's main goal in life to be LST'd. Dont be afraid, side branches will be thankfull and your harvest will be thankfull..
You can se some lst with side branches and how i tucked the leaves and made sure they stay there using the green wire and forming that shape on the pic.
Today i also noticed a white hair showing up, still not sure if it is starting to flower in her DAY 19 from seed, or is it just "stress defending mechanism".
Seems to me i will find out soon :)

Likes
32
Share


@Vega0284
Follow
Hey Guys!
Super excited this week! I've really been wanting to try growing outdoors, so I built a cheap hoop house! Got most of this stuff for the frame from Lowes under 300$. All the soil products I got from GrowGreenMI. Some really cool people out there.
One thing I'm super worried about is drainage. Right now those holes are about 4 feet deep and they've got about 4 inches of water in them already. What's been cautioned is that, eventually, about 2 months in these plants roots will grow and reach the bottom and cause root rot to form. One of the biggest things I was trying to be wary of was causing root rot. This was also the biggest precautionary measure I took when mixing the soil. Adding the extra perlite, coco, and clay pebbles. Best advice right now is to build the soil up on the holes another 16 to 18 inches and possible stick a PVC pipe down to the lowest drainage point of the hole to allow some of that natural occurring water to evaporate.
Any advice anyone has on it is welcomed!
Making a compost tea for the soil outdoors, will probably put 2 cups in each RDWC bucket as well and let that do it's magic for a day or so before nutrient change. Raised the bed about 14 inches as well!
All the seeds sank! Off to a good start! Lol


Likes
233
Share


@Tropicannibis_Todd
Follow
🐶🐶🐶🐶🐶 👉Alrighty Then👈🐶🐶🐶🐶🐶🐶
We're 14 days in and we be moving along great 👍 I've now started some slight LST and began my nutrients plan 👈
We got some great growth right across the board on all plants 👈 All plants receiving at least a min of 600 PPFD
So we are back for another round 😛 But this grow is special because my big boy needs some love too , he's been getting on the old side of things and his hips have been giving him trouble so I've been buying CBD treats for him and it works great so 😉 👍
I've decided to grow this for my little buddy 🐶 so I can make him some Doggy 🐕 Treats and plus I've never tryed it myself and I really wanna give it a go👈 😊 so let's see what it's all about 👈
I will post the recipes at the end of harvest 👏
So Let's Do This
👉Soil Provided by ProMix.ca
👉Nutrients Provided by Agrogardens
👉Lighting Provided by MarsHydro.ca
👉Seeds Provided by Kannabia Seeds
Thanks my friends for the great support over the years 🙏 Happy Growing

Likes
10
Share


@Skully
Follow
🇩🇪
Heute das erste LST und leichte Entlausung, um gleichmäßiges Wachstum anzuregen. Vor ein paar Tagen hab ich sie getoppt.
🇺🇸
Today was the first LST and a light pest control to encourage even growth. A few days ago, I topped them.
🇪🇸
Hoy fue el primer LST y un control ligero de plagas para fomentar un crecimiento uniforme. Hace unos días las destocé.


Likes
24
Share


@Grnhead
Follow
Update 2/4 (day 25):
* Turned the lights back up to 100%. The top of the canopy is getting 50K Lux and they seem to be enjoying it.
* Very small signs of flowering in the two smaller plants. Nothing yet from Pineapple Express #1, which was surprising since it's older.
* Trimming bigger fan leaves to leave a clear top and bottom to the canopy.
* Trying to train the colas to an even distribution and without getting too close to the sides. I am going all in on fewer-but-larger colas to try to boost the harvest. I hope I don't learn a hard lesson by not letting side branching to occur but want to give it a shot.


Likes
7
Share


@Organic473
Follow
Experimenting with extended light source after sun down…solar powered lights. The goal is to prolong the veg and so far it’s working no signs of pre flowering.

Likes
3
Share


@Jp_tetreault
Follow
Everything was fine this week, the plant looks very happy and healthy.


Likes
11
Share


@Guaxi
Follow
White Widow survived! She started growing all the leaves at the same time. There is some fractal shit going on with the leaves, which is very visually appealling for me. I discovered that I like taking care of the plants, make me calm, and is a new nice and healthy hobby. The plants are listening to classical music and "582hz music" 18 hours a day! :)

Likes
14
Share


@danwho
Follow
9/22/2024
Added 80W LED lights below the canopy. Tilted the other 200W fixture to point into the canopy. Relocated circulation fans to keep air moving through the bush! Great flower development is continuing. The stretch is almost complete, but it is still stretching. Super cropping may be right around the corner. With one bucket removed from the system, the new system volume is right around 7-8 gallons.
9/23/2024
Forced to do a water change after a massive spike in PPM up to 2400. Cycled the system with about 5 gallons of pH water and pumped off about 4 gallons. Replaced 3 gallons containing appropriate nutrient concentration to get PPM back to 800 -900 range. Increased lights to 85%. Super cropped some of the lanky main stems that were growing right at the lights. Light directly over the plant is pretty much maxed out on height at this point. Looking to increase intensity by the end of this week to 90% and then to 100% by the end of week 5. Continuing to defoliate larger fan leaves a few per day.
9/24/2024
Plant is looking incredibly healthy even after the water issues. Some trichomes starting to develop on sugar leaves and flowers. There are tons of flower sights, I am excited to see how they continue to develop!!!
9/25/2024
Moved the light up to its last hanging position. There are only a few more inches of adjustment left. Trying to avoid late supercropping if I can.
9/26/2024
Pruning large fan leaves and fan leaf overgrowth. Looking to leave a lot of the smaller leaves for sugar trim collection if possible. Humidity is not an issue yet, but working to maintain 50-60% is getting close to maxing out my setup. Continuing with light defoliation will hopefully help in managing humidity.
9/27/2024
Have been adding pH-adjusted water as well as reduced nutrient concentration to keep PPM 800-900. Prioritizing bloom nutrients and keeping small amounts of micro and grow in the mix, diamond nectar at around 4mL/gallon.
Likes
16
Share


@GirlGoneWeed
Follow
Recovery at its finest, that's what you will see on week 4 around here! Guess who's loving the CO2 with high temperature? Thats right, all plants are!
The comparison of last week with this week have such a difference, on day 24 I introduced a DIY CO2 bottle, the recipe consist in:
-CO2-
2 cups of sugar
1 tablespoon of yeast
1 tablespoon of baking soda
1 later of warm water
Mix all ingredients on a bottle, make a nail hole on the cap shake a little (when shaking put your finger on the nail hole, you should hear a hissssss when you release the hole) use it when lights are on, increase temperature to 30-35C, watch for high levels of humidity, and voila!
I haven't started any LST yet, I am waiting for a bit more growth to start bending, I have to make sure all 5 plants will have enough space inside this 2x4 tent.
All suggestions are welcomed :)
Thats is for now, Stay Lit folks!

Likes
90
Share


@MrCOCO
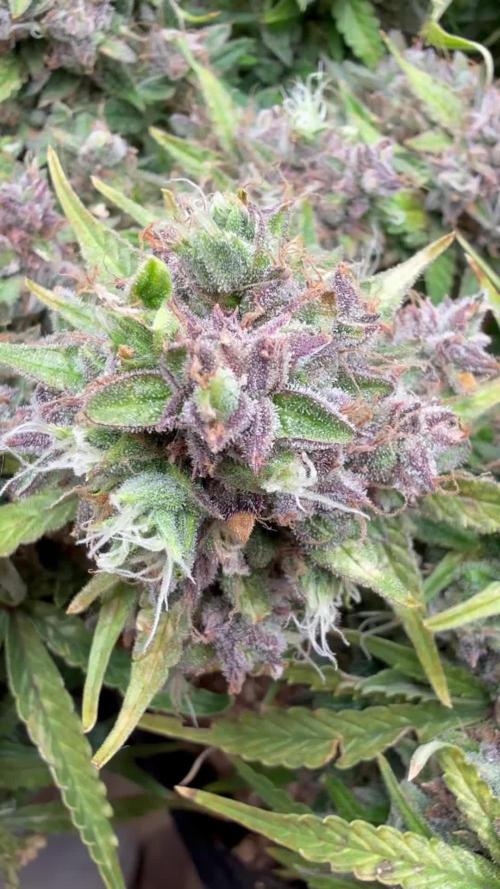
Follow
Hi everyone🍃🍃🍃Everything is going well...🍃🍃🍃 The girls are growing very fast which makes me happy...🍃🍃🍃 I defoliated in 14 days of flowering and removed the small flowers that wouldn't do anything anyway....🍃🍃🍃
Happy growing🍃🍃🍃

Likes
103
Share


@Schnabeldino
Follow
_____ Week 10 | Day 70 - 77 | 3rd week of Flower ______
Day 71 🌞
- I mounted a fan below the net for more air circulation
Day 72 🌞💧
- 24 liters were mixed and distributed among the 8 plants / each plant 3 liter, at the moment I can water them every 4 days
Day 76 🌞💧
- It remains every 4 days 3 liters of water each plant
____________________________________________________________________________________________
Light - 12/12 h - 560 Watt
- 2x 200 Watt Toplight
- 4 x 40 Watt Lightbars
PPFD - 900 - 1000 µmol
Temp. avg. - 22,9°
Hum. avg. - 61 % RLH


Likes
22
Share


@BlumenBot
Follow
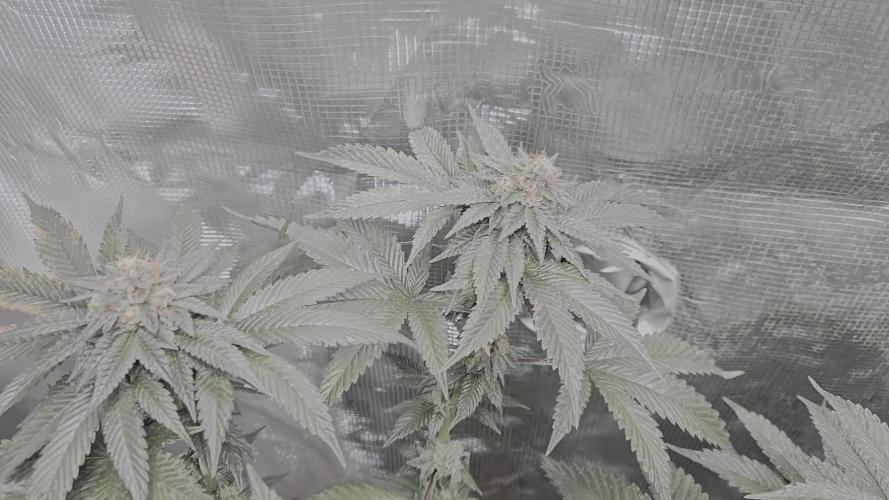
2/13 - a little bit of LST to bring the branches to the edges of the pot and down a bit, then letting the 8 shoots grow long enough to spread out evenly along the edge of the pot. Also got a plain watering.
2/18 - she got her feeding and almost ready for the final training before letting her grow height


