The Grow Awards 2026 🏆 


Likes
119
Share
@Tropicannibis_Todd
Follow
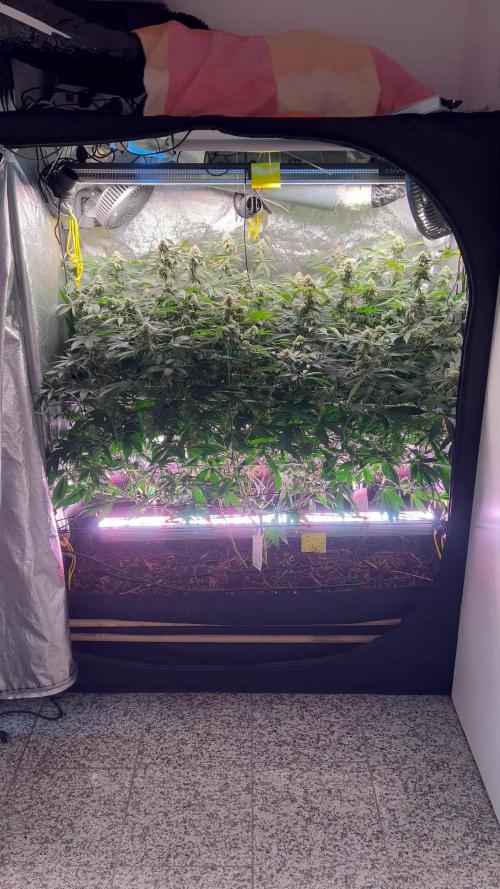
💩Holy Crap Growmies We Are Back💩
Well growmies we are at 49 days in and everything is going as good as can be 👌
👉 So even with some major issues in the early stages , shes bounced back as good as expected 👍
Lights being readjusted and chart updated .........👍rain water to be used entire growth👈
👉I used NutriNPK for nutrients for my grows and welcome anyone to give them a try .👈
👉 www.nutrinpk.com 👈
NutriNPK Cal MAG 14-0-14
NutriNPK Grow 28-14-14
NutriNPK Bloom 8-20-30
NutriNPK Bloom Booster 0-52-34
I GOT MULTIPLE DIARIES ON THE GO 😱 please check them out 😎
👉THANKS FOR TAKING THE TIME TO GO OVER MY DIARIES 👈

Likes
3
Share
@Ohio_Autoflowers
Follow
This plant man. Had to remove the 2nd and 4th node branches because they just weren’t doing anything. Stems were bright purple and the buds were tiny. Decided it was best to just chop them off. Buds are plumping up nicely. She is actually at day 72 right now. Think she’s got 7-10 days left, we’ll see.

Likes
3
Share
@Organic_G
Follow
Einfach wunderbar, noch ne Woche würde ich den Tops geben, dann kommen die wahrscheinlich noch ab, werde wieder stufenweise ernten… oh Mann kein Bock auf Trimm Jail…
Aber wieder ordentliche Beute für 3 Pflanzen

Likes
3
Share
@Purplepassion
Follow
Almost there. Low stress worked pretty well
There you see my outdoor mimosa x orange punch on the right :)


Processing
Likes
26
Share
@thomasgreen
Follow
I was very surprised at the remarkable growth of both plants.
Tree 1 gives me a clear view of the superiority of height compared to the previous week.
The copper buds clearly show the enormous size, I am trying to increase the amount of nutrition to promote the maximum growth in size and taste.

Likes
6
Share
@AbbyCat
Follow
The weight listed is wet, so I expect to lose about 20% as it dries and cures, leaving a final yield of around 8–9 ounces. This is a fantastic strain with an uplifting, energetic high—perfect for thinking, dreaming, and relaxing without knocking you out. I had a lot of fun growing this strain even with all the challenges in the beginning


Processing
Likes
3
Share
@TeamQuality420
Follow
I took David Robinson's tip a little late " dont grow small flowers" So I took anything that was taking away from the main coals. Of that works out in my favour I will have to find out !!
There is a large story behind there fine ladies . But for now let's just say f*ck cancer.

Likes
8
Share
@KingBong_Guerillas
Follow
Welcome the KingBong's first GrowDiary!!🦍🌱
The grow box is still being finished off but I'm happy with results so far. I'll be adding a custom carbon filter In the top corner and also a small intake fan low down... also a door!!
This is going to be a fun experiment hopefully you all enjoy ✌️🇬🇧
Likes
15
Share
@DaddyPrime2
Follow
7/11 testing testing. harvest update? growdiaries isnt working
9/12 after a 2 month long cure, i can say that this is honestly my favorite weed ive EVER

Likes
120
Share
@DogDoctorOfficial
Follow
Week 8 of our Lego Ninja Tropical Tangie Run has been an incredible rollercoaster of growth and excitement. Our Tangie is evolving into a true botanical ninja superstar!
With her rapid growth, I made a bold decision to give her a full defoliation! What does this mean? Well, it's like a ninja makeover, where we removed all the leaves from her stems. Don't worry, it might sound drastic, but it's a ninja-approved technique used to maximize her potential.
During this process, I carefully removed every leaf, allowing more light to reach the lower branches and bud sites. It's like clearing the path for her to channel all her energy into producing top-quality buds. Our Tangie is a champion, and she took this defoliation challenge like a true ninja warrior!
After the defoliation, I was amazed to see how quickly she bounced back. She's incredibly resilient! You wouldn't even notice she underwent such a transformation; the grow room is already looking lush and vibrant again.
Now, with all the unnecessary leaves gone, she can focus her energy on producing larger, denser, and more potent buds. It's like giving her a clear ninja path to success!
But let's not forget the most important part—nutrition. With her full defoliation, it's essential to provide her with the perfect fuel for her ninja journey. I continue to rely on the powerful Aptus All-in-One Pellets, which act as her trusty ninja power capsules, delivering all the essential nutrients she needs with each watering.
The canopy is filling up once again, and our Tangie is now ready to continue her incredible growth journey. The room looks as if no defoliation ever happened!
Thanks to the support and fantastic products from Aptus Holland, Dutch Passion, and Grow Diaries, our Tangie keeps showing us her ninja potential.
Stay tuned for the next update, where we'll dive deeper into our Tangie's growth and unveil more ninja training techniques. Keep cultivating with joy, embrace the ninja spirit, and remember, with love and passion, anything is possible in the world of growing!
As always thank you all for stopping by, for the love and for it all , this journey of mine wold just not be the same without you guys, the love and support is very much appreciated and i fell honored and blessed with you all in my life<3 <3 <3
#aptus #aptusplanttech #aptusgang #aptusfamily #aptustrueplantscience #inbalancewithnature #trueplantscience #dutchpassion #dogdoctorofficial #legoninjago #growerslove
With true love comes happiness <3 <3 <3 Always believe in your self and always do things expecting nothing and with an open heart , be a giver and the universe will give back to you in ways you could not even imagine so <3 <3 <3
Friendly reminder all you see here is pure research and for educational purposes only
<3 <3 <3 Growers Love To you All <3 <3 <3
Likes
241
Share
@Tropicannibis_Todd
Follow
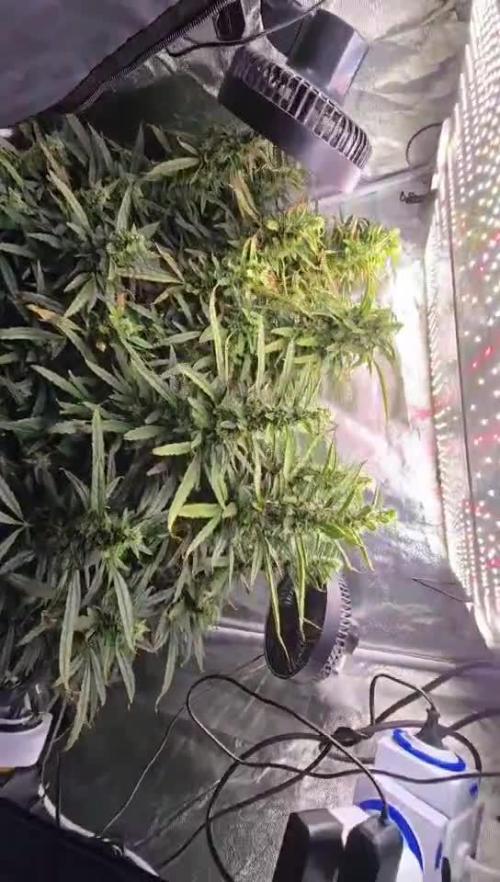
💩Holy Crap We Are Back At It And Loving It💩
Growmies we are at DAY 56 and she's just killing💀it👌
👉We are in full on flowering , gotta say the pink to redish hairs have gone away which is a bummer 😕 but the frost 🍦 is strong 💪
So Shit , I gave them just a tad to much nutes on the first few feeding 👈 But I have since fixed it
So I'm still doing some low stress training 🙃 and some defolation 😳
Lights being readjusted and chart updated .........👍rain water to be used entire growth👈
👉I used NutriNPK for nutrients for my grows and welcome anyone to give them a try .👈
👉 www.nutrinpk.com 👈
NutriNPK Cal MAG 14-0-14
NutriNPK Grow 28-14-14
NutriNPK Bloom 8-20-30
NutriNPK Bloom Booster 0-52-34
I GOT MULTIPLE DIARIES ON THE GO 😱 please check them out 😎
👉THANKS FOR TAKING THE TIME TO GO OVER MY DIARIES 👈
Likes
10
Share
@Fonzo412
Follow
This will be the start of week #2 of seedling stage.
Had an issue 😢 with my blue dream plant I believe I’ve might of over watered . It looks bad hopefully it can recover. Yield may be stunted really lagging behind.
Also I have another blue dream seed so I’m thinking of starting that one fresh so I can pot into the finale medium. I didn’t want to use the cup but didn’t have enough soil at the time 🤷♂️
The strawberry 🍓 banana 🍌 auto and the power plant fem seems to be doing good 👍 so far.
All in all I’m happy 😊 with how things have been going throughout my grow .
I’ll will be feeding my plants nutrients and dropping the lights 💡 for the start of Veg next week.
Let’s goooo…
😎😏

Likes
5
Share
@Rabidreject
Follow
Si it's been a pretty good week. Getting very impatient at the moment. Trying not to dwell on my plants too much, I just need to leave them to finish maturing.
Iv pretty much started flush now for 2 weeks so that will take me to the end of week 8.
Update - Monday
So my thoughts have been drifting towards the next round.
Iv been writing a list and so far Iv decided I want to explore organics further so will most likely be amending my soil with dry amendments such as different meals.
I also would like to make better use of microbes so I will most likely be using at least recharge. Hopefully mammoth p also but I'll buy that one as I need it further down into the bloom phase.
Something else I also really want to try next cycle is the use of other crops to help with IPM and also help feed the soil.
Two I have decided to use already are basil, which is meant to be great for keeping bugs away and also garlic.
I want to try and use crops that I will also want to eat that's why I decided on garlic.
I'd also really like to try and grow a couple vegetable plants alongside my cannabis but I am a little unsure of which plants will also grow happily with the same light cycle as cannabis. IRS a bit of a strange light cycle for here in England so I'm unsure of what to grow but I'd love it if I could grow some squash, corguettes or aubergine. These are my staples for my diet so these would be incredibly handy.
I am about to move so will have a dedicated small room or large walk in cupboard, depending on how u look at it. I would love to be able to make slightly better use of the space and if I can feed myself even a few times from them as well as them improve my cannabis via post resistance and resin production (they use companion crops in lavender production to raise essential oil production) then it seems silly not to do so.
It will be I interesting to pick out cover crops for my 12/12 larger flowering space, but also for my 18/6 space to grow alongside the autos I plan to grow in there.
Obviously different light cycles will let me do different plants.
I think it will take more initial planning on my part, but I feel once I have it all dialled in after 4 or 5 runs it will be a lot cheaper and much more sense sustaining.
If anyone reads this and knows of any decent potential companion crops I can use please message me.
Like I say garlic and basil so far but have heard beans are a great way to get lots of nitrogen in the soil so they might be a good one for the 18/6 tent.
Also I was thinking and I'm a little unsure of when I'm going to want to harvest so I've decided to leave a week between harvesting each plant.
First one will be pulled this weekend at week 7 of flower then week 8 of flower for the next and the last will be week 9.
That way I can sample over the coming weeks and decide which I prefer for the next cycle.
Update - Tuesday
got my jewelers loupe today but i think im going to buy a usb microscope instead, as its really difficult to hold it steady enough for long enough to be able to tell whats going on with the trichs. i tried to shoot a few pics through it on my phone with limited success.
I think there are about half trichs cloudy atm, maybe slightly less but like i say its hard to tell.
Update - Friday
Ok well yesterday i caved and harvested and hung plant 1 of 3.
Couldn't resist. Now that I have this one to fuxk about with I'm less inclined to want to bring the others down.
Smells unbelievable pinot, fruity and skunky.
Have just used a cardboard box with lines strung through the top to hang from. The plants were so small and had no side branches so I had to tie it to the stem from the lines.
Not a lot on it I dont think but the main cola was pretty chunky.
Interestingly the topped plant had more tops obviously and also has some mad side branching that's at the same level as the main colas and they are all about the same size as the one cola on the non topped plant.
I half expected it to just be double the size of the topped but less of them.
Note to self for future reference:
Always top plants
Use bigger pots


Likes
2
Share
@dwotTV
Follow
Into Week 8 now and really filling out. A good solid healthy outdoor plant with little to no extra care or intervention so far, really happy with it and excited to see how it finishes out. Scratched in some Coast of Maine Fish Bone Meal toward the end of the week and then lightly watered in for a little feed.
Likes
162
Share
@nonick123
Follow
Día 72 (18/12/2023)
Empiezan las temperaturas frías... (tengo las luces encendidas de 20:00 a 8:00...)
Día 74 (20/12/2023)
Cogollos engordando y poniéndose duros a velocidad de crucero
Los colores morados de esta cepa son cada vez más profundos 😍
Día 75 (21/12/2023)
Riego: 1 litro H2O + Melaza 1 ml / l + Alga Bloom 3,5 ml / l + Sugar Royal 1 ml / l + Power Buds 1 ml / l + Green Sensation 1 ml / l - pH 6,24 - 875 PPMs
Desde esta semana, añado nutrientes Cal-Mag Amino 1 ml/l y Enzymes 2 ml/l de XpertNutrients
Día 76 (22/12/2023)
Nuestra planta se queda sola en la tienda porque su compañera se ha vuelto hermie... Espero no la haya polinizado
Relleno la parte superior del sustrato con 3 cm de Light Mix, ya que se ha compactado mucho
Riego muy despacio con 500 ml de H2O para que se asiente
Día 78 (24/12/2023)
Reviso diariamente en espera que no sea hermie o se haya polinizado
De momento todo va bien....
Añado un par de vídeos para que veáis los espectaculares colores morados que están mostrando 😍
En 20 años cultivando, nunca había visto una cepa tan bonita. Im in love 😂
Likes
13
Share
@Robeeriegenetics
Follow
Nooooot great custom dwc totes doing much better then vivosun buckets
Likes
25
Share
@Elpicor
Follow
Una settimana colma di cambiamenti, é incredibile come le piante senza nessun tipo di training si adattino perfettamente tra di loro allo spazio circostante, quanti sensori possiedono le piante? Come comunicano tra di loro? mi ha sempre affascinato...
