
Likes
Comments
Share


@MotherNaturesSon
Follow
good with training and strong genetically. good for extracts. medicinal potentials include fatigue, tension, and stomach pain. my grow style seems to minimize ‘cheesy’ terpenes in favor of amazing tropical sweetness. cheers


Likes
5
Share


@Sativa763
Follow
Day 49 after switch.
very nice i would say :)
everything is getting bigger and frosty.
no complains so far.
last week watering with PK 5-8, then just water until she´s finished.
Likes
5
Share

@AestheticGenetix
Follow
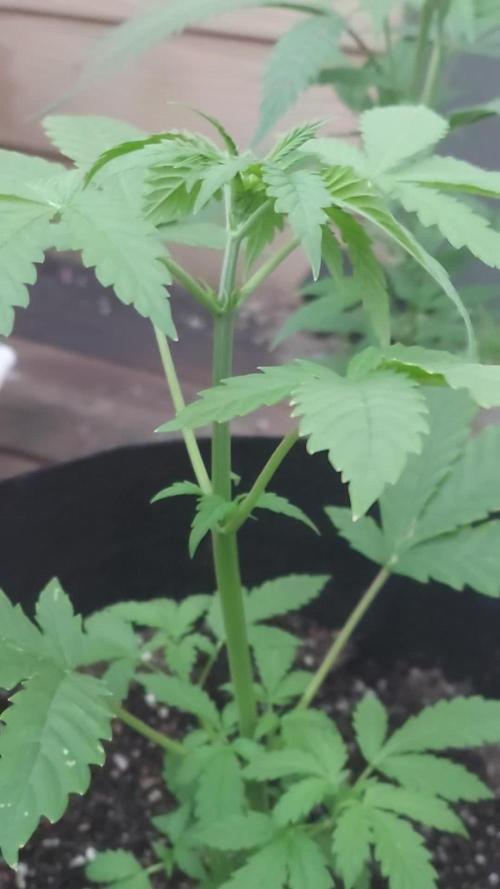
7/5/25 plant is stretching. Not sure if its preflowering or just being outside in a bigger pot. Im just going to let her grow naturally and see how it turns out. I may end up with just one diary of each strain at the moment. But im also not sure whether im going to be doing indoor or outdoor based on personal circumstances.

Likes
9
Share


@RunWithIt
Follow
And the first week of flower begins!
I started this week off by defoliating any and all large fan leaves blocking lower nodes. Also did a little supercropping on BL to get her to spread just a bit more. I raised the light up to 45cm and this will be the final height.
They've been drinking really fast by this point. Definitely going to be very diligent with waterings/feedings until harvest.
Cheers all! This is my most painless grow to date, praying for a nice and smooth wrap-up to this cycle as well.

Likes
39
Share

@AestheticGenetics
Follow
3/12/25
Welcome to another week of this Grow that is in thanks to Zamnesia and Plagron! 🤙👊
3/15/25
they are now under a new evo3 which fits perfectly in this 2x3
When i was changing out the lights, i dropped the light and i smashed one of the plants R3 which is also the most developed plant at the moment. one of the branches didnt fully snap but i have it held up with a soft twist tie and the help of neighboring branch.
The plants have been stretching quite a bit over the course of the last week

Likes
89
Share


@nonick123
Follow
Día 54 (10/03) Riego 1,25 Litro H20 + Wholly Base 2,5 ml/l + Solid Green 2 ml/l + Early Flower 1,25 ml/l de Gen1:11
TDS 1033 PPMs - pH 6,51
Día 55 (11/03) Defoliation time!
Con la increíble ayuda de @miyaguiokpolilla, @dogdoctorofficial y @growwithflow420 hice la defoliación recomendada exactamente después de 21 días cambiada a 12/12
Consejos de defoliación
- Elimine menos del 20% de las hojas de abanico y solo las hojas de abanico
- Retirar el tercio inferior de la planta, incluidas las ramitas.
- Retirar las hojas en forma de abanico dirigidas hacia el interior de la planta.
- Retire las hojas de abanico que dan sombra a los futuros cogollos.
Día 56 (12/03) Esperando algo de estrés tras la defoliación... Han crecido 2 centímetros en 24 horas 😍🚀
Día 57 (13/03) Riego 1,25 Litro H20 + Wholly Base 2,5 ml/l + Solid Green 2 ml/l + Early Flower 1,25 ml/l de Gen1:11
TDS 1043 PPMs - pH 7,0
Las plantas muestras una ligera deficiencia de CalMag. Voy a subir el pH a 7.0 en este riego para mejorar la biodisponibilidad
Día 58 (14/03) Siguen con su crecimientos, los cogollos formándose y las hojas de azúcar empezando a llenarse de resina
Parece que la corrección de la deficiencia de CalMag ha sido muy efectiva! No hay más manchas y las plantas no paran!
Día 59 (15/03) Como mañana me voy a Spannabis 😍 voy a adelantar 1 día el riego reduciéndolo a 1 litro
Riego 1 Litro H20 + Wholly Base 2,5 ml/l + Solid Green 2 ml/l + Early Flower 1,25 ml/l de Gen1:11
TDS 1080 PPMs - pH 6,57
Día 60 (16/03) Spannabis time! 🚀
Día 61 (17/03) Spannabis time! 🚀
💦Nutrients by Gen1:11 - www.genoneeleven.com
🌱Substrate PRO-MIX HP BACILLUS + MYCORRHIZAE - www.pthorticulture.com/en/products/pro-mix-hp-biostimulant-plus-mycorrhizae
🎚️Controlled by TrolMaster TCS-1 Tent-X System Main Controller - https://www.trolmaster.com/Products/Details/TCS-1

Likes
12
Share


@Kayanesta
Follow
Smells amazing, buds are greesy to the touch…serious genetics from fast buds!
Likes
10
Share

@nonick123
Follow
🚀 4 clones de Blueberry Pie F1 Fast seleccionados por @stacksfarmz - https://www.instagram.com/stacksfarmz/
🚀 Breeding by @seedsmangenetics - https://www.seedsman.com/eu-en/blueberry-pie-f1-fast-feminised-seeds-sman-blpi-fast-fem
💦 BioTabs 15% DISCOUNT code "GDBT420" biotabs.nl/en/shop/ @biotabs_official
🌱Substrate PRO-MIX HP BACILLUS + MYCORRHIZAE @promixmitch @promixgrowers_unfiltered
💡2 x Mars Hydro FC1500 EVO Led Grow Light (2024 NEW FC 1500-EVO Samsung LM301H 150W LED) - https://marshydro.eu/products/fc1500-evo-led-grow-lights/ - https://www.amazon.de/dp/B0CSSGN5D8?ref=myi_title_dp


Likes
21
Share


@420DeepGrow
Follow
Gracias al equipo de Kannabia Marshydro XpertNutrients y Trolmaster sin ellos esto no sería posible.
💐🍁 Amnesi K - Lemon:
La Amnesi-K Lemon es una semilla formada a partir de un trío de reyes, la Amnesia, la Lemon Skunk y la Jack Herer. Este matrimonio de tres dio lugar a una gran sativa que, con tonos dulces, terrosos y muy cítricos
🌻🚀 Consigue aqui tus semillas:
https://www.kannabia.com/es/semillas-marihuana-feminizadas/amnesi-k-lemon
💡TS-3000 + TS-1000: se usaran dos de las lámparas de la serie TS de Marshydro, para cubrir todas las necesidades de las plantas durante el ciclo de cultivo, uso las dos lámparas en floracion para llegar a toda la carpa de 1.50 x 1.50 x 1.80.
https://marshydro.eu/products/mars-hydro-ts-3000-led-grow-light/
🏠 : Marshydro 1.50 x 1.50 x 1.80, carpa 100% estanca con ventanas laterales para llegar a todos los lugares durante el grow
https://marshydro.eu/products/diy-150x150x200cm-grow-tent-kit
🌬️💨 Marshydro 6inch + filtro carbon para evitar olores indeseables.
https://marshydro.eu/products/ifresh-smart-6inch-filter-kits/
💻 Trolmaster Tent-X TCS-1 como controlador de luz, optimiza tu cultivo con la última tecnología del mercado, desde donde puedes controlar todos los parametros.
https://www.trolmaster.com/Products/Details/TCS-1
🍣🍦🌴 Xpert Nutrients es una empresa especializada en la producción y comercialización de fertilizantes líquidos y tierras, que garantizan excelentes cosechas y un crecimiento activo para sus plantas durante todas las fases de cultivo.
Consigue aqui tus Nutrientes:
https://xpertnutrients.com/es/productos/
📆 Semana 8:
He encontrado algo de moho en la punta principal 😡y he decidido cortarla y dejarla bajo lupa hasta que esté totalmente madura.


Likes
3
Share


@Luke_Lee
Follow
—————————————————————
WEEK 4 / DAY 22-28
Mars Hydro FC-E3000
Floragard Professional GrowMix
11L Plant bag made of fleece
Light: 55cm / 50%;
Schedule: 24/0;
PPFD: 592 umol/m2/s
20° C - 75 RH
300ml per Plant every 2-3days
PH 6,5-7
1ml BioGrow; 0ml TopMax ; 0ml BioBloom
1ml CalMag
#1 Royal Critical Automatic
#2 Royal Critical Automatic
Fan, extractor and pump ON 24/0.
—————————————————————
-10.02.2025
The third vegetation week begins, the ladies look really good.
The lamp has been set to 55cm and is running at 50%.
The lowest leaves with the rust-colored spots have been removed.
-13.02.2025
The GrowBox was cleaned and disinfected once.
The lowest/oldest leaves were cut off. As the soil had settled after a few weeks, the pots were filled with fresh soil.
-16.02.2025
Today is the last day of the third week of vegetation.
The plants look good, so far everything is quite unproblematic.
Total Time: 701:00h
Total Energy: 107.07kWh
Likes
11
Share


@TooMedicatedToThinkOfOne
Follow
Alright ladies and gents we have finished week 6 and we are getting in on our way to week 7 as we speak! I was so worried because she started really showing signs of nitrogen deficiency so i decided to really up her dose on more veg nutrients, i went to another website for help because i couldnt get much fast help here which isnt too bad because everything is back to normal and shes looking really healthy besides the few leaves that got hit hard. She looks like she is starting to produce sugar leaves because there are small leaves growing out of where the bud sites are located and they have what looks like resin from the buds starting to form on them. I am not 100% sure as this is my first grow but ill be doing more research after i make this posting. But she is stretching like a son of a gun literally 12 inches in this weeks growth like holy shit! We will see what week 7 brings and hopefully next time i report back to you guys i will be showing off some nice buds starting to form until then peace and love everyone and i hope you enjoy this weeks time lapse! 😁

Likes
41
Share


@Reyden
Follow
La mia bellissima Purple Lemonade sta quasi finendo il suo ciclo, mancherà ancora una settimana aspettando che si gonfia ancora un po’! L’odore è intenso e floreale, non vedo l’ora di provare la differenza con questo super terriccio organico!
Likes
10
Share


@TiRobotProds
Follow
Bonjours à tous, nous entamons les deux dernières semaines de rinçage pour ces dames. La gorilla sherbet 1 a été récolter.
Likes
44
Share


@Roberts
Follow
I am dropping Bubba Kush Mintz Auto from Aeque Genetics. I will be growing her in Athena blended line nutrition. She will be under the Spider Farmer G5000/UVR40 lights. Everything is ready to go. Thank you Aeque Genetics, Athena, and Spider Farmer. 🤜🏻🤛🏻🌱🌱🌱
Thank you grow diaries community for the likes, follows, comments, and subscriptions on my YouTube channel. I greatly appreciate all the support. 🌱🌱
🌱https://youtube.com/channel/UCAhN7yRzWLpcaRHhMIQ7X4g
Likes
51
Share


@Chumpkilla
Follow
12/17/23 - Day 41 - It flipped to flower today. I didn't document it via video because it's just like all the other videos. Except this change uses different level of the nutes for Flowering.
Alot of the bud sites have tons of pistles on them. The plant itself is so round and bushy. The plants branches are very close together.
There is a video up there of me using the software to change from veg. to flower.
I'll update you tomorrow once the lights come on. Now I only get 12 hrs of light instead of 18.
12/18/23 - Day 42 - FLOWER POWER! Look at those flowers starting to form! It looks amazing!!!!! I think starting from a good seed is better than a clone. If this ends up better than the last grow..... it's already off to a better start. The leaves looks super healthy.
12/23/23 - Day 47 - What a WEEK! The whole family got sick and I was the lone ranger on the battlefield taking care of all the units! So posting had to take a back seat! I did manage to grab some pictures during those days. I posted them up top. This week is the first week of Flower, and its going great! As you can see in the pictures that the buds are starting to take off from the bushy part of the plant.
I installed a second Scrogg net, the buds are already starting to launch upwards and I can tell they are going to need some support as they get bigger.
The Leaf box has been taking great care of the nutes, humidity, temp, and lighting. There is only one thing that I have had to do manually. Toward the last day of the week, the day before the water change the PH seems to dip down to 5.5. It's not a bad thing to be there for a couple of hours, but it is the lowest range I would ever let PH go in a hydroponic (DWC) setup. I have been adding 2 cap fulls of PH+ to get the PH in check. To be honest, adding 2 caps full of PH+ once a week is NOTHING. I feel like it's the least I could do. The box is creating the perfect environment. It's the perfect Cannabis Oasis, I treat my girls to the finest of living before the end. :)
Happy growing and I'll post again after the water change tomorrow!
If you like this experience and would like to have the same one, you can order your Leaf system from www.GetLeaf.co.
(full disclosure, I paid in full for my Leaf unit. I was a Kickstarter backer back in 2017 this is not an advertisement, this is real life)
Likes
12
Share


Likes
19
Share


@Basementganja
Follow
Day 44 this Girl Scout Cookies auto had its light intensity increased! I placed a 9" tall pale under the pot, to get the plant closer to the light!
This plant is now 24" away from the SF4000(both drivers dimmed down 25% to 333 total watts).
Day 47 - Light defoliation
Day 49 - Flowers coming in strong!
Likes
2
Share


@Bluemels
Follow
Tag 46: Die Blätter der beiden Pflanzen sehen auch nicht mehr so gut aus.