




Likes
3
Share


@Ryno1990
Follow
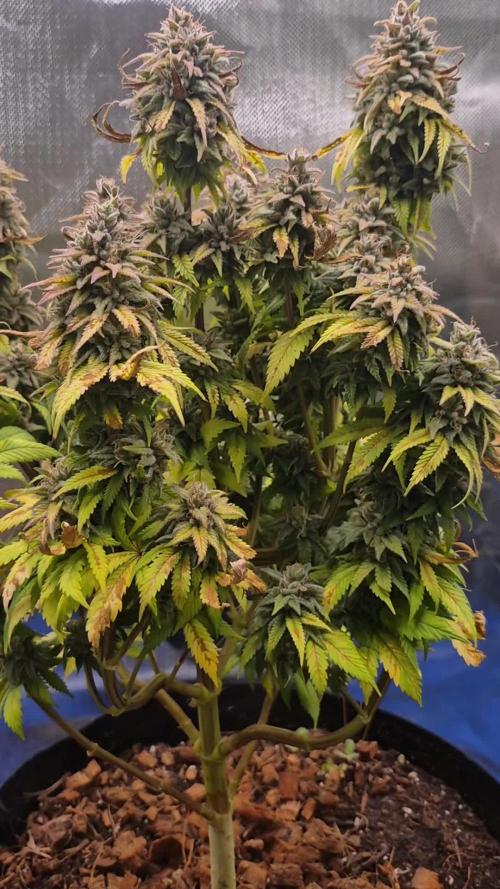
This girl is really comming together an frosting up like crazy as her rock solid buds really start to fatten up threw week 6 of flower under the medic grow fold 6




Likes
64
Share


@yan420
Follow
FERMAKOR BARREL MIX – BASE IN USE
(Testing on the Fantasy Feast girl we pulled out of another diary
https://growdiaries.com/diaries/274722-grow-journal-by-yan402 )
(FERMAKOR BASE SYSTEM KOH VERSION diary
https://growdiaries.com/diaries/278391-grow-journal-by-yan402)
(Urea & Micros on the way — first week running without them)
🍶💧🍶💧🍶💧🍶💧🍶
💧 30 L Barrel – Current Working Mix
🍶💧🍶💧🍶💧🍶💧🍶
Step 1 – Calcium Nitrate (Part A)
7 L warm water (~35–40 °C) → added 45 g Calcinit, stirred until fully clear.
That’s the calcium + nitrogen backbone for the feed.
Step 2 – FERMAKOR PK Base (Part B)
15 L water in the main barrel → added 30 ml FERMAKOR PK Concentrate, mixed well.
This forms the main P + K part of the formula.
Step 3 – Combine Solutions
Slowly poured the Calcinit mix into the barrel while stirring — no reaction, still crystal clear.
That confirms the mix is stable and precipitation-free.
🌿 Step 4 – FPJ / FFJ Batch
Added 30 ml homemade FPJ (fish + veg batch) ≈ 1 ml/L.
Color shifted to a light-amber tone — looks alive and active.
🍋 Step 5 – Citric Acid Balance
Added 1 tsp citric acid after everything was blended to fine-tune pH and help chelate micros later on.
📦 Step 6 – Top Up & Check
Filled to the 30 L mark with plain water → pH tested with drops, showing yellow-green — roughly 5.8 – 6.0 range.
Nice clean look, stable smell, no residue.
💧 Current Base Ingredients (Active Mix)
Warm Water ≈ 22 L total
Calcinit 45 g → N + Ca foundation
FERMAKOR PK Base 30 ml → P + K support
Citric Acid 1 tsp → Chelation + pH balance
FPJ / Fish Emulsion 30 ml → Organic enzyme booster
Result: clean amber mix, mild and balanced.
I’ll let this version run for a week before adding anything.
👀👀👀👀👀👀
Observations and changes
👀👀👀👀👀👀
27.10.25 VW27 noticed some min burnt tips so I decreased Calcium Nitrate 45 to → 40g, decided to add two more elements micros and Epsom salts just to make sure they got everything, Fetrilon Combi 1 (Micros): 0.5 g, Epsom salts: 8 g
28.10.25 VW27 she seems devoid of any deficiencies, seems ready for the flip to 12/12
02.11.25 VW27 girl is looking good so I decided to stop making daily videos and do a standard once a week update.
09.11.25 aVW28 7 days since flip,stretch in full swing, first pistils showing, leaf color deep and healthy. Slight tip burn early week → gone after pH stabilized.
Feed stayed clear, no residue, roots clean and sweet-smelling, did what I hope is a last cleanup and pruning🎥
10.11.25 VW29 added Phosphoric acid pH down to the schedule for flowering stage.
14.11.25 FW1 FERMAKOR PK Micros 40 → 50 ml
23.11.25 FW2 got some burnt tips, observe and act accordingly in case it worsens, diluted by 25% for this week.
05.12.25 FW3 about 2 weeks ago Calcium Nitrate 35 g → 25 g, FERMAKOR PK Micros 50 ml → 60 ml
12.12.25 FW4 Calcium Nitrate 25 g → 20 g, FERMAKOR PK Micros 60 ml → 80ml
16.12.25 FW4 Calcium Nitrate 20 g → 17 g, FERMAKOR PK Micros 80 ml → 110 ml
🌱💦🌱💦🌱💦🌱💦🌱💦🌱
🌿 Day to day tasks & actions 🌿
🌱💦🌱💦🌱💦🌱💦🌱💦🌱
Fed about 5l a day of #1 and on the weekends I do a pure FERMAKOR PK flush 2l runoff
(*RUNOFF reused for tomato plants)
💧💧💧💧💧💧💧💧💧
🌱 Nutrients in 30 L #1 Veg – FERMAKOR
💧💧💧💧💧💧💧💧💧
Calcium Nitrate (Calcinit / Nitcal):
45 → 40 g → 35 g → 25 g → 20 g → 17 g
= 1.50 g/L → 1.33 g/L → 1.17 g/L → 0.83 g/L → 0.67 g/L → 0.57 g/L
= 207 ppm N / 253 ppm Ca
→ 184 / 225
→ 161 / 197
→ 115 / 141
→ 92 / 113
→ 78 / 96
PK Concentrate (FERMAKOR Base):
30 → 40 ml → 50 ml → 60 ml → 80 ml → 110 ml
= 1.00 → 1.33 ml/L → 1.67 ml/L → 2.00 ml/L → 2.67 ml/L → 3.67 ml/L
→ balanced 1:1 P:K + light micros (from extract)
Home-made FFJ/FPJ (Fish + Veg): 30 ml
= 1.00 ml/L
Epsom Salt (MgSO₄·7H₂O): 8 g
= 0.27 g/L → ~26 ppm Mg + ~35 ppm S
Fetrilon Combi 1 (Micros): 0.5 g
= 0.017 g/L
→ Fe 0.7 ppm · Mn 0.7 ppm · Zn 0.3 ppm · Cu 0.3 ppm · B 0.1 ppm · Mo 0.02 ppm
Phosphoric Acid (pH down) + Citric Acid (chelation): as needed
→ First set pH with phosphoric acid, then add a little citric only if you want extra chelation
Target pH: 5.8 – 6.0 (drop test yellow-green)
📦 TOTAL:
Liquids:
60 → 70 → 80 → 90 → 110 → 140 ml per 30 L
= 2.00 → 2.33 → 2.67 → 3.00 → 3.67 → 4.67 ml/L
Solids (CaNO₃ + Epsom + Fetrilon):
53.5 → 48.5 → 43.5 → 33.5 → 28.5 → 25.5 g per 30 L
= 1.78 → 1.62 → 1.45 → 1.12 → 0.95 → 0.85 g/L
YouTube Link: https://youtube.com/-m8h?si=A7x4Zlr2kj-_ga31


Likes
6
Share


@ChewiestEndZa
Follow
Week went well, had a few bug issues that resulted in using a sulphur based pesticide to get rid of spidermite issue that has haunted my grow space for a couple of years.
Used only one application to get rid of mites this week, let the application sit on plant for 5 hours before taking outside and rinsing plant off with hose.
Edit: 2nd plant was a white rhino seed from my indoor grow but turned out male.


Likes
56
Share

@FatnastyzBudz
Follow
1-10 Day 78 Day 32
- First full dose of Green sensation today
- Per Gallon: 1.5ml Cal Mag, 4ml Green Sensation, 8ml Coco A+B - 714ppm @ 6.0ph
- 1500ml, runoff is 634 @ 6.1 ph
1-11 Day 79 Day 33
- Using the same mix I had left over from yesterday, but diluted with plain RO water to bring down all PPMs.
- 589ppm @ 6.2 ph
- 2500ml, runoff is 658 ppm @ 5.9ph
- Will start to lower coco A+B tomorrow
1-12 Day 80 Day 34
- 1.5ml Cal Mag, 4ml Green Sensation, 7ml Coco A+B - 660ppm @ 5.9ph
- 3000ml, runoff is 785ppm @ 5.6ph
1-13 Day 81 Day 35
- 1.5ml Cal Mag, 4ml Green Sensation, 6ml Coco A+B - 660ppm @ 6.1ph
- 2000ml, runoff is 749 @ 5.6ph
1-14 Day 82 Day 36
- 1.5ml Cal Mag, 4ml Green Sensation, 5ml Coco A+B - 573ppm @ 6.0
- 2500ml, runoff is 674ppm @ 5.6 ph
1-15 Day 83 Day 37
- 1.5ml Cal Mag, 4ml Green Sensation, 4ml Coco A+B - 543ppm @ 6.1 ph
- 2000ml, runoff is 705 @ 5.9
- Turns out that a liter of coco A+B is not enough for 4 plants LOL....so, I'm about out. I'm going to switch up I guess to Advanced Sensi Bloom A+B. So to get ready for this, me and chatgpt came up with a plan. Tomorrow I will flush out everyone with cal mag water, reset them, and then slowly start to introduce Advanced Nutrients.
1-16 Day 84 Day 38
- Resetting for Advanced Nutrients today!
- Per Gallon: 0.5ml Cal Mag, 2ml SLF - 33ppm @ 6.0ph
- 6000ml, runoff is 406 @ 5.8ph
- Will start low with the new Advanced A+B tomorrow per Chat GPT
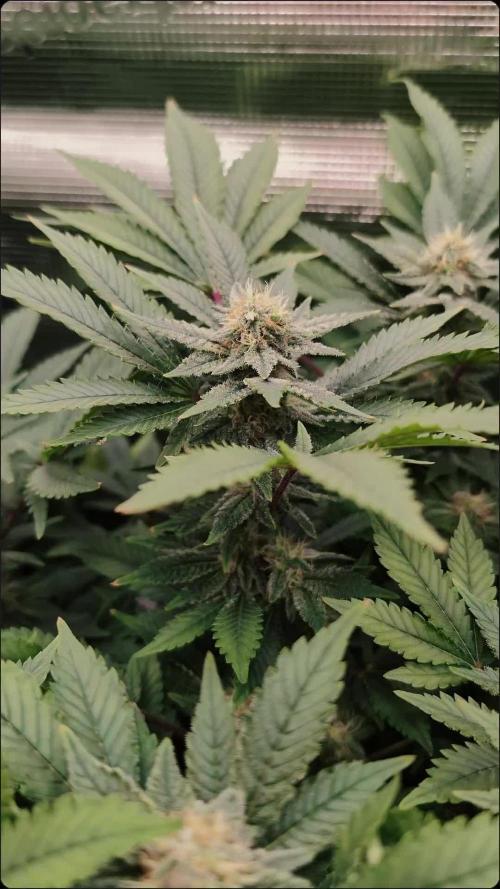
Best smell EVER!!! Hands Down! She is so pretty, and again...that smell! I can't get enough.
Fred is still doing amazing...except Guy keeps looking at him like it's his next lunch. So, I'm not sure how long Fred has....poor Fred.

Likes
66
Share


@LoveGrowWeed
Follow
Well, here is the harvest.
I looked through a jeweler's magnifier, saw yellow trichomes and cut down the plants. 2 days trimmil, tired. Cool groove turned out.
I'll post the weight later when it's dry.
Let's try to pull the diary of the month?
So what did we get.
In the general photo, dense buds - 720 grams. (3 cans and a container).
There were still small buds , did not weigh.
And sugar trim - in the photo, with small small cones.

Likes
155
Share


@deFharo
Follow
Bienvenidos cultivadores de marihuana clandestinos y también a los que tienen la fortuna de no serlo!🖐️👨🌾👍
Este diario es un relato semanal de técnicas, experiencias de cultivo y Bio preparados orgánicos caseros, los cuales llevo experimentando dos años en cultivos de marihuana interior.
• Activación de Microorganismos de Montaña con Calabaza, zanahoria, minerales y quitosano para fortalecer las defensas de la planta contra patógenos.
- Publicado el 😋 22/02/21
Después de 45 días de fermentación anaeróbica he abierto, lo que espero que sea un gran fertilizante para usar desde la etapa de crecimiento vegetativo hasta la preflora y primeras semanas de floración... después de usarlo durante un año en todos mis cultivos, puedo decir que es excelente.
La calabaza y la zanahoria contienen multitud de minerales y vitaminas que ayudan a fortalecer el cultivo y ayudan a la expansión de las raíces. Este preparado es comparable, funcionalmente, con los extractos de algas, aunque mucho más completo. Esta hortaliza es rica en antioxidantes. Destaca su contenido en carotenos, que son los responsables del color característico de la calabaza. ¿Será que esto puede influir en los colores de las cepas?... en observación!!
Gracias a la fermentación anaeróbica con Microorganismos de Montaña, los nutrientes, vitaminas y minerales son quelados por la acción de los MM, consiguiendo así un caldo nutritivo de primer orden que las plantas asimilan de inmediato.
INGREDIENTES fórmula básica:
Agua de manantial alcalino: 2,5L
Suero de leche: 1L
Microorganismos de Montaña Sólidos (varias cepas): 400g
Melaza orgánica: 120g.
Levadura de cerveza y fresca: 10g.
Calabaza y zanahoria fresca: 475g.
Cáscara de camarón deshidratado y molido (Quitosano): 6.5g
• Extra Minerales:
10g de Roca fosfórica: P
7g de Azomite: Ca, Fu, Fe, K, Si, B y trazas de el resto de minerales de la tabla periódica.
8g de Ceniza de palmera: Ca y K.
5g de Piedra Pómez: Si, Al, Fe, Ca, K.
8g de caolin con Illita: Fe, Si.
5g de Sal de Epsom: Mg.
• Elementos contenidos en la calabaza y zanahoria:
Aminoácidos: alanina, arginina, cucurbitina, cistina, glicina, histidina, isoleucina, lisina.
Ácidos: linoleico, aspártico, oleico, palmítico salicílico y fólico.
Vitaminas: Vitaminas A, B1, B2, B3, B6, B9, E, A, C, K
Minerales: calcio, cobalto, boro, magnesio, zinc, potasio, hierro.
Azúcares: sacarosa
PROCEDIMIENTO
En este bio preparado he hecho una pre-hidrólisis de la calabaza y zanahoria, cociéndolas durante una hora con melaza para mejorar luego, en la fermentación, la disolución de todos sus elementos. También he hecho una pre-hidrólisis con la cáscara de camarón, esta vez he hecho una hidrólisis alcalina con KOH, que luego de dos horas añado a la mezcla final, además he diluido, todo lo posible, los minerales mediante una agitación violenta..
Disuelvo todos los elementos y añado levadura de cerveza y fresca para dar comienzo a la fermentación. Coloco en una bolsa de malla los Microorganismos de Montaña Sólidos de mis dos semilleros, donde reúno los Microorganismos (Bacterias de la familia de los Actinomicetos, Levaduras y Hongos (Micorrizas), Microalgas y Protozoarios) de seis bosques vírgenes de mi zona.
Cierro el bidón herméticamente con válvula de escape de gases, como estamos en Enero y hace frío he puesto una cinta de calor alrededor del bidón para mantener una temperatura constante de aproximadamente 36°C, de esta manera el preparado puede estar listo en tan sólo 30 días, si fuera el caso de dejarlo a temperatura ambiente el preparado demoraría 2 meses más en estar disponible para uso. La fermentación comenzó a los 60 minutos y se ha alargado durante 25 días sin interrupción.
He abierto el bidón a los 45 días, el olor ha fermentado es muy agradable, el color fantástico, algunos Microorganismos se ven prosperando en la superficie, separo medio litro para ir usándolo y cierro el bidón otra vez.
Tengo varios cultivos incipientes donde voy a aplicar este fertilizante y observar sus efectos.
Hasta la próxima semana...
SALUDOS, SALUD Y GRANDES COSECHAS A TODOS!! 😁👨🌾💧💦🌞💡
=================================
🙄👇👌👍👉👉🖐️👨🌾👍👈👈👈🤜👌🙏👇🤩🖐️🏻


Likes
5
Share

@420DeepGrow
Follow
📆 Semana 5
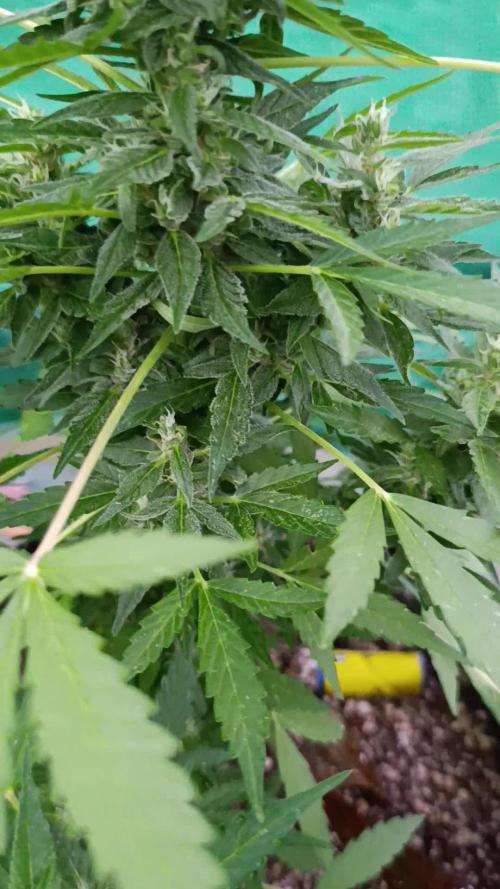
Esta quinta semana muestra una evolución clara en la floración. Los cogollos continúan desarrollándose y empiezan a ganar más volumen y definición, mientras la planta mantiene un crecimiento equilibrado bajo el sol directo.
La estructura floral comienza a tomar protagonismo y poco a poco se empieza a apreciar el potencial que puede desarrollar durante las próximas semanas. Mantengo una nutrición moderada, acompañando el avance sin forzar el ritmo de la planta.
⚡ EC: 0.95
💧 pH: 6.2
🌡️ Agua: 21°C
🌫️ Humedad: 45–55%
💡 Intensidad: Luz directa del sol
🔥 Nota de cultivo: La floración empieza a coger velocidad y los cogollos ya muestran una evolución más evidente. Ahora toca seguir acompañando el desarrollo y dejar que la planta vaya construyendo volumen semana a semana.
¡Seguimos creciendo fuerte! 💪

Likes
9
Share

@MrWeeedWorld
Follow
Guava Runtz Automatic – Woche 5
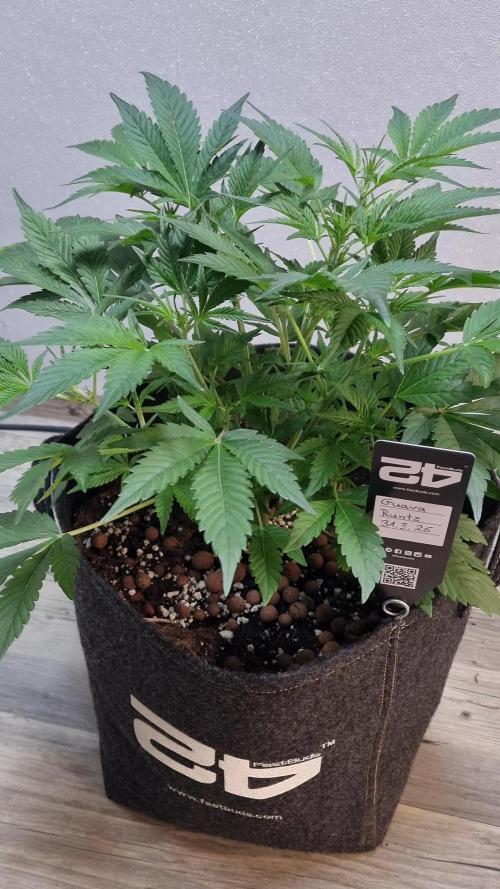
Meine Guava Runtz Automatic befindet sich aktuell in Woche 5 und zeigt einen richtig schönen, buschigen Wuchs, der mir persönlich extrem gut gefällt.
Sie entwickelt sich sehr kompakt und gleichmäßig, wirkt dabei absolut gesund und vital. Ihr Gesamtbild ist kräftig und stabil, genau so, wie man es sich in dieser Phase wünscht.
Bis jetzt sind noch keine Anzeichen der Blüte zu erkennen, aber ich gehe stark davon aus, dass sie in der kommenden Woche damit beginnen wird. Die Voraussetzungen dafür sind auf jeden Fall perfekt.
Ich bin mir sicher, dass sie ordentlich abliefern wird – sie macht jetzt schon einen sehr vielversprechenden Eindruck.
Neue Updates gibt es jeden Sonntag – bleibt dran!
---------------------------------------------------------------------------------------------------------------------------------------------------------------------
Guava Runtz Automatic – Week 5
My Guava Runtz Automatic is currently in week 5 and shows a really nice, bushy growth structure that I personally like a lot.
She is developing in a very compact and even way, while looking completely healthy and vigorous. Her overall appearance is strong and stable — exactly what you want to see at this stage.
So far, there are no visible signs of flowering yet, but I strongly expect her to start transitioning within the next week. The conditions and her development definitely point in that direction.
I’m confident that she will deliver great results — she already looks very promising.
New updates every Sunday – stay tuned!
Likes
190
Share


@Herbalize
Follow
Hello folks
For this second week of flowering the girls are doing well and they are healthy 😊
I removed the 400MH and put the 400W HPS
Watering every 4/5 days PH 6.2, without nuts this week, because the ppm runoff was still a bit high and I wanted to make a little "flush" before using flowering nuts
Runoff : Ph 6 / 1650 Ppm
Did a defoliation at the end of the week,so the light could cross the canopy, even though I usually dont like to remove leaves, I have to try👌
Follow, like and comment if you enjoy it
I also have a second diary with 2 Remo Chemo
Peace Love & Weed 😍👊

Likes
18
Share


@TheItalianGrower
Follow
Hi guys, in the middle of this week I changed my 400w HPS to a 600w one. I also added another 600w HPS to give more light to the plants in these last 10 days of vegetative growth. So now i use 2 600w HPS.
So far everything has been fine. Plants begin to stretch after the stress of cutting.
If you know any good nourishment for the flowering phase, I listen to you, thank you.
Stay tuned 🦍😎

Likes
11
Share


@dutchm913
Follow
start of week 3 gave her some big bud and at the mid week she was thirsty again so decided to brew up flowering tea for my other and gave her some , loving the growth of this strain

Likes
Comments
Share


@Nobody1991
Follow
It is a vigorous plant with very uniform branching, high resinous and high yield, if you grow from seed there are a few different phenos that I got, equally as good
Likes
9
Share


@Franco123
Follow
the sprouted seedling and a seed that they had given me some time ago and a cross of black Domina x NY diesel o super skunk? I don't remember however I selted it to make a mini jar grower than a peanut butter jar
Likes
83
Share


@Grey_Wolf
Follow
Chance of a Lifetime
Greenhouse Seeds Competition
Wonder Pie
8th May 2020
When I first saw that Greenhouse seeds were running a Worldwide competition I was amazed because Australia does not normally get included in such things, especially involving Cannabis. But I knew straight away that this was the chance of a Lifetime for me so I applied straight away. When I got the email saying I was in I was over the moon with happiness.
The Contest will see the winning Diary/Grower win a trip to Amsterdam for two with accommodation in the apartment above the famous Green House smokeshop.
To be in the running I simply applied to grow one of their chosen strains with their own Nutrients (greenhouse feeding) I picked and was very luckily accepted to grow the "Wonder Pie"
strain alongside the Greenhouse feeding Bio Feed Range.
Here is a little bit of info on the
"Wonder pie" strain courtesy of Seedfinder.eu
Wonder Pie, sweet, fruity and petrol aroma
It is a wonderful hybrid between two really powerful lineages, Wedding Cake Cannabis Strain (aka Triangle Mints: Triangle Kush x Animal Mints) and OG Kush (Chemdawg x [Lemon Thai x Hindu Kush, Pakistan)].
It produces tall plants with a vigorous and branchy development with flexible but strong branches.
It develops an ideal structure for applying pruning and moulding methods such as topping, LST or Main Linning. It also offers good results when cultivated in SCROG.
These optimisation techniques help both to control its size and structure and to maximise the harvest by enhancing bud production.
Wonder Pie marijuana, with a balanced, euphoric and relaxing effect
The harvest is ready after about 60-65 days with a yield of up to 550g per m2 cultivated in an indoor grow tent, and a yield of up to 800g per plant cultivated outdoors.
It produces flowers completely covered with bright and aromatic resin, it is a good variety to perform Live Resin resin extractions and enjoy them greatly in a resin vaporiser.
Wonder Pie offers a sweet and fruity aroma and flavour, with exotic gas touches that permeate the palate for a long-while and drive your taste buds crazy, particularly when inhaled using a cannabis vaporiser.
It produces an intense effect of rapid appearance, combining a euphoric and psychedelic feeling with a pleasant body relaxation. It is ideal to consume it at any time of day.
Green House Seed Wonder Pie info:
Type: Feminised cannabis seed
Genetics: Wedding Cake x OG Kush
Indica Sativa hybrid
Indoors flowering: 60-65 days
Outdoors harvest: End of September
Indoors yield: Up to 550g per m2
Outdoors yield: Up to 800g per plant
For my Grow and entry I will be using soil with some added hydroton and perlite for extra drainage.
All feeds will be from the Greenhouse feeding bio nutrients range, that came with the seeds for the purpose of this competition.
To win this would be a dream come true
as I have always wanted to travel to Amsterdam ever since watching Cheech n Chongs Movie Still Smokin back in the 1980's as a teenager.
The first steps to starting my grow
are preparing my grow area, which involves a thorough cleaning with bleach.
Then I set up lights and fans etc and test it all to make sure everything is working. Then on the 4th of May I recieved the seeds in the mail
and immediately began to soak four seeds in some tepid
water overnight before transferring them into a moistened piece of paper towel then into a ziplock baggie for another 12 hours.
From there all germinated seeds will go into the rockwool cubes for about a week before being moved into the final grow out pots.
From there they will veg for 7-8 weeks before I flip to 12/12 and flower them accordinly.
As of today (8th May 2020) I have 3 healthy seedlings from the four seeds I soaked.
So now they are up it's officially Game On 🙏 I am still waiting for the Greenhouse Feeding to arrive but thats ok because I won't need it for about a week.
I chose 12 Litre Fabric pots because of the height limitations in my Grow tent (need a bigger one but cant afford it at the moment ) as soon as the powdered feeding arrives I'll
mix the required amounts straight into the pots so they are ready for when I transplant the seedlings into them.
Before I go I'd like to thank Greenhouse seeds and Grow diaries for this Amazing oppurtunity
Also I would like to wish Good luck and Good Growing to all other Entrants
LET'S GROW.......
Grey_Wolf


