


Likes
56
Share

@Growbody
Follow
Hallo und herzlich willkommen zum Ende meines Grows mit der Auto Jack, Jacky White 6th Gen. von Paradise Seeds. Die "Eltern" sind Jacky White x Ruderalis, die "Großeltern" sind Jack Herer und White Widow. Sie ist dadurch eine 75% Sativa mit zitronig-fruchtigen Aromen, genau mein Ding. Es freut mich sehr, das mir die Samen in einer sehr schönen Verpackung freundlicherweise von Paradise Seeds zur Verfügung gestellt wurden. Das war für mich der Ansporn, eine möglichst genaue Beschreibung des Growverlaufs aufzuzeichnen.
Die URL des Strains findet ihr hier:
https://www.paradise-seeds.com/de/product/auto-jack/
Für diesen Grow verwende ich den 15Liter WideVersion Stofftopf von ROOTiES, die Sonnenerde Bio Hanferde, den BioBizz Wurmhumus, Sonnenerdes Bio Faser, BIONOVA + zamnesias MonsterBud Mix Living Soil, zamnesias Smast Start und Plagrons Seedbooster Plus. Hat sich alles prima bewährt.
Tag 106: Mondhöchststand, Ende der Erntezeit, Anfang der Pflanzzeit am Blütetag, ein Optimaler Erntetag. Die Auto Jack, Jacky White 6th Gen. von Paradise Seeds wird geerntet. Letzte Woche habe ich eine kleine Schimmelstelle bei Ihr gefunden, zum Glück wurde es nicht mehr. 160 Gramm Nassgetrimmter Buds sind es geworden. Die liegen jetzt im Keller in DryFerm Bags zum Trocknen. Nächste Woche gibt's mehr Infos.
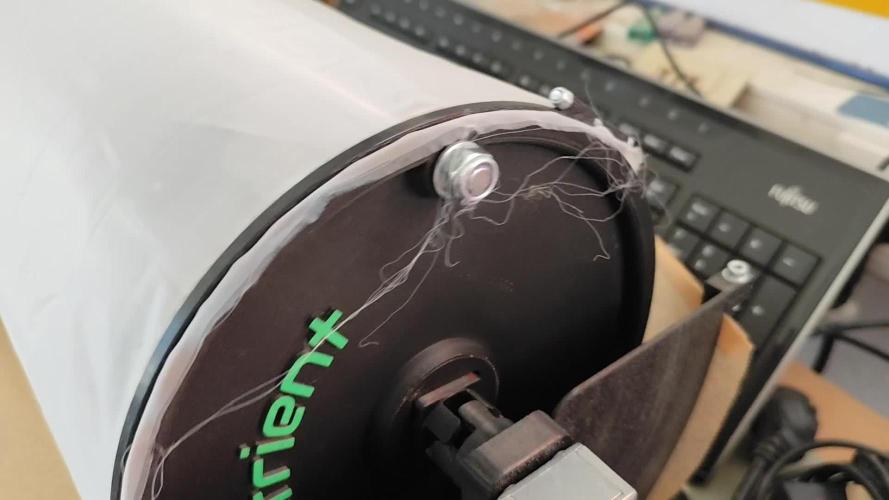
Tag 114: Das ist meine Trichomtrennmaschine. Da kommt aller Verschnitt rein mit ein paar Stängeln. Ich habe ein sehr feinmaschiges Netz gewählt, damit wirklich nur die Trichome durchpassen. Das dauert zwar viele Stunden, aber es ist ein sauberes Ergebnis. Die Maschine hab ich im www gefunden, Man kann den Bauplan für einen 3D-Drucker bekommen oder die fertig gedruckten Teile mit den wichtigsten Schrauben und Metallteilen, außer dem Motor mit Getriebe, dem USB-Spannungsregler und den Gewindestangen, die in jedem Baumarkt zu haben sind. Ja, und eben dem Netz. Da kann jeder seine bevorzugte Maschenweite dazukaufen. Die 3D-Teile haben vor ca. 1 Jahr ~80,- € gekostet, wenn ihr die Adresse braucht, schreibt das in die Kommentare bitte. Das Netz hatte ich glaub 150 Maschen(?) für 10,- €/m², der Schneckengetriebemotor (ohne Plastikteile!) mit dem USB-Spannungsregler haben ~45,- € gekostet. Die 2 Gewindestangen kosteten ~10,- €. Das Ergebnis nach einigen Stunden Sieben könnt Ihr auf den Bildern sehen.
Tag 216: Ich habe vergessen die Gläser zu fotografieren, sorry. Es waren mal 3 Gläser a 750ml, ihr seht, es schmeckt mir wirklich sehr gut.
Schön, dass du reingeschaut hast. Ich freue mich, dass du dabei warst 👋😎

Likes
64
Share


@nonick123
Follow
Día 78 (06/01) CBD Auto 20:1 #1 - El amarilleo continua... esperando que haga efecto el SILICIUM FLASH 💥
OG Kush Auto - Empieza la ventana de cosecha: Reviso los tricomas y solo hay algunos nublados (el resto trasparentes), pero creo que acabará en una semana más como máximo!
Día 79 (07/01) CBD Auto 20:1 #1 - Parece que el amarilleo se frena un poco. ¿Será suficiente y formará unas buenas porras?
OG Kush Auto - Riego 750 ml. Está consumiendo mucha agua en este tramo final! 😍
Día 80 (08/01) CBD Auto 20:1 #1 - Está recuperando el verdor! El SILICIUM FLASH está haciendo efecto!
OG Kush Auto - La planta no para de beber y las ramas se doblan por el peso de los cogollos! 😍💥
Día 81 (09/01) CBD Auto 20:1 #1 - Los cogollos empiezan a coger mayor densidad. Según mis cálculos, le faltan 17 - 24 días
OG Kush Auto - La senescencia sigue avanzando pero los tricomas aun no están listos (50% nublados). Espero cosechar en el día 84 aproximadamente
Día 82 (10/01) Busy day
Día 83 (11/01) CBD Auto 20:1 #1 - El SILICIUM FLASH ha hecho efecto y empieza a retomarse el verdor en las hojas! Que maravilla!
OG Kush Auto - Los tricomas están mayoritariamente nublados y algo ámbar. Mañana la cosecha! 😁
Día 84 (12/01) CBD Auto 20:1 #1 - Los cogollos empiezan a apilarse y a engordar 😁
OG Kush Auto - Día de cosecha! 😍💥💨😁
FastBuds 15% DISCOUNT code "NONICK" 2fast4buds.com @fast_buds_official_ @fastbuds.official
💦 BioTabs 15% DISCOUNT code "GDBT420" biotabs.nl/en/shop/ @biotabs_official
🌱Substrate PRO-MIX HP BACILLUS + MYCORRHIZAE @promixmitch @promixgrowers_unfiltered
💡2 x Mars Hydro FC1500 EVO Led Grow Light (2024 NEW FC 1500-EVO Samsung LM301H 150W LED) - https://marshydro.eu/products/fc1500-evo-led-grow-lights/ - https://www.amazon.de/dp/B0CSSGN5D8?ref=myi_title_dp

Likes
28
Share


@luvurgarden
Follow
In the home stright now, a few milky trichomes on each plant, just ph’d water for the next 1-2 weeks. The smell from these two is phenomenal, its actually making it through my carbon filter.

Likes
33
Share


@DesDeGrower
Follow
Ladies and gentlemen...welcome in Week 3 of Flower 🙌
Omg....The stretching is real.....girls almost tripled in size.
Few days ago we went through every plant, removing tones of lower shoots and leafs. Girls recovered straight away, increasing in size. They all look very happy without exemptions and I’m just hoping I will manage to accommodate space they need.
We can already see those nice small buds starting to form. Really can’t wait to see them in full beauty 😍
EC 1.9 - 2.0 as aim this week
pH 5.8
2 litres every 24h
Stay tuned with updates 🙌

Likes
16
Share


@CanarianGrow92
Follow
First week of flowering and it seems to go quite good, the brown powder we see on the leaves is insecticide.
Next week we will start with some food!


Likes
31
Share


@ngenius
Follow
week one ( day 1-7) went great ,
i germinated both seed in paper towels and transferred them to big pots .
1 (30 liter pot) !(25 liter pot).
after that i got them outside in the sun as much as i could (it was pretty grey and bad weather) while keeping the soil damp with a spraybottle and keeping a sliced bottle over the top to increase humidity.
just had to wait for my tent and lights to arive the first week.


Likes
30
Share


@TragicTerps
Follow
Plant A (left side) started pushing through the medium first after 48 hours. Plant B germinated successfully at 96hrs but due to cold climate and moisture in the seed the seed got too cold and turned to mush. At 96hrs Plant A had reached 1.25" and had started to spread the first set of leaves. It is now approximately 2" tall and the first fan leaves are about 1/3" long. Growth is steady and effortless for this girl.
So far the self watering set up, grow light, and medium have been treating plant A great. After 60hrs she became fully exposed. Plant B germinated as stated before and died, Plant C was planted 5 days into the germination week of Plant A. No pre-soak, just dry seeds dropped directly into the medium. Miracle Grow myth has so far been proven wrong (performance organics, not regular potting soil).
In addition to the set up, I found a water bottle diffuser I have on a 6hr rotation (6 on and 6 off) that I found for $9USD at a grocery outlet. Humidity now steady at 31% on the gauge and about 65% Relative Humidity. Temps sit steady around 68-71°F.
Shooting for 360g or 180g from each plant utilizing LST. We are seeing if organic miracle grow has enough nutes for an autoflower, with 3 months of nutrients as stated from the bag it should end up timing out perfectly for harvest time with no flushing needed as nutrients will already be used up.



Likes
17
Share


@hachiko
Follow
Buds are looking great, still no signs of bud rot :)
I've been trying to keep humidity under control but every time I water, next night will reach 67-68%. I took a couple of measures but would have been simpler to get a dehumidifier
good thing is that I left lot of space between colas for airflow (I had bud rot in that area last time).
I'm allowing the plants to get dry and humidity to come close to 40% before watering again.
This will be the last week of fertilizers any way. Will add some ripen maybe 1 or 2 times during the week and then just plain water.




Likes
52
Share


@Ogchemst
Follow
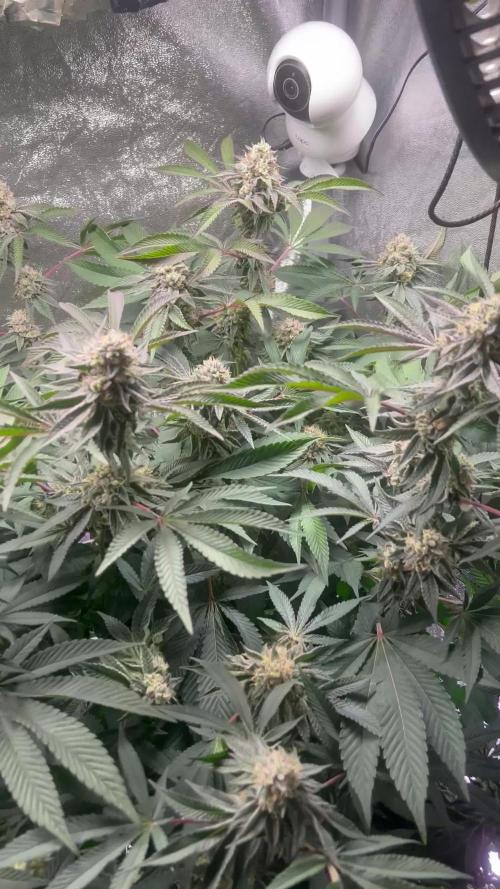
Quick kush is called quick for a reason 👌, nice big indica leaves starting to grow and stretch pretty fast, i had to re pot one of the girls so one of them might look a bit sad but she will get better (its the salts)
Flushing and Buffering-
I am personally using Canna Coco Coir,mix with one brick of plagron coco coir(had one left).
1. Why you Should buffer your Coco. Lets get to reading! (Its Worth it for those that dont know about it)
There are cation exchange sites in coco that will interfere with nutrition until they are buffered. The cation exchange sites in coco naturally come loaded with sodium (Na) and potassium (K) cations. However, the Na and the K are only weakly held to the exchange sites. In the presence of calcium (Ca) or magnesium (Mg), the sites will release their Na or K cations and lock onto the Ca or Mg. These processes are known as “cation exchanges”.
Buffering coco is accomplished by soaking it in Ca and Mg. This allows the cation exchanges to take place prior to adding plants. Simply soak your coco in a solution of Cal/Mag water and the exchange sites will release their K and Na cations and lock onto the Ca and Mg. When the cation exchange sites bond with Ca and Mg rather than Na and K, it is “buffered”. The bonds that hold the Ca and Mg to the sites are very strong and cation exchange will largely stop. This means that all of the nutrients that you add to the water will be available to the plant at the ratios that you provide them.
2. Alot of growers Grow in Unbuffered coco coir and its a big mistake guys, I myself was a "victim"😬of unbuffered coco and it does cause alot of problems... now i am going to try and fix them!
-----GROWING IN UNBUFFERED COCO---
Many growers are unaware of the need to buffer the coco and they try to grow plants in unbuffered coco. In unbuffered coco, the cation exchange sites will strip the nutrient solution of the Ca and Mg and replace those cations with Na and K. This creates a sub-optimal Nutrient Element Ratio (NER) and renders Ca and Mg unavailable to the plant.
Failing to buffer the coco is why so many growers suffer calcium deficiencies in coco grows. Manufacturers of prepared coco products try to exploit these problems and convince growers that only their proprietary products are suitable for growing. However, it is actually very simple to properly buffer your coco yourself. This tutorial walks you through the process and provides all the information you need to turn even the cheapest brick of dehydrated coco into a superior growing medium.
I hope i Helped out someone who didnt know about this link on how to Buffer your Coco Coir is Here https://www.youtube.com/watch?v=OQi8AMMIyyA&t=18s
14/02/2019- I Decided tp raise up the amout of nutes and im giving them 1,5 ml per L so 15 ml's for 10 L / 2 Gallons of water

Likes
8
Share


@EBPbyEVD
Follow
Summing up, I can say that sativa is really not mine.The next diary will be related to breeding, I will test and gain experience in this matter.Further more, success is inevitable.
Likes
209
Share


@BioBuds
Follow
They are going slow but steady. Holding back on watering to help fight the gnats. They were with too many last week. Some yellow points because of an 'on the limit' foliar feed. Nothing to worry about.
Still very lush greens. I'm thinking the main reason for their slower growth, is the fan that is on high. My mission from the start s to get thick stalks and branches, to facilitate larger buds.
Also, I'm pushing the SP 3000 to its max for the age of my plants, they don't have to reach for the light, resulting in shorter, bushier plants. I don't mind, I think the flowering stretch will make up for that and fill the tent.
Still very happy with the SP-3000 from Mars Hydro, a much more constant and manageable climate in the tent, a dream to work with. I made a thank you video for @MarsHydroLED, of course, to also show off my music.
I'm thinking one or two more weeks before resetting the light schedule for flowering. I'm already late and if another week will deliver bigger and more buds, I will give them what they need.
For those living in Europe, wanting to try super soil, see my recipe in the images.
Thank you for following and your likes and support! It really keeps me motivated. Big Hug Bud


Likes
10
Share


@HideAndFly420
Follow
Day 34 this lady is running, I can see flowers getting bigger every day, smell started really really soon this time so I already had to add the Carbon Filter.
I’d like to close the cycle in less then 80 days. It would be great
First flowering fertilisation
Ph 6.2
Ppm 631
Day 37 - 9 of flower 🌸
Started blooming fertilisation, I’m keep Giving all-in one from aptus, i think I lm substitute with super pk and I stop all in one.
Ph 6.2
Ppm 731
As I’m growing an solito in a 9.2 lt pots with all mix nutrients I’m slowing down with all in one and just giving base feedings, I ll decide later if I should give super-pk for the next weeks
Day 40, tomorrow will be feeding days. Sge’s going really well, resin is already showing up on flowers that are several as and colorfull, smell is already there 🤤
Tomorrow update with feedings parameters.
Day 41 feeding day
Aptus regulator 0,15ml/1 lt
Aptus all in one 1,25ml/1lt
Aptus Topbooster 0,3 ml
Aptus enzym + 0,5 ml
Calmag 0,3 ml /L
Ph 6,18
Ppm 756
Let’s see
Likes
3
Share


@RainerWinklerGrow
Follow
Harvested Around 220 Grams from 3 Plants, terps were there slightly, smoked fine, its alright, went with a differnent breeder after.