



Likes
4
Share


@Autofeather
Follow
So the grow cycle was pretty easy. I work away from home and I sometimes have to leave for 4 days in a row. Before I'd leave for the four days I'd just add 4-6 cups of RO water with some Cal-Mag. When I can back she was always bigger and didn't have any problems. I was lazy this time and never checked the PH of the water. This strain is pretty resilient so props to sweet seeds.
I decided not to LST this plant, it was a little taller than I wanted but grew in a nice shape.
I still cant believe how purple this strain is.
I started to get foxtailing on the top bud not sure what would cause that.
Once again sorry for the lack of pictures. I'll let you know the smoke report later.

Likes
9
Share

@MindFlowers68
Follow
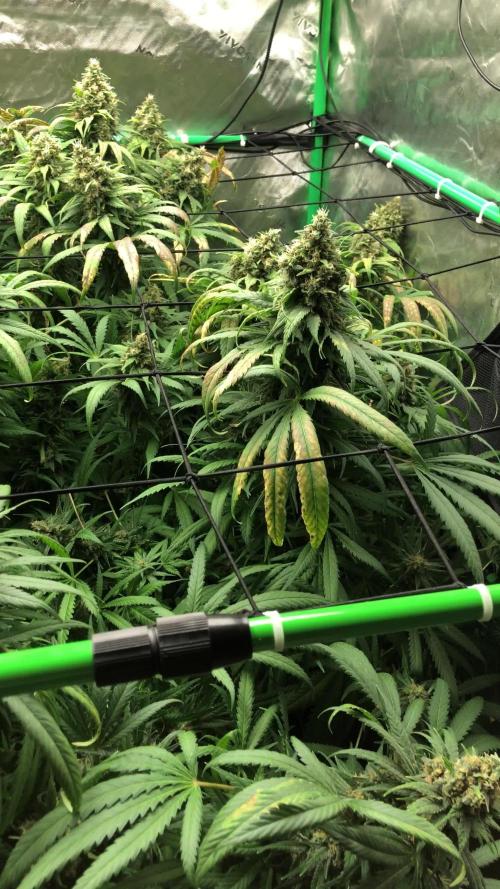
Colombian Jack turned out amazing. Pretty sure this is gonna be my favorite smoke of the bunch being a sativa lover. I'm a sucker for lemon Terps too and this is got some nice citrus to it. Very citrusy and gassy. Has some sweet floral and a touch if pine to it too. The colors on these branches are massive. They're like 5 inches in diameter and over a foot long with side nodes. She was really easy to harvest too because of the giant colas. After my Nevilles giant cola drying experience I've been a little nervous about drying big colas. This time, though, even though they're huge, I'm not really that nervous this plant survived me falling in it pretty hard, and didn't even blink. I hope plants don't blink.
Harvest went really well with the plants. It's always a little nerve-racking going in there wondering if you're gonna run into anything like budrot or pests you didn't see but this round, nothing to speak of. Which most rounds are but I've had a few issues with some bud rot in some big colas before. Everything looked really clean. No signs of bud rot, no pests in or our of the soil. No powdery mildew. The tent really wasn't even that dirty. I had to clean it after I recommended my 65 gallon pots for my next round and was shocked how clean I got it within a day of having those plants in there growing.
This week my main focus was trying to get the temps down a little bit and humidity is low as I could. At the beginning of the week I dropped the lights down a full hour, down to 10/14. Also, the last few days before harvest, my temps were getting above 83 towards the end of the night and cut them off even earlier, so there was a few days they got roughly 9 hours of light last few days. I watered twice this week but the last dry back before cutting them my soil moisture's got around 18%, so pretty dry. I would've like to keep them a little wetter but ambient humidity has been very high. The last few days I managed to get into the 78°F 55% humidity range which I was happy with.
Harvesting the four plants took from 8 PM to 4 AM after their night cycle by myself. Each plant taking an hour and a half With very tiny breaks in between. I was on the second plant taking a hanger out to my dry area and I hear a loud shuffle in my mind thought it was the cat at first and then I realized that was too big of a sound to be my cat. Then I thought I was getting robbed or something and then I looked up and it was like a three year old buck about 250 pounds big antlers! We both looked at each other and jump scared, and both took off in opposite directions. It was kind of hilarious, but I was a little spooked after that, so I kinda had to set up a light outside so I could see better and the first few trips after that, I may have grabbed a PVC pipe in my off hand like I was in the game Doom or something lol.
Processing
Likes
2
Share


@Wuutownwarrior
Follow
Really bad weather this week no sun and rained everyday including storms so had to get a big tomato tent , the ladies really stopped growing for few days worried me but last 36 hours they have started to shoot up
Edit : the weather is great now plants are living it

Likes
17
Share


@Basementganja
Follow
Compared to her sister, this Pineapple Express auto flowered very early!
I LST'd her while I could, and defoliated what was necessary.
She turned out great! Although the yield for this phenotype is at my lower limit for acceptable.
I'm happy that I'm growing a second one, that vegged out longer, making for a much larger Pineapple Express!


Likes
52
Share


@Roberts
Follow
FBT2403 is growing greatvthis last week. She is putting more energy into her Cola development. She is growing really healthy, and strong at the moment. I did not do any training this week. I just been letting her grow outwards, and develop. Thank you Fast Buds, Agrogardens, and Medic Grow. 🤜🏻🤛🏻🌱🌱🌱
Thank you grow diaries community for the 👇likes👇, follows, comments, and subscriptions on my YouTube channel👇. ❄️🌱🍻
Happy Growing 🌱🌱🌱
https://youtube.com/channel/UCAhN7yRzWLpcaRHhMIQ7X4g
If anyone needs to purchase fastbuds here is a link for my affiliate program
https://myfastbuds.com/?a_aid=60910eaff2419
Likes
Comments
Share


@DogDoctorOfficial
Follow
🌱 Week 3 | Purple Haze Photo | Folder 7A | Building the Foundation, One Leaf at a Time
Welcome back to another chapter of Project Blue, where every Purple Haze phenotype receives its own dedicated GrowDiaries report. Although these plants all come from the same genetic line and are growing under identical conditions, each individual expresses its own personality, structure, and growth rhythm.
That is exactly why these diaries exist.
Some growers only document a room. I wanted to document every plant.
Each report is completely self-contained, allowing anyone who discovers this diary to understand the entire project without needing to read the previous folders.
Like every plant in Project Blue, Purple Haze 7A is being cultivated using my favourite 12/12 From Seed technique. From the moment she broke through the soil, she has lived under a 12-hour flowering photoperiod, encouraging compact growth, tight internodal spacing, and allowing each phenotype to reveal its natural characteristics while remaining perfectly manageable inside the grow room.
Even though we’re only entering Week 3, this little lady has already shown remarkable progress. Looking back at the first photographs of the week compared with the final ones, the transformation is easy to appreciate. She began the week looking modest and compact, but by the end she had developed into a beautifully structured young plant with noticeably stronger branching and a much fuller canopy.
Sometimes the biggest progress isn’t measured in height—it’s measured in structure.
⸻
🌡️ Week 3 Growing Environment
Consistency remains one of the most important ingredients in every successful grow.
Throughout the week the environment remained stable:
• 🌡️ Day Temperature: 27°C
• 🌙 Night Temperature: 25°C
• 💧 Relative Humidity: 55%
• 🌱 Root Zone Temperature: 21°C
• 🚰 Nutrient Solution Temperature: 20°C
• ⚖️ pH: 6.0
• ⚡ EC: 1.3
• 🌬️ CO₂: approximately 666 ppm
• 💡 Photoperiod: 12 Hours ON / 12 Hours OFF
• ☀️ Average PPFD: 600–700
Stable environmental conditions allow the plants to dedicate their energy to growth instead of constantly adapting to fluctuating temperatures or humidity levels. Healthy roots, consistent transpiration, and balanced metabolism all begin with a stable room.
⸻
🌿 Feeding Schedule
Purple Haze 7A continues receiving the complete Plagron Terra vegetative program:
• Terra Grow — 1.8 ml/L
• Power Roots — 1 ml/L
• Pure Zym — 1 ml/L
• Sugar Royal — 1 ml/L
At this stage I still prefer a conservative feeding strategy. Rather than pushing maximum growth, my objective is to build a healthy root system, strengthen the stems, and encourage vigorous but controlled vegetative development before flowering accelerates naturally.
A healthy plant never needs to be rushed.
⸻
🍃 Leaf Tucking Before Leaf Cutting
One of the biggest changes throughout this week wasn’t caused by nutrients or lighting—it came from simple canopy management.
Rather than removing fan leaves, I continued practicing leaf tucking, gently repositioning the larger leaves beneath developing branches whenever possible.
This simple technique allows light to reach lower growth sites without sacrificing the plant’s solar panels.
Those fan leaves are producing valuable energy every hour the lights are on, so if they can be moved instead of removed, the plant keeps all of that photosynthetic power while the lower branches receive the light they need to grow.
It’s a small adjustment that often produces surprisingly big results over time.
⸻
🌱 Gentle Low Stress Training
As the week progressed, Purple Haze 7A also became an excellent candidate for some very gentle Low Stress Training (LST).
Rather than forcing the plant into shape, the objective is simply to guide her natural growth.
By carefully opening the canopy and encouraging the developing side branches to receive equal exposure to the light, we’re already beginning to create a much more balanced structure for flowering.
The difference between the beginning and end of the week is remarkable.
Instead of one dominant growing tip, multiple future flowering sites are now waking up and preparing to compete for the canopy.
Every day she becomes a little more symmetrical.
Every day the structure becomes stronger.
And every day she looks a little more prepared for what’s coming next.
⸻
🌿 A Compact Plant With Big Potential
Purple Haze 7A may still be one of the smaller plants in the room, but she has something I always appreciate—balance.
Her internodal spacing remains tight.
The stem is thickening nicely.
The foliage displays a rich, healthy green colour.
New growth is vibrant and full of energy, while the secondary branches continue to develop steadily beneath the canopy.
She’s not trying to become the biggest plant.
She’s quietly becoming one of the best-built.
Very often, those are the plants that surprise you the most once flowering begins.
⸻
🔭 Looking Ahead
With another successful week behind her, Purple Haze 7A is entering the next stage with an increasingly well-organized structure and excellent overall health.
The combination of stable environmental conditions, gentle LST, strategic leaf tucking, and balanced nutrition is beginning to pay dividends. Every adjustment this week has been made with one goal in mind: creating an even canopy that will maximize light distribution once flowering starts to accelerate.
She’s still a compact young lady—but she’s no longer a tiny seedling.
She’s becoming a very promising phenotype.
Growers Love ad I can’t wait to see what she has planned for the weeks ahead.


Likes
48
Share


Likes
10
Share

@MindFlowers68
Follow
Drying ended after 12 days. Trimming took around 1 1/2 hours and was really easy. No real small or larfy buds to speak of. I'm surprised how well it did considering how high the humidity was in flower it is a very resilient plant. Smoked pretty well off the bat, but needs just a little time to smoke the best. After curing for a month is super smooth and makes fore a very nice dubes. its almost gone! My friend loved it.
Likes
24
Share

@Grower_Tom
Follow
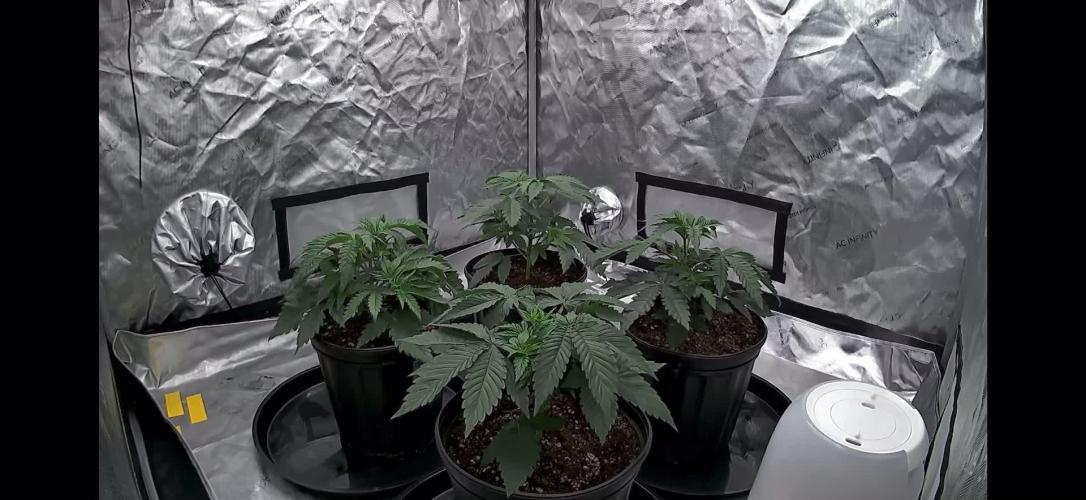
Day 21: plants acclimated great to their new 1.5g homes, and have already rebounded. I’m currently running about 47% on the dimmer of the sf7000 @ 25” above canopy. All plants are very level making lighting easy thus far. They dried out a bit since the transplant watering so I’m back to feeding roughly 500ml to 700ml per day. That may change, I want to do a bottom feed next, so we’ll see how long that takes before I stay on the top feeding and implement a standard watering schedule.
Day 27: added a video of the growth over the past 6 days. Starting to show signs of vigorous growth. Excuse the Timelapse as I am leaf tucking and rotating once in a while. Haven’t seen a need to tie down yet, since the fan leafs are so huge it makes tucking easy and super viable in this position.

Processing
Likes
8
Share


@Stick
Follow
She has a delicious candy/sweet perfume! Bud structure is really nice, tight nodes and dense buds, I love this {unknown} strain! 😍

Likes
24
Share


@Starplatinumsrealdad
Follow
This plant has been my strongest/largest from the gate, so no surprise she was my biggest yielder! Incredibly strong/resilient from the start, however everything seemed to just go right for this plant. Lots of defoliation and attention helped cultivate dense medium-large nugs that certainly pack a punch! Very flavorful, and amazing aroma. I will definitely be growing this strain again!

Likes
9
Share


@Orange_bud
Follow
Coronavirus is keeping me away from my garden, but my friend is taking care of everything, i hope in a good harvest


Likes
14
Share


@Momgrowsthechronic
Follow
Welcome to Week 6, Day 42 for the Sweet Seeds Gorilla Girl XL Autoflowering grow. All four of these lovely ladies are now fully into flower and the tent has filled up considerably. Even though this grow cycle is not going to produce the XL plants I was originally hoping for, this strain seems to have a lot of bud sites compared to other autos I have grown previously. Had these plants reached their full potential- I truly believe that this could/would have been a massive harvest. I fertilized them again in Week 6 with their final dose of a Grow based formula at 2 mls/gallon. They will be switched over a Bloom based fertilizer in Week 7 at a rate of 2.5 mls/gallon. I am still watering every 4th day and all four plants are receiving 3 litres each or 0.75 of a litre per plant per day. There is something killing off the foliage from the bottom up on the plant in the front of the tent on the left hand side. Not sure what the problem is so I am simply removing the dead/dying foliage as needed and hoping that she’ll have enough leaves to make it through to harvest.
Mom’s Tip for Week #6- When it comes to Fertilizer- $Less$ = More… For me, successfully growing Cannabis indoors means trying to mimic what nature normally provides for free. Sun, fresh air, water and nutrient rich soil are all essential for healthy, happy plants. At some point during the grow (usually 4-6 weeks in) the plant has used up all of the nutrients originally present in the soil thus requiring the grower to have to supplement with some type of fertilizer. I see many growers photographing and showing off their huge displays of colourful bottles and I gasp when I read their long lists of 10-15 different fertilizers and supplements being added to every single batch of water. Not only is this unbelievably expensive and overwhelming but time consuming and completely unnecessary for a successful grow. For those seeking an Organic path there are options such as homemade compost tea or powdered formulas consisting of bat guano, glacial rock dust, bone meal, alfalfa meal, etc. I often use a Canadian made brand called “Gaia Green Organics", mixed in at the start to create my own super soil thus carrying the plants through their first 4-6 weeks of life needing nothing more than PH’d water. The organic fertilizers are usually more expensive and often have a slower uptake by the plants themselves as they tend to feed the soil first which in turn feeds the plants. For novice/newbie growers and those with fast flowering strains such as Autos- a non organic, liquid, water soluble fertilizer is often the way to go. They are generally cheap, easy to use and quickly taken up by the plants when they need it most. My ride or die brand is "Flora Nova” by General Hydroponics and it comes in a 1 part nutrient grow and bloom formula catering to my plants’ needs from start to finish. This company has many options available including all kinds of additional supplements to be used in conjunction with their standard grow/bloom formulas but I’ve never found these products all that necessary or beneficial. Using them in the past has led to over fertilization resulting in burnt foliage, stunted bud development and harsh flavours when smoking/vaping the final product. Not only does $Less is More$ apply to how many fertilizers you are giving your plants but it also applies to how much. Most photosensitive strains can easily tolerate a full dose (as per the manufacturer’s recommendations) and thrive with being fed every time you water. But Autoflowers and some smaller photosensitive strains seem to respond differently to a slight tweak- keeping in mind that if you start small, you can always add more but if you start big, you can’t take back what’s already been given. I will generally only fertilize at half of what the manufacturer recommends for a photosensitive strain- every other or every second watering. Starting out at a quarter dose for the initial feeding which can sometimes be as low as 1.25 mls per gallon and working my way up from there. It doesn’t seem like much but within hours I can see my plants responding positively with increased/sustained turgor, greening up a little and increased resin production which equals "smell/scent". For me, I can smell when I’ve just fertilized my plants- it’s a stronger smell than the normal scent that they give off with a plain watering. If you’re lucky, you’ll end up growing a greedy Autoflowering strain that seems to want more than what you’re giving it. Rather than increasing to a higher dose in a single feeding, try feeding more often at the same dose- so if you’re feeding every other or every second watering, try feeding every watering at the same dose (trying not to increase above half of the manufacturer’s recommendation for the photo strains). Occasionally I will increase beyond the halfway dose to accommodate for the plants’ needs in late flower as most fertilizer companies list an increase to adequately feed during late flower anyhow. I guess the main message for this week is to keep it simple as nature intended. Learn to read your plants and supplement the small amount of nutrients that your plants don’t already have in the high quality soil you initially provided. Cannabis cultivation can be overwhelming at first but the $Less is More$ approach will save you time, money and the realization that you’ve accidentally fried your plants!
Likes
22
Share


@420_liquidsun
Follow
I can say I didn't expecting this.. she amazed me, and teach that you can get decent amount of buds in 1L pot also.. this is my first growing in small pot and teachs a lot about using your space..54300


Likes
7
Share


@Dunk_Junk
Follow
Wow she's grown 34cm this week!!!!
Monster!!!!!!!!!!
I wish I knew what she was!!!
If I had to guess a breeder I'd say this seed came from FastBuds as it was their type of container....
But what exact strain? I have no idea whatsoever. 😭
Likes
Comments
Share


@SolitudeCorners
Follow
Week 3 Flower (Bloom Week 3) – Daily Tasks
Evening (Lights On)
Check environment (temp 24–27°C, RH 55–60%).
Inspect leaves and buds for pests, mold, or deficiencies.
Water/feed (depending on medium): balanced bloom nutrients with slightly higher P and K.
Ensure good airflow (oscillating fans).
Adjust plant training (light defoliation if leaves block bud sites).
Check for early signs of stretch finishing.
Evening (Before Lights Off)
Ensure irrigation is not too late in the cycle to avoid wet medium during dark period.
👉 In Week 3 bloom, the plants are finishing their stretch and starting to put more energy into forming bud sites.
Main job is: Setting Scrog net 2layers ,Control environment (VPD, airflow) ,Support the plant with bloom nutrients.