
Processing
Likes
Comments
Share


@Piablo
Follow
Lessons learned from week 1 of my first grow so far:
the best watering solution I found so far is a mix of distilled water from the store and filtered tap water. with a final ph of 6 and ppm of 20-40.
a little ph buffer goes a bloody long way. Use with caution.
performing tasks like mixing solution and potting a germinated seed are best performed without a phone (camera) in one hand.
the seed germinated within 24 hours using paper towels. I planted after 36 hours.
After 24 hours of potting, the stem was already shooting up, and I turned on the lights, set to an 18 hour schedule. I wasn't quite ready for this, so it took me some time to research and get the desired humidity and temperature.
At this point I added more nutrient in even quantities of FloraGro, FloraMicro, and FloraBloom, according to instructions. Perhaps a little early though, although after just one 18 hour light cycle this plant is shooting up like a rocket and showing leaves.
I bought a fan for the inside of the tent and propped it up on a box, and a humidifier to bring the humidity from 40-50% to around 70%.
Since it's a winter grow, I have to periodically increase the temperature to keep it at 25 °C. The intake fan, humidifier, and inside fan are significantly lowering the temperature. I'm also experimenting with finding the right humidifier settings since the humidity seems to increase a lot when the lights go out, and the machine is still new.

Likes
33
Share


@BudXs
Follow
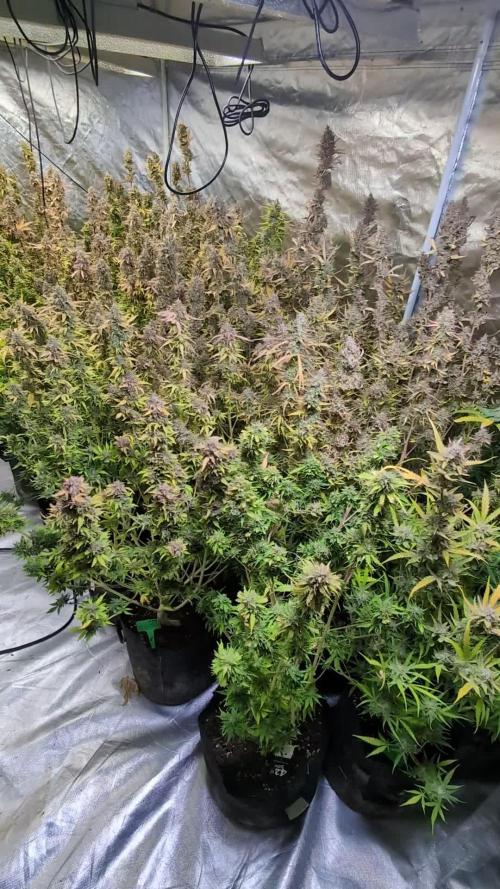
Ok, so photos are finally in flower, autos will have to do with 12/12 till finish. A batch of 15 more photos is brewing outside the main door, all primo. Plan is to veg em out there for 4 weeks and then in the flower room. Will fill in missing spots with more autos and then a late auto run as batch 2 of photos finishes. Will get my 7 lbs or so
@peakyplanters - slide in my dms

Processing
Likes
Comments
Share


@Scarface8290
Follow
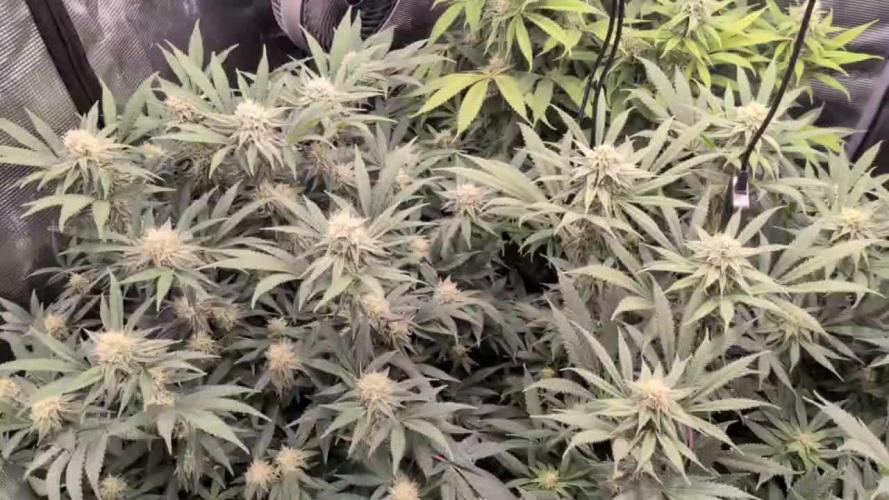
They got huge. Nice green leaves and smell great. I bend the fan leaves a little to get more light in the canopy. They love the nutes. We having a great time! Transplanted 3 to 3 gallons pots. They love the air. Topped(fim’d) one. She getting lanky but I feel she’ll snap back strong.


Likes
6
Share


@Killerz224
Follow
Overall it was a great first time grow. The outcome was smaller than expected. This was caused by the heavy under watering, that stunted the growth of the plant.
However the 26g of weed that I got from this harvest is amazing! Smoking is very smooth and the sativa effects are great.

Likes
8
Share


@Grimreefer420
Follow
Week 3 of flower. Beastie bloomz and cal-mag this week into next week. Cha-ching after and then flush!

Likes
37
Share


@TheIceCreamParlour
Follow
End of week 5 - Day 35
On day 33 I switched the lights off for 24 hours and back on to 12/12 yesterday so they are now officially on a flowering light schedule.
This week has seen another massive boost in growth. Conditions pretty much unchanged from last week however I have changed the layout in the tent. As this is my first grow it's been trail and error up to now but I think I've got it pretty much bang on. Moved the humidifier above the smart pots so they aren't getting any moisture other than the feed. Also moved all the plants further down the tent and away from the heater.
I've added a video this week so you guys can get a proper look at the set up and advise me accordingly. Includes the air moving fan and natural Co2 generator. Lights have been moved around the filter so that they can be kept at 18" from the tops of the plans. I have had to move them 3 times already this week as some dominant colas are shooting up.
Final training of tallest colas happened tonight. I topped the tallest 2 on each plant hoping that they now wont stretch too high during the first 3 weeks of flower. Head space is a bit limited in my tent. I think as of next week they may benefit from some defoliation lower down but I'm hesitant to do too much at this stage while they transition from veg to flower.
Nutes wise I've now introduced BioGreen X-Bloom as per my feed chart. They seem to like a slightly stronger feed than the chart suggests at around 0.1 - 0.2 higher. Run off EC and PH has been within 0.3 again so I'm taking this as a nice equilibrium.
I have been feeding on a wet and dry schedule of every 3 days while in veg. I'm led to believe that at this point every other day would now be needed and after 3 weeks switch to every day feed?
As always your guys feedback would be great as each part of the grow is completely new to me. Hoping I've got things right up to now and confident these girls will produce some really nice buds! See you next week!

Likes
16
Share


@GRow_M8s
Follow
- Day 62 and the 4 of the mephs are with some amber crystals already ( Stomper#1,#2 & GWK#1,#2),
- Stomper #3 (D62) and SODK (D57) are a few weeks behind.
- Stomper and GWK produced a light>medium bud structure (tap water only🚿) with full of crystals 💎 (pretty cool for an auto with little effort), not yielders (soil organic) thought but with buds to make diamond rings.
- SODK looking more like a yielder from these 3 strains with more compact buds and indica structure.
- Humidity a little higher than the optimum this week, except Stomper#3 & SODK we didn't water the plants too much and we had some dry periods in the medium.
- Made a final defoliation before harvest (4), we will dry the buds in a dry machine (as the Root66 dairy 👀) and make the rest trimming before curing.
🔕 Smells were super stealth until now, no problem at all and the buds looking and smelling dense when touching and checking them.
⚠️ Next update --> next week with the first part of the meph harvest 🤯.

Likes
12
Share


@SSKNFbyHAZE
Follow
Throughout the week, I give compost tea, and fermented plant juice once each ^^
Hope you guys have a wonderful day today ^^v
*** Please Like, comment & share ***
Highly appreciated -----/-----<@

Likes
17
Share


@bsplayerone
Follow
I used both the soaking in a cup and paper towel method to germinate. I’m using fox farms ocean with no other fertilizers until week 3 or 4. I let it finish germinating in the window indoors. I water with R/O water PH 6.0-6.2
Likes
6
Share


@Mismatas
Follow
MI MEJOR COSECHA HASTA AHORA, 425 GRAMOS EN SECO DE FLORES PERFECTAMENTE MANICURADOS, DUREZA DE COGOLLOS, INCREIBLE EFECTO Y SABOR, INCREIBLE PRODUCCION, GRACIAS SENSI SEEDS !!!!!
Likes
13
Share

@smoking_hills9
Follow
1 of the best autoflower I ever grew. Super stable genetics. Tones of super tasty buds. Definitely will grow again.
Dry weight of 3 plants is 180 gr. Hard sticky buds with nice smell


Likes
30
Share


@Naitik
Follow
The week went well, the plant is developing, but it seemed to me that slowly. In the middle of the week, before going to bed, it wilted, the next day it became cheerful again, now it always fades before turning off the lamp, is this normal ? The plant began to drink more, increased the amount of fertilizer, PM brought to 1010.I keep the PH from 6 to 6.5, I water 2.5 liters of water every 2 days, as the soil dries out.

Likes
3
Share

@Thedibber
Follow
Bottom left is the badazz og cheese she's smelling dank and hopefully gives me some dank medicine

Likes
37
Share


@The_Bearded_Grower
Follow
welcome to Day 36 22/1/21 and she is looking great nutes are still the same and I'm mostly happy with my autopot system. well that's all for this week so as always happy growing and keep you stick on the ice


Likes
54
Share

@BudXs
Follow
Geurilla set up because it is ultra important that my neighbors, wife, police dont find it
Gravity fed drip system feeds mini hempy buckets. Continous drip, bucket takes about 35 hours to drain. This will be a mostly video based diary going forward.
Contest or not, I challenge all to this fun solo grow.
This strain is a favorite of BeanswithPork and was gifted to me in December 2019. I checked the seeds for mites
Follow along and see if I dont get busted

Likes
3
Share


@GoodTimesOrganics
Follow
Welcome Back!💚
Nach der vierten Woche entwickelt sich die Peach Frosting im Vergleich zu den anderen Pflanzen etwas langsamer, wobei ich die abzeichnunh der Seitentriebe sehr schön finde.
Auch bei ihr warte ich definitiv noch mit dem topping, evtl. Bis sie in das Große Zelt umgezogen sind und individueller auf die unterschiedlichen Wachstumsbedingungen der Pflanzen einzugehen.
Die Umgebungsgegebenheiten sind weiterhin optimal:
—————
🌞 Temp: 24°C bis 26°C
🌚 Temp: 18°C bis 19°C
💨 RH: 68%
VPD: 0,7 kPa👍
—————
Grüne Grüße 🥦

Likes
2
Share


@Mr_nugs_lover_David
Follow
Suuuper sweet and tropical smell, beautiful fragrance of the buds man! By far the sweetest nuggets I have in my garden currently even more than my bslck cherry punch plants, awesome strain, such a beautiful surprise, I'll grow her more times now that I know her, she's fading out perfectly showing purple on the leafs because of the cold weather, and I'm seeing a lot of yellow leafs,let's see what happens at the end! ✌️👨🌾🌱💚
