
Likes
Comments
Share


@WeedleyScott
Follow
Ich habe nun ein Netz eingespannt damit jedem Trieb ein Quadrat bleibt, wenn diese nun etwas durch gewachsen sind schneide ich alles weg was unterm Netz hängt.


Likes
34
Share


@Damonkey
Follow
So the video shows lights going out at the end of week 2 in the bloom phase. The phantom are developing a little faster than the Sherbert. And likewise those below led are developing faster than those below HPS. Everything looking healthy and growing to plan, well even quicker than that, hopefully week three will bring the spreading of buds and sites and the onset of trichome covering😍😍😍
Update-

Likes
13
Share

@Chucky324
Follow
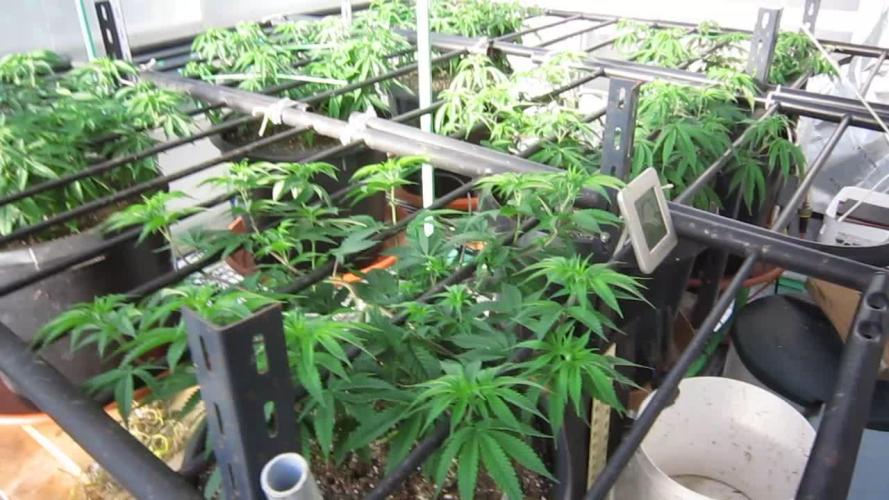
Hello This is the end of week 9 and the beginning of week 10 of veg.
Got them outside and into the greenhouse last week. I see they have warm up, and all the leaves are facing the sun now.
Got them spread out so they can cover their area. Slightly split 1 stem and didn't bury 2 root balls deep enough, so the top branches have to go over the first rung and then under the second. I think I'll try, putting a top net in here instead of the bamboo I've used for the last few years.
Gave each plant 2 liters of ph adjusted water and poured it down the stem, so the water will travel down the stem to the root ball, and the drier soil will wick any extra water away and not cause problems for the roots of the plants. Cannabis plants don't like cold, wet, root balls.
I'll do some LST next week and take some clones of these smelly plants.
Some have the smell of sweet but strong lemony cleaner Some smell a little like desert and earthy.
They leave a smell on your fingers you can still smell minutes later. These plants should be really good... is what my experience is telling me.
OK. Be Really Cool.
Chuck.
Likes
16
Share


@Marsledgrower
Follow
At least one plant or more is needing water daily as they are drinking so much.. still trying to pull the humidity down as it's in the high 60s. Other then that..the girls are looking phenomenal.. Hope to see you guys till the end..It's Going to be an Amazing Harvest


Likes
28
Share


@MrGrowthSpurt
Follow
What's up growmies 🤟🏽
Week number 4 is in the books🙌🏾
Today marks the official start of week 5 and just like my previous grows all my autos are starting to preflower. Like clockwork it starts around week 5 so it lets me know these are right on schedule.
I am really focusing on keeping the main cola ties down to keep the canopy as even as possibly. Typically in the past I would stop tying them down during flowering and the main cola would outgrow the rest and dominate. This grow I am continuously tying the main cola down. They all are pretty even except for Caramelicious, her main cola is just a stud and won't bend to 180 w/o me snapping the main stalk. She still is my favorite though and it's my 7th time growing her (I plant at least 1 Caramelicious each grow)
The nutrient schedule remains the same. I am feeding them General Hydroponics Flora series. (Floragro, FloraMacro, FloraBloom) I am mixing what the manufacturer recommends for 1 gallon into 3 gallons, so I'm giving roughly 1/3rd what's recommended and it seems to be the sweet spot for my set up and environment.
All the plants are doing well and are not showing any signs of stress, deficiency, or toxicity at this point.
The weather here in VA has been pretty cold which makes it perfect humidity wise for my indoor grow, without having to blast my Cloud intake system, or even turn on the dehumidifier which won't last long because they are starting to flower and will take up more volume increasing humidity so I expect to have to use them both in the next few weeks.
It appears a spider has made it's home in my tent (I see webbing in one corner of the tent) I figured it'll take care of pests for me and is not harmful so I am leaving it be for now.
All in all everything is going well so far, fingers crossed.
That is it for now, until next time, Happy Growing and like always May the grow goddesses bless you all with a bountiful harvest!

Likes
30
Share


@Grower_Of_Persia
Follow
week intel:
it was the time to prune the cover crops this week i chopped them - no problem all good
stresses :
just a little E.C stress around 1.4 once a week
feeding:
i feed them 3 times this week with this order :
day 1 : i feed them heavy with silicate +base nutrients(calcium & micros + Bloom) about 707 ppm - 1.4 e.c to cause a little stress.
day 3 : i feed them low dose of Feeding Booster around 275 ppm - 0.57 e.c to let them recover a little but not fully recover still a little stress will caused.
day 5 : i feed them with normal dose of Top-Max + B-52 around 213 ppm - 0.42 e.c to let them recover the stresses to get ready for another stress next week.
guide of the week :
autos do so so so much better with 20 hours light per day pls dont run autos near femenized 1 of them must get sacrificed


Likes
5
Share


@Dopacks
Follow
Jetzt sind wir schon in der Woche 5 :) Die buds werden sichtlich dicker, voller und harziger. Nun stellt sich mir die Frage wann ich die beiden Schönheiten ernten soll? ich hätte gedacht ich ernte in 1-2 Wochen, aber vorher möchte ich mir die Meinung von den Profis hier abholen :) Zu dem würde ich jetzt anfangen die Erde auszuwaschen, damit der Geschmack von den Düngern nicht ruiniert wird.
Likes
8
Share

@birdmountain
Follow
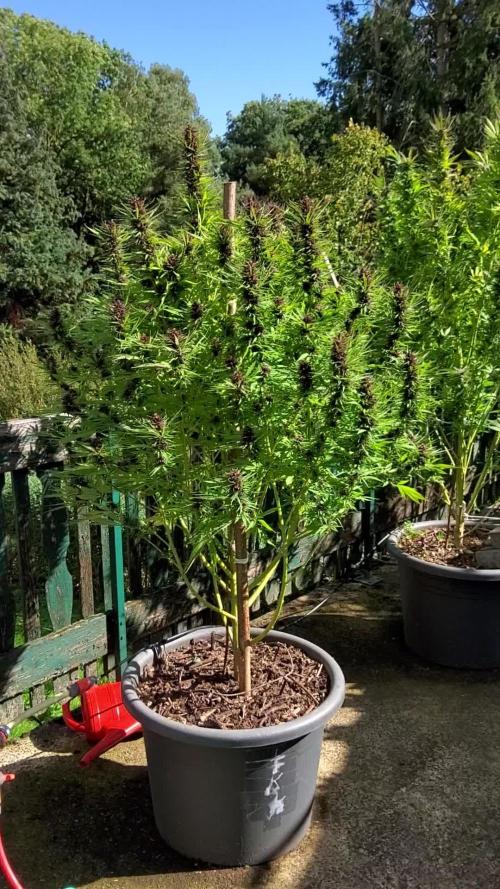
Es war eine sehr gemischte Woche mit viel Regen, etwas Sonne und eine Menge Wind. Die Durban Poison lässt sich davon wenig beeindrucken, sie ist am Stock festgebunden, steht kerzengerade und lässt ihre Buds weiter anschwellen. Leider habe ich bei sehr genauem Hinsehen doch ein welkes verdrehtes Blatt in einer Blüte gefunden und dieses mit der Blüte sofort entfernt. Weiteres Untersuchen brachte aber keine weiteren beginnenden Schimmelstellen zum Vorschein. 100% schimmelfrei ist sie also nicht... Das Wetter ist jedoch sehr schimmelförderlich zur Zeit. Ich freue mich schon auf die Ernte und dann benötige ich viiiel Platz zum Trocknen. Die DP ist dieses Jahr etwas kleiner als im Jahr davor, was sicherlich an der Düngemenge im Topf in der Vegetationsphase liegt. Entscheidend wird sein, ob das Entlauben etwas am Erntergebnis verbessern wird. Letztes Jahr hatte ich mehr Blätter an der Pflanze gelassen.
Vielen Dank für den Besuch mit besten Wünschen für eine schimmelfreie Woche! 😀
---
It was a very mixed week with lots of rain, some sun and a lot of wind. The Durban Poison is not particularly affected by this; it is tied to the stake, stands straight as a die and continues to swell its buds. Unfortunately, upon closer inspection, I did find a wilted, twisted leaf in one of the flowers and immediately removed it along with the flower. Further examination revealed no other signs of mould. So it's not 100% mould-free... However, the weather is very conducive to mould at the moment. I'm looking forward to the harvest and then I'll need a lot of space for drying. The DP is a little smaller this year than last year, which is certainly due to the amount of fertiliser in the pot during the vegetation phase. The decisive factor will be whether defoliation will improve the harvest yield. Last year, I left more leaves on the plant.
Thank you very much for visiting and best wishes for a mould-free week! 😀


Likes
38
Share


@CANNASIM
Follow
---GENERAL COMMENT---
Girls are at day 4 technically, but i like to update Sunday always, so keep that in mind, is 1/2 a week now.
From germination to soil emerging took 3-4 days, no issues at all. 100% germination rate from multiple breeders till now.
I will try my best to do a stress free grow again, so will grow mainly naturally.
---RQS EASY BUD---
Ironically the Easy bud is developing better and growing faster than her sister.
---DAY 10 UPDATE---
Over some days she got volume, just started to use RECHARGE, and wow, that thing works, 48H you could tell something is different, since watering with it the stem is thicker and is growing more vigorous, lets see how it will impact overall!
---DAY 14 UPDATE. WEEK 2 FINAL---
This is the last day of this week and this girl is absolutely amazing, she grew a lot, showing already the intension of shooting up more stems, i'm very happy with her, it has been a delight to grow, response in very good. Voodoo juice is of by now, will keep the recharge maintenance every other watering as i'm loving it.
Feeding program will start soon!
Processing
Likes
5
Share


@Ensign420
Follow
Week 02 Introduction
This week has been a bit of a struggle. Had my first experience dealing with slime and brown algae. But I think adding enzymes and increasing the beneficial bacteria helped to fix the issue. Also experienced nutrient burn for the first time. My nutrient solution strength got as high as 671 PPMs. So backed it down to about 430 PPMs during the end-of-week reservoir change. Also cut Hydroguard (expired?), CaliMagic, and Superthrive from this grow. Now she's still stunted, but is starting to recover. Hopefully...
[START OF WEEK 02]
Day 01 - Monday - 08/10/20 - Total Days: 008
-----------------------------------
- [0830]: Still looks a bit yellow. But getting larger!
--- Solution strength was at 248 PPMs.
--- Just topped off with a bit of distilled water
--- PH went up to 6.1 so PH'd down to 5.8
--- Ran the top feed for a bit to wet the hydroton.
- [2130]: She's looking even more yellow now.
--- Even the new leaves are really yellow.
--- Decided to add more base nutes.
--- Added 4ml of Sensi A
--- Added 4ml of Sensi B
--- Now at about
--- Solution Strength went up to 304 PPM.
--- PH was at 6,
--- Also raised the water level a bit more.
--- I really hope it's a nutrient deficiency and not an over-watering issue.
--- Please live!
Day 02 - Tuesday - 08/11/20 - Total Days: 009
-----------------------------------
- [0830]: Looking less droopy. But still yellow.
--- Decided to do a reservoir change.
--- 4.5gal of distilled water
--- 8ml of Sensi Grow A
--- 8ml of Sensi Grow B
--- 8ml of Voodoo Juice
--- 4ml of B-52
--- 4ml of CaliMagic
--- 4ml of Hydroguard
--- 4 drops of Superthrive
--- PH'd down to 5.8
--- Solution strength: 302 PPM
--- Since I didn't want to risk over-watering the rockwool, I did not to do a top feed, may do one tonight after the sleep cycle (lights are still set to go off at 10am and back on at 4pm).
--- As I was doing a reservoir change, I noticed that the tubes and bucket were a bit slimy. Didn't really stink or anything. Is this normal? Maybe due to the Hydroguard and Voodoo Juice?
--- I hope she gets better soon!
- [2215]: Getting larger! But still yellow.
--- Also can see a root growing through the net pot! Tiny little thing but it's there! Will have to start dropping water once more appear.
--- After looking over a few DWC diaries using AN nutes, seems like my solution strength is still too low. Most around this stage average around 500 PPMs with about 4ml per gallon.
--- Top fed for a minute to wet the top of the hydroton.
--- Solution strength went down to 263 PPM.
--- Added 8ml more of Sensi A
--- Added 8ml more of Sensi B
--- Now base nutes are at 16ml for 4.5 gal of water.
--- PPMs went up to 411.
--- Still lower than 500 PPMs, but that's okay.
--- PH was at 6. Not sure if I should adjust PH using AN nutes. So going to not ajdust unless PH goes above 6.1.
Day 03 - Wednesday - 08/12/20 - Total Days: 010
-----------------------------------
- [0830]: Looks like more root growth!
--- She still looks yellow. But leaves are perky.
--- PH was at 6.2 so lowered down to 5.8.
--- Solution strength was at 394 PPMs
--- Since roots are still growing, I decide to lower the water level a bit. Now water level is a bit below the net pot.
- [2200]: Root is getting longer!
--- Slime is returning. Not sure why.
--- Solution strength: 357 PPMs
--- PH: 6.1
--- Decided to add an enzyme along with more beneficial bacteria to hopefully cure the slime.
--- Added 16ml of Sensizym
--- Added 5ml of Hydroguard
--- Added 8ml of Voodoo Juice
--- New solution strength: 430 PPMs
--- New PH: 6.1
--- Top fed for a minute.
--- This slimy residue is really freaking me out! I hope the added enzymes will help eliminate the slime.
--- Going to do a full reservoir sterilization/nutrient change over the weekend. Please survive until then girl!
Day 04 - Thursday - 08/13/20 - Total Days: 011
-----------------------------------
- [0930]: I think the enzymes worked! There is little to no slime now!
--- Although I think the root was also dissolved in the process. It's now just a little stub sticking just below the net pot. The enzyme is also suppose to dissolved dead roots too but guess that root was too weak? Not sure what happened there. But I think the slime is cured!
--- Solution strength went down to 395 PPMs. Decided to add more base nutrients.
--- Added 8ml of Sensi A
--- Added 8ml of Sensi B
--- Added 4ml of B-52
--- Solution strength went up to 598 PPMs.
--- PH was at 6.1
--- As long as the PH is between 5.5 and 6.3, I'm not going to use PH Up or Down. But still will monitor PH levels.
- [1715]: Checked up on her after her nap and shes looking alive but stunted. But no slime!
--- Decided to add some sugars to help maintain the enzymes and beneficial bacteria.
--- Solution strength was at 587 PPMs.
--- PH was at 6.2
--- Added 8ml of Bud Candy
--- Solution strength went up to 671 PPMs.
--- PH also went up to 6.3
--- Lowered water level a bit to hopefully promote more root growth.
--- Top fed for a minute.
--- She is getting bigger, but still looks yellow.
Day 05 - Friday - 08/14/20 - Total Days: 012
-----------------------------------
- [0915]: Leaves look a little burnt on the tips. Still no slime.
--- Going to back off on the PPMs to hopefully fix the nutrient toxicity.
--- Solution strength was at 632 PPMs
--- PH was at 6.3
--- Added/Removed water until PPMs were at 536.
--- PH was still at 6.3
--- Raised water up a bit, then top fed for a minute.
- [2200]: Looking better. Still yellow though.
--- Solution strength: 514 PPMs
--- PH: 6.5
--- Added PH down.
--- New solution strength: 518 PPMs
--- New PH: 5.2
--- PH was kind of high. So decided to PH down. Had to use quite a bit to bring it down. But eventually got it to drop down to 5.3. A little low, but so far, the PH has always gone up so wanted to start it really low.
--- Ran the top feed for a minute to re-saturate the top of the hydroton.
Day 06 - Saturday - 08/15/20 - Total Days: 013
-----------------------------------
- [0830]: She looks stunted. leaves are still yellow.
--- Solution strength: 514 PPMs
--- PH: 5.6
--- Top fed for a minute.
--- Not sure what to do at this point. Going to do another reservoir change soon. Hoping she lives until then.
- [2145]: Looking pretty much the same.
--- A bit of slime has returned. Since I've been diluting the nutrient solution, the enzyme ratio has dropped. So I guess this is expected.
--- Also noticed that slime build up was on the air-stones. Never really checked the stones so not sure how long that has been there. Looks brown too, which can't be good.
--- Going to do an H202 sterilization of the system (minus the net pot) tomorrow so did not add anything.
--- Lowered the water level to below the net pot.
--- Then top fed for a minute.
Day 07 - Sunday - 08/16/20 - Total Days: 014
-----------------------------------
- [0900]: STERILIZATION DAY!
--- Decided to skip today's night cycle for a deep clean.
--- I'm hoping that skipping a night cycle won't be too stressful.
--- Temporarily moved her to a new bucket.
--- Used about a half of gallon of straight distilled water to flush out the net pot.
--- Drained the system and wiped up all the brown sludge. Also removed the air stones and cleaned up all the goo.
--- Filled the system with 2 gallons of distilled water and at least 30ml of food grade hydrogen peroxide (35% strength).
--- Yea its a lot, but since I'm not going to sterilize the system overnight, I went with a really high doseage. Basically I kept adding until I started to see little bubbles start to form.
--- Then I ran the water pump.
- [0915]: Boiled the air stones in tap water for about 10 min. Then reconnected them to the airlines.
--- I let the air stones and hose soak in the sterilization solution for about 5 minutes so the peroxide can absorb into the stones. Then ran the air stone to help mix and agitate the solution.
--- Occasionally, I'd repeat the process of turning the air pump off for a few minutes to let the stones soak.
- [1000]: Covered the top two row of holes of the net pot with some aluminum tape. Hopefully this solves the light leaking in through the hydroton.
- [1200]: Used an old toothbrush and scrubbed the pump clean. Then drained the system.
--- Refilled with more distilled water and peroxide. Again added a lot.
--- Ran system again to sterilize even more.
- [1530]: Drained the system and refilled with distilled water to rinse.
--- Ran the system for a few minutes, then drained and rinsed again.
--- Did this a few more times over about an hour.
- [1630]: Added 4 gallons of fresh distilled water.
--- Added 15ml Sensi Grow A
--- Added 15ml Sensi Grow B
--- Added 12ml of B-52
--- Added 16ml of Voodoo Juice
--- Added 16ml Sensizym
--- Solution strength was at 430 PPMs
--- PH was at 5.6
--- I was going to add Hydroguard, but I think the bottle is expired. Since 2017 or 2018!? I think Hydroguard is good for up to 2 years from the date on the bottle or 6 months after opening. So not going to use from now on. I wonder if this could have contributed to the slime build up.
--- Also removed the CaliMagic and Superthrive too. Going to only use AN products to eliminate the chance of incompatible nutrients.
--- Placed her back in the bucket and top fed for a minute.
--- Here's hoping for the best. Going to let it ride until morning! Please feel better!
[END OF WEEK 02]


Likes
50
Share


@Rwein93
Follow
Ciao ragazzi e bentornati qui con me e le sorelle Limonose 🍋
Tutte 3 hanno smesso di crescere, la numero uno ha una struttura incredibile,💪 mi sono pentito di non aver fatto Lst su tutte le sorelle.🤦♂️
La numero 2 è alta e ben strutturata ma ha una sola cola bella grassa.
Mentre la numero 3 sembra più avanti delle altre con quasi tutti i peli arancioni e i buds di media grandezza.
Le cole principali delle altre invece misurano circa 3/4 cm, ma sono ancora parecchio indietro👍
Il colore è standard! Niente di particolare bei buds verde chiaro e pistilli bianchi ma sembrano molto gelide🤙
L odore delle sorelle sembra diverso tra di loro. La numero 1 ha note accentuate di diesel e nocciola, la numero 2 ha un profumo aspro tipo mapo e la numero 3 ricorda un dolce cremoso al limone 😋
Eh niente ragazzi! Aspettiamo che loro ingrassino per bene!👊
Grazie a tutti per aver guardato e restate sintonizzati per nuovi aggiornamenti.🙏
Buona settimana e felice crescita 🌱 🌱 🌱


Likes
22
Share


@medicalhydro
Follow
Seed to harvest day 67
Sticky buds
Fruity smell
Good strees performance
Total Used power 400w


Likes
Comments
Share


@zombikush81
Follow
I start by saying that the genetics of this fantastic and super plant, the only exemplary because I was given after ordering, the first time I cultivated this variety .. I never had any problem from germination at the end of harvest, made grow for 6 weeks approximately with light hours 18/6, then kept in bloom for 10 weeks ...... and from about 10 days to dry with temperatures between 19/20 degrees, and humidity rate to 50% between today and tomorrow I'll make a nice manicure.

