Likes
13
Share
@Oyziphar
Follow
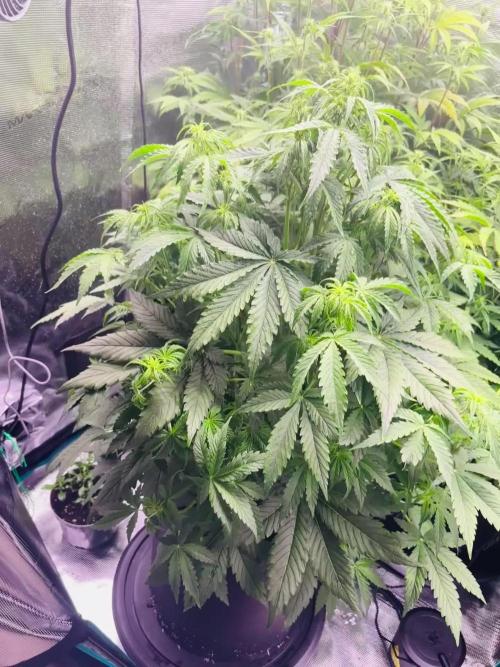
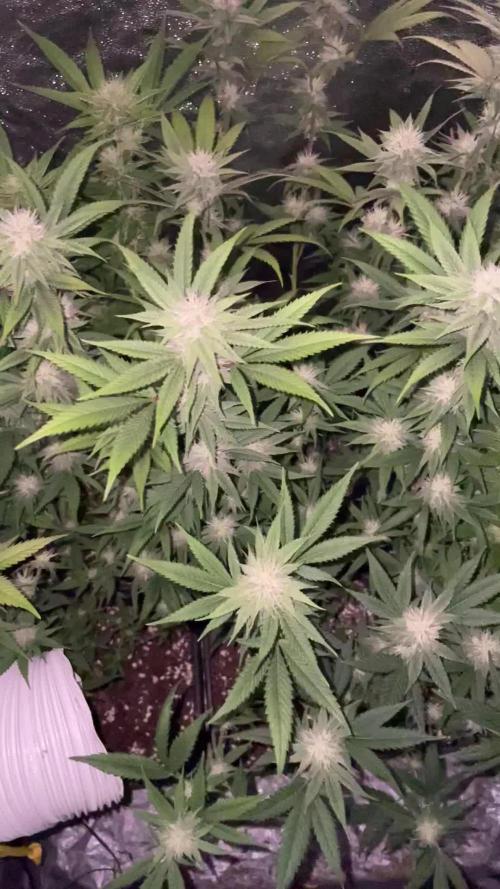
DAY 63 / 9 weeks of flowering. Last pictures of these sativa's. Ready to harvest 😛 Not all plants are equally ripe.. Some plants have hard ripen buds. But some plants could use one or more extra weeks of flowering, 😶 The fragrance varies widely. From fruity candies to strong diesel scent. 😊 The size and appearance of the plants also varies greatly. Not really suitable for SOG. 😪 This week only water. 😨 Low RH% 40-45 --------------------------------------------- Plant size and description : #1 89cm Promising in the first weeks, but ultimately only a small plant with a low yield.😥 #2 144cm Monster-tall beautiful large sativa-like plant, with beautiful fat buds. I love her. 😍 #3 144cm By far the most typical sativa plant. Enormous length with loose foxtail buds. Could use a few more weeks of flowering. 😵 #4 129cm Tall plant with fewer buds. Maybe because this girl is in the corner of the growing room where she doesn't get that much light. Nice and ripe anyway.😳 #5 117cm Beautiful semi-tall plant. The buds may not be as fat, but they are nicely ripe. 😉 #6 92cm Very photogenic rather small plant. The buds seem to spiral up to a fat top. 😃 #7 123cm Large plant with many sativa influences. Pointed hard top studded with trichomes. 😛 #8 124cm Like # 7, a nice big plant but with leaf greenery woven into the buds. 😋 #9 102cm Half to rather high plant endowed with one of the most beautiful buds. Sativa-style bud, but swollen, hard and ripe. Magnificent! A lust for the eye.😍 #10 65cm Small plant. Lower yield. Many brown hairs. Pretty ripe. 😄 #11 71cm Very small even thin plant. Pointed small tops. Undoubtedly the plant with the least yield. Still lovely. 😊 #12 111cm Semi-tall plant. Floppy side branches, but really nice buds. 😀 #13 113cm One of my favorites. Beautiful plant with very fine decorative flowers. Very fresh and tasty appearance. Delicious! 😍 #14 92cm Rather small plant, but with firm hard ripe swollen buds. Yummy. 😘 #15 126cm Incredible plant with a fist-sized huge super-fat head top. But also beautiful side branches with thick buds. Exteme heavy yielder! 😝 #16 88cm Small plant in the corner with relatively many buds. Pointed head top. 😚
Likes
6
Share
Day 71: Hope everything's going well for you. Unfortunately, it's still way too hot here. The outside temperature is 29°C, so it's pretty similar inside the tent. I do have a portable air conditioner, but it would have to run constantly, and that's too expensive for me. That's why I’ve increased the humidity a bit. Otherwise, they look healthy and the buds are getting bigger. I removed two leaves from the Tropical Marker that seemed a bit burned — at least that's what I suspect. Day 74: Today, like every two days, the ladies were watered again with 2 liters of water mixed with fertilizer and Cal-Mag. The girls are looking beautiful. The Tropical Marker is very frosty, but the Purple Kush is also getting frostier. Today, I wedged a board with a hole for the exhaust fan into my window. I hope the room will get a bit cooler now. Additionally, I temporarily hung the lamp’s power supply outside the tent. Day 75: Today, for once, I didn't do anything. Thanks to the new exhaust outlet, the temperature in the tent is actually 5 degrees Celsius lower. The VPD is now back at 1.6. Yesterday, I lowered the exhaust from 80% to 50% to better maintain the 60% humidity, which is working well now. The buds continue to grow, the girls look beautiful, and the smell is getting stronger. Day 76: Today the ladies got 2 liters of water again, this time without any fertilizer. The buds are getting bigger and the girls are looking wonderful. Other than that, I had a little chat with them and then left them in peace again.
Likes
137
Share
@MrJones
Follow
mrjones - Slurricane #7 S1 🌱Slurricane #7 S1 @inhousegenetics_official 👨‍🌾🏽GD Grower: MrJones 🔹🔹🔹🔹🔹🔹GOALS🔹🔹🔹🔹🔹🔹 🌞Environment - 75/80℉ and 60% Humidity Good Old Mother Nature 💧 Feeding - The Green Sunshine Company - Earth Dust All-Natural Plant Nutrients ⚗️Soil - 35% ProMix MP / 25% Ocean Forest / 20% Tupur Royal Gold / 10% lobster Compost / 10% Additional Perlite 🍃Training / So this girl was 60 Inches and spread out under a 5x5 Trellis 🕷️ IPM - Will be using Green Cleaner" 1 OZ per Gallon, and CannControl from Mammoth alternating between products each month 🔹🔹🔹🔹🔹🔹🔹🔹🔹🔹🔹🔹🔹🔹🔹 📜 Rambling - So with the end of July on the Horizon, my time is running out to get the 3rd trellis up and do some major defoliation, but work has been so busy, the girl under the trellis has grown a foot above the second trellis! The other plant is almost 7 feet tall as well, just amazing, the Earth Dust is rocking it out! 🔹🔹🔹🔹🔹🔹🔹🔹🔹🔹🔹🔹🔹🔹🔹 ▶️ Sunday - 07.25.21 / Just watering daily with Dechlirnated H20 using the BOOGIE BLUE PLUS+ (High-Capacity Filter) to remove the Chlorine and Chloramine out of the water. ▶️ Monday - 07.26.21 / Just watering daily with Dechlirnated H20 ▶️ Tuesday - 07.27.21 / Just watering daily with Dechlirnated H20 ▶️ Wednesday - 07.28.21/ Just watering daily with Dechlirnated H20 ▶️ Thursday - 07.29.21 / Just watering daily with Dechlirnated H20 ▶️ Friday - 07.30.21 / Just watering daily with Dechlirnated H20 ▶️ Saturday - 07.31.21 / Today the girls got a hair cut, in the form of massive defoliation, adjusted the trellises, then top dressed with Earth Dust, watered it n with Dechlirnated H20. 🔹🔹🔹🔹🔹🔹🔹🔹🔹🔹🔹🔹🔹🔹🔹 Earth Dust - DESCRIPTION 🔹Earth Dust is our all-natural plant nutrient designed for indoor and outdoor flowering plant growers. You can grow easily by “just adding water” to your soil for the entire growth cycle. It creates a “living soil” so your plants thrive from seedling all the way through flower and harvest. Earth Dust represents an organic dry amendment method of gardening, it’s made of a natural powder of ingredients. 🔹Because you only need to water your soil with Earth Dust, you can concentrate on caring for your plants and getting a healthy crop “on autopilot”. Now you can grow without spending hours of your life mixing chemical nutrients, and you can do it naturally. What’s more, is you will enjoy the cleanest, most aromatic, and flavorful harvest you’ve ever experienced when a plant grows in a rich, organic web of living soil. Product Highlights 🔹All-Natural Ingredients – Mostly plant-based – Safe around children and pets. 🔹Packaged in kraft paper bags that are recyclable and compostable. 🔹Easy to Use – Just mix the powder into the soil 3 separate times – then water only. 🔹Packed full of rich microbe food & contains billions of beneficial fungi and bacteria! Creates a resilient, living soil that defends against pests and diseases. 🔹Rich in trace minerals and nutrients for full plant expression. Sourced from rock dust, sea-farmed kelp, and land-grown crops. 🔹Soil Conditioners help balance pH and make nutrients more available in the soil. Achieved with ingredients like bat guano, worm castings, limestone, molasses, and humic acid. 🔹The correct balance of N-P-K nutrients for each stage of growth: 🔹Earth Dust Base (3-1-2) contains key nutrients for sustained vegetative growth. High nitrogen (N), Low Phosphorous (P), and Medium Potassium (K). 🔹Earth Dust Boost (2-3-6) contains accelerated-release nutrients for powerful flowering growth. Low nitrogen (N), Medium Phosphorous (P), and High Potassium (K). 🔹Re-use soil harvest after harvest by simply adding more Earth Dust Base to begin again. Create your own living soil that gets better every time it’s used. 🔹Go organic, save time, and get predictable, healthy harvests. 🔹🔹🔹🔹🔹🔹🔹🔹🔹🔹🔹🔹🔹🔹🔹 Compost Tea for Vegetative Stage Water 4 Gallons 3 Cups Composr (Your Favorite Worm) 4 TBL Molasses 4 TBL Seaweed Extract 4 TBL Fish Fertilizer Use air Stone o the tea for 24/3 hours 70/75F, use at full strength for establishing plants and a half-strength for younger plants
Likes
19
Share
Another good week in the books down in the tent. Carl 1 and UKBS 1 are both developing some nice buds, Carl 1 with the bigger buds of the two. Carl 1 had to have a few more buds tied up today, as they overweighted what the stems could handle and started sagging like crazy, creating a lot of empty space in the canopy. Timelapse for the week is out, of course. Updates as they come; per usual. 6/11/2021 - Got a video of how the stem's degenerated, it's mainly on that one side. Somehow an entire branch snapped off of UKBS 2, upon further inspection I noticed it was barely attached to the stem at all and did not attempt to re-attach it. Additionally, some of the clones are doing alright and others are shriveling and dying. Not sure what the inconsistency is caused by. It may be the medium; being soil, stays wet for too long. I can't really think of any other reason. I'm misting them, the humidity stays high now that I have a dome for them, they've been dipped in stim-root and supplied mycorrhizae. Will be submitting a grow question as I'm completely new to the whole cloning concept. Also today: more bud shots using the fancy EOS T5 Rebel. Stay tuned! [Out now] 6/11/2021 - The branch drop seems to not have affected UKBS 2 much at all, something which continues to confuse the hell out of me. I may have to get a PVC greenhouse or something to flower the outdoor plants in, as they're giant and I don't know how they'll stand up to the high winds in the area.
Likes
59
Share
Was für ein toller Strain. Die Pflanze wuchs von Anfang an sehr stark. Sie brauchte wenig Nährstoffe und hat sich nach nur 4 Wochen Vegitationsphase sehr schnell entwickelt. 7 1/2 Wochen nach Umstellung auf 12/12 war sie für meinen Geschmack fertig. Sie ist voll von Trichomen und der Duft erobert innerhalb von Sekunden den Raum. Jetzt darf sie Trocknen und fermentieren. Sobald sie fertig ist gibt es einen Rauchbericht. Wirklich sehr zu empfehlen!!!!
Likes
470
Share
Day 8 : Still watering a small amount everyday, before lights turn off. No nutrients, only my lentils juice, to help roots production. She show no deformation, leaves have a perfect shape. That's something i was used to with auto ^^ She is a bit too tall in my opinion, but she's not stretching anymore. Good. Still planning to add dirt on the top, to simple solve this. She Spend day outside, the weather is still perfect.
Likes
Comments
Share
🌿Week 4: Defoliation & SCROG Setup Week 4 was all about structure and airflow. The canopy was getting bushy fast, with a ton of inner growth, so we went in for a solid defoliation session across the board. Lower fans, overlapping leaves, and shaded internodes were cleaned up to let light penetrate deeper into the canopy and reduce potential humidity traps. Right after that, we finally dropped the SCROG net, stretched out gently across the canopy to guide the branches horizontally and prep for flower stacking. Some of these phenos are already reaching for the sky, so the timing felt just right. Captured a full-time-lapse clip of the defoliation + netting process. It’s super satisfying watching the chaos turn into clean lines. Nature meets intention. Feed Bloom since 20/6 22/6 Defoliation 🌱 Plant Response: After defol, they bounced back fast. Tops are perky, leaves are praying, and stretch is continuing in a controlled way. The structure’s more open now — better airflow, better light distribution, better everything.
Likes
16
Share
@osmrducks
Follow
Day 22: Honestly didn't think I would have made it this far. The girls are looking great minus a couple of issues. I have over watered them and over fed too! Not to mention trying to LST too early. I will wait a bit longer before watering this time. Day 23: MORNING - They were super dry. I have been over watering a bit so I watered maybe 1/2 gallon for all 6. I also did some more LST and took 1 large fan leaf off of each plant. I will update again before lights out. Day 23: NIGHT - The girls are responding very well to the LST. I don't think they are liking the 80°. I am starting to have issues with lower humidity again. I need to try and figure some sort of ducting out or possibly even get a small AC unit for the grow room. Day 24: MORNING - I removed a couple more leaves that were covering potential bud sites. I have also done a partial main-line on the smallest girl. It looks to be already showing pistols. I've had to open the tent with a big fan blowing directly in with the humidifier behind it. The girls were getting hot and dry. Day 24: NIGHT - Well 5 are showing to be female. The biggest plant is showing no signs of sex. I am guessing it will be the mystery seed. I will be doing no more LST to these ladies for at least a week or better. I think I have stressed them out enough the past 2 days. Day 25: These girls are very resilient!! I tortured them all weekend and the one I nopped off to do a sort of mainline grew by 20% at least. Day 26: It is the official 3 week mark today and the girls are starting to flower. I tied em down to get light to all bud sights. I will 100% not touch them unless they need it from this point!!!! They are soo small and I need not stunt them any more!! I have removed the Mystery Seed as it looks to be a male and I do not want to take the chance!! Also fed and watered today. Only 200 ppm for the feed. Day 27: Nothing new to report. These girls are gonna be tiny :| I must've stressed em too much too soon :( Looking good though I think! 💪 Day 28: I never do what I say. Dumb! Broke main stem on one of the best plants. Taking it as a lessons learned. It's been two hours and she looks SICK! Oh well.
Likes
1
Share
Día 5/10/20 día 29 de floración Acaba de amanecer un nuevo día y todo continúa bien. Seguimos alimentando las nenas con 1,6 de ec y 6,1 de ph. De momento el engorde no es abrumador pero si constante y si nada cambia obtendremos unas buenas flores!! Día 7/10/20 día 31 de floración Hoy nos vemos forzados a retirar algunas hojas que tapaban demasiada luz y que podríamos considerar sumideros de nutrientes. Por otro lado el riego de hoy ha sido solo de agua más zyco kleanse así prevenimos la sobrefertilizacion. Día 9/10/20 día 33 de floración Hoy preparamos un nuevo tanke de nutrición y lo hacemos a 1,75 de ec y a 6,1 de ph. En los siguientes días observaremos cómo se adaptan a esta nutrición x si tenemos que realizar cambios. No te lo pierdas!! Día 11/10/20 día 35 de floración Hoy te reina la semana 5 de floración y lo hacemos preparando un nuevo tanque de nutrición con el tanque totalmente limpio. La solución está a 1.8 ec, 6.1 ph y a 20 grados. La temperatura de la sala se mantiene a 23 6 la humedad al 47% para evitar la aparición de hongos en sus últimos días de maduración , algo que se puede apreciar en el avance de sus flores. No te lo pierdas!!
Likes
9
Share
@Roberts
Follow
Mintz Runtz automatic is doing good. She had her first training today. She has been making great progress. Everything is looking great really. Thank you Elufah, Spider Farmer, and Spliff Seeds. 🤜🏻🤛🏻🌱🌱🌱 Elufah (Power by Growpros solutions) UAP1500,Die-cast radiator and featuring an optical lens design(Uniform PPFD),150W,PPE3.0μmol/J,PPFD1500umol/s/m²,Use the verified commercial-grade spectrum;Full/Epar Boost Spectrum adjustable,A very excellent grow light; By entering the discount code, you can enjoy an additional 10% price reduction when making the purchase. Amazon discount code:SAVEURCASH10 product Link:https://a.c1ns.cn/uap1500 Thank you grow diaries community for the 👇likes👇, follows, comments, and subscriptions on my YouTube channel👇. ❄️🌱🍻 Happy Growing 🌱🌱🌱 https://youtube.com/channel/UCAhN7yRzWLpcaRHhMIQ7X4g.
Likes
57
Share
@Roberts
Follow
Pablo Escobar has been growing good this last week. She had her roots pruned today with some defoliation, and lst. She has steadily been making good progress. Nothing more to report at this time. Thank you Spider Farmer, and Divine Seeds. 🤜🏻🤛🏻🌱🌱🌱 Thank you grow diaries community for the 👇likes👇, follows, comments, and subscriptions on my YouTube channel👇. ❄️🌱🍻 Happy Growing 🌱🌱🌱 https://youtube.com/channel/UCAhN7yRzWLpcaRHhMIQ7X4g
Processing
Likes
12
Share
@Fleetwood
Follow
Trying to keep away as I fear my meddling caused my hermie's. I found a light out, luckily I have 2. Looking for an upgrade now. Will use the remaining light as a backup. End of week, I have 3 x "600w" LED lights. Total draw is about 360w. 2 white (with added red) and one blurple in between them. I need to fix hanger system to keep them close, but not too close to affect cooling.
Likes
15
Share
Flower Week 6 Day 42 to 48 - 3/26 to 4/1 Stepped up my attention with these this week and hope I didnt let them go too far for a decent harvest. I defoliated for the last time this week and spotted more purple leaves. The buds are super dense so I have higher hopes than I did last week Feed this week was 1.25 gallons 2 times. 700ppm total before add-ins. I used 400ppm Bloom concentrate mix (recipe week 5). Then I added 1ml/gal of CaliMagic (General Hydroponics 1-0-0) PH balance this week was 6.6 I plan to feed 1.25gal 2 times with 6.6ph and half nutes. This will also be the same for all remaining feeds before harvest. From this point Im simply watching for signs to harvest in the pistils, calyx, and trichomes
Likes
10
Share
Hey Farmers. Another successful harvest! Let's start off with the weigh in. This time around we got 207 grams of bud, none of which I would qualify as top shelf. We also got 47 grams worth of larf, which is a lot, and lastly we have 22 grams of frosty trim. I will be more specific about the taste and feel of the plant in the smoke comment below. I dried her in cardboard boxes, the total dry time ended up taking 10 days. I got a very nice rootball, especially when compared to my early days. I'm using Calcium hypochlorite to combat pythium growth in my growbucket, as well as providing free chlorine for the plant to uptake. It's a very cheap and effective way to run a "Sterile" DWC run, although you have to be very careful when handling and dosing, if you want to know how I calculate my dose, check below. It's a great and cheap alternative to UC Roots. for Calcium Hypochlorite I use HTH Pool shock, its 67% Chlorine, don't just buy HTH pool shock, as its contents vary by country, try and buy pure Calcium Hypochlorite with 70% chlorine from an online Lab supply store, its dirt cheap and 1 KG will last you a lifetime for less than 40 bucks, i aim for 2ppm of free Chlorine in my reservoir, this will slow down growth of bacteria, and is still relatively low in dose so our root hairs don't take too much damage. ALWAYS Check the chlorine of your Calcium Hypochlorite, Mines 67% the following is the calculations I use, feel free to adjust the formulas to your needs: 2 ppm chlorine from 67% strength Calcium Hypochlorite and I want to fill an empty 2 litre bottle with 0.5% Chlorine which will serve as my stock solution (2000x0,5) / 67 = 14,9 14,9 grams of 67% strength Calcium Hypochlorite to get a 2L Chlorine bottle with 0.5% strength !! Be careful with this Stock bottle. 0.5% Doesn't sound like a lot, but it is HIGHLY corrosive and will give you chemical burns !! I then want to turn that stock bottle with 5000mg Chlorine per litre into 2mg/litre which is 2 ppm.. (There are 1,000,000 milligrams (mg) in 1 litre (L)) (0,0002x1000) / 0,5 = 0.4 which is 0.4, so 0.4 ml of the stock solution per litre of water then gets me 2mg/l total chlorine in my plant buckets note that I don't use this in late flower once I start feeding Green sensation. mainly because Green sensation is 80% bio and I'm not sure how well the two would work together and at this point, roots no longer grow anyway and pythium is unlikely if you're a little smart in the final weeks
Likes
23
Share
Its done! Even though I expected a higher yield, I'm happy with my first harvest. It could have gone worse. Got 61 grams of the biggest plant, it took eternities, but the yield is pretty decent for a first grow. Thanks WSE! Next up will be Strawberry kush and Harlequin.
Likes
3
Share
@Furet
Follow
The girls are so big now, I had to do LST again this morning for discretion 😅 Everything ok and thrips are almost gone. The pistils are starting to multiply 😎