


Likes
20
Share


@adam_pawloski87
Follow
We are in Flush !! Was giving them GH Flora series + rapid start + cal mag
Likes
21
Share


@BushDoctor740
Follow
Day 70 Well I think I will give them another week and harvest.Showing lots of trichomes that are mostly cloudy so I’ll let them go a bit longer.The tallest girl is at 40 inches and suffered some fox tailing I’m gonna say from when I pounded them with light for a week or so 😆.Even though she fox tailed and will not have the most dense buds she smells super strong and loaded with trichomes.Of the 5 Runtz the shortest has the chunkiest most dense buds.The other 3 were very big producers and took the LST great branching out forming tons of colas.Ill try to let them dry out this week and place in the dark for a day or so before chopping.Unfortunately in my area we have heavy rains all week humidity may become a problem so I will add a dehumidifier soon.
Likes
2
Share


@Chubbs
Follow
Week 4 for these girls. They've doubled in some since last week. I took a couple of the bigger fan leafs off this week, also raised my lights up allowing some stretch. Starting to see some preflowers and pistols. So next week will be off to the flower stage.
Happy Growing.
Likes
4
Share

@PotusArg
Follow
Hoy comienzo con el ciclo de luz de floración 12/12. Las plantas se han desarrollado muy bien hasta ahora, sin mostrar problemas, signos de plagas, ni enfermedades. Estoy evaluando si instalar una red de soporte (Scrog) o no. Personalmente, no lo considero imprescindible, pero he leído que ayuda a sostener las punteras a medida que crecen y evita que las ramas se caigan o se rompan. Sin embargo, dado que las plantas han crecido bien hasta ahora, no estoy seguro si será necesario.
Más allá de eso, estoy muy emocionado por comenzar la floración y ver cuánto durará, ya que puede variar entre 8 y 12 semanas.
Today I’m starting the 12/12 flowering light cycle. The plants have been developing very well so far, showing no issues, signs of pests, or diseases. I’m considering whether or not to install a scrog net. Personally, I don’t think it’s essential, but I’ve read that it helps support the colas as they grow and prevents branches from falling or breaking. However, since the plants have grown well so far, I’m not sure if it will be necessary.
That said, I’m really excited to start flowering and see how long it lasts, as it can vary between 8 to 12 weeks.


Processing
Likes
1
Share


@wheedtobeus420
Follow
Day 36. She has responded well to being left in the dark. I wanted some more vertical growth. She has stretched upward a few inches yay. I’m excited to watch her grow. Since my other girl is in such a small pot we can see both options.
Likes
1
Share


@Vincentmad
Follow
End of week 3, last week we removed bottom node and this week removed last node from bottom tpp, heavy lollipoping for pre veg for 2/3 weeks then flip to 12/12
Likes
20
Share


@StickyHands
Follow
Flowering Day 66
Harvested today.
I'm really happy with the run.
Towards the end of the flowering phase, the plants didn't look 100% happy. I'll add more perlite and pumice next time, as I suspect the soil was a bit too moist for too long due to the Autopots.
The whole plant will be dried in one piece. I'll dry one in DryFerm bags for testing purposes.
Update to follow.
Stay green!

Processing
Likes
6
Share


Likes
8
Share


@TakinTopsDaiily
Follow
What’s growing on everybody?!?! Exciting week in my Banana punch grow! The plants are really growing quickly now. Got the light cycle switched over to 12/12, got my first layer of trellis screen put up so I can start weaving branches through. I also started the bloom feed today, which just substitutes the grow for the bloom as far as my botanicare line goes, I like to use a small about of MOAB to really get my plants to start flowering. I’ll have more boosters coming on in the later weeks of flower. I will continue with my IPM regiment of spraying Athena IPM twice a week until the third week of flowering, which at that point I will cut off all sprays. I plan on running this strain until my planned harvest date which is 3/13-3/20. I vegged until my plants were telling me they were ready to go to bloom, I let the shape and hardiness of my plants dictate when to flip them, I wasn’t rushing them. I’m excited to see how everything looks in the coming weeks! Thanks for looking, As always, Happy Growing everyone!
Likes
6
Share


@GrapevineGrower2
Follow
Week 4 flower went fine with all three humming along nicely in living soil. Watered to saturation after applying a 1" top dressing of worm castings, compost, and Langbeinite from Down to Earth. No need for further plant training, defoliation, or pruning. Now, just sit back and let these girls finish their run.

Likes
2
Share

@PapaTerps
Follow
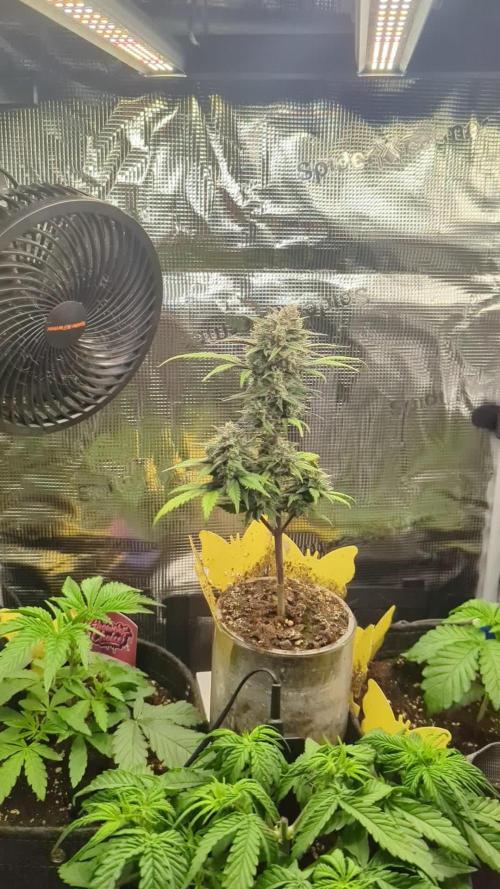
Strawberry Gorilla Automatic - FastBuds
Day 57 - watered with 500ml of RO tap water with defined nutrients, mixed in order and then pHd to 6.3. Considering her pot size, I'm seriously impressed with the size of bud growing on this plant!! She's so beautiful too, a full spectrum of colour, from her flower to her leaves👏🏻 She's also started to smell really good, because she's the only flowering plant in the tent right now, you just get a wonderful bang off it when the tent opens 👌🏻. Not much work on her again this week, just her second daily watering with 500ml 👍🏻


Likes
3
Share

@MrGrOH1008
Follow
Did a light defol on 1. Gonna let the other just go until day 21 of flower. But yeah, these babies been a little struggle. But they’re drying out from their first real pot soaking feed. Another day or 2 and we’re gonna flip! Let’s gooooo!
Processing
Likes
11
Share


@TheGreenTouch
Follow
Last day of week 5 I been high asf I almost forgot about this lately lol but you see the results


Likes
23
Share


@Ashbash
Follow
Both plants are into the final maturing stage now I think.
#1 looking to be more dense, #2 longer and fluffier.
Very temperamental with the nutes, shows signs of burn and deficiency, I think I'll leave with just water from here on out.


Likes
14
Share


@eldruida_lamota
Follow
Vamos familia tercera semana de floración de estás Punch Pie de RoyalQueenSeeds .
Que ganas tengo de ver el progreso de esta variedad, las plantas están sanas, se ven con buen color.
La cantidad de agua cada 48h entre riegos, nutrientes de la gama Agrobeta.
Esperaremos que no me suba mucho la temperatura , por el momento se mantiene entre 25-26 así que lujo.
Estas próximas semanas veremos cómo avanzan y progresan estas flores.
Mars hydro:
Code discount: EL420
https://www.mars-hydro.com/
Agrobeta:
https://www.agrobeta.com/agrobetatiendaonline/36-abonos-canamo
Hasta aquí todo, Buenos humos 💨💨.
Likes
17
Share


@Appoldro420
Follow
This week ia am planning to let it grow just like this. Hopefully I will receive a plant camera next week to monitor my VPD. Also added an IRheater to keep temperature stable
The infrared heater does its job, but I find it a waste of electricity, 3.6 kWh in one night. So I've decided to install a gas heater instead, which delivers the same result at a much lower cost and also provides additional CO2. The heater can then keep the temperature above 21˚C with the lights off. The natural gas heater will be used with the lights on. I need to quickly find a CO2 sensor because too much CO2 has a counterproductive effect, as I've already noticed. Approximately 1200 PPM at 32˚C is optimal as long as I can maintain a DLI of 35. Great technology is on the way.
Added: Installed CO2 burner, run it for 6 minutes every hour. Temp raises from 22˚C to 27˚C in about 7 minutes. CO2 detector (just colors, no values) doesn't alarm so not above 1500PPM CO monitor also no alarm :)
Running for 4 hours now and a visible change is there. Tomorrow I will know if it is ok or not.
Added a few pictures. Lets see if we can see the difference tomorrow.
26-05: Added Dimlux Maxi controller for CO2 and VPD. Works nice.
28-05: Topped a few
31-05 Added additional 300W to heat the stuff up. RH is stable but high on 72%. Could add a dehumidifier but since CO2 is already there and my VPD is around 0.8 I thought adding light would be cheaper. Can go up to 33˚C before my floor is heating up too much.
Also cleaned the watertank. So from now on they are on Ata Max

