


Likes
Comments
Share


@BasedBuds_89
Follow
Really looking good so far, she's nugging up nicely. Can't wait to see the finished product!

Likes
8
Share

@carlitoshaze44
Follow
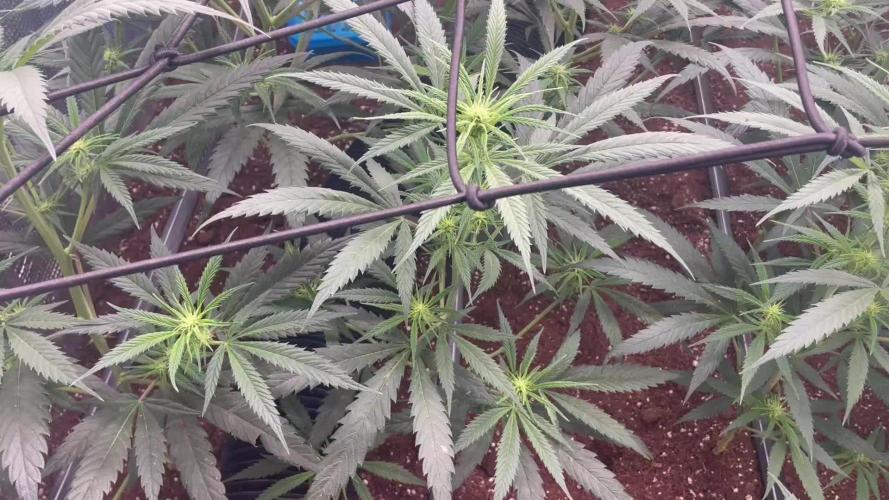
Así es como empezamos la tercera semana,seguimos con humedad alta pero la vamos controlando..
Estos días da buen tiempo la humedad en la calle será mucho más baja así podré meter aire sin tanta humedad..
De momento todo bien en el cultivo ningún problema hasta la fecha.
Ya podéis ver,y comentar sobre algo que veáis que yo no!
Como dicen! Ven veinte ojos mejor que dos!
🖖
Día 12
Último fungicida prevención mutritis,hongos
humedad.
Primer riego foliar hormonas producción de flores.
🌹
Día 13
Nada en especial solo observar si veo algún cambio tras las hormonas,aún no veo grandes observaciones fuera de lo natural del paso de los días.
En el día de mañana por lo que me recomendó el fabricante se verán los resultados a la vista!
Comentar que seguimos con la iluminación al 100x100 de capacidad
Marshydro sp3000 x2
Hero led Ignator t720
Yxo led 60w ir+un espectro completo
En la siguiente semana me llega el nuevo driver de philips para poder conectar la lámpara de IR que pude adquirir a Yxo nuevamente! Lampara led espectro completo + IR 70w .
Me vendrá muy bien para el pequeño espacio de la puerta que necesita más iluminación para poder desarrollar bien esas dos plantas,de la entrada.
La humedad fue cosa del pasado.
Evite el uso de desumificador eléctrico añadiendo varios de sales,deciros que funcionan muy bien no dan un control exacto pero mantienen una humedad interior estable para todo el periodo de floración!
50% de humedad lo demuestra!
Hoy añadi un poco más de sustrato. 110 litros exactamente sobre la cama de cultivo que tenía de topcrop con humus de lombriz,tierra diatomeas y alimentada con npk.
Después de eso tengo en mi cama de cultivo 810 litros de sustrato para mis 44haze. 💐
Saludos
Día 14
Anulado el intractor,ya que el propio extractor mete aire fresco por las rendijas de ventilación..
En lo largo de la noche iré viendo el resultado en datos..
Ya coloque los soportes para la nueva iluminación que en estos días llega su driver de sustitución
E visto que algunas plantas en estos dos días están en 67-70cm..
Ya colocado el sistema de riego para evitar más pisadas en el cultivo ya que algunas se realentizaron por pisar encima de sus raíces..
Le e metido una pequeña poda de bajos para airear más la zonas bajas del cultivo.
Pequeño riego de folacion con remedio de agua azúcar para dos que estaban más estresadas.
Día 15
Hoy era día de regar pero el sustrato aún parece húmedo en gran proporción aplazare el riego.
Día 16
Hoy me acerqué a ver las niñas en caso de que necesitaran algo..
Se ve todo correcto parece que no tienen mucha sed.. llevamos todo el día de alta humedad y lluvia en el exterior..
Las dejaré hoy sin riego también.
El sustrato está bien alimentado.
Mañana seguramente se presente el armario con una plantación pidiendo agua a gritos!! Jejeje.. así comerán con más ganas!,veremos qué tal..
Dia 17
Perfecto,las plantas se han mantenido muy bien para estar el sustrato ,prácticamente casi seco..
Se le aplicaron 32litros a la cama de sustrato con el riego de goteo
Y la humedad se ha mantenido bastante bien .
Una vez termine el riego la temperatura en el armario cayó considerablemente,llegando este a 16 grados.
Una vez se cierra todo vuelve a sus parámetros controlados de 23/24 grados.
Día 18
Hoy es el quinto día de la tercera semana,aplique el riego ayer en proporción de 850ml por planta.
La humedad subió por unas horas a 62%
Después de las 24 horas del riego el área se encuentra en un 55%.. esta noche llegará a el valor determinado de 48/50
Las plantas están desarrollando las formaciones
de flores muy rápido!
En unas semanas veremos!,algunas pequeñas en este último riego del día 17,sufrieron un poco más debido a la subida de la ec .
Esta vez trabajamos con 1200 totales.
Que a muchas le sentaron fenomenal pero a otras cinco no tanto..pero es lo que tiene el riego por goteo..

Likes
13
Share


@Lazuli
Follow
Week 5 and she smells amaaaziiing haha
This is by far the BEST strain u can get
I dont touch her orher then feeding and next week starting the ripen feeding for 10 days, then a 3 day flush and cut her down she is so perfect


Likes
23
Share


@ILoVeThiSpLaNt
Follow
Giorno 14. Le 5 Cream Mandarine XL sono tutte simili come il giro precedente e di questo sono molto contento perché vuol dire più spazio nel box, più circolazione d'aria, più penetrazione di luce e meno defogliazione 😊
A settimana prossima e grazie del passaggio!!!

Likes
15
Share

@TrickzCutz
Follow
Servus Moin!
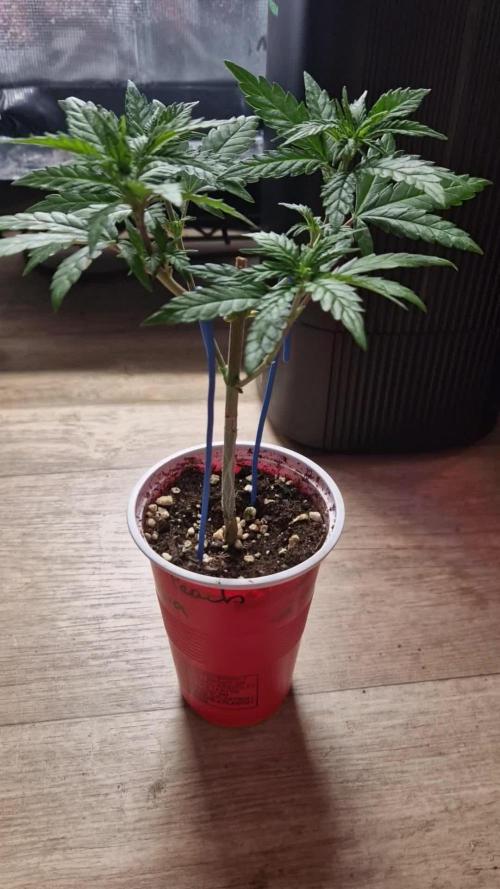
Auch die Sun of a Peach macht sich super. Ein paar Fraßstellen von Insekten sind auch bei ihr zu sehen. Deswegen wird sie mit Neemöl eingesprüht.

Likes
12
Share


@Thechefgrower
Follow
Ad water and nutrients every day 5L ,ph 5.4
Defoliation day 49 ,50 , 53 , 56


Likes
43
Share


@Jack_Greenstalk
Follow
I made a few big mistakes. most notably not flipping early enough. I vegged til 13 inches hoping theyd stretch to 26-30 inches and have adequate space away from light, well I underestimate them way too much! despite stretching a ton, these girls were both amazing to grow. bounced back to every training, with a lot of lst and topping and defol, they never stayed down long. they eat a lot, and once i got my feed dialed in they grew healthy and strong thru harvest. i chopped at all milky trichs, decided to harvest all in one go. so lowers have a tiny clear trich but mostly milky, tops are fully milky and after dry have a tiny touch of yellow or amber at tips. effects are ranging from 70-30 sativa (on lowers with clearer trichs) its high energy. very distinct feeling of relaxation all thru body from neck down feel loose in joints and relaxed. in mind i feel very sharp, focused and productive. at the same time i noticed i was more creative. i teach tennis classes and i was better able to describe what I was trying to convey to my student who is a teen, creativity helps. both our games improved, definitely a nice productive smoke, tastey as hell in vape or bowl. grinds up and smells like blueberries soaked in gasoline, topped with a big squeeze of lemon and dash of spicey red chili peppers! ooooh eeee! this stuff is amazing, and the bubble hash i spun looks like its going to be top quality once it dries! will post more pictures of buds once they cure up a bit more. should mention as a hash / rso maker, i also pulled over 1,000 grams of wet fan leaf, and a few hundred grams of trim which yields great medicine not accounted for in harvest #s00

Likes
39
Share


@MyStery21
Follow
This Baby just can't stop grow. i wanna smoke this strain so bad so badddd.
To give you an example of why i'm telling you this, check this out.
i have my grow tent with the door open in my house with my infinity at maximum speed 10/10. AC ON 24/7. This days are really really hot over here and if i close the grow tent the Temp will raise up to 85%. Anyway.... 2 days ago i had a visit in home and i was a little afraid for the smell, turns that when they got here the first thing they ask for.... was the fruit that smell like that?. 😂😂
I said that i made a casquito de guayaba (that's a famous cuban dessert made from real guavas) smells very very sweet and taste asome.
This plant smells like that. Like a candy or a very sweet fruit But she's taking her time and im glad of that.
I want to tanks to @jinks101 @Trueorganics84 for the help they give me in this, my first grow. 🙏 thank you all guys...

Likes
54
Share


@Fatnastyz
Follow
12-28
Scc got plain ph water. 3x got none.
Just a day to show off their moves. 😂🤘
Scc is happy. I suspect she may not like plain water though.
12-29
3x plain ph water.
12-30
Scc half tsp build a bloom ( I put ml last week, think it was stuck in my head 😂), 1/2 tsp recharge, 1/8th tsp kelp and 1 ml drops. Upped the dose of build bloom from 1/4 to half tsp.
Was only 310 ppm after stiring and desolving for several hours. Felt low, but taking it slow.
3x gets all the goodies on her next!
.
12-31
Started a 2 gallon tea. 1/4 cup poo, 1 1/2 tsp build a bloom, 2 ml drops, 1/8 tsp kelp, 1/2 tsp recharge, 1 tbs molasses. Bubble bubble. Ppm is 612 brewing. 24 hrs
Bring in the new year with some goodies! 💪🤘
Happy New Year!
1-1
Gabe them both the tea. Ppm was 623 ph 6.2.
Mmm

Likes
8
Share


@GrowPassionItalyChris
Follow
È stata una settimana bellissima e calda. Tutte le varietà sono vicine alla fase finale della fioritura e ognuna ha il suo forte aroma particolare. Tutte quasi piene di infiorescenze dure e molto appiccicose ormai stanno completando il loro processo di fioritura in maniera impeccabile. Come sempre queste varietà dutchfem seeds autofiorenti sono una soddisfazione! Alcune sono di tipo XXL mentre altre di taglia media ma sono tutte piene di infiorescenze e continuano a riempirsi quindi verrà applicata una raccolta graduale tra una settimana o due al massimo. Sparito ogni insetto nelle piante a causa della resina appiccicosa. Sono felice un abbraccio a tutti.

Likes
8
Share


@FirstTime97
Follow
Left um 4 days over Christmas being a lazy bum and come back to half a tent off yellow a lot of fan leaves are looking sickly / fell off altogether most yellow leaves have been pulled off plants lost a lot of they fam leaves all in maybe abit too many , it’s hard because one person tells ya leave um all on and another person will tell ya take um all off so we just been seeing what works ourselfs and still ain’t got the foggiest , when ya rub the buds you get hints off lemon / pepper and fresh dog shit 🤣🤣 as I say we have um last feed of nutes this week and started to flush um they take about 6 litres of water through the pots untill any type of coloured run off and we only have 100l so 3 days at it we got through about 10 plants and we gave up 🤣🤣 so again intrested to see the finished prouduct if flushing does change the taste of the smoke , saying this the plants we have flushed seem to be looking alot more healthy than the ones we haven’t so deffo leaning towards a lockout or too high nutes for the girls , alot of rusting and alot of burnt frazzled tips one plant we chopped early and didn’t even get a gram of smoke able off it just alot of leaf n skinny buds , it being a first time go at this I’m not really too disappointed with the outcome but deffo kicking myself at how many I rammed in togther , some of the top Kolas are looking 10/10 but other than the top kolas the rest ain’t worth a wank to me , all in all learnt a lot though so excited to finish this one up and get cracking with number 2 I’m leaning towards bud Buddha seeds cheese puffs after smoking some zheez that’s going around the country at the minute cheese x zkittles , anyway happy growing people and don’t forget to drop a comment if you have anything to say or ask

Likes
14
Share

@Pheno_Minds
Follow
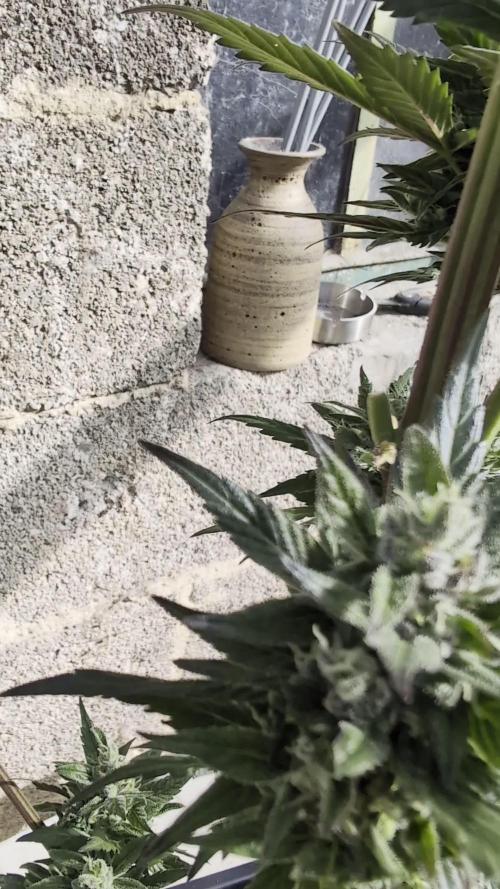
✂️ Wir sind in der Erntewoche angekommen. Eigentlich wollte ich die Wild Thai noch länger stehen lassen, aber die Natur hat mir einen Strich durch die Rechnung gemacht. Am 2026-06-15 habe ich massiven Befall mit Botrytis, also Grauschimmel, festgestellt. Bei einer Landrace-Sorte in diesem Stadium ist das ein absolutes K.O.-Kriterium, da wartet man nicht mehr ab.
📋 Die Fakten für diese Woche sind schnell zusammengefasst: Die Behandlung des Befalls bestand in der sofortigen Ernte am 2026-06-16, um den Rest der Pflanze oder andere Bestände nicht zu gefährden. Der Grow ist damit offiziell beendet.
📸 Wenn man sich die Bilder ansieht, erkennt man deutlich die typische Struktur dieser Sorte. Die Blüten sind eher locker gewachsen, was bei einer Thai-Genetik aber auch zu erwarten ist. Trotz der frühen Ernte sind die Blätter dunkelgrün bis violett gefärbt, was für eine schöne Optik sorgt. Die Trichome sind überall auf den Blüten und den kleinen Zuckerblättern gut ausgebildet und erkennbar. Der Stamm ist kräftig und zeigt die für die Sorte charakteristische Rötung.
Fazit: Schade um die letzten Tage, die ich ihr noch gegönnt hätte, aber Sicherheit geht vor. Grauschimmel ist ein gefährlicher Gegner, den man nicht unterschätzen darf. Jetzt geht es ans Trocknen und dann sehen wir mal, was die Ernte qualitativ hergibt. Man lernt eben nie aus, auch bei Landrassen nicht.


Likes
41
Share


@WolverineGreens
Follow
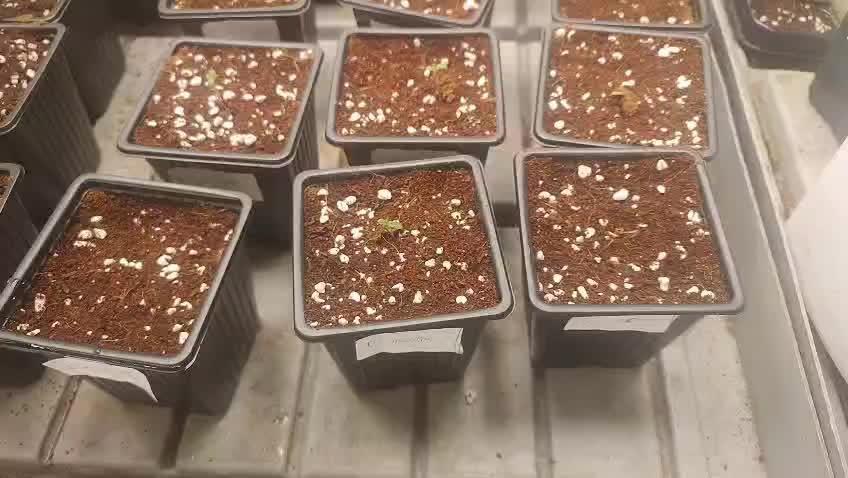
Day 1 down...will connect the blumats tonite 😁. Blackberry moonrock and girl scout cookie were damaged during transplant but look good and bounced back nicely. Was waiting for them to recover to flip.
Light compost tea bubblin since 8 pm yesterday to help start the process. In the next day or 2 ill get the last trim and take the last few clones.
At the end of week 2 ill quit sprayin labs and em5.
Grow cam still sux but its all i got at the moment so ill have to make due with it and my cell.
Likes
8
Share


@Rabidreject
Follow
This weeks been hectic! Iv had a lot of training to do and a fair amount of defoliation - all only done until my plant had no feed left.
Iv signed up to a couple of patreon accounts : ‘Willymyco’ and ‘DGC - dude grows podcast’s. Another great podcast.
However, over the past week there’s been a heatwave and I accidentally pulled the red on/off plastic valve from the res for a second , it’s all good and just went on insulated wires…so I just mopped it up.
I changed it to a mars hydro ts-1000w, and then the ts-600.
Glad the dimmer works though or temps will be insane! I am still thinking of putting in the fc-e3000 but if I do that I’m going to have to take out the stoppers from the ends and hacksaw some off. It’s only cheap aluminium and then I’m going to think about removing one of the light strips if I can. Then I’ll just keep it low. It’s still weird working with a plant they suggested, un-topped— this is the first time i have done this in my life - I have literally always - HST’d, using the early veg stage and making used of the time for it to heal.
Likes
14
Share

@TrichoWitchka
Follow
Nazdarek🌱😸. Pravje fcil sem sa rozhodua,ze ta otestujem z nasej slovenskej zahoractiny☝️🤣Co uz k temuto dodat?😆 Dneskaj 29.3. je tyden po prepnuci ,v patek sme dosli dom a skoro sem odpadua jaka dzuglabo na mna vyskociua🙈. Najvacej vyskocila za ten tyden Gorilla prime 🦍. Secko sem v sobotu polela a do stredy rana si teraz mozu cilovat🤣. Tipujem este dva tydne a donde mi fantazia,jak ich vynasat ven a focit📸. Uz fcileky maju svoju vahu😮💨. Nech sa vam seckym dari a nech vam to rostne🌱. Baj😸

Likes
7
Share


@Guerillafarm
Follow
D 74 es wurde zu eng also hab ich die pflanze in einen anderen Raum gestellt mit einer anderen Lampe
Lampe : COSMOS 150W mit UV und IR.
Mein Anbau Raum wird bis zu 32•C warm wenn die Tür ganz zu ist, ich lasse aber auf dann komme ich auf 29,5 - 30,5
D 75 gestern habe ich vergessen zu gießen
Also bekommt sie heute 2L bis zu den Topf löchern.
Lampe nur auf 80%
D 77 2L gegossen bis es überlauft.
Likes
58
Share


@Rap_a_cap
Follow
Well, my organic vegetables garden, in anticipation of growing weed has been at rest for twenty months. I started to amends with green manure from legumes and lawn mowing (expecially the last month, for ready availability of N). I've mixed 1 gallon of Vigo Plant Full (perlite, guano, peats) to improve drainage. All the roses around, the apple tree and the hedges were treated with deltamethrin so as to preventively reduce the population of aphids, whiteflies & red spiders.
My vegetables & weed eventually will receive only spraying of nettle macerated. SK#1 has spent the previous week outdoors night and day in her pot savoring the discrete temperature changes in my area.
Now in the evening I will have to pay close attention to broadnose weevils and later to bedbugs. It will be a tough fight against the wind and heat. A whole week of full sun awaits her.
Special Kush #1 now is growing quite well though in the week spent outdoors has suffered from the wind and is very sensitive to overwatering.
Maybe it will be the southern sun but they already smell slightly

Likes
47
Share

@Terp1
Follow
07.02.2026
Trichome 10% klar / 80% milchig / 10% Bernstein
Yippie 👋 das Erntefenster ist erreicht. Ich werde die beiden in den nächsten 3-5 Tagen wahrscheinlich ernten. Sie haben das bis hierhin großartig gemacht. Das war ein astreiner Grow. 💪
Die Terpene der Papayton sind wild. Frucht, süß, zitronig sauer, Orangensaft, etwas Gas und Keks.
Biscotti Gelato legt auch langsam nach. Sie riecht lecker nach Erde, Gas und Teig. Geht aber neben der Papayton deutlich unter.
Terp 👽