
Processing
Likes
Comments
Share


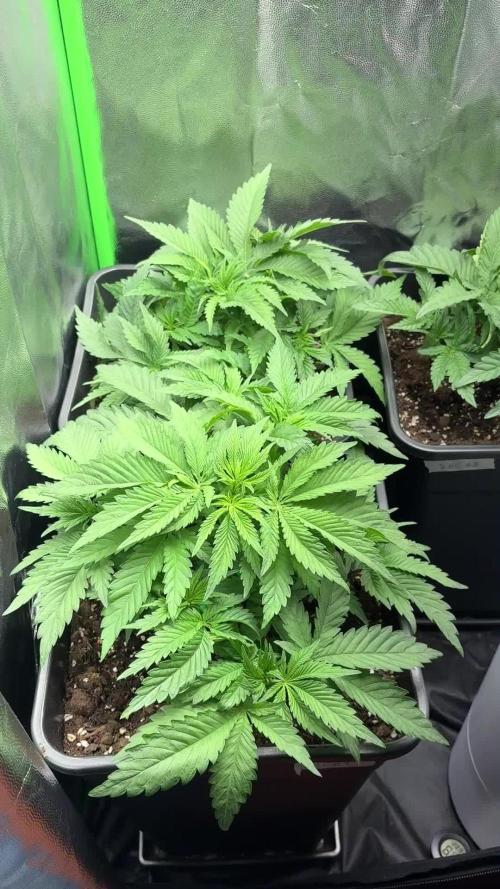
@Canadian
Follow
The plant is monster even though I topper at the 6th node she is 51in tall and smell nice fantastic but requires support the plant grows very tall even before having lots of weight in the buds it requires support .
today I brought them outside the tent to give them a good water down in order to drain out any excessive buildup in the soil.
I will continue to update but thank you for reading have a happy grow.

Likes
20
Share


@Insaniac_0
Follow
8set Mainline & 6/4set Manifold in Auto Pot - Selfie Seeds Sweet Slurry x Sugar Cane (6X4) - Week 18
Flower Week 9 Day 69 to 71 - 5/20 to 5/22
After a few extra days of dryout I chopped. I decided to wet trim while still on the stems.
Lots of rain lately, and the drying process was a challenge but I overcame with fans around the hangers and more dry time. I dried until I could snap a test branch. Then I trimmed off the buds and placed in humidity controlled bags with hydrometers.
Likes
19
Share


@GoldenWeedGrower
Follow
Legend
Timestamp: 📅
Measures: 🛠️
Water: 🌊
Actions: 💼
Thoughts: 🧠
Events: 🚀
________________________________
📅 D36/V34 - 28/09/23
🛠️
🌊
💼 New LST - Made Timelapse of the grow
🧠
🚀
________________________________
📅 D37/V35 - 29/09/23 -
🛠️
🌊
💼 LST on the younger lady.
🧠
🚀 Marlene Senior is pre-flowering
________________________________
📅 D38/V36 - 30/09/23
🛠️ EC raised to 1.2 pH is stable to 6
🌊 Added 5L and nutes
💼
🧠
🚀
________________________________
📅 D39/V37 - 01/10/23
🛠️
🌊
💼 LST again on the younger and HST on her main bud
🧠 The bigger one is ok for now, I'm going to let her grow normally a little bit
🚀
________________________________
📅 D40/F01 - 02/10/23
🛠️
🌊 Added 2L water and nutes
💼 LST on Marlene Junior and a little bit on the older as well
🧠
🚀
________________________________
📅 D41/F02 - 03/10/23
🛠️ EC and pH are both stable
🌊 Added water 2L
💼 Made timelapse of the last nights
🧠 She's drinking a lot, I need to understand how to manage the flowering stage
🚀
________________________________
📅 D42/F03 - 04/10/23 -
🛠️
🌊
💼 Big Defolation and strong LST
🧠 Maybe the last training before full flowering stage
🚀

Likes
6
Share


@MissSolasolita
Follow
End of week 4 of flower
Looking very healthy
She is so sticky and smells amazing
One in shared pot exactly the same
Roll on next 4 weeks
STAY SAFE EVERYONE!

Likes
2
Share


@fabialien
Follow
Semana sel 2 de septiembre al 8 de septiembre 8 de septiembre, fotos del dia Jueves 5 de septiembre 2024.
Se regaron con Floralicius plus adicionado con Hidrol-pez + vitaminas.


Likes
37
Share


@Budz_Bunny
Follow
Grow Journal Week 3: Bloom Phase Progress 🌼
Hello dear growers and growerettes,
I’m thrilled to share the third week of the bloom phase in our grow journal! Here are all the details for Week 3:
Weekly Progress
We are at the end of Bloom Week 3, and the plants are thriving! Even our previously problematic plant has made a full recovery. My favorite plant, the one on the left, has claimed an entire half of the tent for itself. The stretch phase has now concluded, and I am very pleased with the results.
Watering and Control Systems
The watering system is operating smoothly, even with the increased water consumption of the ladies. The Blumat and TrolMaster systems are working without any issues.
Challenges
In Week 2, I performed a heavy defoliation since I had some time that day. Although it was a bit early, the ladies have recovered well. Due to limited time over the past two weeks, and this likely continuing until the end of December, I've been doing my best to keep the journal as current as possible.
Goals and Expectations
In the next two weeks, I expect my buds to start swelling, and I am very excited about this development.
Thank you for following along, and stay tuned for more updates! 🌿✨

Likes
68
Share


@Sparkles
Follow
Got bud rot. It was foggy and raining second last week before chop….and not gonna lie, prolly cuz it was sitting under the carbon filter. I haven’t changed or washed the pre-filter in a year, just a light tap and I can see dust flying everywhere.
Prolly tossed 1/3lb into garbage. Harvested prolly 1/2lb of tops and mids. And threw all the larf into the freezer for bubble hash.
Will update in a few weeks after cure.
This was a fun run. Mars Hydro for the win!


Likes
2
Share


@CannaIGrow
Follow
Trop Cherry #8 x BeeJayz hasn’t been topped, I transplanted the girls this week from a 1 gallon pot to a 3 gallon pot. Trop Cherry was in a plastic pot but now in a fabric pot. Plants seem to be growing well.
Likes
9
Share


@Lazuli
Follow
She starts to drink a lot now , final week stretch then she goes full flower

Processing
Likes
70
Share


@CBD_Sweden
Follow
Illuminauto 21 - Sour Crinkle (Grape Crinkle x Sour Crack)
Two of our fastest and frostiest varieties collide to make a sweet and sour delight!
Expect super frosty, compact nugs that won't be a toke for novices.
Destined to be a great strain for extraction work too!
Plant size - Small - Medium
Cycle time - 60-65 days from sprout
Indica/Sativa - 80/20
Frost level - Extra Ridiculous
https://www.mephistogenetics.com/product-page/illuminauto-21-sour-crinkle
--------------------------------------------------------------------------------------------------------
2017-10-18. Week 8 day 56 from germination. She is 33 cm high and really frosty and have nice buds. Maxed the nutes and hope she will grow a little more in the buds.
Added video and pics.
Its getting close to harvest i think.

Likes
2
Share

@Hidden
Follow
:
- Day 1 week 5: just checking how lst is doing, they will be ok
- Day 2 week 5: not completely dry to water so I’ll wait for day 3 of week. Did lst to make sure all branches receive as much ligth as possible
- Day 3 week 5: watered them with 4ml/L calmag and 2ml/L bio grow ph 6,5 tap water trough activated carbon filter. RHC#2 broke one of the branches, I had to tape it. Not to be worried, she’ll recover from that. RHC#3 is very slow compared to the others.
- Day 4 week 5: defoliation so sun enters better


Likes
11
Share
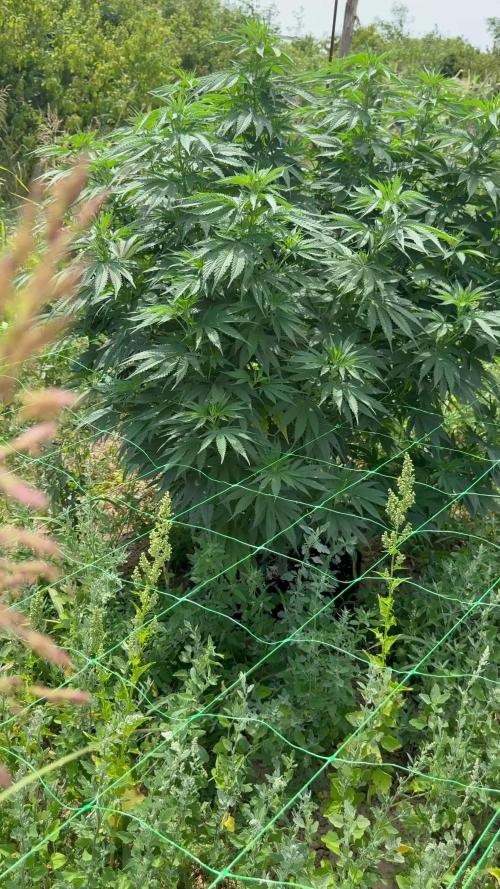

@Radagast_
Follow
26.07.
Wedding Cake 1# Day 92#
Wedding Cake 2# Day 86#
Wedding has not grown much again this week, but it is still spreading abnormally, the trunk and branches are getting sickly thick, a huge difference from the last update... I don't think it will go much higher by the time it stretches, which would be ideal.
Today it started to rain and it will rain for the next 4-5 days, while there will be storms for 2-3 days, and it will cool down a lot and the next 10 days will be much better weather... today I added another layer of netting to this row and pulled them through, in a few days I will add the third and let them grow through it.
I forgot to take a picture of the second one, it will be in the next update..everything is the same with her, constantly hungry and thirsty, from the next feeding I'm going to force her with food, so let's see how much she eats because this is unreal lol
Stay High and Keep Growing!!!

Likes
6
Share


@Beanz2Budz
Follow
Well time for the chop, I'm not waiting any longer! 10 weeks on a "fast" "ruderelis" cross my a@$! None the less she smells amazing, thick strawberry old school hash at the moment. The back couple of phenos could have done another week easy!! Trimmers at the ready boys and girls, results coming soon!!!

Likes
14
Share


@Terpyboyz
Follow
So this grow came to a finshed but I had a. Few issues that’s held me up from finishing up the diary, but in due time I will reupload it all in order soon. But over all I will also update with a final weigh in of each strain produced so stay tuned 🤙🏻🔥


Likes
7
Share


@Treesus01
Follow
Used too much bloom nutes and some top leaves were starting to yellow so I flushed and have Been gentle since
Few days later it was t from nutrients it could actually use a little more the lights I have were putting 1700-1800 ppfd on top canopy and was cooking my leaves I lowered the plant so it would get 1200 ppfd on top and it’s back to normal

Likes
69
Share


@Reyden
Follow
Che dire, queste 3 ragazze di Seeds Mafia sono alla terza settimana di fioritura, ho slittato di qualche giorno perché non sto benissimo con i polmoni, non sono riuscito a stare dietro come volevo ma alla fine meglio così, siamo circa a 1650 ec e ph 6.7, Original Skunk sembra avere delle macchie colore ruggine sulle vecchie foglie a ventaglio… sembrerebbe un eccesso di ferro? Sembra strano, nel complesso ho aumentato ricircolo di aria e alzato il ph di qualche punto..andiamo avanti così 🌀😁💚🔆😈🎬🕷️

Likes
56
Share


@Island
Follow
Week 8 -
Dead line is coming, starting week 8 of flowering.
The routine is maintained, feeding only with water.
The pistils take on an orange color.
I think Gorilla Girl will pass 10 weeks of flowering.
Likes
22
Share


@wheedtobeus420
Follow
Day 34 she’s looking bushy and beautiful. I am so happy she is stoked on life. One of my favorite strains. Always fire. She’s getting huge I can’t wait to see how heavy she is going to be. Green and leafy may defoliate her sooner then later to get some good light penetration.
Likes
6
Share


@Elcoquigrow
Follow
Primera vez cultivando clones, me fue mejor de lo que esperaba gracias a una buena iluminación, excelentes fertilizantes y un poco de experiencia que vamos adquiriendo con cada cosecha ✌️🏾