Likes
Comments
Share
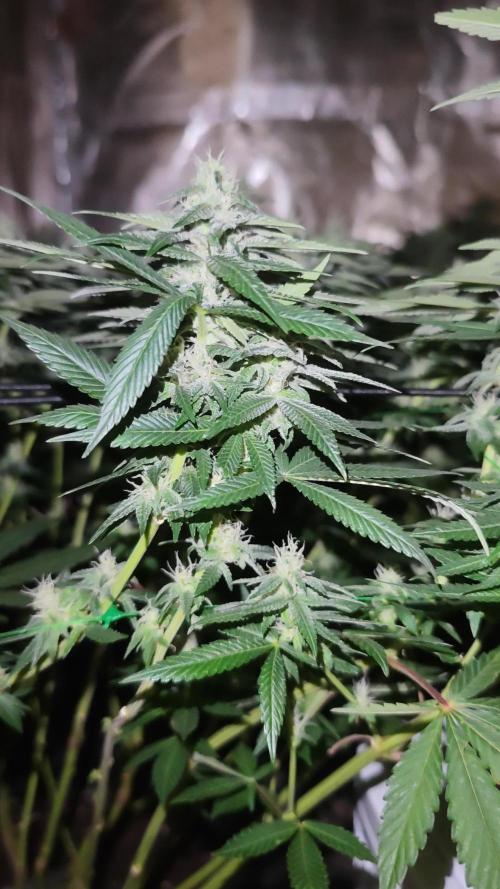
Opening 4th week blooming!! Since I levelled the EC, they are going so smoothly. Live and learning! Once they ate like a monster last time, I decided to increase 10% of the schedule, due last watering it was around 2.7. So I'll work with EC between 3.5 and 4.0 a they are consuming around 2.5-3.0 by 3 days. 
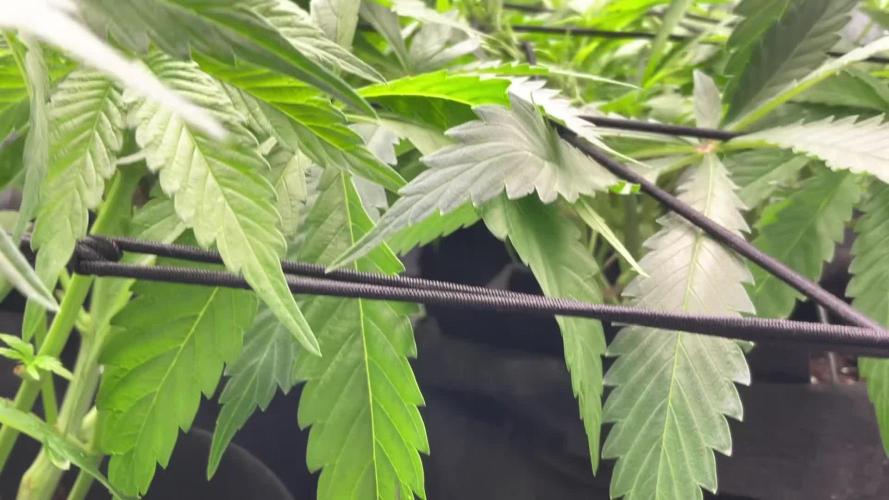
Removed some specific leafs covering other buds. Even didn't consider as a defoliation. Day 50 - 23/05/2025 🌞 ~900ppfd 🌡️~28°C ⏫💧~55% ⏫📏 45cm distância Mango Cream Watered with 3,5L RO water with 10+10ml Athena Bloom B+A + 8ml of Athena PK + 5ml of Athena CaMg + 5ml of Athena Cleanse EC 3.0 PH 6.0 EC Run Off 3.5 Strawberry Cola 1 Watered with 3,3L RO water with 10+10ml Athena Bloom B+A + 8ml of Athena PK + 5ml of Athena CaMg + 5ml of Athena Cleanse EC 3.2 PH 6.0 EC Run Off 4.6 Strawberry Cola 2 Watered with 3L RO water with 8+8ml Athena Bloom B+A + 8ml of Athena PK + 5ml of Athena CaMg + 5ml of Athena Cleanse EC 3.0 PH 6.0 EC Rum Off 3.7 Day 52 - 25/05/2025 Checking their trichomes, they started to become amber. So I'm supposing that we have more 2~3 weeks ahead. Their bulking phase are going so well and I'm starting to be anxious to harvest them. Day 53 - 26/05/2025 They are bulking very well and the interesting is both Strawberry Colas have different terpenes smelling out. The 1st has more gas terpenes and the 2nd has more citric terpenes. The Mango Cream, as base for Strawberry Cola, also have fruity and gas terpenes. The buds are pretty dense. Their structure are pretty tight and thick, with most of lower buds just fetching between the others, forming a unique bud for each stem. I'm pretty happy with their results. I'm expecting to harvest between 150 and 200g dry. Let's see in the next few weeks! 🌞 ~900ppfd 🌡️~27°C 💧~55% 📏 45cm distância Mango Cream 3,5L RO water with 5+5ml Athena Bloom B+A + 11ml of Athena PK + 4ml of Athena CaMg + 5ml of Athena Cleanse EC 2.1 PH 6.0 EC Run Off 3.4 Strawberry Cola 1 3,5L RO water with 5+5ml Athena Bloom B+A + 11ml of Athena PK + 4ml of Athena CaMg + 5ml of Athena Cleanse EC 2.1 PH 6.0 EC Run Off 3.8 Strawberry Cola 2 3,5L RO water with 8+8ml Athena Bloom B+A + 8ml of Athena PK + 4ml of Athena CaMg + 5ml of Athena Cleanse EC 2.3 PH 6.0 EC Run Off 3.5 This week is working in progress and should be updated asap they growth. Cheers!🍁🤞🏽
Likes
31
Share
Semana 10 de floración: Los valores en el drenaje del riego, siguen altos, la EC midió 1650 ppm y el ph me dio 6.1,( bajo el valor del ph pero no tanto las ppm ) Los cogollos se siguen cargando de resina y aumentando en tamaño , el aroma es rico dulce, afrutado. El camino que queda es largo, pero la planta va respondiendo relativamente bien.
Processing
Likes
15
Share
Que hay familia, ya estamos de nuevo, y es que estas crazy cookies estan engordando todavía, las seguimos manteniendo unas semanas más solo con agua , y a ver cómo avanzan estas semanas. Ph controlado 6,5 humedad por debajo del 40% , lo único que no estoy puedo eso controlar es la temperatura que nos subió a 28,5 grados, por lo demás, sobre ruedas. Para los próximos cultivos, cambiaremos la gama de nutrientes , más que nada por probar otras marcas. Un saludo y buenos humos fumetillas.
Likes
5
Share
@Herbie
Follow
Mrs Big B is about to have her sweet stretch to Budville so I hope I've shaped her well enough to take full advantage of the light space. If not a traditional 'Super crop' will solve any future spacing issues. Ha ha. Due to an accident in her younger days she's sort of become a triple stem after topping. I'm hoping I get something cool looking as a result. I trimmed a few lower buds that would soon be overshadowed by the canopy and not worth her effort. Weekly does of Biobizz triple nuits and tap water just to top up and irrigate. Because shes not drinking loads yet. My LST may need refining..... but we learn every mistake right?
Likes
13
Share
Likes
16
Share
@Ensign420
Follow
Introduction - Week 14|07 Summary - Ensign's log, stardate 9437.65, Great week of growing! Wow what a good week! Growth in the main tent has all around been incredible! Submitted my first submission to the Global Grow Cup! Filmed a video of the solo cup container (marked with the ticket/order number) that will be used for the competition. Also had to fill and prove the solo cup holds 2 cups of soil. Now I need to root a clone (for the first time), transplant her into this cup, and submit my 2nd entry before the 30th of this month. As far as my first attempt at cloning, have already begun the rooting process! Managed to take cuttings from 3 out of the 6 phenos in the main tent (the first cutting was also my first time topping). Soaked the cuttings for two days before planting them into Coco Coins. So far everything has gone surprisingly well! The clones are now rooting under the propagation dome with the vents fully closed. Will check for roots soon! At the end of the week, growth was just raging! Was planning on flipping to flower in a week, but decided to begin the first week of flower next week! Thus this is the last week of veg. Plan to flip to 12/12 next Monday! Onwards to next week! [START OF WEEK 14|07] ========================================================== Garlic Budder #1 - WEEK 14|07 - Full Veg Wk5 Garlic Budder #2 - WEEK 14|07 - Full Veg Wk2 Garlic Budder #3 - WEEK 07 - Full Veg Wk5 Garlic Budder #4 - WEEK 06 - Full Veg Wk4 06/03/24 → 06/09/24 This Week's Estimated Goals ---------------------------------------------------------------------------------------------- DLI: ~26 mol/m²/d PPFD: ~400 μmol/m²/s VPD: ~1.0 kPa This Week's Meter Readings & Averages [Lights On: 16:00 - 10:00] ---------------------------------------------------------------------------------------------- DLI: 24.56 mol/m²/d PPFD: 379 μmol/m²/s VPD: 0.91 kPa Soil %: [32.7, 37.6, 37.9, 34.1] ========================================================== Day 01 - Monday - 06/03/24 - Total Days: 098 ----------------------------------- Daily Averages [~23:00] - Temps: 80.7°F [27.1°C] - Humidity: 74.4% - VPD: 0.90 kPa - Soil %: [31, 34, 39, 35] ----------------------------------- - [09:57]: Quick morning check! --- #1 is looking a bit droopy, but almost lights off (at 10:00) so not concerned. --- Nice! Mainly wanted to check on #4 and she is looking great! She’s perked back up and looking good! - [23:08]: Evening check. --- Wow! It’s a jungle in here! --- #1 has gotten too big? Nah!? Keep on growing girl! --- #2 is growing and definitely getting bigger! Growth just looking really weird. --- #3 has continued to get larger and is looking quite uniform in growth! --- #4 is growing and looking perky again! --- Even the original #1 and #2 phenos (in the back) are looking good! --- Wow! #4 is really getting close to the light. - [23:14]: Checked down both fill tubes. --- Both reservoirs were completely dry! - [23:27]: Checked the Ecowitt soil moisture sensor data: --- 30% - [CH01 EB1 - Garlic Budder #1] --- 34% - [CH02 EB2 - Garlic Budder #2] --- 39% - [CH03 GFP - Garlic Budder #3] --- 32% - [CH04 FPT - Garlic Budder #4] - [23:32]: Poured 4 cups of distilled water down EB1’s fill tube. --- Poured 2 cups of distilled water down EB2’s fill tube. - [23:38]: Checked the humidifiers. --- Refilled the 4X4’s humidifier with distilled water. --- Tomorrow, plan to defoliate and start cloning for the first time! --- Going to take multiple cuttings from both #1 and #4 for sure, but still deciding on the rest. --- Getting hyped! Day 02 - Tuesday - 06/04/24 - Total Days: 099 ----------------------------------- Daily Averages [~23:00] - Temps: 81.4°F [27.4°C] - Humidity: 74.3% - VPD: 0.93 kPa - Soil %: [29, 35, 38, 32] ----------------------------------- - [11:59]: Time to film the first entry for the Global Grow Cup! --- Going to be using BuildASoil 3.0 potting soil. --- Filming the video using a stand and my phone. --- This video is mainly to establish the container that the plant will be grown in. Also to prove that the container is a 16oz container and that it can hold 2 cups of soil. --- The ticket (order) number also had to be written on the cup. - [12:36]: Done! --- The video had to be done in one continuous shot with no edits (my original submission does not have the logo). --- There was also a photo that needed to be shot which shows the cup filled with 2 cups of soil (just like the video, the original image submission did not have the logo). --- I think I did everything correctly, but also sent an email for verification of submission and validation. --- Getting hyped! --- [*smokes a bowl] --- Going to defoliate today along with for the first-time, going to take cuttings for clones! --- After a bit of online research, decided to split the cloning process into two days. --- Today going to take cuttings and will soak them in a solution of aloe for 24hrs. Afterwards will change the water out and use straight distilled water. --- Then in a couple days, plan to transplant into coco plugs (Coco Coins) for rooting. --- For optimal results, also be using a rooting hormone (Clonex). --- Well.. Here goes nothing! - [17:01]: Evening check. --- Wow! #1 is looking huge! Her main top is stretching above the lower canopy which is continuing to bush out. --- #2 is growing along. Growth is gnarly and a bit droopy, but she’s getting taller! --- #3 is looking great! Still a bit small, but she is continuing to get larger. --- #4 looks like she needs a watering. --- Both plants in the back are also looking surprisingly great as well! - [17:05]: Checked down both fill tubes. --- Both reservoirs were completely dry! --- As far as today's defoliation, going to leave #2 and #3 alone and will focus my defoliation and cloning on the rest of the plants. --- This will be my first attempt at cloning, also going to try topping for the first time today. --- No pressure Ensign. What can possibly go wrong right? - [17:27]: Time to start the cloning and defoliation process! --- Filled a measuring cup with 3 cups of distilled water. ------ Added 3/4tsp of Horticultural Aloe ------ Added 1 more cup of distilled water --- Mixed the solution and poured an even amount into three separate solo cups. --- Made sure to mark two of the cups (#1 and #4). The unmarked one will be for any other clones from amongst the 6 phenos (if any at all). - [17:43]: Time to top and defoliate #1! --- Using a pair of brand new trimmers (AC Infinity), --- Gently cut the main stalk to even out the canopy. --- Then trimmed and cleaned most of the nodes leaving the top node or two. --- Also trimmed the leaf fingers a bit before placing the top cutting into the cup of aloe solution. --- Now for the rest of the cuttings! --- [~45 minutes later] - [18:32]: Managed to finish defoliating and cutting the rest of the clones. --- Took two more lower cuttings from #1 (3 clones total). --- Took 3 lower cuttings from #4 --- While defoliating, decided to try and clone the original #2 pheno as well. Took 4 small cuttings. --- Similar to the top cutting, trimmed and cleaned each lower node for each cutting before placing them into the cups. --- Before finishing up the 2nd cutting, I noticed the first cutting (the top cut that was also trimmed) was drooping. --- So I did not trim and the leaf fingers for the other cuttings. --- In total there were 10 cuttings taken for potential clones. --- My main focus was to take cuttings and to clean up all the lower growth from both #1 and #4. --- Defoliated and cleaned up the back original phenos as well (also trimmed back the cover crop). - [18:35]: Temporarily placed the cuttings onto the floor of the 4x4 tent. --- Took the trimmings (about 3 cups) and spread them onto the top mulch of #1 and #2. --- Time to set the environmental controls for the 3x3 veg tent. - [18:43]: Within the AC Infinity App, --- For the Veg Tent [3x3] controller, --- Adjusted the 'Vegetative [18/6]' Schedule for the grow light. ------ Set the Mode to ‘On Mode’ ------ Set the START/END times to 04:00PM/10:00AM ------ Set the MAX to 1 --- The IonBoard S33 is now utilizing around 60.8W (at intensity 1 out of 10). --- Adjusted the 'Vegetative [18/6]' Schedule for the exhaust fan. ------ Increased the Humidity’s HIGH trigger value from 81% to 87% --- Adjusted the 'Vegetative [18/6]' Schedule for the humidifier. ------ Decreased the VPD target value from 1.5kPa to 0.8kPa - [18:52]: Moved the cuttings into the 3x3 veg tent. --- It begins! I think. --- Going to let these cutting drink some aloe for a day before switching to straight distilled water. --- Hmm. Could be the white floor of the 3x3 veg tent, but have noticed the S33 has a whiter spectrum whereas the FC-6500 seems to be warmer in color. --- Anyways, - [18:58]: Poured 4 cups of distilled water down EB1’s fill tube. --- Poured 2 cups of distilled water down EB2’s fill tube. - [19:06]: Filled a pump sprayer with 5 cups of distilled water. --- Focused mainly on the straw mulch of #4. --- But also misted the straw mulch for the rest of the plants a bit. - [19:12]: Checked the humidifiers. --- Refilled the humidifiers with distilled water. - [19:44]: Going to be using Clonex rooting gel before planting the cuttings into Coco Coins (pre-soaked with microbes and aloe). But before that begins, going to transfer the Clonex gel into a squeeze bottle. --- Gently peeled back the seal on the original Clonex bottle. Just enough make a tiny opening, --- Then slowly and carefully poured the gel into an empty squeeze bottle. --- Also removed the sticker from the original bottle and placed it onto the new one. - [19:54]: Perfect! --- Instead of applying the gel to the cutting, going to be applying the gel to the Coco Coin. --- This squeeze bottle will make applying the gel a lot easier. --- Will take PPFD readings tomorrow. --- Also will change out the aloe solution to distilled water. --- I really hope I didn’t screw things up before they could even begin. --- Don’t die on me ladies! --- Please. Day 03 - Wednesday - 06/05/24 - Total Days: 100 ----------------------------------- Daily Averages [~23:00] - Temps: 81.9°F [27.7°C] - Humidity: 75.5% - VPD: 0.90 kPa - Soil %: [29, 36, 38, 36] ----------------------------------- - [09:40]: Quick morning check! --- #1 is looking a bit droopy, but looking okay. Topping is a high stress technique so going to take some time to recover. Don’t plan on flipping the main 4x4 tent to flower for a good week or so which should be enough time. --- #4 looks great! The defoliation seems to have no effect on growth. Nice! - [09:41]: Also quickly checked on the 3x3 veg tent, --- Nice! The cuttings are looking great! --- No yellowing and they all seemed to have turned up towards the light. --- So far so good! - [22:53]: Evening check. --- #1 is continuing to dominate this grow! She has spread wide and looking incredible! --- #2 is looking gnarly, but getting there. --- #3 is getting larger! But still a runt. By far, her leaves are the darkest of the bunch, but she is still growing! --- #4 looks happy and growing along beautifully! Wow! - [22:55]: Checked down both fill tubes. --- Both reservoirs were completely dry! - [22:59]: Poured 5 cups of distilled water down EB1’s fill tube. --- Poured 2 cups of distilled water down EB2’s fill tube. - [23:05]: Checked on the 3x3 veg tent. --- Ooo yea! The cuttings are still green! Nice! - [23:07]: Took PPFD readings. --- The cuttings were around 121 μmol/m²/s which gives a DLI of 7.84 mol/m²/d --- Nice! These levels are on the lower range for seedlings (~100-300), perfect! I think. - [23:14]: Swapped the aloe water out to straight distilled water. --- Going to let these cuttings soak for one more day before planting. --- Please don’t die girls! - [23:15]: Checked the humidifiers. --- Refilled the humidifiers with distilled water. --- Ooo yea! --- Tomorrow is the big rooting day! Day 04 - Thursday - 06/06/24 - Total Days: 101 ----------------------------------- Daily Averages [~23:00] - Temps: 81.9°F [27.7°C] - Humidity: 75.2% - VPD: 0.91 kPa - Soil %: [32, 38, 38, 34] ----------------------------------- - [16:20]: Evening check. --- #1 is a bit droopy, but growth is looking green and healthy. --- #2 is looking bigger! She’s also looking sort of droopy. --- #3 is growing along nicely! Looking good girl! --- #4 is looking great! A bit droopy but plan to water today. - [16:23]: Checked down both fill tubes. --- EB1's reservoir still has some water. --- EB2's reservoir was completely dry! - [16:23]: Checked the Ecowitt soil moisture sensor data: --- 28% - [CH01 EB1 - Garlic Budder #1] --- 36% - [CH02 EB2 - Garlic Budder #2] --- 37% - [CH03 GFP - Garlic Budder #3] --- 30% - [CH04 FPT - Garlic Budder #4] - [16:30]: Using a pump sprayer, --- Misted the straw mulch of #4 with 6 cups of distilled water. --- Focused mainly on the straw mulch. --- Also misted the straw mulch of #3 (in the grassroots fabric pot) a bit. - [16:43]: Poured 5 cups of distilled water down EB1’s fill tube. --- Poured 3 cups of distilled water down EB2’s fill tube. - [16:52]: Checked the Ecowitt soil moisture sensor data: --- 56% - [CH01 EB1 - Garlic Budder #1] --- 44% - [CH02 EB2 - Garlic Budder #2] --- 40% - [CH03 GFP - Garlic Budder #3] --- 45% - [CH04 FPT - Garlic Budder #4] - [17:01]: Took general PPFD readings. --- #1 was around 379 μmol/m²/s which gives a DLI of 24.56 mol/m²/d --- #2 was around 333 μmol/m²/s which gives a DLI of 21.58 mol/m²/d --- #3 was around 293 μmol/m²/s which gives a DLI of 18.99 mol/m²/d --- #4 was around 378 μmol/m²/s which gives a DLI of 24.49 mol/m²/d - [17:09]: Took the weekly height and light distance measurements. --- #1 was about 21" tall. --- #2 was about 13.5" tall. --- #3 was about 9.5" tall. --- #4 was about 19.25" tall. --- Hmm.. - [17:19]: Adjusted the right oscillating fan a bit. --- Re-angled the CloudRay S6 oscillating fan upwards. Been noticing that the air has been hitting the tops of the plants so easing off a bit (#1 is still getting hit, but she’s huge so not too worried). - [17:23]: Back to the measurements! --- #1 was about 9.5" away from the grow light. --- #2 was about 17" away from the grow light. --- #3 was about 17.5" away from the grow light. --- #4 was about 11.5" away from the grow light. - [17:46]: Checked on the 3x3 veg tent. --- Cuttings are still green! They do look a bit droopy but no signs of yellowing. --- Okay! - [17:55]: Time to begin the rooting process! --- For my first attempt at rooting, going to be using Coco Coins pre-soaked in saponins, microbes and aloe. --- To further help with rooting, going to also be using Clonex rooting gel. --- Filled a measuring cup with 4 cups of distilled water. ------ Added half of 1/64tsp of Quillaja Saponaria Extract [60] ------ Added 1/16tsp of Horticultural Aloe ------ Added 1/8tsp of Mycrobe Complete --- Mixed the solution thoroughly. --- Time for the Coco Coins! --- 10 cuttings means 10 Coco Coins. - [18:09]: Dropped 10 Coco Coins into the measuring cup. --- The coins immediately started to expand. --- A bit too much.. Oops! --- Poured the solution and Coco Coins into a pitcher. --- Added 2 cups of distilled water to the solution (now at 6 cups). --- Great! The coins are pretty much fully expanded, but going to wait a bit longer to fully saturate each coin. --- [~20-30 minutes later] - [18:42]: Great! --- Took the seedling and flood tray from the AC Infinity propagation dome and placed all 10 Coco Coins into the slots. --- Gave each Coco Coin a quick shake to remove excess solution. The coins were not dripping with solution but still pretty saturated. --- Arranged them into 3 groups with the cuttings in mind. --- Also tried to keep the pre-made holes intact. --- Time to inoculate the Coco Coins! - [18:54]: Using a squeeze bottle, --- While keeping the nozzle from making contact with the coco, gently filled each pre-made hole with Clonex rooting gel. Just enough gel to fully cover the hole of each coco coin. - [19:00]: Time to plant the cuttings! --- Gave each cup a misting of distilled water. Focused on wetting the top growth with water. --- Okay! --- To avoid mixing cuttings up. - [19:01]: Starting with the original #2 pheno cup, --- For each cutting, --- Using a pair of clean trimmers, made a final 45° cut about 1/2" from a bottom node. --- Then stripped away and scared the protective membrane below the node before planting. --- Made sure the node was about 1/2" below the surface of the coco. --- To help with planting, while inserting each cutting, gave the Coco Coin a gentle squeeze to loosen the coco. This also helped to ensure the coco and gel was in good contact with the cutting. --- Once the cutting was planted into the Coco Coin, made sure to place back in the same spot (made sure to keep the cuttings in their groupings). --- Once a cup was complete, made sure to keep the label with the group. --- Re-misted the top growth as needed to keep it wet. --- Also wiped the trimmers with isopropyl alcohol in between cuttings (plan to use 10% bleach solution for next time). --- Repeated this process until all 10 cuttings were cut, planted, and in the tray. --- The coco coins fit perfectly into the tray and don’t reach the bottom. Nice! --- The bottom air gap is important. --- Poured a bit of distilled water through one of the empty slots into the bottom of the tray. Just enough to fill the bottom of the tray, but not enough to reach any of the Coco Coins (~1/4cup). - [19:35]: Placed the propagation tray with cuttings into the 3x3 veg tent. --- Placed the first layer of the propagation dome on before giving the sides a misting of distilled water. --- Also sprayed the top of the propagation dome before covering the cuttings. --- Vents are all fully closed. - [19:40]: Placed the bar lights onto the top of the dome before configuring the controller. ------ Set the START/END times to 04:00PM/10:00AM ------ Set the bar light’s intensity to 2 (out of 10). --- Also made sure the propagation light controller’s time was in sync with the Controller 69 Pro. - [19:47]: Took PPFD readings. --- The cuttings were around 136 μmol/m²/s which gives a DLI of 8.81 mol/m²/d --- The PPFD levels are similar to the floor. --- Perfect! --- Going leave the IonBoard S33 on during this rooting process. --- Will check back tomorrow to cycle the air under the dome. - [19:56]: Checked the humidifiers. --- Refilled the humidifiers with distilled water. - [20:17]: Quick night check! --- Ooo yea! Growth is raging and looking perky! --- Mainly checked on #1 and #4 which were looking incredible! --- Keep on growing ladies! Day 05 - Friday - 06/07/24 - Total Days: 102 ----------------------------------- Daily Averages [~23:00] - Temps: 82.7°F [28.2°C] - Humidity: 76.2% - VPD: 0.89 kPa - Soil %: [37, 40, 38, 35] ----------------------------------- - [10:03]: Decided to increase the ambient temp in the 3x3 veg tent. --- Within the AC Infinity App, --- For the Veg Tent [3x3] controller, --- Adjusted the 'Vegetative [18/6]' Schedule for the heater. ------ Increased the Temp target value from 78°F to 82°F --- Hopefully this will help to keep the veg tent at a more consistent temp. - [22:26]: Evening check. --- Ooo yea! The garden is looking incredible! --- #1 is looking perky and just bushing out! Wow! --- #2 is getting big! Growth is weird and leaf fingers are huge! Just going to let her grow. --- #4 is looking happy and growing along like a champ! Nodes are starting branch out and she is turning into a bush! - [10:28]: Checked down both fill tubes. --- Both reservoirs were completely dry! - [22:33]: Poured 5 cups of distilled water down EB1’s fill tube. --- Poured 3 cups of distilled water down EB2’s fill tube. - [22:40]: Checked on the propagation dome (inside the 3x3). --- Ah yea! Looking great ladies! --- Lifted the top of the dome to let some fresh air in for a bit. --- Wow! --- Leaves still look nice and green! --- So far everything looks great! --- Just going to continue on! - [22:53]: Checked the humidifiers. --- Refilled the humidifiers with distilled water. - [11:01]: Decided to adjust the humidifier for the 3x3. --- Within the AC Infinity App, --- For the Veg Tent [3x3] controller, --- Adjusted the 'Vegetative [18/6]' Schedule for the humidifier. ------ Increased the VPD target value from 0.8kPa to 1.5kPa --- The higher VPD level will essentially turn the humidifier off. --- I won’t be needing the humidifier for a good week so might as well save the water. Day 06 - Saturday - 06/08/24 - Total Days: 103 ----------------------------------- Daily Averages [~23:00] - Temps: 81.6°F [27.6°C] - Humidity: 74.9% - VPD: 0.91 kPa - Soil %: [35, 40, 37, 31] ----------------------------------- - [07:40]: Quick morning check! --- #1 and #4 are looking perky and happy! --- Also checked on the propagation dome, --- All cutting still look green! Hyped! - [20:02]: Evening check. --- Wow the garden is raging with growth! --- #1 has blown up! She has clearly recovered and growth is ramping up again! --- #2 is stretching upwards! --- #3 is now the smallest of the 4, but still getting larger! --- #4 is looking incredible! Wow! Growth looks perky and happy! - [20:05]: Checked down both fill tubes. --- Both reservoirs were completely dry! - [20:10]: Poured 6 cups of distilled water down EB1’s fill tube. --- Poured 2 cups of distilled water down EB2’s fill tube. - [20:16]: Checked the Ecowitt soil moisture sensor data: --- 35% - [CH01 EB1 - Garlic Budder #1] --- 40% - [CH02 EB2 - Garlic Budder #2] --- 36% - [CH03 GFP - Garlic Budder #3] --- 27% - [CH04 FPT - Garlic Budder #4] - [20:19]: Using a pump sprayer, --- Misted the straw mulch of #4 with 5 cups of distilled water. --- Focused mainly on the straw mulch. --- Also misted the mulch of #3 a bit (in the fabric pot). - [20:27]: Checked propagation dome (in the 3x3), --- To cycle the air under the dome, lifted the top off for a bit. --- Ooo yea! Everything is still green and looking great! --- Keep on rooting ladies! --- Oops! - [21:45]: Checked the humidifiers. --- Refilled the humidifiers with distilled water. Day 07 - Sunday - 06/09/24 - Total Days: 104 ----------------------------------- Daily Averages [~23:00] - Temps: 81.5°F [27.5°C] - Humidity: 74.8% - VPD: 0.91 kPa - Soil %: [36, 40, 37, 36] ----------------------------------- - [08:18]: Quick morning check! --- Nice! The main tent is looking great! #1 and #4 are both raging with growth! --- Checked on the propagation dome (inside the 3x3) and the clones are still looking green! --- Wow! Everything is going almost too well! Just keep on growing! - [19:08]: Evening check. --- Garden is just exploding with growth! Seems everyone has fully recovered from the defoliation and topping! --- Wow #1 is bushed out and looking incredible! --- #2 is growing really starting to get large! Growth still is funky, but stoked none-the-less. --- #3 is starting to fill in the pot! Getting larger! --- Wow! #4 is getting taller and looks healthy and green! - [19:12]: Checked down both fill tubes. --- Both reservoirs were completely dry! --- Wow the canopy is really starting to get taller and closer to the light. May need to raise it up soon. --- Absolutely surprised how low the light levels have been throughout this entire cycle. Barely moved the light and have not increased the intensity past 2 (out of 10). Less is really more. --- Anyways! - [19:18]: Checked the Ecowitt soil moisture sensor data: --- 36% - [CH01 EB1 - Garlic Budder #1] --- 41% - [CH02 EB2 - Garlic Budder #2] --- 37% - [CH03 GFP - Garlic Budder #3] --- 34% - [CH04 FPT - Garlic Budder #4] - [19:19]: Poured 6 cups of distilled water down EB1’s fill tube. --- Poured 3 cups of distilled water down EB2’s fill tube. - [19:24]: Checked propagation dome (in the 3x3), --- To refresh the air, lifted the top off for a bit. --- Sweet! Still green! Wow! --- Using a spray bottle, misted the top growth with distilled water. - [20:35]: Checked the humidifiers. --- Refilled the humidifiers with distilled water. --- Wow what a week! --- Growth has been just insane in the 4x4 tent! All plants have fully recovered and have just exploded with growth. --- I think it’s time to flip to flower! --- Also, I’m absolutely baffled about how well the cloning process has been going. --- So far no issues! --- Not complaining, but just surprised. Keep on growing ladies! --- If all goes well, should have fully rooted clones soon ready for transplanting (into solo cups of course). --- Absolutely hyped for next week! --- Maximum warp Ensign, Engage! [END OF WEEK 14|07]
Likes
13
Share
Hi Gromie's, well it's the end of another problem free week! Week 9 going into week 10 of veg! I don't usually veg for this long but I'm just trying to get the timing right for perpetual harvest. Plants in flowering tent were harvested & drying now for 5 days, so these girls will be transferred to the flowering tent in the next few days for the start of flowering, I've allready planted new seeds for the following grow, so just trying to get on top of the timing for everything related with perpetual growing. Thinking of setting up a 4x2 tent with a 4 inch extraction fan & filter for drying, so I can cut out around a week, that way as soon as I've harvested & cleaned the tent I can transfer plants from veg instead of having to dry in the flowering tent. Have developed really strong & thick structure's from the H.S.T & L.S.T training. Plants are nice & healthy. Performed 1 last defoliation before they go to flower as they get very bushy quickly.
Likes
9
Share
@Luv2Grow
Follow
Day 64 - The start of week 10 and not much longer before chop. Looking like 2 weeks tops but I’m gonna keep an eye on the trichs and pistils and when they say she’s ready, she will get the chop. Day 65 - Nothing much new today, she’s doing her thing and fattening up. Still thinking about 7-10 days till harvest so will run foxfarm sledgehammer through her next watering and nothing but water till the end. Day 66 - Gave the girl a gallon of water and some sledgehammer today to try and push the nutes out. I’m thinking she’ll probably be getting chopped next weekend or a few days after that. Just want her to fatten up a bit more and get more amber in the trichs. Day 67 - Nothing new today, just letting her suck all the nutes left in the soil and then suck her leaves dry. Hopefully it’s this weekend sometime but I’ll let her go until she’s ready. Day 68 - Checking trichs daily and she’s not require ready yet. A couple amber in there with a few still clear and the rest milky. Once she dries, I will give her another gallon of water and sledgehammer and let her go until she’s done. Day 69 - Coming to the end of week 10 and going to give her one more flush with the sledgehammer tomorrow and will just let her dry up until I decide to harvest. Really can be any day but will probably wait until the end of the weekend. Day 70 - The end of week 10 and gave her a final flush with the sledgehammer tonight. Will let her ride it out without anymore water until it’s time to harvest. Trichs are all milky with a few amber so she’s getting close.
Likes
149
Share
Hi all the happy people here in GrowDiaries. This is my second cultivation ever and it will be fun to try a bigger space than my closet grow. First, I'm just going to say I'm done with the construction of my new growroom. I put some pictures on the construction here in week one. The room is 2.14 meters by 1.7 meters and has a ceiling height of 2 meters. It provides a floor area of ​​3.6 square meters. I use a 54 Watt Lightwawe T5 for germination and 2 Pcs 400 Watt HPS lamps. I have a channel fan that replaces the room air about 40 times an hour to get a comfortable theme in the room, the air enters a fresh air intake from the outside. The air is purified through a carbon filter to then leave the room to the rest of the basement. Then I use that heat to heat the rest of the basement. I will use 8 pcs 15 liter Autopots to grow with and a 100 liter water tank that supplies the pots of water and nutrition. I will grow completely organically in soil and will watercure my buds to get the best possible medicine for me. But there are no cultivation rooms to be displayed here, so I continue with what is most important. Today I have put my seeds in my moisture dome and hope the seeds have germinated within a few days. I am very excited to see how the new growroom will work and how this Blue cheese Auto from Royal queen seeds will turn out. Blue Cheese automatic cannabis seeds are a cross of Blueberry Automatic and Cheese Automatic that has been perfected over five years of breeding and careful selection. The result is a feminized, autoflowering strain with superior yield, flavor, and effects to either of its distinguished parent strains. THC: 16% CBD: Low Yield Indoor : 325 - 375 gr/m2 Yield Outdoor: 60 - 110 gr/plant Height Indoor: 40 - 70 cm Height Outdoor: 60 - 110 cm Flowering: 7 - 8 weeks Harvest month: 9-10 weeks after planting Genetic Background: Blueberry x Cheese x Ruderalis Type: Sa 35% In 40% Ru 25% Effect: Cerebral and uplifting Climate: Mild .............................................................................................................................................................................................................................................................................................................................................. 2017-09-11. Kl 12.00. Week 4 starts. I have cleaned the whole room for the new week and gave the girls water and nutes. Added videos and pics. Girl nr 1 is 27 cm high and girl nr 2 is 50 cm high and nr 3 is 15 cm high. ------------------------------------------------------------------------------- 2017-09-12. Kl 10.00. New pics and video. Nr 2 has grown 5 cm in 23 h, its incredible. --------------------------------------------------------------------------------------------- 2017-09-13. Kl 22.00. Everything is great in the garden right now. Updated with new video. ---------------------------------------------------------------------------------------------------------------------------- 2017-09-15. KL 10.00. New pics and videos. Girl Nr 1 is 33 cm high, Nr2 is 70 cm and girl Nr is 22 cm. Nr 2 has grown 20 cm the last 3 days. Look at the stem of girl Nr 2 😍 The girls are starting to smell a lot now. Its a intense smell in the grow room. ----------------------------------------------------------------------------------------------------------------------------------------- 2017-09-16. Kl 10.00. The girls grow like crazy, i have to defoliate about 20 leafs a day. Nr 2 is 76 cm tall now, i wonder when she slows down?. Added 2 liters of water and nutes this morning and 2 new videos. ------------------------------------------------------------------------------------------------------------------------------------------------------------------ 2017-09-17. Made a time laps of the girls first 28 days.
Likes
6
Share
7.2.25 9th week of flower started on 6.30. Buds smelling nice and pungent! Almost done another week and it’s harvest! Trichomes are almost all milky with some still clear! Can’t wait to finish this one up! Thanks for looking at my mini plants have a great week! 🏼
Likes
Comments
Share
@BlumenBot
Follow
I'll be doing a cleanup sometime this week, the canopy is nearly as wide as the pot, I'm hoping to flip to flower in the next week or 2
Likes
21
Share
SATIVA DREAM by KANNABIA WEEK #17 Overall Week #3 Flower This week she's looking good starting to flower and dealing with the elements she's definitely got that sativa build!! Stay Growing!! Kannabia.com SATIVA DREAM
Likes
4
Share
@twenty20mendocino Ateam R&D Update! Let’s Go Week 3 , day 17 of Veg!! Another great week it’s been , the babies are building a looking super healthy ! Sometime this week we will eventually top em a few times so you don’t want to miss next week’s update ! Y’all have an amazing productive week , peace love a positive vibes to all y’all Cheers an Enjoy 😶‍🌫️💨💨💨💨🤙🏻 Let’s Go A-Team!!!
Likes
20
Share
@OGJesus
Follow
Just finishing up the second week of budding here. The girls have grown a bit over the last few weeks and I've neglected to measure the heights and update them, the height in this diary is of the tallest of the 4. I'm really starting to see some bud development now, starting to really get excited about the results of this grow!
Likes
26
Share
Che dire ragazzi... Odori fortissimi nell'aria, come vedete gli insetti stanno a pranzo e cena sulle mie piccole.. Pazienza! Non dovrebbe mancare tanto, penso 2 settimane al raccolto, sono riuscito a farcele vedere di giorno finalmente è sono contento di poterle condividere con tutti voi 🙏🏽 aggiunte un po di noci in più, anche se si vede un po di fox talking, il resto perfetto.
Likes
11
Share
Nous sommes à la 7ème de fruits gros colas principal, tête des tiges secondaire moyennement gros. Je n'envoie plus de nut irrigation a l'eau uniquement.
Likes
16
Share
Week 7, one more week and i will harvest this precious girls, they dont require lot of attention and even slightly less nutrients would have done the trick! I still have 1 of these ladies in veg so i now what to expect and what to do! Great strain, very generous with very little attention, the perfect strain, a very nice sweet smell, it reminds me of candy very sweet, its going to be delicious for sure!