
Likes
Comments
Share


@Targona
Follow
Targona: 57 days since my little girl sprouted from seeds🌱
Eighth week of growing my Apple Fritter Automatic 🍎🍏🍎
Nutrients:
As I mentioned last time, I switched to mostly organic nutrients from Plagron and Biobizz💓 -
Plagron Alga Bloom - is a complete fertilizer designed exclusively for the flowering phase. It contains all the important substances that the plant easily absorbs 🌸🌾
----------------------------------------------------------------------------------------------------------------
Plagron Sugar Royal - Sugar Royal is a supporting enzymatic fertilizer designed exclusively for the flowering phase. It contains hormones, enzymes, vitamins and trace elements necessary for proper flower development🍭🍭🍭
----------------------------------------------------------------------------------------------------------------
Plagron Green Sensation - Green Sensation is a professional flower stimulator and activator. It contains all the necessary ingredients to support flowering and also the formation of sugars, and thus the overall yield 🌊🌿
--------------------------------------------------------------------------------------------------------------------------------------------
JUNGLE X Environ is a highly effective complex preparation for stimulating flower formation. 🌸🏵️
---------------------------------------------------------------- -------------------------------------------------
BioBizz Bio pH - is an organic pH regulator. An aqueous solution of citric acid, which is naturally found in citrus fruits 🍋🍋 - I didn't use it this time, because the pH of the dressing was 6.5 +
---------------------------------------------------------------- -------------------------------------------------
BioBizz Calmag - 100% vegan and certified product Calmag is made from calcium carbonate and magnesium sulfate, supplemented with humic acid. Unlike other products, the all-natural Biobizz CalMag does not contain any nitric acid and therefore does not affect the NPK values or EC of the solution 💩💩
------------------------------------------------------------------------------------------------
Terra Aquatica pH test kit - Very reliable, easy to use and inexpensive. The pH Test Kit conveniently replaces expensive pH meters. It includes a wide range from 4.0 to 8.5. 🌈
General:
Apple Fritter Automatic 🍎🍏🍎 - The plant is getting more and more beautiful, its buds are getting thicker, they are really all white, as if they are covered in sticky resin. The stem, leaves and buds have turned a little pink. I wondered if it was a lack of phosphorus, but based on the nutrients I give them and the overall pH, which is 6.5, I assume that this is the classic coloration of the plant during maturation. 🌱🏵️💚Nevertheless, I preferred to add Calmag to the watering yesterday and also feed it with Alga Bloom in case it lacks important elements.
Training:
The plant is very tall. Sometimes I turn it all over so that the light also shines on the side branches on the side of the tent. Otherwise, I don't do any training, I just cut off some excess leaves in the classic way. Plus, this girl doesn't have many leaves, she's a beautiful genetics as usual with strains by Zamnesia 💚🌞🌞
Light: Mars Hydro TS1000
The plants respond effectively and the light is technically very well managed - I try to have 18 cm between the light and the plants, so I move it up regularly 💡💡💡
Thanks for the likes :)
See you soon 😍😍

Likes
18
Share


@Diips
Follow
d.57 - looks alright, had to do some lst and adjustments to level out the height
gave an additional biotab.
move my big fan, below the plant, in an effort to push the moisture upwards and out, which resulted in me being able to raise the lights further up.. my plant is way over the average height of is genetics, thanks to biotabs 🌞.
fastbuds said it would have an average height of 70-100 cm, and ny plant is closing in on the 80 cm and she keeps going ^^. and people say that autoflowers cant be main lined, well i believe this grow proves it.
achieved darker folliage in the bottom, so i believe that we are on the right track. hopefully the deficiency levels out.
day 62/63 gave an additional biotab so we are at 6 total. day 63 i gave 10 ml bio pk with the watering.

Likes
2
Share


@CecilioJardinero
Follow
Doy comienzo al SoG de OG 24K de Bsf 🌱🧐
Hace frío en Santiago de 🇨🇱 pero en cuarentena nada mejor que plantar.
Estas son 12 og 24k en macetas de 3lt de momento aunque serán las 12 macetas de 11 o 7 lt.
Esperando que hagan una buena raíz, las tendremos 4 semanas en 3lt y luego transplante.
Quedo atento a comentarios y sugerencias, es primera vez que tiro 12 en un metro. 🤠😲🤭

Processing
Likes
10
Share


Likes
4
Share


@HighOhioAn
Follow
Rainbow melon has exploded with vibrant green branching. Seems like a new node every day beautiful plant structure going to start low stress training this week.🔥
Likes
9
Share


@JonDin
Follow
it was outdoor growing in soil. used flora trio, koolblum, rippen and floraKleen. I had to harvest 1 weeks early, but it was awesome tree :D I've got about 100g dry. about 300-320 wet.

Likes
3
Share


@MarihuAchA
Follow
Empezamos el lavado de raíces de la Tropicana cookies. Sigo lidiando con la humedad pero voy a cambiar el extractor para el próximo cultivo. En breve haré corte y les adjuntaré fotos de.la.cosecha. cogollos muy grandes. Algo aireados pero púrpuras y muy frutales. Un gran abrazo amigos. Estamos en contacto
Likes
1
Share


@Zanto
Follow
Day 17 of flowering
I applied the last dose of Delta 9. They reacted beautifully.
Hope to see big colas and healthy buds.
Likes
2
Share


@SecretC8keSociety
Follow
Today I finished Wedding Glue Autos.
Now onto London Pound Cake ! Will check back in 2 days to see if tap root show.
Supposedly be 12 seeds but end up with 13.
3 gallons smart pots and 10 -> 2 gallon plastic pots

Likes
11
Share


@Thigh
Follow
Paar Tage schönes Wetter 🙂
Paar Tage schlechtes Wetter 🙃
Willkommen in Deutschland 👨🏽🌾
Bis jetzt läuft alles 😜
Likes
6
Share


@Frosty905budz
Follow
Im so loving this strain !
Smells so goooood!!
Did a last watering with Dense by GP
Im really loving this stuff!! Check my IG account for a giveaway @Frosty905budz
The flushing has begun
Flushing with Flawless finish by Advanced nutrients [email protected]

Likes
3
Share


@Kushizlez
Follow
Day 47-54 (June 7th - June 14th)
(Day 49) Pots are now drying out at a fast pace. I’m watering a solo cup or more everyday depending on the weight of the container.
(Day 50) Jack Herer’s are really starting to show their sporadic structure. The buds are nearly all foxtail. The chunky BAOGC pheno is really fattening up now. It will definitely be the thickest main cola.
(Day 51) My other tent is just about finished now. I will chop that down on the 21st along with whatever is ready in here. TWOG might be the only strain finished by day 60.
(Day 52) All the plants are starting to get deficiencies except for twog and black garlic. TWOG is actually starting to fade out with a weird interveinal dark purple color.
(Day 54) Solid week. All plants look happy and growth is on point. Can’t wait for harvest. One more week!!!


Processing
Likes
4
Share


@GrowSmith
Follow
This week temperature dropped slightly but she continues to grow with a few bud sites as you can see in the video
No need to Waterbury as it’s not that hot and humidity is high during the day

Likes
4
Share

@Webacca
Follow
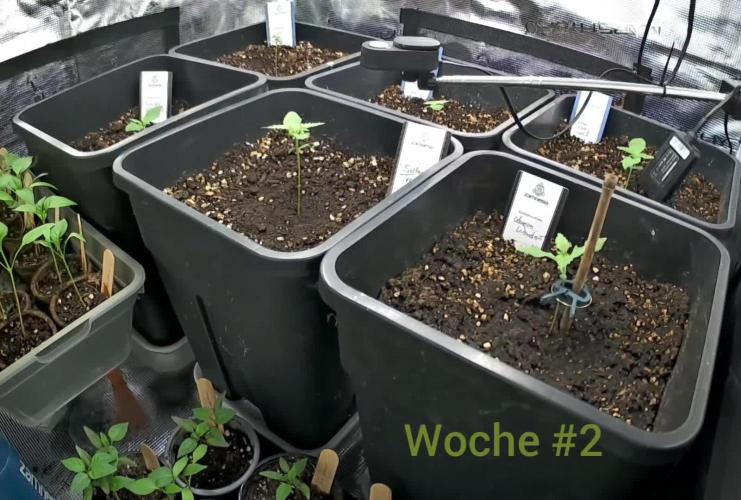
Start in Woche drei.
Mittlerweile sehen die 3 auch aus, wie kleine Canna Ladies.
Keine besonderen Schübe, keine Probleme, alles gut.
Darf gern so weiter gehen.
Beleuchtung erhöht (von 17 auf 20 mol/m²/d DLI bei max. 480 μmol/m2/s PPFD)
Am Ende der Bilder kommt der Zeitraffer für w2.
Uodate: S. Sherbet hat etwas sehr strange aussehende Blätter entwickelt, aber mal abwarten ob sich das rauswächst


Processing
Likes
53
Share


@Skunk_Life85
Follow
Seed starting out strong. Sunk in water on day 2 and cracked on day 3 then went into the starter. I'll get her into a small container w/ #4 soil (USA) once she anchors her root. I'll be running nectar for the gods. Using it currently and it works wonders. I started the seed with bloom kaos, it is a kelp extract, kelp and seaweed have large amounts of natural growth hormones. I used it as a soke for the seed and for misting clones with. I use 1/16 of dosage and it really helps.

Likes
2
Share


@Ferenc
Follow
Day 72: 600W LED, 18 hours on 6 hours off the same with ventilation. Water intake also remains the same 200ml per day. Humidity approx 35 percent.
Day 74: I started flushing next week is harvest time :)
Likes
4
Share


@Growstopher
Follow
Fastbuds seeds
LSD-25 auto #2
Only using spring water for first week and spraying with foop mist every night.
Going to be using foop nutrients with Humboldts secret cal/mag and nectar for the gods ph up and down.
Here we go!


Likes
65
Share


@3lementa1
Follow
I made a DWC system from a water pump in a 5gallon bucket and an air pump outside the bucket. The water pump brings water up through a tube to replicate a drip ring and the air pump aerates the water in the reservoir. It's very quiet and seems to work well. I modified a design I got from my local hydroponics guy where I also got the net pot and peat pellet.
I soaked the peat pellet in tap water that I'd left out overnight to evaporate out the chlorine. I put the seed in the hole in the top and pushed some peat over the hole. I kept it on a plate under a bowl in a drawer for a few days like I would do for the paper towel method. Then I put it in a rock wool cube. It didn't quite fit and I was worried that I might have hurt the root while forcing it in but it looks OK. Then I put it under my light and waited for it to sprout. Now that I've got a sprout happening, I'll plug in the DWC system and put in some starting nutrients.
This is my first time running a hydroponics system after almost 10 years growing, so I'm excited :)


