
Likes
Comments
Share


@weedelicious
Follow
Day 57:
Today I defoliated all the plants again. It wasn't much on the Tropical Marker, but I had to remove quite a bit from the other two because they're growing very bushy. I also wove the shoots further into the net. I think it's turning out really well. I also watered the Tropical Marker and the Purple Kush with 2 liters of water each with fertilizer and a pH of 6.3. I set the light to 80%. The Tropical Marker's flower is getting bigger and bigger!
Day 58:
Not much new has happened; they've enjoyed the defoliation and more light. All the girls are preaching to the light. I've also woven some shoots further into the net.
Day 59:
Hey guys, the plants look great! The Purple Kush and Pink Gelato are starting to stretch more. The buds are slowly forming. Today, I watered all three plants with 2 liters of water. I added 5 ml of Hes-Bio-Bloom and 1 ml of Bio-Bizz-Calmag to the water per liter. Then, I increased the pH to 6.4 with bio-bizz-up. Here and there, I weaved some shoots further into the net.
Day 60:
The girls look good and are preaching to the light. Today I measured the PPFD. It was between 600 and 740 PPFD. So I set the light to 90%. Now I've measured a PPFD of 700-850. I'll observe how the ladies like it and increase the value if necessary. I've also woven the shoots further into the net. It's very hot in the tent, so I set the fan to 80%.

Likes
11
Share

@StonedSteve
Follow
Zdravim všechny✋
4. týden květu pryč.
Dnes 8.6. startuju 5. týden květu.
Major ještě povylezl na 74cm, ale to už bude asi jeho maximum, už tak je to slušný.
Veškerou energii začal posílat do formování a vývoje palic, krásně voní a mě nedělá nic jinýho než radost😜
Jak už jsem psal minulý týden, zálivku tak nějak kombinuju pokaždý něco jinýho podle feelingu, jediný co jsem u ní změnil je, že jsem musel jít na 8L, ten parchant je dost hladovej, ale nemám mu to za zlý, Mephisto to na stránkách jasně píše že je hladovější.😏
Přikládám pár fotek a videjko z dnešního dne.
Všem přeju good luck a za týden zase čau✋
Likes
Comments
Share


@zombikush81
Follow
Performed root washing ... a few days and this delight should be put to dry!👍👏🤭🤙😁

Likes
103
Share


@Schnabeldino
Follow
_____ Week 10 | Day 70 - 77 | 3rd week of Flower ______
Day 71 🌞
- I mounted a fan below the net for more air circulation
Day 72 🌞💧
- 24 liters were mixed and distributed among the 8 plants / each plant 3 liter, at the moment I can water them every 4 days
Day 76 🌞💧
- It remains every 4 days 3 liters of water each plant
____________________________________________________________________________________________
Light - 12/12 h - 560 Watt
- 2x 200 Watt Toplight
- 4 x 40 Watt Lightbars
PPFD - 900 - 1000 µmol
Temp. avg. - 22,9°
Hum. avg. - 61 % RLH

Likes
5
Share

@DonEspas
Follow
Pre-floraison
1 TCO
2 plants étaient hermaphrodite
Ils ont été tués
Des clochettes étaient mature, j'espère qu'il n'y a pas de contamination générale 🤯!
C'est la deuxième fois avec des graines de chez Advanced seed ... 🤔🤬
Pour mon premier run je pensais que c'était ma faute mais ça vient de se produire à nouveau pour ce run donc ça pourrait être a cause de génétiques instables. Déçu perte de temps et d'argent

Processing
Likes
8
Share


@GrownwithLED
Follow
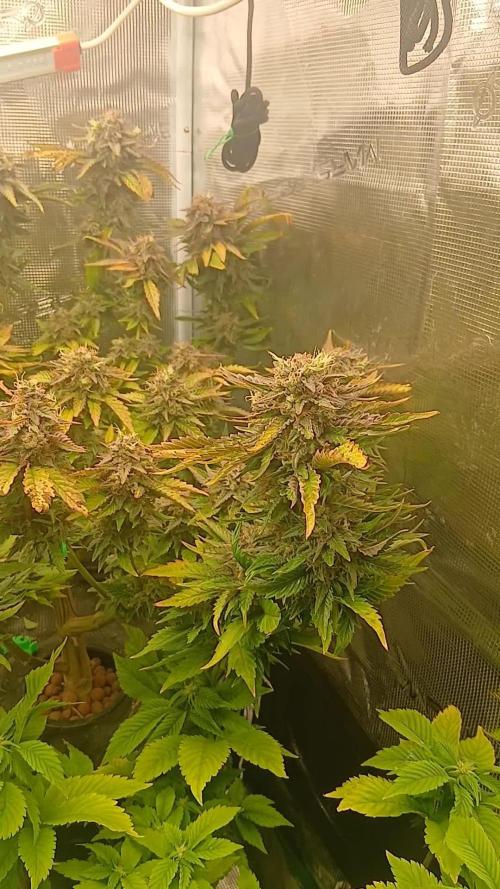
After defoliating both Barbarian (=AK-47 x Barbara Bud) plants after week 11 they now develop more and amore flower clusters, since the light can penetrate deeper int the canopy now. The plants are producing trichomes like crazy, even the bigger sugar leaves are covered in them! VERY FROSTY PLANTS! The flower clusters clearly form colas now along all side branches and both plants fill up nicely. The smell is now strong and sweet with a clear peach aroma to it, it makes me smile every time I look into the tent. The plants love the Advanced Nutrients feeding schedule and are getting the recommended dose every watering.
Likes
12
Share
@Trinidad
Follow
156 days (22.2 weeks) from germination to cure. Baddazz og cheese is very resienous and sticky. She give high yeild of wax when pressed. This is my 1st cheese weed so smell is new to me, very pleasant, almost like the Fahrenheit perfume from Dior. I did smoke maybe a branch and a half while drying.
As for the big budda cheese, she is almost finished with about a week or 2 again. Her buds are very big and she has lots of thricomes. The blue cheese is struggling as this one was transfered from soil to hydro.


Likes
7
Share


Likes
15
Share


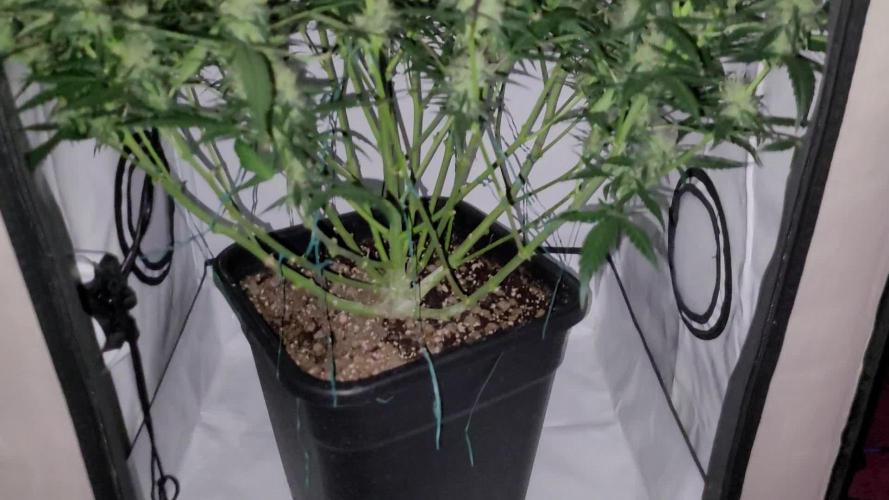
@GardenTroll
Follow
Started training the main stems towards the corners. Pulled the runt and actually wanted to pull the second runt, but the roots of the two left plants are tangled and I didn't want to damage the healthy plant. Started lst with pipe cleaners
Processing
Likes
12
Share


@2Stones1Bird
Follow
Checkout my Instagram @smallbudz to see the Small budget grow setup for indoor use, low watt, low heat, low noise, step by step.
30/01/2020 - One more week to go ! Trichomes still transparent.
01/02/2020 - Gave her 1,5l RO water

Likes
2
Share


@ripp3rzcr3rz
Follow
Preparing the plants for pre-flowering stage with another defoliation (two times) + LST

Likes
8
Share


@Lazuli
Follow
Start flower: june 6 2023
The nutrients are
1ml/L calmag
1.3 grams/L drypart bloom
Both from T.A.
Ph around 6-6.4


Likes
9
Share


@chapothegrower
Follow
Photos 2 days ago there were some defiences you could see them on lower leafs but added them strong nutrient mix and now they growing very vigorous, made some topping a few days ago next update soon they will grow dynamic now everything is good organic grow 💪👌 they also closer to the light now as soon as they are bigger😍 i will train them more in next few weeks lets go!!
Likes
11
Share


@dataTwiiix
Follow
les fleurs après 48h ds le noir etais devenues plus imposante et les pistils presque tous devenusroses! beaucoup de feuille avait viré au pourpre pour ce faire j'ai ajouté un ventilo droit sur le plants durant les 48h 😇. Suivie d'un wet triming vue la pluie dabns mon pays et les forte température (merci au réchaffement). harvest excuter le 13 mai a 17h +/-. la purple en auto et surtout en indoor est un petit buisson pas evident a palisser quand on débute! Alors soit on la pousser naturelement mais alors mieus vaut le faire en outdoor! c'est définitif je ne ferai plus d'auto en indoor ou alors je doit être certain que ca en vaille la peine! je compte encore tester les fameuses variétées fastbuds quand même et m'essayer au topping/mainlining car je suis curieux de voir dans les fait comment leur génétiques senser etre si extraordinaire se compporte!
je ne peux m'avancer ni sur sont goût ni sur ses effets j'ai juste sentit des efluve assez sucré fleurie et douce mais fort subtile j'ai peur quand a ça qualité niveau stonage... finalement le résultat est plus que convenable cette weed a un effet appaisant idéal pour démarrer en douceur une journée ou la finir à chaqu'un ses petite habitude :)
Dernièrement j'ai récupéré au fond du pot d'affinage de ma purplequeen du poken/résine ainsi que une fine poudre de feuilles et petite partie de fleur jme suite je récupère ça me roule un boulon et biM verry high mémorable !

Likes
2
Share


@Elguacho420
Follow
Muy buenas noches muchach@s.... Bueno, comento!, segunda semana de crecimiento de estás critical! 🌱 Cómo ven hoy fue día de selección de las q para mi, novato, fueron las mejores para trasplantar a estas macetas q ya son las definitivas, las regué con ½lts de agua c/u, prendí el otro led y ahora hay una fiesta ahi dentro q no saben, terrible!!.. 😎🕺🏻💡 Bueno, ya las ven, están re lindas... Así q ya no las molesto más... Ahí están trankilamente... La semana que viene les cuento más... Buen finde y buenos humos para tod@s... 🔥 💨💨💨
🇪🇸🤝🏻🇦🇷
Likes
2
Share


@Keep_it_Cleannabis
Follow
Everything going good , some get feed today. Starting really smell amazing, my runtz always puts in the work💪💪