
Likes
Comments
Share


@All_our_small_plants
Follow
Bewässerung: 500 ml jeden 3 tag in der zweiten Woche
pH-Wert: 5,8
EC-Wert: 0,6
Temperatur: 30ºC
Luftfeuchtigkeit 68%
Schädlingsbekämpfung:
PPFD: 200 µmol/m²/s
DLI
Düngemittel: organischer Dünger 4,2-0,8-4 💩
Besonderheiten: wir versuchen bei diesem Grow Effektive Mikroorganismen aus. Die Opfer Linsen sind wieder da 😜
-Tag 8 Heute hat sie Nematoden bekommen 😝
-Tag 10 Heute wurde sie mit organischem Dünger gegossen 4,2-0,8-4 💩
-Tag 12 wir haben ihr wieder etwas Dünger gegeben und wir haben entschieden dass wir sie nur mit organischem Dünger gießen werden um den Unterschied zum mineralischen Dünger zu beobachten 👋
-Tag 14 Sie hat heute nur Wasser bekommen. Sie wachst etwas langsamer als die anderen die gleichzeitig gekeimt sind

Likes
30
Share


@BillMonroe
Follow
Harvest update in 2 weeks or so :)
I wanted to let them go a bit longer but the mildew was going to take over so I chopped the plants and rinsed them in water + H2O2.
Lots of lessons learned ... Lots of bud hanging on the vine. Good luck to everyone


Likes
25
Share


@m0use
Follow
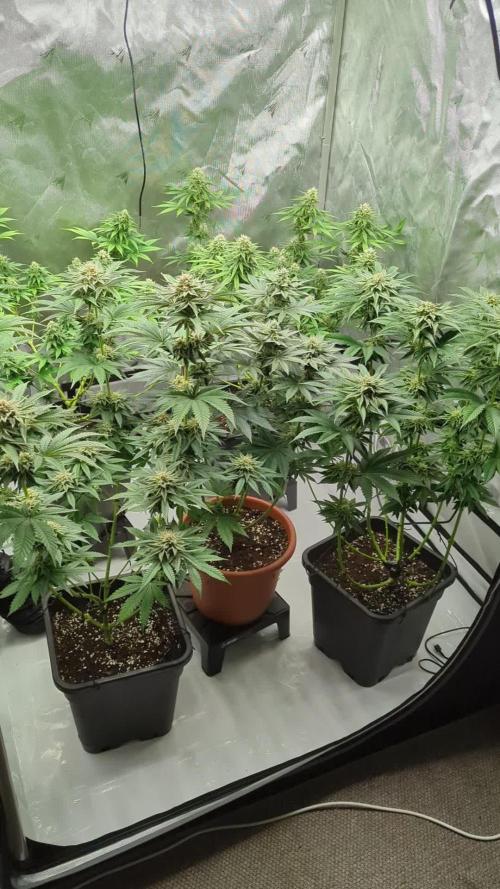
This week has been good for these little ones, the runoff was a bit high for my liking so I gave them more water before feeding to help flush out their medium and introduced the bloom nutrients as they are now entering flower. Got one purple looking ones, one green ones and one mixed that is leaning more towards green in terms of colour profile. I remember before when growing these strains I was disappointed in the fact they where not all purple. Now I know and don't care to much. Nothing crazy on the smells so far, hoping they get real juicy and tasty in the next coming weeks.
The PH has been harder to lower when the nutrient solution is mixed, it takes more PH down to get ti to the 5.8 that I''m aiming for. Hopefully they explode in growth in the next few weeks.

Likes
Comments
Share


@DaddyPrime2
Follow
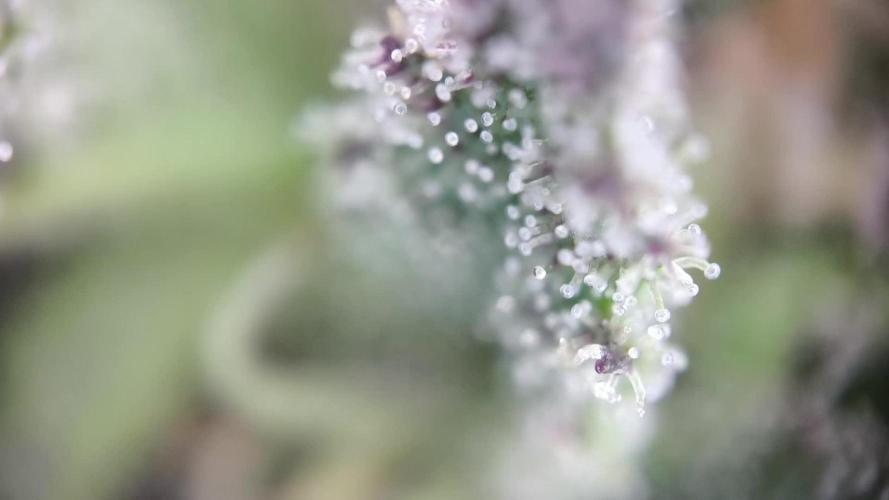
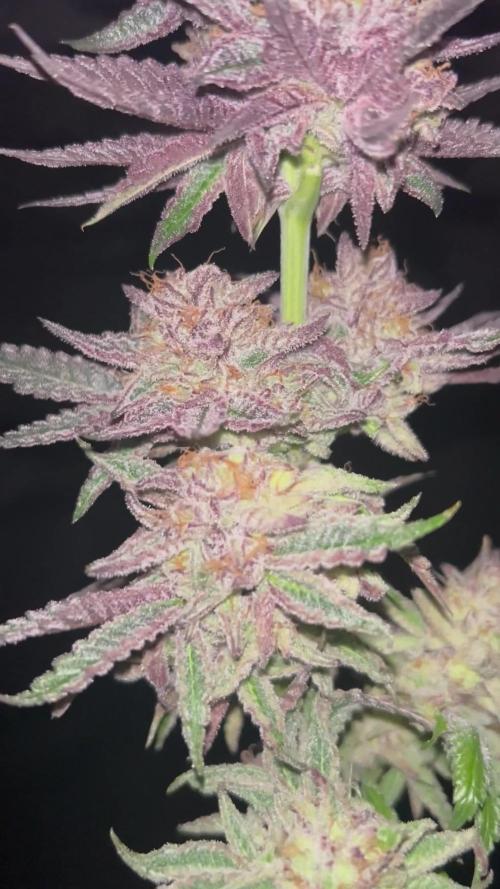
10/9/24 more colors are showing. its mostly just purpley pink on the tips of the fan leaves but its spreading a bit and she should have a week or so left depending on how mold and everything happens
10/13 this may be the last week. weve got continous rain coming and theyre coming up on the final stretch. i want them to go 60+ days for more color but may chop
10/14 chopping the rest of her. shes got nice cloudy trichomes. taking the tops and gonna leave the bottoms to ripen. i may try to reveg her

Likes
65
Share


@Jayvo
Follow
Getting very close to the end now, lowering my night temps has definatley made the buds more dense, will be feeding her nutrients this week and start the flush from next week, unfortunately I’ve just realised the water pump was the case for my reservoir to be heating up, so I’ve probably messed up it’s nutrient intake, so my next runtz muffin run will most probably be a lot better

Likes
22
Share


@bypado_farm
Follow
Day 57:
Watered each plant with 1L with nuts
1588 ppm, 3380 us/cm, 3.3 EC (purple punch, strawberry banana, wedding Cheesecake)
1690 ppm, 3595 us/cm, 3.5 EC
(gorilla cookies)
2 different feedings for the 10 plants
Day 60:
Watered each plant with 1L with nuts
1563 ppm, 3325 us/cm, 3.3 EC
Day 62:
Watered each plant with 1L with nuts
1726 ppm, 3712 us/cm, 3.7 EC (purple punch, strawberry banana, wedding Cheesecake)(I gave them more than usual, by mistake)
1528 ppm, 3525 us/cm, 3.5 EC (gorilla cookies)
2 different feedings for the 10 plants
Day 63:
Watered each plant with 1L with nuts
1563 ppm, 3325us/cm, 3.3 EC (purple punch, strawberry banana, wedding Cheesecake)
1523 ppm, 3301 us/cm, 3.3 EC (gorilla cookies)
2 different feedings for the 10 plants
Day 65:
Watered each plant with 1L with nuts
1518 ppm, 3210 us/cm, 3.2 EC (purple punch, strawberry banana, wedding Cheesecake)
1359 ppm, 2891 us/cm, 2.9 EC (gorilla cookies)
2 different feedings for the 10 plants
Next feeding I will start to flush some plants, 1st week with flawless finish, 2nd week clean water, 10x the pot, 150L each
Day 67:
Watered each plant with 1L with nuts
1379 ppm, 2908 us/cm, 2.9 EC (1 purple punch, wedding Cheesecake)
1250 ppm, 2687 us/cm, 2.7 EC (gorilla cookies)
285 ppm, 606 us/cm 0.6 EC (3 strawberry banana and 2 purple punch) (2L each)
3 different feedings for the 10 plants
Started to flush all the strawberry banana and 2 purple punch with flawless finisher. (1st week flawless finisher, 2L each, 2nd week clear water, 150L)
Likes
13
Share


@russrahl
Follow
I’m a week late posting on these as I was a week ahead in the timeframe for this diary because of the new Germination option. We are caught up now day wise anyway, and all is good. Finally got her into the flowering tent and into my 5 gal RDWC system under a 1000w HPS on a light rail mover. We flipped her to flowering as soon as we got her in because my DWC systems tend to grow big ass plants. Lol so I’ve decided to flip without much of my screen full and let the stretch fill it. I will also be hitting them at 1000w rite from the start instead of trying to turn it down and get it closer to save power consumption. I will be starting with the light already up as high as it can be at about 3 ft above the screen. I’ve also shortened the span of my rail mover and set my pauses shorter at about 10 sec. with the light at 1000w we get a better spread out on the light meter and don’t need to move the light as far. I’m also going to keep tucking till they completely stop stretching in an effort to keep them as low as possible. We also had some excessive nitrogen build up a couple weeks ago and dropped the ec way down to 0.2 for the next week. They responded quick and went in the opposite direction very fast and before I new it we had nitrogen deficiency. Lol so we got them sitting around 0.75 EC now and they are coming back around. Well that’s it for this week, Cheers! 💨

Likes
148
Share


@BioBuds
Follow
Greetings my dear Jungletamers,
So a major surprise came when @MarsHydroLED contacted us and asked if would like to try out their new SP 3000 light. Being a fan of Mars Hydro for years, we of course accepted their offer. We are totally in love with this light. I was when I saw it in another grower's setup and was in awe of its output and results.
So with much pride and thankfulness for the presents the Universe bestowed on us, in the form of MarsHydroLEDS offer and the bountiful harvest of the last grow, (which I am thoroughly enjoying btw, such a great weed to have grown ourselves) we start out on a new adventure that we can't wait to share with you.
With many lessons learned from the previous grow, a mighty producing strain in the form of Expert Seeds Gorilla Glue #4, a.k.a Expert Gorilla's and a tweaked super soil mixture, we are setting out to hopefully get over a gram per watt, preferably 1.5.
The Setup
A 4.5 (140 cm) x 2(70) x 6.2 (200) grow tent, giving me a .98 m2 workspace. This space is customized to my needs.
A standing fan will provide airflow through the whole grow, a top fan will help guide cooler air past my lights onto the grow.
3 56 ltr pots will be the home for the plants when they are 2 weeks old, up to then in smaller jars.
The Light
The leading role and star of the show will be played by the Mars Hydro SP-3000, so kindly provided by MarsHydroLED, which we will test and review here and I might say, endorse.
I'm very careful with who I endorse and support these days, but a company with that many wins in design, I'm talking ever since their first range came out in 2009 these guys have been raising the bar for the whole industry, I did not hesitate to support this leading brand.
If you want to compete with these guys, you better bring some quality AND affordable pricing. Why do I endorse the SP-3000 without ANY hesitation?
It is seriously THE BEST light on the market in this price range and size group. It has an enormously effective output in U/Mol and with 30% less energy waste comparing to older LED lights.
Prove me wrong!
And with a company holding a considerable market share selling thousands of units every month, competing on price and quality, one would think that customer service would suffer. Of course, also Mars Hydro is not perfect, but check the sheer amount of people that not only praise the light but also the service received, should the light somehow not perform up to par. It is this dedication to their customer base that made this company have a fanbase... Yes, a fanbase with a website and a wiki.
So if you are looking to buy new lights, check out the END OF SUMMER OFFER at the Mars-Hydro Global Store on Aliexpress:
https://marshydroled.aliexpress.com/ 👈 Check their offers but also their score, they ship from a warehouse near you so you don't have the extra import fees!! Cut out the middleman and have a deal on these lights!!
At the moment I write this in August 2021, the lights are 408,20 euro when sent from Germany to the rest of Europe, that's 40 euro cheaper than the other Mars outlets, BUT EVEN 60 euros cheaper than ordering at a grow store!!
The Strain:
Experts Seeds - Expert Gorilla feminized regular.
Don’t let the name fool you because Expert Gorilla is suitable for growers of any skill level. However, you do need to be an experienced smoker because Expert Gorilla is one of the most potent strains on the market.
Lineage: Chem Sis x Chocolate Diesel x Sour Dubb
Popularity: Extremely Popular
Flavor/Aroma Profile: Chocolate, Earthy, Fuel
Yield: 400 g/m2
Stress Tolerance: High resistance to disease
Potency: 24% THC
Flowering time: 58 - 63 days
The Soil:
Those who saw my Monstercropped Gelato #33 grow (you should see it if you didn't, I'm so proud of that grow), know about my super soil and organic nutrients/ permaculture tea combo that starred in my previous diary.
Because of the great results, we are going to use the same recipe, adjusted some more with some new ingredients that will complete the mix and give an even more sustained super soil buffer.
20% Atami Bi-grow (very similar to ocean forest)
20% Atami worm castings
20% Atami Coco Coir
10% Hydrocorn
10% Peat powder
1 cup Fossil seaweed chalk
1 cup bonemeal
1 cup bloodmeal
1 cup Microlife
3-4 teaspoons of epsom salt
3 cups of activated biochar (activated with our own permaculture tea)
I just made layers, starting with hydro corn on the bottom to aid airflow/run-off. On this I started layering the coco coir, Bi-grow, peat, castings, and amendments in a way that the more mature the plants get, the more phosphorous and less nitrogen they will find. Every time I made three layers, I would mix them by hand. This way we simulate natural soil, which consists of humic layers, composting plant waste, fungal and microbial life, and nutrients from fossilized sources.
The Nutrients
I will start with just adding 6.4 PH water, although this soil should buffer ph itself and regulate, after 4 weeks, I'll slowly be adding:
- Biobizz Grow
- Plagron Alga Grow
- Biobizz CalMag
- Biobizz Flower
- Plagron Alga Flower
- Biobizz Topmax
- Melasses
The Tea
Some of you might remember the permaculture tea from my previous grow, I have a short video in my harvest page showing how we make it), it will star again in this grow.
- (Rain)water
- Comfrey (whole plants)
- Dandelion leaves
- Roots and leaves from the earlier grow
- Minor periwinkle (Finca minor) is a plant we have in our garden, it contains an alkaloid that is associated with increased brain function but also is a light toxin for wee beasties and other unwanted guests like gnats (who hate it).
- When flowering I add some wood ash to this mix
Thank you for checking in on one of my grows again! Thanks for all the love on my previous grow, check it out if you haven't seen it!!
Hug
Bud

Likes
55
Share


@MadeInGermany
Follow
Info:
Unfortunately, I had to find out that my account is used for fake pages in social media.
I am only active here on growdiaries.
I am not on facebook instagram twitter etc All accounts except this one are fake.
Hey guys :-)
The lady develops more and more beautifully into a bush 👍.
She will now stay in the vegi for a few more days before she comes to the flower tent :-).
During the last watering, I started with Fast Plant.
I am happy to finally be able to put it in bloom again.
This week it was poured 3 times with 1.2 l each (sewing materials, see table above).
The tent was cleaned and all plants checked for health 👍.
Fresh osmosis water was prepared and filled into canisters for the next 2 weeks.
Otherwise they were admired several times a day 😂.
With the next update we will see each other in bloom again :-).
Until then, I wish you all a good start to the week.
Stay healthy and let it grow 🙏🏻
You can buy this Nutrients at :
https://greenbuzzliquids.com/en/shop/
With the discount code: Made_in_Germany you get a discount of 15% on all products from an order value of 100 euros.
You can buy This Strain at :
www.Zamnesia.com
☝️🏼☝️🏼☝️🏼☝️🏼☝️🏼☝️🏼
Strain
Gelato clone from mother (Zamnesia )
☝️
Genetics: Wedding Cake x Gelato x Gelato 33
Vega lamp:
2 x Todogrow Led
Quantum Board 100 W
💡
Bloom Lamp :
2 x Todogrow Led
Cxb 3590 COB 3500 K 205W
💡💡☝️🏼
Soil :
Canna Coco Professional +
☝️🏼
Nutrients :
Green Buzz Liquids :
Organic Grow Liquid
Organic Bloom Liquid
Organic more PK
More Roots
Fast Buds
Humic Acid Plus
Growzyme Big Fruits
Clean Fruits
Cal / Mag
Organic Ph - Pulver
☝️🏼🌱
Water: Osmosis water mixed with normal water (24 hours stale that the chlorine evaporates) to 0.2 EC. Add Cal / Mag to 0.4 Ec Ph with Organic Ph - to 5.8

Likes
12
Share


@Jays_Not_Here_Man
Follow
Great week, the girls are doing fine without me. All I have to do is pop in and give them
Some water x2 a week. I increased their feed just a bit this week, I will start tapering the nutrients off soon, and will increase the amount of water going through them in hopes of getting a 10% runoff or so at least 3-4 times before harvest. Don’t even want to think about getting too far ahead, I’m getting very excited for these beautiful girls. These are quickly turning into the best homegrown I’ve seen yet! Happy Gardening 🇨🇦👊❤️

Likes
6
Share

@k0nz1
Follow
This week all Ladies are getting extra pk13/14. Buds are getting bigger and more dense every day. The smell in the tent is absolutely insane. Fruity, sweet spicey. The LO are full of trichomes. The BBP a lil bit less snowy but also VERY terpy. BBP with a little autumn fade in the leaves. RJ ist the smallest and needs a little extra time i think.
Lights 90%
RH 50-60%
Temp 20-26 Celsius
In the second tent the RJ and SH are developing also very Well. A few weeks to Go. Just letting them grow for now.


Likes
51
Share


@Fatnastyz
Follow
2nd week of flower and shes going hard!
sun 1.5 inches
mon 12.5
tues 13.5
wed 15.0
Thurs 16.0
Friday 18.0. Woo look at her go!
Sat 19.5
did minor, very minor LST. just enough to help guide the tops out for light.
only removed leaves really blocking bud sites. like 4-6 total.
Smooth and easy for now! Very exciting!


Likes
20
Share

@BalconyBoy
Follow
17.10.25 after checking the trichomes with my smartphone microscope I was glad to see enough milky ones to chop those two remaining plants and clear the balcony. I wet trimmed everything down to the nugs for a quick drying process and since these plants had little spots of powdery mildew despite relentless spraying all of this harvest Will be pressed for rosin as soon as possible.
30.10.25 Flowers are pressed to rosin details in the smoke report. The fresh press is now whipped on jars and curing in the fridge
31.10.25 flower tested 16% THC with Purpl Pro


Likes
5
Share


@Roberts
Follow
I am starting a Tangerine Band. I scuffed the seed ends, then dropped it in water. In about 24 hours or as soon as I see a tail start I will drop it in the rockwool. Thank you Exotic Seeds, Spider Farmer, and Athena. 🤜🏻🤛🏻🌱🌱🌱
Thank you grow diaries community for the 👇likes👇, follows, comments, and subscriptions on my YouTube channel👇.
❄️🌱🍻 Happy Growing 🌱🌱🌱
https://youtube.com/channel/UCAhN7yRzWLpcaRHhMIQ7X4g.
Likes
28
Share

@BudVision
Follow
Hello growers,
I harvested because she had completely consumed everything in her pot, so there was nothing left to wait for. The aroma is sweet and spicy, hard to describe but very pleasant. The bud is dense and beautifully colored.
Peace and happy growing! ✌️


Likes
11
Share
@BalconyBoy
Follow
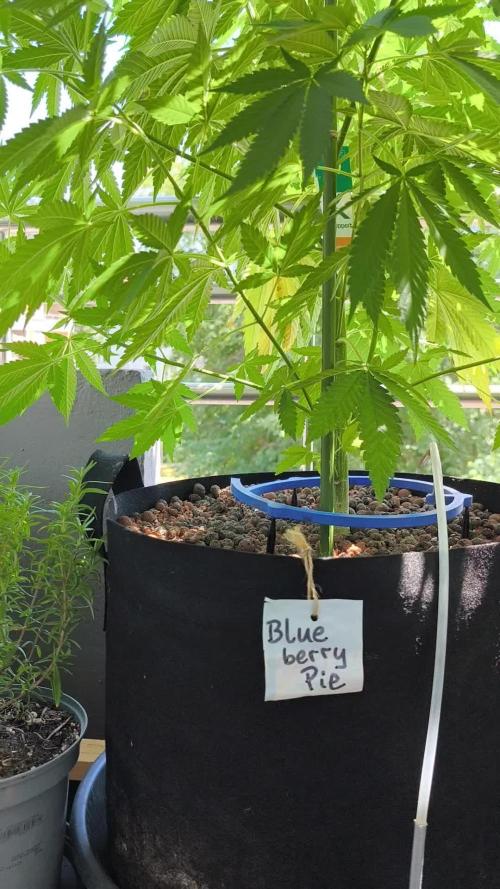
13.07.26 die Luft nach oben wird langsam knapp für die Blueberry Pie, nun mist sie 1,50m und hat noch 30cm bis zur Decke. Gleichzeitig sehe ich an den Triebspitzen nun mit deutlich mehr Pistillen den Übergang zur Blütephase und damit vielleicht das Ende des Höhen Wachstums.
2025 habe ich Ende Juli den Blütedünger ausgebracht, ich denke heuer werde ich das etwas früher tun und mich im Laufe der Woche daran machen. Ernsthafte Mängel sehe ich noch nicht, aber ich habe bereits 3 große Blätter entfernt die gelb geworden sind, was in dieser Saison eine Premiere ist.
Auch die großen Pflanzen haben letzte Woche Tüten mit Raubmilben gegen Thrips bekommen und trotz eigentlich zu niedriger Luftfeuchtigkeit, sehe ich weder neue Fraßstellen noch Thripse.
Die automatische Bewässerung liefert aktuell 3x je 2 Minuten Wasser, was 3x2x700ml = 4.2l entspricht
2x2 Minuten (2.8l) waren bei den Temperaturen nicht genug
Danke fürs vorbei schauen und angenehme Woche euch allen!
Likes
8
Share


@TorvicKofran
Follow
ESPAÑOL:
Hola chicos, espero se encuentren muy bien!
Esta semana las chicas han mejorado un poco, se detuvo el amarillamiento, descubri que Cal-Max de Grotek interfiere en la composicion de la linea hesi por lo que las chicas sufren un bloqueo de nutrientes, dejé de utilizarlo y las chicas han continuado con su desarrollo relativamente normal.
ya estan en su 5ta semana de floracion, Tutankhamon ha producido una cantidad gigantesca de resina, Lennon esta engordando a toda velocidad y aun le quedan 6 semanas aprox.
Anubis a pesar de su color intenso amarillo palido esta engordando bastante bien y su produccion de resina es inimaginable y ya solo que quedan 2 semanas y media aprox.
espero que a partir de ahora ya no surjan mas problemas y que las chicas terminen su floracion de la mejor manera.
esto es todo por esta semana chicos, espero que se encuentren muy bien !
INGLES:
Hello guys, I hope you are very well!
This week the girls have improved a little, the yellowing stopped, I discovered that Cal-Max from Grotek interferes with the composition of the hesi line so the girls suffer a nutrient lock, I stopped using it and the girls have continued with their relatively normal development.
They are already in their 5th week of flowering, Tutankhamun has produced a gigantic amount of resin, Lennon is gaining weight at full speed and he still has about 6 weeks left.
Anubis, despite its intense pale yellow color, is gaining weight quite well and its resin production is unimaginable and there are only about 2 and a half weeks left.
I hope that from now on no more problems arise and that the girls finish their flowering in the best way.
This is it for this week guys, I hope you are doing well!

Likes
4
Share


@DRO420
Follow
Starting 5th week of flowering. Buds are growing nicely. I increased the neutrients from 3/4 to a gallon to 1 teaspoon per gallon. They are fed every 3rd watering . They each get a gallon of water every 2 days ph balanced twice a week and fed once a week.