


Likes
Comments
Share

@Selkot
Follow
.
FIRST DAYS
-------------
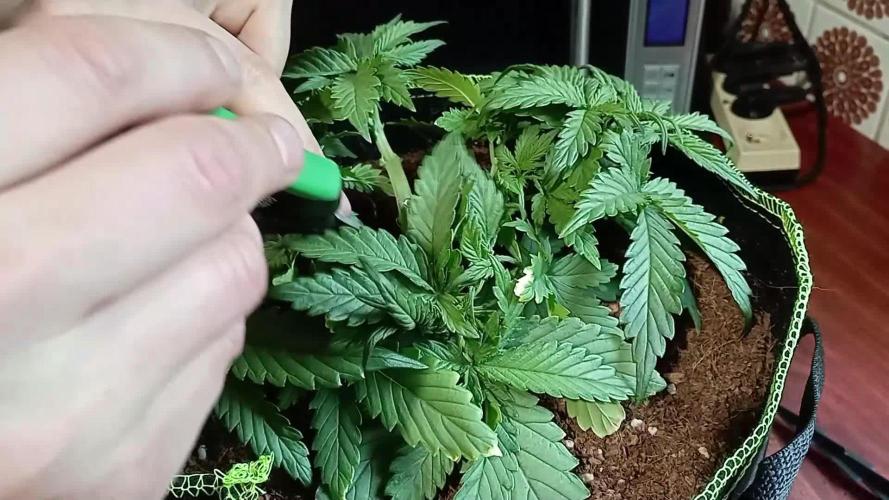
The girls tolerated the topping well; in three days, I found small bushy bushes in my tent.
So, a little mainlining to give them the desired shape, and a little splash of water with just Voodoo.
Tomorrow they will receive their 4ml Grow A+B, with 2ml B-52 this time.
PS: as you can see in the photo, a little mistake due to over-enthusiasm...
I damaged one, but the branch didn't break completely; a little bandage, we'll see if it recovers, if not it will do without that branch.
I've seen worse in a previous session, and it was my 3-branch plant that gave me the best harvest!
👉 https://www.youtube.com/watch?v=_QTXbEUN8pA
MIDWEEK
-----------
Two days after mainlining, it's time for the first defoliation.
I cut the “horizontal” sites, as I don't want branches growing in the center of the structure.
I'll leave them to rest now; I'll do some lollipopping when they've climbed.
+ I'll switch Voodoo to B-52.
PS:
- The damaged branch is not dead, but does not seem to be recovering; I will give it a few more days before deciding to cut it
- On the other hand, I had an unpleasant surprise: one of my other girls showed signs of wilting and browning on three of the four branches. I've never had that before... As with gangrene, I cut the three, hoping that the fourth will hold up. For her, I kept the middle sites + mainlining; if it works, I'll still have three branches.
see 2 last pics 👆


Likes
25
Share


@Kush_queen
Follow
The buds are getting fat and there are plenty of bud sites and they are nice and frosty now the 2 that were lagging behind certainly aren't that far behind.
I have bamboo canes ready to go in soon as the side branches are getting heavy and i don't want them to get snapped or anything now I come this far 40 days on 12/12 today
Thanks for taking the time to read my update 🙏💚


Likes
9
Share


@Alejangrow
Follow
Flushing now. Plucked a few fan leaves. I'm excited for the chop in 7 days 😁😁😁

Likes
5
Share


@RumplePuffskins
Follow
It’s getting cold and damp. Fingers crossed for a couple warm weeks into croptober


Likes
15
Share


@SmokingDwarf420
Follow
18/09/2023
I'm very eager to harvest, especially since they all seem ready for harvest except for number 3. Like in the previous weeks, I'm hardly cutting anything, just removing the yellow/brown leaves that come off easily when I pull on them. Regardless, I think I'll harvest next week because the small buds in the lowers parts of the plant and not just the sugar leaves are starting to turn yellow/brown.
I forgot to take a picture of the main cola of number 2.
I still can't upload great quality vidéo idk why sorry for that ridiculous amount of pixel in the video.
20/09/2023
I was watching a guy on Youtube talking about harvesting when this idea (See the last picture) came to me... I feel so DUMB for not doing this WHEN I did the LST... SEVEN WEEKS AGO, and right now I would not be struggling with the little delay on number 3.


Likes
5
Share


@Ninjabuds
Follow
Hey there the 2 pound cake plants are doing well they grew a decent amount sense a week ago. I turned the light up to about 200umol they seem to be able to take more light earlier than photo plants. I'm wandering if I should be giving it even more light I don't want them to be to small when they go into flower they look nice and the leaves are never sagging
Likes
92
Share


@Hou_Stone
Follow
Flowering begins.
I did defoliation on the lower tiers on day 4 of flowering
------------------------------------------------
Water: tap water at 300 PPM, I add 0.7G of Hybrid powder per liter to reach 800PPM and I adjust the PH to 5.8. Currently I water my pots with about 1.5L of water every 4 days
-Daytime temperature: 27°C
-Night temperature: 23°C
-Humidity: 45-65%
-Lamp: Mars Hydro FC3000. intensity 80% at 40cm from the top leaves
-Room: Mars Hydro 100x100x180cm
-Extractor: Mars hydro 402 CFM Max. power 2/10
-Substrate : 70% coco, 25% perlite, 5% vermiculite.
My instagram : https://www.instagram.com/p/CuMhQ_BsjRP/?utm_source=ig_web_copy_link&igshid=MzRlODBiNWFlZA==
Looking for MarsHydro equipment for your crop? 🔥
You can use my promo codes! 🙏😻
3% off with "houstone3" for: TS LED Grow Light, Tent, Ventilation
5% off with "houstone5" for: FC&FC-E&SP LED Grow Lights; Grow Tent Kits
https://www.mars-hydro.com/?acc=hou-stone

Likes
68
Share


@Roberts
Follow
Auto Northern Dragon Fuel grew really well in a small potter of a gallon and a half. I unfortunately had too much nitrogen in her system during flowering. This effeced my yield some. The flower that is there has a great cherry wood diesel smell. It was also very frosty and looks potent. I should get several ounces for sure once it is processed. Thank you again Super Sativa Seed Club, and Medic Grow. 🤜🏻🤛🏻🌱❄️
Thank you grow diaries community for the 👇likes👇, follows, comments, and subscriptions on my YouTube channel👇. ❄️🌱🍻
Happy Growing 🌱🌱🌱
https://youtube.com/channel/UCAhN7yRzWLpcaRHhMIQ7X4g.

Likes
11
Share


@Haoss
Follow
These seeds are grown in Georgia, OTOBAIA x AMNESIA HAZE, seeds of the same variety should be grown in coconut and soil


Likes
14
Share


@MrWigglyJiggly
Follow
Trichomes are coming along.nicely. looks like its gonna go over 60 days. Most of the pistils are still white despite flowering for 42 days already.
PS. Sorry guys i cannot answer to the comments due to having a problem verifying my email. The lil plants in the pot are clover (cover crops), help retain moisture and good for small living organism

Likes
11
Share


@Weed4Lord
Follow
Une liberty haze a cramé a cause de la lumière, elle est beaucoup trop grande comparée au autres et une amnesia lemon a cause d’un sur-engraissage sinon a part ca elle se porte plutôt bien

Likes
38
Share


@Green_Mountains
Follow
Another good week. Watered them twice. I'm not planning on feeding them again. A little defoliation. I definitely think they are in the last 2 weeks before harvest.
Still seeing some nutrient burn developing on the leaves. I don't think I watered enough through the whole grow! I'd love to hear opinions on this!
Took some videos of the buds with an iPhone 12 at 6X magnification. Decent quality!
Otherwise, still looking to successfully harvest these plants! Thinking about the next grow. Probably going to be Auto Strawberry Cheesecake and Auto Anesthesia.
Peace!
Likes
14
Share


@EaRtH
Follow
1.4. - I've returned from the prolonged weekend and was shocked how big the plants got. I've had to do some LST to start spreading the branches. Watered 💧
3.4. - Added some wires to spread the plants. Watered 💧
4.4. - Of course that I've managed to break the main stem on one plant. Again! Thankfully, it was not broken off completely and I've fixed it with wire. Hope she'll recover quickly before start of bloom. 🤞
5.4. - Week wrap-up: Broken plant is not wilting and started to recover ❤️
Likes
18
Share


@rockbo47
Follow
SUMMARY: I flushed the NL with tap water straight from the hose. I’ve heard you’re supposed to flush with 3x the container volume, however that would be around 57 litres for a 5 gallon pot which seems absurd. I didn’t record the amount but I took my time and flushed with at least 30 litres.
I will now continue to flush until harvest on 10th April by which point she should have faded nicely and used up any residual nutes. I read that the each time you water/irrigate you draw oxygen into the root zone and this promotes growth and in turn helps to increase yield and so I will endeavor to water her twice per day now until harvest.
DAY 86
-----------
Sunday 28th March
I flushed the NL with tap water straight from the hose. I’ve heard you’re supposed to flush with 3x the container volume, however that would be around 57 litres for a 5 gallon pot which seems absurd. I didn’t record the amount but I took my time and flushed with at least 30 litres.
Likes
3
Share


@NocturnalGardner44
Follow
Caught up... things are going well, Bruce stretched like crazy and has evened up its canopy to the others idk if it's that big bud in it or what. Lilac has looked a solid week and half ahead of the others since flower, she looks wicked though, trichromes are starting to build. I've done my last training, I usually go hard on thinning but I'm trying to be conservative and only uncover buds under leaves. Still same feeding routine.. looking forward to the finish line but know this is an important time with terms and trichromes beginning to resonate... I sick at this guy's but I want to get better at chronicling my grows.. so hourly I will improve in the process of Journaling.

Likes
4
Share

@xipo86
Follow
Day 76
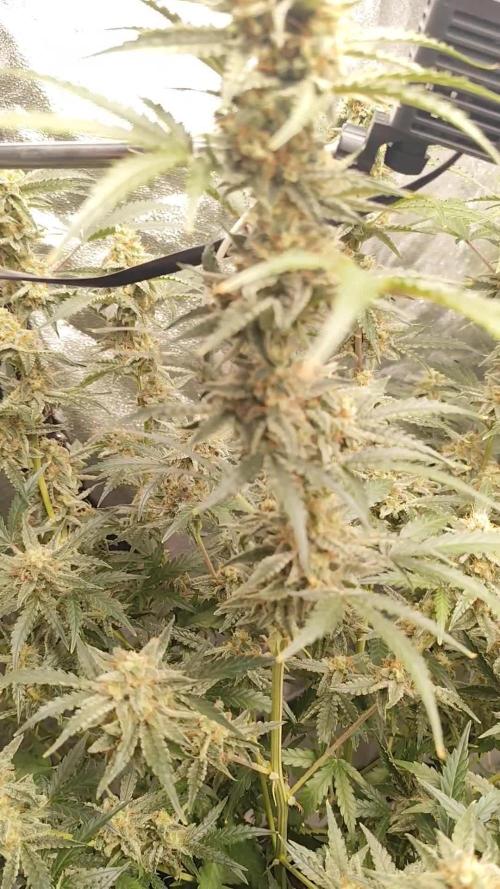
smell just went trough the roof. wow. gettin buds fatty and sticky.. it's a matter of waiting.😎


