



Likes
21
Share


@Sweetspot88
Follow
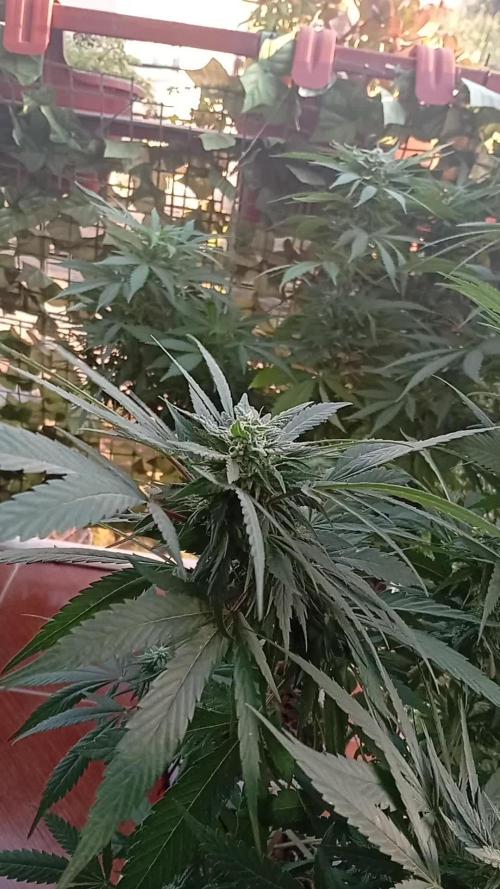
Looking good late updating this week creeping the p and l as mid flower comes. Other than that this week coming in will see a light defoliation to help fatten bud sights

Likes
23
Share

@DogDoctorOfficial
Follow
Week 7 Flower | 12/12 From Seed
Nectar Drip — Bulk, Frost & the Quiet Finish
No drama this round. No chasing deficiencies. No heavy corrections. No unnecessary stress.
Just stable roots, stable feed, stable environment — and plants doing exactly what healthy plants are supposed to do when you stop interrupting them.
This run was built on simplicity from day one.
12/12 from seed. No veg extension. No topping. No high-stress shaping. No aggressive stripping. Just early guidance, clean structure, consistent watering, and enough light to let each plant express itself without wasting energy rebuilding from stress.
That decision shaped everything we’re seeing now.
By removing the recovery time that usually comes with topping, overtraining, or prolonged veg, these plants never had to pause and re-prioritize. They rooted, established, stretched, set flower, and transitioned directly into production mode. No detours. No wasted momentum. Just one continuous push from seed to flower.
And now, in Week 7 flower, it shows.
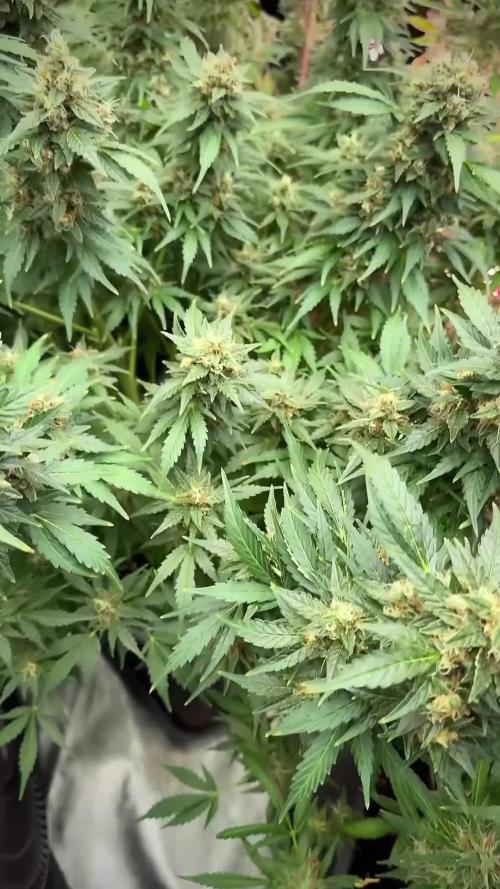
The canopy is heavy.
The flowers are swelling.
The resin is stacking hard.
The fade has started.
And the room is finishing with exactly the kind of top-to-bottom consistency this run was built for.
⸻
From Seed to Here — Why This Run Behaved Like It Did
This room was never pushed for speed.
It was built for continuity.
That’s the difference.
12/12 from seed changes the entire rhythm of development. Instead of forcing long vegetative expansion and then asking the plant to completely shift gears, this approach keeps the metabolism focused and directional from the start.
The plants stay efficient.
Internodes stay tighter.
Stretch stays controlled.
Energy gets allocated earlier.
And instead of building oversized frames that need correction later, the plant builds only what it intends to finish.
That’s why this room developed the way it did.
Not the biggest plants.
Not the tallest plants.
But highly efficient plants.
Compact structure.
Controlled vertical growth.
Dense flower sites.
Less wasted lower growth.
Less larf.
More usable biomass.
That efficiency is exactly why they are carrying weight now.
And because they were never heavily interrupted, resin production stayed consistent too. No major stress events, no stalled metabolism, no repeated recovery cycles. Just stable uptake, stable transpiration, and uninterrupted flower development.
That’s where the frost comes from.
Not magic. Not hype.
Consistency.
Stable roots feed stable flowers.
Stable flowers stack stable resin.
⸻
Feed Strategy — Simple, Stable, Boring (and Exactly Why It Works)
The feed is still intentionally simple, and that is the point.
At this stage, the plants are not asking for complexity.
They are asking for consistency.
So instead of overloading the root zone with ten competing inputs, the approach stays clean, predictable, and easy for the plant to process.
Current feed (per liter):
* Terra Grow — 2.5 ml/L
* Pure Zym — 1 ml/L
* Sugar Royal — 1 ml/L
* CalMag Pro — 1 ml/L
* Power Buds — 1 ml/L
* Green Sensation — 1 ml/L
That’s it.
Simple inputs. Stable ratios. No chaos in the root zone.
Why each one is here:
Terra Grow (2.5 ml/L)
Still holding the base. Even this late, a controlled amount of nitrogen matters. Enough to support photosynthesis and maintain metabolic function, but not enough to keep the plant too green or delay senescence. At this stage, it is no longer feeding growth — it is supporting function.
Pure Zym (1 ml/L)
Quietly doing the dirty work in the root zone. Enzyme support helps break down residual organic matter, keeps the substrate cleaner, improves root-zone efficiency, and helps maintain smooth uptake late into flower when consistency matters most.
Sugar Royal (1 ml/L)
Used here to support terpene expression, aroma development, and overall secondary metabolite production. Not magic in a bottle — just one more gentle nudge toward stronger expression in the final weeks.
CalMag Pro (1 ml/L)
Still important under strong lighting and consistent transpiration. At this stage it is less about “fixing deficiency” and more about maintaining transport stability, cell integrity, and keeping the plant moving cleanly through the finish.
Power Buds (1 ml/L)
Supports flower-site commitment and reinforces reproductive focus. At this point it is less about creating sites and more about helping the plant continue investing in the ones already built.
Green Sensation (1 ml/L)
This is the finisher. PK support, density support, sugar movement, and late-stage flower swelling. Right now this is one of the key drivers behind the visible bulking and weight gain.
Nothing excessive.
Nothing aggressive.
Just enough to keep the engine running clean while the plant finishes what it already decided to build.
That’s the entire strategy.
Stable EC. Stable pH. Stable uptake.
Let the plant do the rest.
⸻
Environment — Guided by Plants First, Numbers Second
This room is running warm, steady, and honest.
Around 26°C with ~60% RH, stable root-zone temperatures, consistent irrigation, and strong air exchange.
On paper, some growers will immediately point at VPD charts.
That’s fine.
But charts do not grow plants. Plants do.
Room VPD is useful. Leaf VPD is more useful.
And real plant behavior matters more than both.
The leaves are praying.
Transpiration is stable.
Uptake is stable.
Resin is building.
Flowers are swelling.
Nothing is stalling.
So the room is not judged by theory alone.
It is judged by response.
Numbers guide.
Plants decide.
And right now, the plants are very clearly saying yes.
⸻
Under Canopy Lighting — One of the Biggest Differences in This Run
This is one of the clearest upgrades in the room.
The under canopy lighting is doing exactly what it was meant to do:
keeping lower flower sites productive, reducing weak lowers, and allowing the plant to finish far more evenly from top to bottom.
That matters more now than ever.
Late flower usually exposes the weak parts of structure.
Lower sites fall behind.
Shaded flowers stay airy.
The top wins.
The bottom gets left behind.
That is not what happened here.
This room is finishing with noticeably better lower-site density, stronger mid-canopy development, and far less separation between top buds and lower buds.
Not identical — but much closer.
And that means more usable flower, more uniform ripening, and less waste at harvest.
The top still leads.
But the bottom is no longer irrelevant.
That is a major win.
⸻
What We’re Seeing Now
This is the transition every healthy flower room should earn.
The green is fading.
The fans are beginning to surrender.
Nutrients are being reallocated.
Calyxes are swelling.
Resin heads are thickening.
Aroma is deepening.
Weight is climbing.
This is not decline.
This is completion.
The fade is not a problem to correct.
It is the plant finishing on purpose.
And paired with the resin production we’re seeing now, this is exactly where these girls should be.
They are not just ripening.
They are closing.
⸻
What to Expect Next Week
Next week should be all about consolidation.
Less vertical movement.
Less new growth.
More density.
More oil.
More finish.
Expect:
* continued calyx swelling
* stronger late frost production
* deeper aroma development
* more visible fade through fans and lowers
* slower water demand as the finish approaches
* heavier flowers and firmer structure across the room
At this point, the work is mostly done.
Now it is about staying out of the way, keeping the root zone clean, keeping inputs stable, and letting the plants close properly.
No panic.
No chasing.
No overcorrection.
Just finish clean.
⸻
Shoutout Corner
Big love to everyone walking this one with us.
To the platform for giving growers a place to document the real process.
To the community for the time, support, questions, conversations, and shared experience.
To the day-ones, the regulars, and the silent followers who have been here since the first leaf.
To the new faces just arriving now.
To the growers learning.
To the growers teaching.
To the ones showing love.
To the ones watching quietly.
To the skeptics.
To the critics.
To the lurkers.
To the haters too.
If this took even a second of your time, it mattered.
Energy is energy, and none of it goes unnoticed.
To the genetics for doing what good genetics do.
To the tools that help us read them.
To the sponsors who support the work.
To the growers who keep showing up.
Respect all around.
See you next week for the close.
📡 DELETED @ 1K Please stay tuned.we never quit https://www.youtube.com/@TheDogDoctorOfficial NEW 🙏 Thank you for your patience and continued support.
FOR DISCOUNT CODES AND MORE JUST FOLLOW THE LINK https://website.beacons.ai/dogdoctorofficial
📲 Don’t forget to Subscribe and follow me on Instagram and YouTube @DogDoctorOfficial for exclusive content, real-time updates, and behind-the-scenes magic. We’ve got so much more coming, including transplanting and all the amazing techniques that go along with it. You won’t want to miss it.
GrowDiaries Journal: https://growdiaries.com/grower/dogdoctorofficial
Instagram: https://www.instagram.com/dogdoctorofficial/
YouTube: https://www.youtube.com/@dogdoctorofficial Deleted by Youtube - https://www.youtube.com/@TheDogDoctorOfficial NEW
Vimeo : https://vimeo.com/dogdoctorofficial Under construction stay tuned ⸻
Explore the Gear that Powers My Grow
If you’re curious about the tech I’m using, check out these links:
🔆 Lighting & Environmental Control
• Future of Grow — Advanced LED lighting technology
https://www.futureofgrow.com/
DISCOUNT CODE: DOG20
• Lumiflora — Under-canopy LED lighting
https://lumiflorade.com/
• TrollMaster — Environmental controllers and automation gear (past collaboration)
⸻
Genetics
• Zamnesia Seeds — Genetics used in this project
https://www.zamnesia.com/
⸻
🌱 Soil, Substrates, Boosters & Root Support
• Plagron — Substrates, bio mixes, and supportive products
https://plagron.com/en/
⸻
🎒 Storage, Curing & Preservation
• Grove Bags — Curing and storage solutions
https://grovebags.com/
⸻
📸 Photography Equipment & Tools
(Not sponsors, but part of my creative toolkit)
• Sony A6700
• Sony full-frame macro lens + few more
• Stacking photography workflow - learning
• iPhone (for behind-the-scenes shots)
We’ve got much more coming as we move through the grow cycles. Trust me, you won’t want to miss the next steps, let’s push the boundaries of indoor horticulture together!
As always, this is shared for educational purposes, aiming to spread understanding and appreciation for this plant. Let’s celebrate it responsibly and continue to learn and grow together.
With true love comes happiness. Always believe in yourself, and always do things expecting nothing and with an open heart. Be a giver, and the universe will give back in ways you could never imagine.
💚 Growers love to all 💚
📸 P.S. – The Eye Behind the Lens
All photos in this diary (for now — except for the ones showing the camera, which I took with an iPhone) are taken with a Sony A6700 paired with a Sony full-frame macro lens and a few more.
Photography is part of the story — it’s how we share the fine textures, the glow, and the quiet details that words can’t always capture.
I’ve also started experimenting with photo stacking — a technique where multiple images, each taken at a slightly different focus point, are layered together to create one perfectly sharp image from front to back.
It’s not digital enhancement or AI; it’s pure photography — a way to reveal the plant’s beauty in microscopic depth, from trichome to petal.
You’ll even see a few shots of "ghost me" capturing the shots — camera, lens, setup — because every grow deserves not just to be cultivated, but documented like art.
FOR DISCOUNT CODES AND MORE JUST FOLLOW THE LINK https://website.beacons.ai/dogdoctorofficial
NEW DISCORD - Official Server Invite Link : https://discord.gg/ksjAkA5T74

Likes
5
Share


@coihue_ancestral
Follow
Las plantas están progresando de manera saludable y muy rápido
Les aumente en 0,5ml los dos nutrientes que les estoy dando y ya pueden ver los resultados
He estado muy pendiente de las plantas con el tema de la luz, frecuentemente las estoy rotando para que absorban la mayor cantidad de luz
Estoy aplicando jabón potasico para limpiar las hojas y alejar las plagas

Likes
27
Share


@adam_pawloski87
Follow
Today is Day 50 !! We have started flower an they are just looking amazing! We have switched up the nutrients for flower, instead of 1 tsp bloom and 3 tsp of veg , we just swap 3 tsp of bloom and 1 tsp of veg !! Can’t wait to see what these laddies do this week!!

Likes
66
Share


@toxicswine462
Follow
End of week 9! Everything is progressing, buds are stacking good, leaves are still yellowish but the calmag deficiency and the rust spots stopped progressing, I'm starting to think that maybe the yellowing is natural fading? Don't have a clue at this point, I just want this first run to finish in the best way possible. She is starting to smell amazing, I really can't wait to chop her but I think she has at least 3 weeks more. Patience is the key!
Day 66 08/05/2022 - Holy fucking shit, I came back home after 2 days that I was out and the smell has taken the whole house LMAO, never felt anything like it, smell of lemon and candy, it makes my mouth wet😱
Day 67 09/05/2022 - Took some pics with lights off and flash and defoliated a bit to improve air flow




Likes
9
Share


@High_Grade_Dadli
Follow
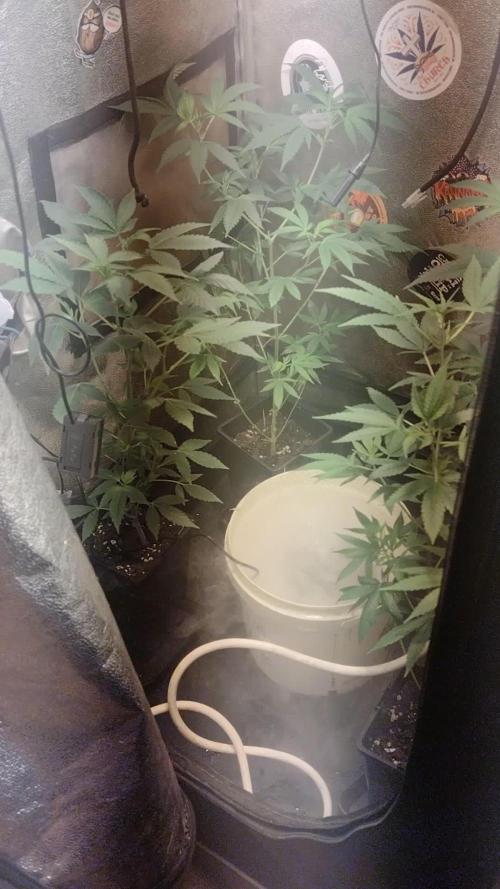
Two low branch broke off due to wind and
stem wasnt stong enough for weight of the buds....other than that just a handful or two of defoliation every two day or so....makes trimming ez lol
Likes
7
Share


Likes
15
Share


@Spirit4i20
Follow
You can notice that a part of it has started to dry out...I noticed some bed bugs on this part of the plant, plus at the base of the stem there is a big open bruise.


Likes
23
Share


@deFharo
Follow
Semana 14 desde semilla. La planta sigue creciendo lustrosa y engordando las colas, a pesar de alguna incidencia.
- A mitad de semana comencé a notar pequeñas quemaduras en la punta de las hojas más grandes, hice un riego con agua pura y medí la concentración de PPM en el agua escurrida en el plato. La medida me dió cifras locas de hasta PPM: 7500, es una medida altísima para mis propósitos, pero tampoco se puede comparar con altas concentraciones PPM surgidas de riegos con fertilizantes químicos, donde esas medidas hubieran matado irremediablemente el cultivo.
Los motivos de estas altas concentraciones de minerales y nutrientes en el sustrato son por causa de un exceso de aporte de nutrientes líquidos, sin dar descanso y oportunidad al cultivo de ir digiriendo los nutrientes que le aplico,
- Dos días después de la detección del desequilibro en el sustrato, puse 3L de agua de lluvia (EC: 0,036) y bajo el nivel de PPM hasta 1500. Como se demuestra un lavado de raíces en un sustrato puramente orgánico es mucho más fácil por la poca agua necesaria, ya que el arrastre o disolución de componentes sobrantes es mucho más directa y no necesita tanta agua como para disolver las sales acumuladas de fertilizaciones químicas. Cuando se hace un lavado de raíces como el anterior, se debe de tener en cuenta que, el elemento que más rápidamente se pierde por el lixiviado es el Nitrógeno, en base a esto observar las señales de falta de nitrógeno y corregir en posteriores riegos.
• En base a lo anterior, partir de esta semana comienzo a aplicar otra estrategia para el riego con nutrientes, el cambio lo voy a hacer en todos los cultivos y se trata de esperar al menos 72h desde el último aporte de nutrientes (Sólidos o líquidos) para aplicar nuevos, mientras tanto, si la planta necesita riego, lo haré sólo con agua para de esta manera dar tiempo a la planta a digerir todos los nutrientes convenientemente, voy a bajar también el nivel de EC en todos los riegos durante todo el cultivo, además voy a hacer formulaciones nutricionales más simples y específicas, excepto componentes que sistemáticamente incluyo en todos los riegos como el Ormus, la melaza o la miel, con este cambio de estrategia estaré muy atento a las señales de la planta, el motivo del cambio es primero para reforzar mi autocontrol frente a mi afición a sobrealimentar las plantas debido a mi colección de preparados 😋, aunque no es fácil bloquear dramáticamente una planta cultivada con puros elementos orgánicos, estoy observando un exagerado EC en el agua sobrante de las macetas, esto me indica que los MM están haciendo muy bien su trabajo de disolver los componentes del sustrato, componentes que al añadirlos en demasía enriquecen sin medida el sustrato haciéndolo demasiado denso, perjudicando su eficacia.
😕 DIETA SEMANAL
1) Día 99. Ormus 2%, Bio frutas NP 2%, Lacto fermento MMM 1%, Hidrolizado de Pezuña 0,25% y Melaza. PH: 6.33 EC: 2.0 - 900ml.
2) Día 100. Ormus 1,5%, Humato PK 1,5% y Melaza. PH: 6.3 EC: 1.66 - 600ml.
3) Día 101. Ormus 2,2%, MMA 3%, Melaza y Lixiviado 2%. PH: 6.6 EC: 2.0 - 500ml.
4) Día 102. Ormus 1%, Humato Mineral 2% y Melaza. PH: 6.4 EC: 1.87 - 900ml.
5) Día 103. Sólo agua pura con miel. PH: 6.8 EC: 0.350 - 600ml.
6) Día 104. Agua pura con miel y 1% de MMA y Ormus. PH: 6.37 EC: 0.850 - 800ml.
7) Día 105. Agua de lluvia. PH: 6.8 EC: 0,036. 3L. (Recojo 1,8 litros de lixiviado que uso diluido para regar mis geranios y otras flores)
😂 GROWING TIPS
Lacto fermento experimental con auxinas y enriquecido con minerales y nutrientes NP, para usar desde germinación hasta preflora. Debido a que disponía de 1,2 litros de auxinas líquidas y estaban a poco de caducar he comenzado este bio fertilizante con la intención de mantener una solución de riego rico en auxinas naturales y otros elementos específicos para enraizado y crecimiento vegetativo.
1) Obtención del suero de leche con leche fresca o pasteurizada.
a) Calentar la leche entre 70°C a 90°C
b) Apagar el fuego y añadir el zumo de 1 limón grande.
c) Revolver con madera hasta que se vea la leche cortada.
d) Dejar enfriar 30 minutos.
e) Colar y filtrar para separar el suero de la materia sólida.
f) De 1,5l de leche pasteurizada he sacado 1,2l. de suero.
2) Mezclar el suero con melaza y miel
3) Pesar los componentes sólidos y añadirlos al recipiente digestor. Añado zanahoria picada para garantizar la presencia de Boro.
4) Añadir al suero, Bacterias ácido lácticas (BAL), levadura de pan y Ormus.
5) Añadir la mezcla al barril.
6) Agitar vigorosamente.
7) Añado el agua de auxinas.*
8) Cierro herméticamente el recipiente y coloco la válvula de escape de gases.
9) Lo dejo fermentar al menos por 30 días. Cuanto más tiempo se mantenga en fermentación mejor es el resultado del lacto fermento, como el vino!!
* Para todos mis fermentados y bioles uso agua de un manantial de montaña cercano, este agua es muy alcalina PH: 9.2 y contiene mucho mineral: EC: 0.85, la uso para compensar la acidez de los fermentados y garantizar un aporte seguro de carbonato cálcico y trazas minerales.
El preparado comenzó a fermentar a los 20 minutos de cerrar el barril. Probaré este lacto fermento incluyéndolo en mis procesos de germinación y crecimiento.
Saludos y hasta la próxima semana!! 😷
Likes
24
Share


@SmallBatchNugz
Follow
ETHOS Cherry Gar-see-ya ... just found out about this neat site... stay tuned!!!!!......8 weeks of veg from seed... DWC... 3 gal pails.... topping... fimming and defoilage.... stay tuned for flower time.. week by week.

Likes
25
Share

@Borberad
Follow
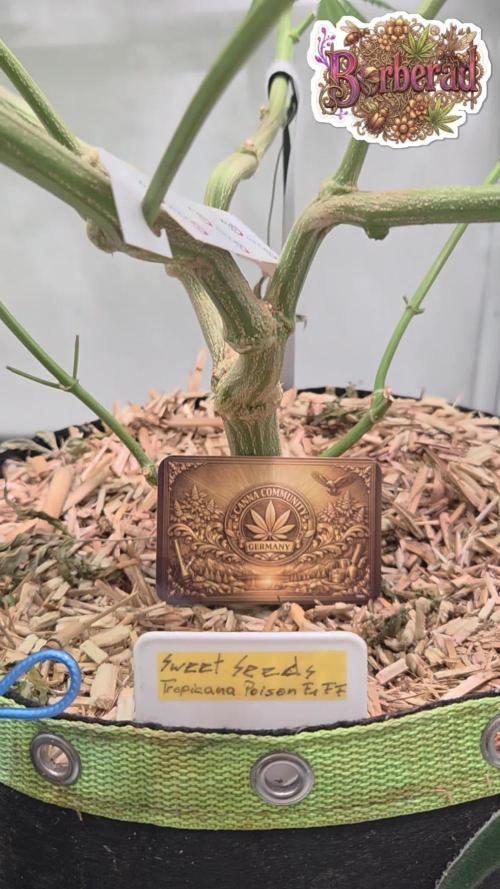
Woche 11
Herrliches strömt aus dem Zelt. Das Blümchen duftet extrem süß fruchtig und ist mit glitzernden Trichomen überzogen. Der ein oder andere Bereich der Buds scheint auch ein bisschen rot zu schimmern. Mal sehen was noch geht.

Likes
7
Share

@TheDutchWizzards
Follow
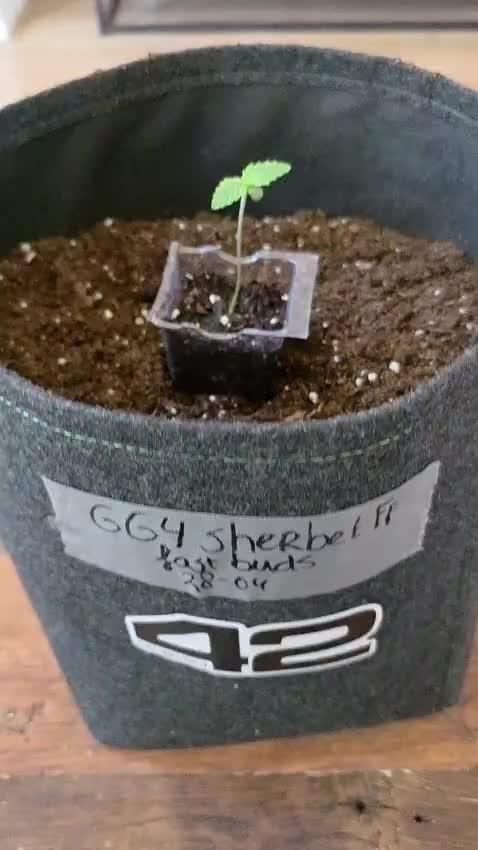
So lets gooo, i chosen to grow 1 of many lovely strains from @fast_buds 🙏🏻🌱🤙🏻 i popped one of this strain and she germanted great and looking very strong and stable 🌱🌱 So happy daysss
also check our instagram : https://www.instagram.com/thedutchwizzards?igsh=MTMzd2JuOWxpbWlxNQ%3D%3D&utm_source=qr
Big tnx for taking time to check it out 🌱🌱🤙🏻🙏🏻
Likes
10
Share


@jahredi
Follow
Things are looking good. I started counting Day 1 before the dummy leaves even shed the seed, also, I think the 3 gal pots are probably holding back the above ground growth a tad. Been watering about .5 gallons each in a ring just outside the plant every 2-3 days. They look healthy and I'm sure by the end of the week, they'll be screaming along.
Not sure if I'm more excited about the ganja or the melons. Lol. Can't wait to enjoy both ☀️🍉💨
Likes
5
Share


@negyhusztv
Follow
Always the happiest period we starting to switch the lights to flowering stage, Also we incrase the ventilation and starting to manipulate huminidy also. The plants now needs every day around a 2 x 9 l osmo water and i boos it with 2 x 0,9 ml / l TA NovaMax Grow and Bloom.
Likes
10
Share


@BelgianBudtender
Follow
Hey growmies!
what a week for this plant, she responded wonderfully to the lollipopping and defoliation performed last week, in fact she started voraciously eating and i had to keep increasing dose and water every day. She did enter flower now, I have taken off a few more offshoots that wouldn't have yielded much bud and was crowding the canopy with tiny branches. Now was my last chance to take off said shoots, because this girl has started pumping energy into stretching, and now more of that precious energy will go into more dominant branches, that ultimately will yield higher quality flower.
Could I technically have higher yield if I left the little branches? possibly. but that weight would come in fluffy bud that choke out airflow and nutrients away from the pretty flowers, which in turn suffer.
the plant started stretching and she grew too close to her new lights, as a result all my tops have yellow tips, she should recover nicely however, I have raised the lights back to 45 cm above the canopy.
Speaking of canopy, this autoflower is pretty big, atleast in DWC, so if you're growing her, deffo ScrOG her.
Hydroguard keeps my roots pretty healthy, even during the heatwave without a chiller!
next week i will put in a second trellis, help her while she stretches! hope to see you then

Likes
3
Share

@Pipapole
Follow
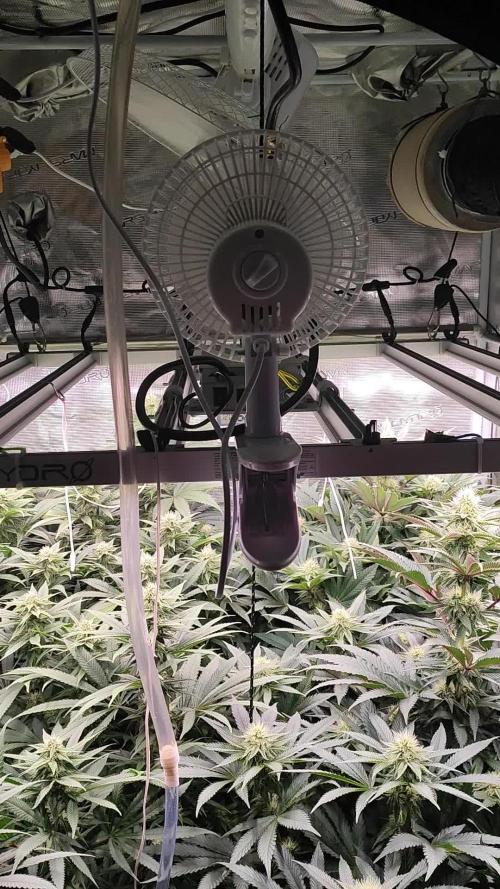
Blüte Woche 3 ist überstanden auf serious seeds ist tatsächlich Verlass die seriotika sind nicht größer wie ein Meter geworden ich bin jetzt bei knappen 95 cm und angekommen die Pflanzen entwickeln sich prächtig!


