


Likes
Comments
Share

@MuckmanMelts
Follow
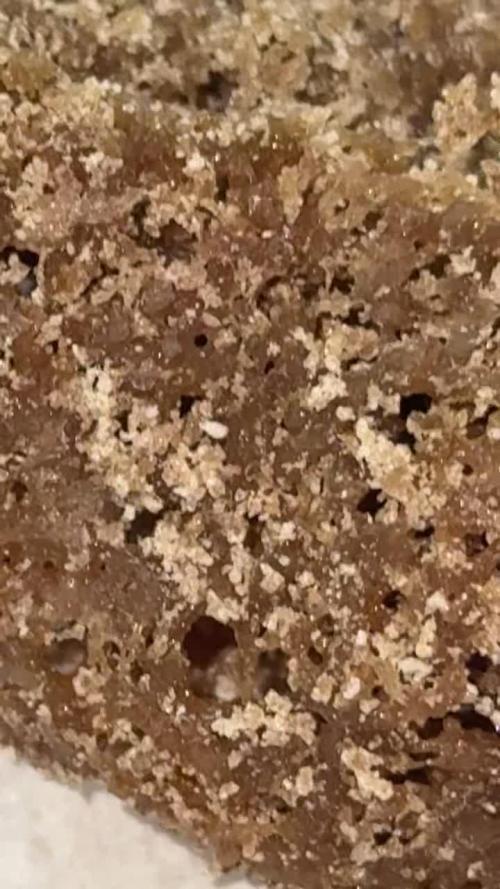
This grow is looking phenomenal. Can’t wait to wash for rosin! Freezing as of now update: test run of bubble this shit is fucing crazy gas. So pungent and full of flavor. Tried some wet Melt in the Puffco it hits like crazy. Great effects and gas flavor. Will be pressing asap update did a 2nd wash tonight of all the trim from plant 3. I’d say 600 wet grams. Yielded great and awesome color.
update: pressed 10 gram puck of rosin to test run. See results above. She’s a squirter! Update: I’m officially done wash all of this plant. Good fuckin riddance in the best way. Ugh I’m just pooped hands are killin me. Over 3 batches the yeild is insane: the coloring in the first hash batch has such an orange/ yellow tint compared to the pale merky other 2 batches. Anywho ids say 35 grams total in hash. We will have to see the total numbers but to say I yielded 10 grams with the smaller batch I’d say on par. Fuck I can prolly make some thumbprints with the 2 different hues make it fancy. Great time for it being cold!
Update: I am done officially washing this strain. 4 batches I’m going to estimate 50 grams of fresh frozen dried hash out.

Likes
16
Share


@osmrducks
Follow
Day 29: The girls are looking great. I upped the nutes yesterday, as I have been giving them barely any at all. Will up them once again on next feeding. Looking like tomorrow. The main branch that I snapped off did not make it. Lesson learned on that one.
Day 30: Removed all other lights and added the HLG 550 V2 RSpec. Did some defoliation on the girls along with another feeding. Will do straight PH'd water next go. The girls are looking strong and healthy. 💪 Just on the small side. Still having to leave the tent wide open to subside temps and humidity.
Day 31: Nothing new to report. Looking very short and stubby and healthy!!
Day 32: Looking like they had some good stretching going on over the 3-day weekend. Will be needing fed tomorrow after work. May water a little less this time, as it is taking 2-3 days for them to dry out.
Day 33: Great stretch and bloom on the girls today! They are looking super healthy and strong! 💪 No smell yet.
Day 34: Girls are looking decent. Noticed some rusty looking splotches on the leaves. I'm thinking possibly Cal-Mag deficiency? Not sure.
Day 35: Not looking too happy today. I let them dry completely and watered with only Cal-Mag. Hoping the patchiness clears up for them!


Likes
10
Share

@InsideAz
Follow
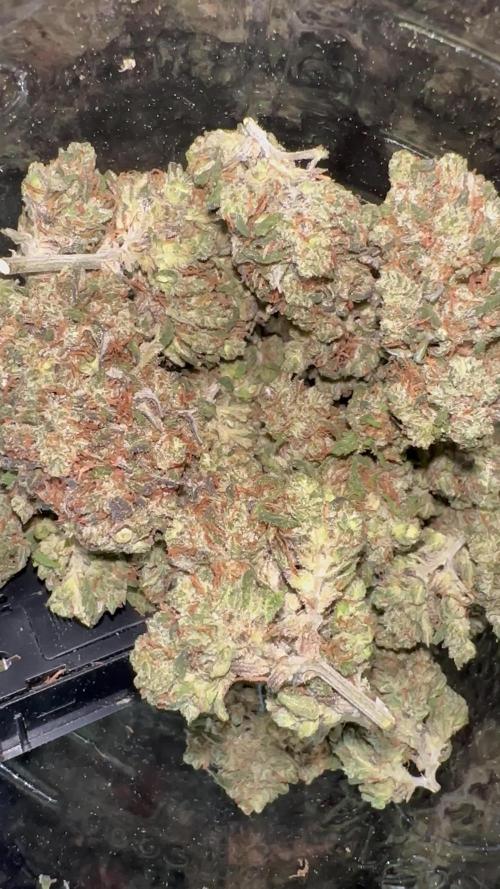
This is my 1st of 4 Banana Purple Punches that was green all the way through, I think the chances of a green plant on that strain about 20% so I hit that almost head on. Also this is the last BPP seed I had, grew 4 and gave 1 away to a friend, which also grew amazing and flavorful. Gotta spread the love (:
Loved growing this strain for the last few years one plant at a time. Always a good strain to throw in the mix with some autos. They were free seeds that I will be buying in the future when I run out of buds and begin to miss her distinct effects.

Likes
127
Share


@DreamIT
Follow
🎃👹👽MONSTERCROPPING RED MANDARINE 👽👹🎃
____________________________________________________________________________________
💀 19.2
💀 20.2
💀 21.2
💀 22.2
💀 23.2 vacation week
💀 24.2
💀 25.2 ...
____________________________________________________________________________________________
📜👀 A look at the details of what I'm growing 👀📜
🍊💚 Red Mandarine F1 🍊💚 by 🌱🍭 Sweet Seeds 🍭🌱
📋 Details
⚧ Gender
▪️ Feminised
➰ Genes
▪️ 55% Indica / 45% Sativa
🎄 Genetics
▪️ Red Poison Auto (SWS39) хCalifornia Orange x Skunk hybrid)
🚜Harvest
▪️ 400 - 500 g / m²
🌷Flowering
▪️ 49 - 63 days
✨THC
▪️ 16%
✅CBD
▪️ 0,2%
🏡Room Type
▪️ Indoor
🌄Room Type
▪️ Outdoor
🕋Room Type
▪️ N/D
🎂Release Year
▪️ 2019
__________________________________________________________________________
👀📷🥇 Follow the best photos on Instagram 🥇📷👀
https://www.instagram.com/dreamit420/
🔻🔻🔻Leave a comment with your opinions if you pass by here🔻🔻🔻
🤟🤗💚Thanks and Enjoy growth 💚🤗🤟

Processing
Likes
19
Share


@Fire_Farmer
Follow
I'm like 5 days late with this update so I have had to pin videos that I took the same week while I was communicating with TRYHARD so ignore any dialogue that's out of context they aren't diary logs they are simply correspondence between myself And TRY, oh and sorry about my language I'm common as muck me.
The pictures are just random pics I took that week as oppose to my usual more organised method but hey ho I'll do a more tidy job next week.
The week went swimmingly barring some nitrogen deff on the lowers which I initially put down to the hot weather drying the pots too quickly and causing nute lockout with the salt buildup so I flushed then gave them a nice feed after they dried the pot at which point I noticed the most heavily afflicted by the N deff were also the quickest drinkers and had lower EC on the runoff so I have been giving them a slightly stronger feed than the others and it seems to have solved everything so I'm happy with that.
Bud development is nice, frost is nice, terps are through the roof right now.....
Zkittlez ones are really stinking of lime and candy bubblegum
Punch ones are stinking berry berry nice!
Grandpas Crush is smelling kinda hazey right now but I'm hoping the berries comes out of her too.
Little else to report really.
Thanks for reading
One Love 💚
Fire Farmer🔥👨🌾
Processing
Likes
21
Share


@LittleBigTrees
Follow
The plants were so crowded I decided to put them into a Larger tent to allow some light to the lower bud sites and to help lower the humidity amongst the plants. I'm sure they will love the extra space.
The light has now been raised 20cm (20cm taller tent)
Allowing me to turn out right up which is 45000 lux in the centre right below it.
I will up the bloom to 2ml/l this coming week.
Likes
Comments
Share


Likes
8
Share


@Chucky324
Follow
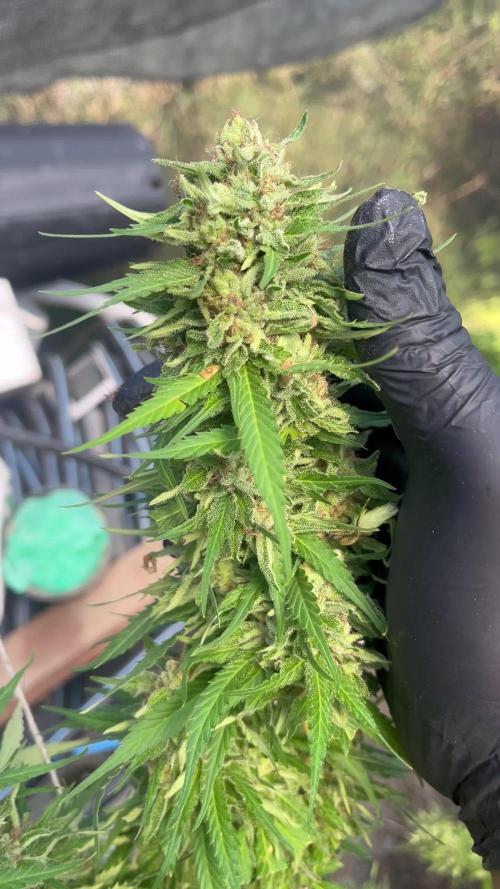
Hello. This is the end of week 12 and the beginning of week 13 of veg.
The plants are doing good and smelling like citrus/lemon when I work with them.
It will still be another week or 2 before I start flowering. I'll continue with training them till they fill in their spaces.
A couple of plants have made it to the edge now, but still have to fill in the spaces.
They are getting a gallon of rainwater each 3 to 4 days now.
There's lots of compost in each pot (5 gallons per pot) to keep them going for a few more weeks before needing nutrients.
In the past, in this greenhouse, I've used my 15 gallon hydro reservoir to give a some nutrient each day, and hand watered when they seem dry.
And got great results. So I'll try that method again this year. Give enough nutrient each day for 6 days so the 15 gallon tub lasts 6 days.
Then make more nutrient and wash the tub/reservoir on the seventh day. Then fill it up for the next 6 day schedule.
I'll do that starting the 2nd week of flowering with flowering nutrient. Just so's you knows.
OK. Be Great.
Chuck.


Likes
22
Share


@Stork
Follow
Day 50 Mon
PH 5.7
EC 0.8
DLI /12h/
PPFD/
Water 21c
Day 51 Tue
PH 5.8
EC 0.8
DLI /12h/
PPFD/
Water 21c
Day 52 Wed
PH 5.7
EC 0.8
DLI /12h/
PPFD/
Water 21c
Day 53 Thu
Reset water and add 5 L nuts
PH 5.8
EC 1.1
DLI /12h/
PPFD/
Water 16c
Day 54 Fri
PH 6.3/5.8
EC 1.1
DLI /12h/
PPFD/
Water 16c
Day 55 Sat
PH 5.9
EC 1.1
DLI /12h/
PPFD/
Water 20c
Day 56 Sun
PH 5.9
EC 1.1
DLI /12h/
PPFD/
Water 19c
Likes
17
Share


@Fat_Olsh_Farms
Follow
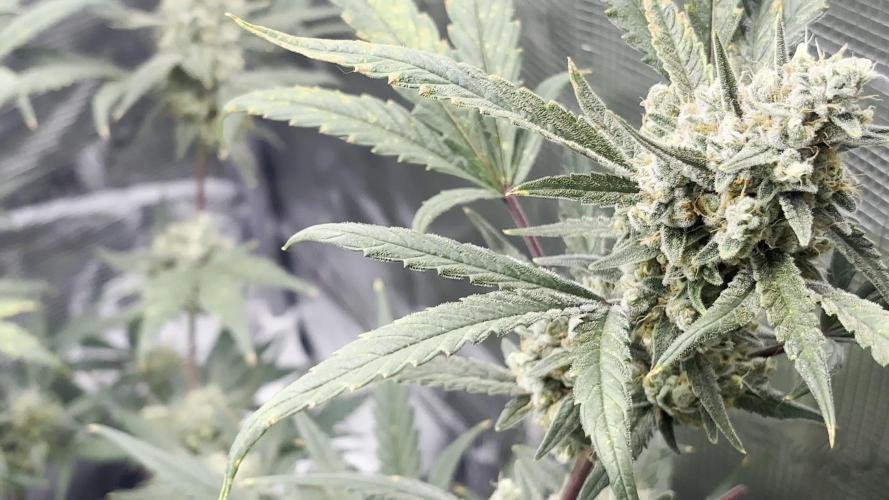
Day 21. Mild dose of general Hydroponics maxigro every other watering. Watering each time slowly til 10-15% runoff.
LST and HST daily. Removing 1 or 2 leaves per day to open her up.
Day 24. Lowered light to try and boost growth.



Likes
19
Share

@GoldenWeedGrower
Follow
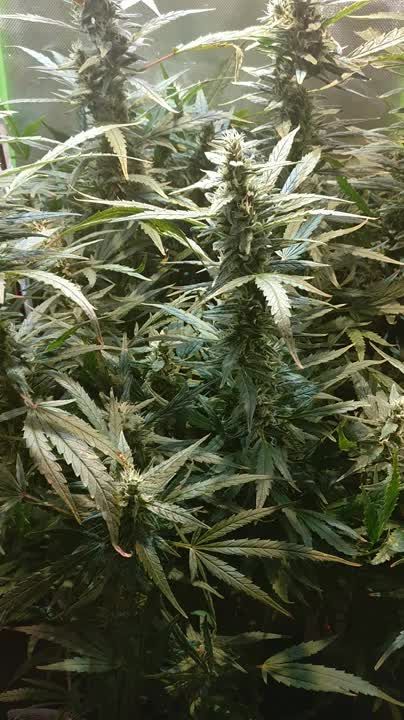
Just made a total flush. The new res with flora kleen will run until 05/06 @00:10
The today res is
04/06
EC: 0,47
PH: 6,4
05/06
Flush made, now I've a totally new res with a lower EC and stable PH.
After the flush the new leaves seems going better.
EC: 1,3
PH: 6
06/06
Great new: she starts smelling very good :D
EC: 1,18
PH: 5,6
07/06
EC: 1,17
PH: 6,04
08/06
EC: 1,37
PH: 5,8
09/06
EC: 1,37
PH: 5,72
09/06
EC: 1,33
PH: 6,15
10/06
BAD THINGH HAPPENED. I realized that the PH meter was broken and the PH res were very much lower than what I guessed!! The roots was immerged from many days in a really acid solution.
So I completely changed the res and eliminated all the rotten branches (that was many). I hope my girl will survive to this bad stress. Finger crossed!

Likes
6
Share

@420DeepGrow
Follow
📆 Semana 7
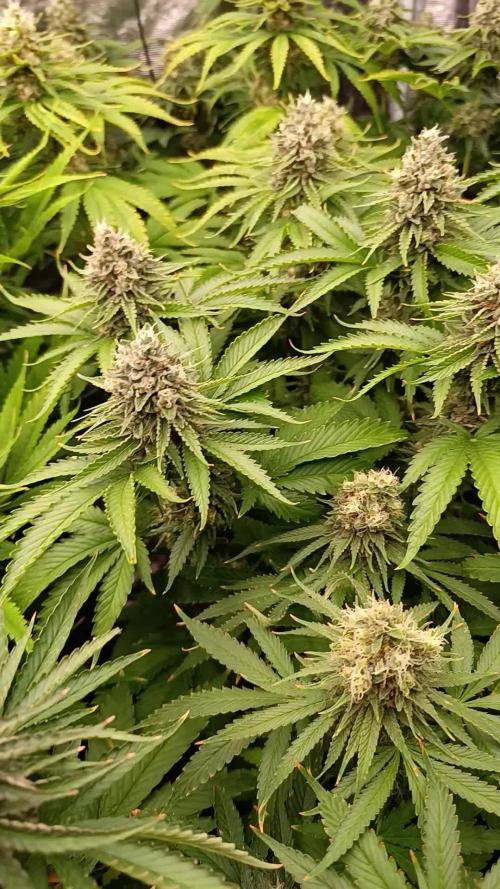
El engorde continúa a gran ritmo y los cogollos siguen ganando volumen y densidad cada día. Los cálices continúan hinchándose, los pistilos permanecen mayoritariamente blancos y la producción de resina sigue aumentando, haciendo que los aromas sean cada vez más intensos.
Las plantas mantienen un elevado consumo de agua y nutrientes, respondiendo de forma excelente. Mantener una nutrición equilibrada y un ambiente estable será clave para completar esta fase de desarrollo.
⚡ EC: 1.8 1.7
💧 pH: 6.2–6.5
🌡️ Agua: 21°C
🌫️ Humedad: 40–45%
💡 Intensidad: 1000–1050 PPFD
🔥 Nota de cultivo: La estabilidad sigue siendo la prioridad para maximizar el engorde, la producción de resina y la calidad final de las flores.
Seguimos creciendo fuerte 💪!

Likes
3
Share


@macrocefalo
Follow
We arrived in the third week the plants show good vigor and growth. Some cold days 17 Cº may have prevented further growth but we do not have to complain the plants demonstrate to be enjoying food and light. On the 15th the plants presented slightly wilted leaves as day 16 was the day of watering I imagined it was thirsty. But day 16 a few hours after watering the plant still had the same symptoms so I realized that the LED screen was 53 cm from the plant. I increased the distance to 65cm and the plant returned to normal both in force and I managed to correct the diagnosis. I am managing to apprehend some things finally putting into practice.
Likes
53
Share


@DogDoctorOfficial
Follow
Hey Grow Diaries fam,
Welcome back to another update on our PCR adventure! We're at Week 9, which marks Week 4 of the flowering stage, and things are getting exciting!
Overview
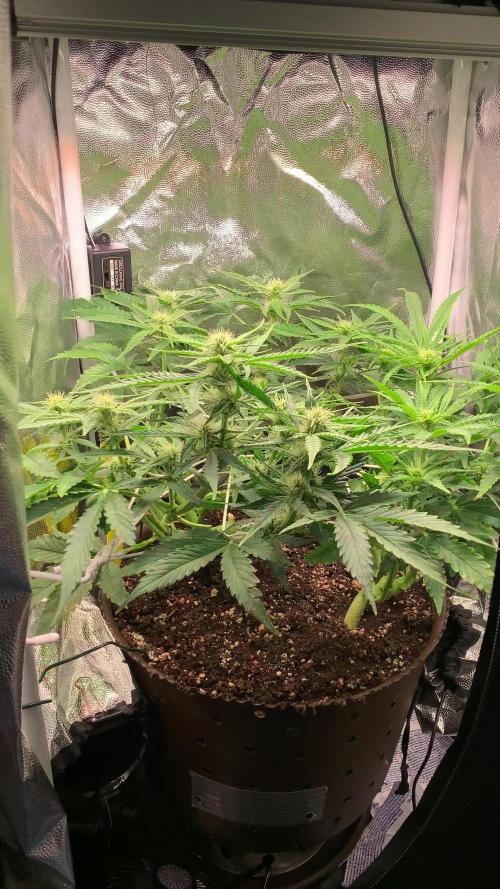
The PCRs are flourishing, and the transformation is nothing short of spectacular. The tent is buzzing with energy, and every day brings new developments. The buds are swelling beautifully, and the trichome production is off the charts. This week has been all about maintaining optimal conditions and ensuring our ladies get everything they need to reach their full potential.
Environment and Conditions
Tent: 3x3, cleaned and prepped from top to bottom to ensure a pristine environment.
Lighting: ViparSpectra P2000, delivering a perfect spectrum for this stage of growth. The balanced PAR output and efficient energy use keep our girls happy and thriving.
Watering: TDS at 410, pH 5.8, and water temperature at 21°C. This ensures the nutrients are perfectly balanced and readily available.
Nutrient Regimen
We’ve kept up with our Aptus Holland feeding schedule, and it's paying off big time. Here's the current mix:
Nutritional Spray: Aptus Holland NutriSpray to keep those leaves lush and healthy.
TopBooster: Replaced StartBooster with TopBooster to promote flower development.
P-Boost: Added to the mix for that extra phosphorus kick, crucial for blooming.
K-Boost: a must for them to go fat as we like.
The results speak for themselves – lush green foliage and robust bud formation.
Defoliation
At the end of this week, we performed a mass defoliation. It's always a bit nerve-wracking, but the results are worth it. Removing excess leaves ensures better light penetration and airflow, reducing the risk of mold and pests. Plus, it allows the plant to focus its energy on bud production. And let me tell you, after the defoliation, the PCRs look sexy as ever with their long legs and sculpted structure!
Clones Update
Our clones are thriving, showing the longest and whitest roots I've ever seen. We treated them with a water mix that included K-Boost and Mycor Mix at 1 gram per liter. This combination has worked wonders, promoting vigorous root development and overall plant health.
Reflections
This week has been a testament to the importance of a clean environment and precise nutrient management. The PCRs are responding exceptionally well, and I couldn’t be more thrilled with their progress. We're well on our way to an incredible harvest, and I can't wait to see these beauties in full bloom.
A huge shout out to:
Aptus Holland: For the top-notch nutrients and constant support. You guys rock!
Art Genetix: For creating such an incredible strain. The PCRs are truly something special.
Grow Diaries Community: Your support and feedback are invaluable. Keep the positive vibes coming!
Here’s to another fantastic week of growing! Stay positive, keep pushing forward, and enjoy every moment of this beautiful journey.
Genetics - P.C.R. @Art_Genetix_Team https://artgenetix.world/
Nutricion @aptusholland https://aptus-holland.com/
LED Power @Lumatek and @viparspectra
As always thank you all for stopping by , for the love and for it all, i fell blessed to have you all with me for one more love journey Thank you Thank you Thank you , you guys are great and have been amazing , thank you for everything !
#aptus #aptusplanttech #aptusgang #aptusfamily #aptustrueplantscience #inbalancewithnature #trueplantscience #dogdoctorofficial #growerslove
With true love comes happiness , Always believe in your self and always do things expecting nothing and with an open heart , be a giver and the universe will give back to you in ways you could not even imagine so !
Growers love to you all



Likes
11
Share


@LiamF
Follow
So after 106 days + 11 days drying im finally done with my first grow.
Got 97g dry buds + 30g shake
Way more then i anticipated.
Alot of the buds are pretty airy but the top ones qre pretty solid and all of them have amazing coat of trichomes.
Im so greatful i had this experience. I learnt alot and have way more confidence to grow more and my plan was to have my first grow to anwser all the questions i had.
Im cant believe i spent less then 300$ on this setup and harvested equals to like 1,500 - 1,700 $ of buds(prices in my country) thats definitely going to help me with the economy situation right now. And all this was stealth inside my closet, i had family members comming and didn't notice nothing i just had to turn off the blower fan since it's the only thing in my setup which isn't stealth.
I know i didn't gave her the best conditions but she showed me how strong is a Cannabis plant 😍
Im just starting my 2nd grow - Auto Northen Lights. Stay tuned

Likes
20
Share


@Chubbs
Follow
420 Fastbuds Week 2 Veg
FBT2305
The two of these are starting off great. The few rust spots stopped and stayed on the couple leafs it showed up on. I feed 500ml of solution every other day. I did start the General Hydroponics 3 part Flora series as well as the Calimagic. On week one I started 1/4tsp per gal ratio every other feed, so far no burn so will probably bump it up this coming week and see how they respond. All in all Happy Growing.