
Likes
18
Share
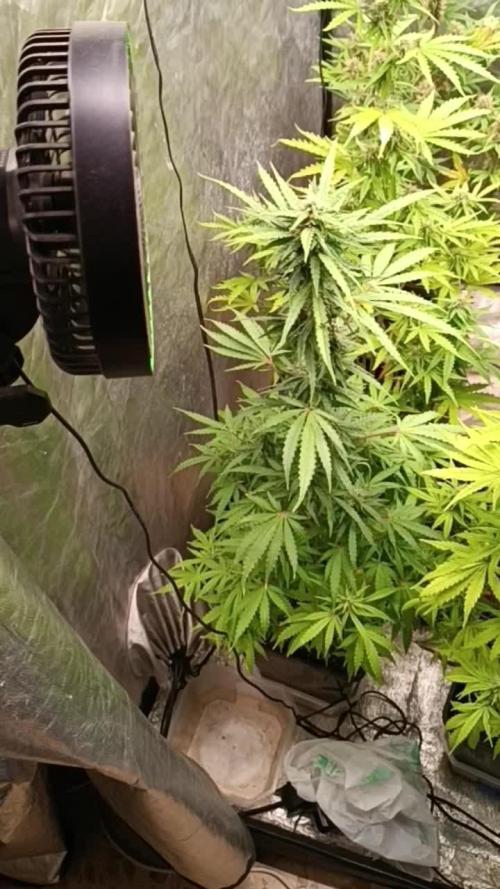
Hello friends! Welcome back to the enchanted gardens of PEAKY These sweets seem to develop differently My God ... It looks like a meteor fell from uranium into my tent It gives off radiation ... be careful!šŸ˜Ž
Likes
7
Share
@maxpain
Follow
Week was good did a light defoliation...buds coming in nice now she smells nice too
Likes
1
Share
@Blessed
Follow
Cured for 1 month, nice trichomas covering, smell good, nice THC level (not for beginners), easy to grow, long cycle, needs long term veg time.
Processing
Likes
18
Share
@desijones
Follow
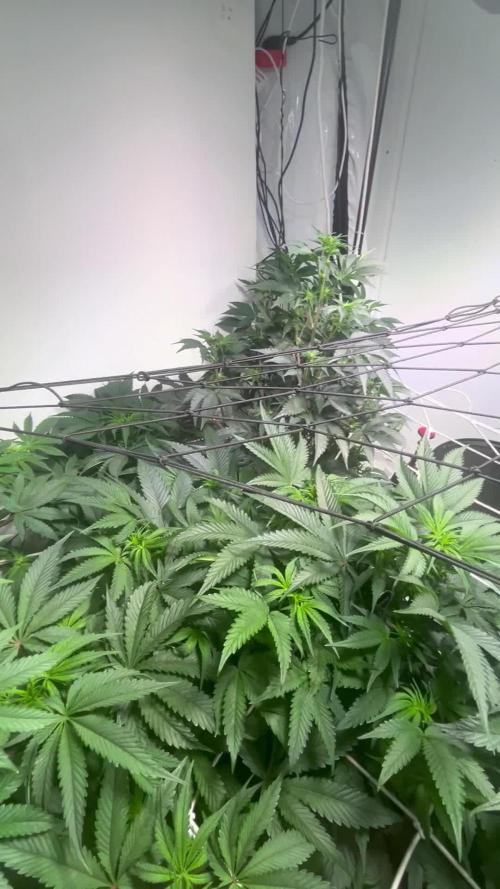
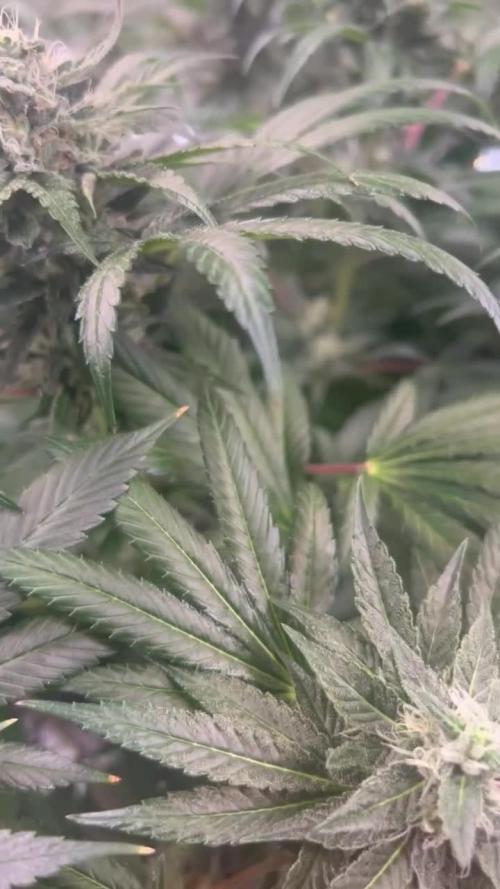
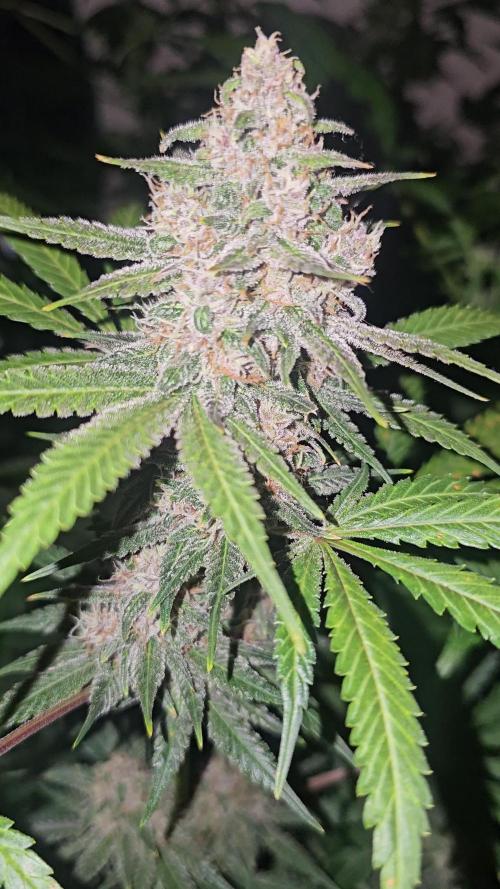
These ladies are really stretching this week. I should see the stretch slow down in the next couple of days. Looks like bud production is just starting. I reduced the amount of nitrogen in my feed and will continue over the next few weeks.
Likes
17
Share
Hello guysšŸ˜šŸ˜ We have reached the sixth week of flowering All phenotypes are now visiblešŸ˜ The color of some plants has completely changed due to the temperature difference I observed between night and day. The very dense and snowy buds are the result of my genetic cross (OGcream) of course the real result in my opinion is obtained after drying😈 This week I used feeding and advance fertilizers. Thank you for following and commentingšŸ˜ "farah4weed"
Likes
12
Share
🌸 Week 4 – Gorilla Cookies Auto Pheno Hunt Week 4 has officially started and all 6 phenos have entered flowering šŸ”„šŸŒø Really happy to see every plant transitioning into bloom now. From this point on, things should get much more interesting because the differences between the phenos are becoming impossible to ignore. šŸ“ˆ Current observations: Several phenos are stretching hard since flowering started Some plants are already reaching heights of around 40 cm Growth patterns are becoming much clearer between each phenotype On the taller phenos you can already see that the first side branches are developing almost like additional main colas šŸ‘€ šŸ’§ Feeding & training: This week the plants received their first bloom nutrients following the Master Recipe. I also continued removing selected large fan leaves that were shading potential flower sites to improve light penetration and help lower branches develop more evenly. šŸ“Š Current environment: Temperature stable around 26°C Humidity remaining between 63–65% VPD holding around 1.3 kPa Light intensity unchanged Now the exciting phase begins — the next few weeks will probably be the most important ones to identify the strongest and most beautiful phenos in the hunt šŸ‘€šŸ”„ šŸ’¬ Which pheno do you think will dominate once flower production really kicks in?
Likes
25
Share
@BB_UK
Follow
Been a wonderful week! Defoliated for the last time until the flip and have great news! Have a new light on arrival TSW2000 and it will cover the whole space in the tent! Mars hydro have made me proud of myself! I’m glad I’m a loyal Martian šŸ™šŸ’š I will continue on as per usual until I flip them to 12-12 thank you for stopping by
Likes
7
Share
Hello growers, Another week down. Nothing major happening so keeping it short and simple. After stretching she is 83cm from base to highest cola thanks to the training. I measured the main stem and it comes out around 1.4m in length. Flower development has gone into full effect. Decrease in temperature outside so hoping to get tight and dense nugs. Water 1.5L per day.
Likes
44
Share
The plants seemed to be hungry this week even though they have been given the correct dose of dry amendments. I have started to feed them my usual Organic feed as well. They are now putting on weight and colour. Removed some dead leaves and they seem ok. Also starting to smell now.
Likes
Comments
Share
@Oyziphar
Follow
šŸ‘½ We had very sunny day this week šŸŒžšŸŒžšŸŒž, with very hot temperatures šŸŒ¶ļøšŸŒ¶ļøšŸŒ¶ļø Fourth week of Light Deprivation šŸ‘‰šŸ‘‰šŸ‘‰šŸ‘‰Every morning at 8:30 am I move the plants to the greenhouse. šŸ‘‰šŸ‘‰šŸ‘‰šŸ‘‰Every evening at 8:30 pm I move the plants (together with some other strains) inside the growroom (which I don't use in the summer) āž”ļø I defoliated the plants āž”ļø The plants are making new flowers everyday 🌻🌻🌻, trichomes are appearing, and every day they start to smell stronger šŸ‘ƒšŸ‘ƒšŸ‘ƒ āž”ļø Plant #3 (last photos) has beautiful pink pistils 🌷🌷🌷 šŸ‘‰Two times a week I boost the plants with gift of water enriched with OPF 7:2:3 ; Fulvic 25 ; Yuccah ; Biovin liquid ; Earthworm compost extract ⭐Big Thanks to Luc from Plant Health Solutions / Bioplantenvoeding dot nl ⭐ Plant #1 ; height : 147 cm Plant #2 ; height : 130 cm Plant #3 ; height : 117 cm
Processing
Likes
6
Share
Plants are looking much healthier than before. There’s a bit leaf curling on sour dream. Their growth didn’t stunt at all after defoliation as I did it way more than I should have. The unknown strain has been growing so perfectly.
Likes
22
Share
@PhotonMan
Follow
04/09-- 04/10 500ml of solution each pot, PH 5.84, nutrients as described into schedule. 04/11-- 04/12 200ml of pure water each pot, PH 5.8 04/13-- 04/14 500ml of solution, PH 5.8, added + 1ml of B-52 and +1ml of nirvana 04/15--
Likes
19
Share
Bueno , este es el segundo cultivo que realizó del la cepa "Waka" , el anterior lo tengo igualmente documentado en otro diario . en esta ocasión cultivamos los clones que habĆ­amos recolectado del cultivo pasado , guardando los fenotipos que nos gustaron mĆ”s y los clones restantes los pasamos a floración que fueron los que se le hizo seguimiento en este diario. El crecimiento fue bastante explosivo y reaccionaron muy bien a cada trasplante realizado . pude observar que los clones de cada fenotipo seleccionado se desarrolló con mucha similitud al de sus madres . El olor en vegetación es bastante discreto y en floración se pone un mĆ”s intenso El desarrollo en floración fue explosivo generando bastante resina y se vieron muy hambientras . Al fumar se puede sentir un rico toque cĆ­trico en las N° 4 se siente un fuerte sabor a limón en algunas flores mucho mas marcado que en otras, N° 3 y 13 un agradable toque a naranjas muy rico de sentir en el paladar , La N° 8 con pizcas dulces bastante interesantes. El humo al fumar es muy suave lo que permite sentir mejor el sabor de cada fenotipo.- saludos y buenos humosšŸ˜‰ Al momento de cosechar se cortaron los clone y se dejo secando en oscuridad a temperatura ambiente por cerca de 16 dĆ­as posterior a eso se pasó a curar en frascos
Likes
16
Share
@Ensign420
Follow
Introduction - Week 14|07 Summary - Ensign's log, stardate 9437.65, Great week of growing! Wow what a good week! Growth in the main tent has all around been incredible! Submitted my first submission to the Global Grow Cup! Filmed a video of the solo cup container (marked with the ticket/order number) that will be used for the competition. Also had to fill and prove the solo cup holds 2 cups of soil. Now I need to root a clone (for the first time), transplant her into this cup, and submit my 2nd entry before the 30th of this month. As far as my first attempt at cloning, have already begun the rooting process! Managed to take cuttings from 3 out of the 6 phenos in the main tent (the first cutting was also my first time topping). Soaked the cuttings for two days before planting them into Coco Coins. So far everything has gone surprisingly well! The clones are now rooting under the propagation dome with the vents fully closed. Will check for roots soon! At the end of the week, growth was just raging! Was planning on flipping to flower in a week, but decided to begin the first week of flower next week! Thus this is the last week of veg. Plan to flip to 12/12 next Monday! Onwards to next week! [START OF WEEK 14|07] ========================================================== Garlic Budder #1 - WEEK 14|07 - Full Veg Wk5 Garlic Budder #2 - WEEK 14|07 - Full Veg Wk2 Garlic Budder #3 - WEEK 07 - Full Veg Wk5 Garlic Budder #4 - WEEK 06 - Full Veg Wk4 06/03/24 → 06/09/24 This Week's Estimated Goals ---------------------------------------------------------------------------------------------- DLI: ~26 mol/m²/d PPFD: ~400 μmol/m²/s VPD: ~1.0 kPa This Week's Meter Readings & Averages [Lights On: 16:00 - 10:00] ---------------------------------------------------------------------------------------------- DLI: 24.56 mol/m²/d PPFD: 379 μmol/m²/s VPD: 0.91 kPa Soil %: [32.7, 37.6, 37.9, 34.1] ========================================================== Day 01 - Monday - 06/03/24 - Total Days: 098 ----------------------------------- Daily Averages [~23:00] - Temps: 80.7°F [27.1°C] - Humidity: 74.4% - VPD: 0.90 kPa - Soil %: [31, 34, 39, 35] ----------------------------------- - [09:57]: Quick morning check! --- #1 is looking a bit droopy, but almost lights off (at 10:00) so not concerned. --- Nice! Mainly wanted to check on #4 and she is looking great! She’s perked back up and looking good! - [23:08]: Evening check. --- Wow! It’s a jungle in here! --- #1 has gotten too big? Nah!? Keep on growing girl! --- #2 is growing and definitely getting bigger! Growth just looking really weird. --- #3 has continued to get larger and is looking quite uniform in growth! --- #4 is growing and looking perky again! --- Even the original #1 and #2 phenos (in the back) are looking good! --- Wow! #4 is really getting close to the light. - [23:14]: Checked down both fill tubes. --- Both reservoirs were completely dry! - [23:27]: Checked the Ecowitt soil moisture sensor data: --- 30% - [CH01 EB1 - Garlic Budder #1] --- 34% - [CH02 EB2 - Garlic Budder #2] --- 39% - [CH03 GFP - Garlic Budder #3] --- 32% - [CH04 FPT - Garlic Budder #4] - [23:32]: Poured 4 cups of distilled water down EB1’s fill tube. --- Poured 2 cups of distilled water down EB2’s fill tube. - [23:38]: Checked the humidifiers. --- Refilled the 4X4’s humidifier with distilled water. --- Tomorrow, plan to defoliate and start cloning for the first time! --- Going to take multiple cuttings from both #1 and #4 for sure, but still deciding on the rest. --- Getting hyped! Day 02 - Tuesday - 06/04/24 - Total Days: 099 ----------------------------------- Daily Averages [~23:00] - Temps: 81.4°F [27.4°C] - Humidity: 74.3% - VPD: 0.93 kPa - Soil %: [29, 35, 38, 32] ----------------------------------- - [11:59]: Time to film the first entry for the Global Grow Cup! --- Going to be using BuildASoil 3.0 potting soil. --- Filming the video using a stand and my phone. --- This video is mainly to establish the container that the plant will be grown in. Also to prove that the container is a 16oz container and that it can hold 2 cups of soil. --- The ticket (order) number also had to be written on the cup. - [12:36]: Done! --- The video had to be done in one continuous shot with no edits (my original submission does not have the logo). --- There was also a photo that needed to be shot which shows the cup filled with 2 cups of soil (just like the video, the original image submission did not have the logo). --- I think I did everything correctly, but also sent an email for verification of submission and validation. --- Getting hyped! --- [*smokes a bowl] --- Going to defoliate today along with for the first-time, going to take cuttings for clones! --- After a bit of online research, decided to split the cloning process into two days. --- Today going to take cuttings and will soak them in a solution of aloe for 24hrs. Afterwards will change the water out and use straight distilled water. --- Then in a couple days, plan to transplant into coco plugs (Coco Coins) for rooting. --- For optimal results, also be using a rooting hormone (Clonex). --- Well.. Here goes nothing! - [17:01]: Evening check. --- Wow! #1 is looking huge! Her main top is stretching above the lower canopy which is continuing to bush out. --- #2 is growing along. Growth is gnarly and a bit droopy, but she’s getting taller! --- #3 is looking great! Still a bit small, but she is continuing to get larger. --- #4 looks like she needs a watering. --- Both plants in the back are also looking surprisingly great as well! - [17:05]: Checked down both fill tubes. --- Both reservoirs were completely dry! --- As far as today's defoliation, going to leave #2 and #3 alone and will focus my defoliation and cloning on the rest of the plants. --- This will be my first attempt at cloning, also going to try topping for the first time today. --- No pressure Ensign. What can possibly go wrong right? - [17:27]: Time to start the cloning and defoliation process! --- Filled a measuring cup with 3 cups of distilled water. ------ Added 3/4tsp of Horticultural Aloe ------ Added 1 more cup of distilled water --- Mixed the solution and poured an even amount into three separate solo cups. --- Made sure to mark two of the cups (#1 and #4). The unmarked one will be for any other clones from amongst the 6 phenos (if any at all). - [17:43]: Time to top and defoliate #1! --- Using a pair of brand new trimmers (AC Infinity), --- Gently cut the main stalk to even out the canopy. --- Then trimmed and cleaned most of the nodes leaving the top node or two. --- Also trimmed the leaf fingers a bit before placing the top cutting into the cup of aloe solution. --- Now for the rest of the cuttings! --- [~45 minutes later] - [18:32]: Managed to finish defoliating and cutting the rest of the clones. --- Took two more lower cuttings from #1 (3 clones total). --- Took 3 lower cuttings from #4 --- While defoliating, decided to try and clone the original #2 pheno as well. Took 4 small cuttings. --- Similar to the top cutting, trimmed and cleaned each lower node for each cutting before placing them into the cups. --- Before finishing up the 2nd cutting, I noticed the first cutting (the top cut that was also trimmed) was drooping. --- So I did not trim and the leaf fingers for the other cuttings. --- In total there were 10 cuttings taken for potential clones. --- My main focus was to take cuttings and to clean up all the lower growth from both #1 and #4. --- Defoliated and cleaned up the back original phenos as well (also trimmed back the cover crop). - [18:35]: Temporarily placed the cuttings onto the floor of the 4x4 tent. --- Took the trimmings (about 3 cups) and spread them onto the top mulch of #1 and #2. --- Time to set the environmental controls for the 3x3 veg tent. - [18:43]: Within the AC Infinity App, --- For the Veg Tent [3x3] controller, --- Adjusted the 'Vegetative [18/6]' Schedule for the grow light. ------ Set the Mode to ā€˜On Mode’ ------ Set the START/END times to 04:00PM/10:00AM ------ Set the MAX to 1 --- The IonBoard S33 is now utilizing around 60.8W (at intensity 1 out of 10). --- Adjusted the 'Vegetative [18/6]' Schedule for the exhaust fan. ------ Increased the Humidity’s HIGH trigger value from 81% to 87% --- Adjusted the 'Vegetative [18/6]' Schedule for the humidifier. ------ Decreased the VPD target value from 1.5kPa to 0.8kPa - [18:52]: Moved the cuttings into the 3x3 veg tent. --- It begins! I think. --- Going to let these cutting drink some aloe for a day before switching to straight distilled water. --- Hmm. Could be the white floor of the 3x3 veg tent, but have noticed the S33 has a whiter spectrum whereas the FC-6500 seems to be warmer in color. --- Anyways, - [18:58]: Poured 4 cups of distilled water down EB1’s fill tube. --- Poured 2 cups of distilled water down EB2’s fill tube. - [19:06]: Filled a pump sprayer with 5 cups of distilled water. --- Focused mainly on the straw mulch of #4. --- But also misted the straw mulch for the rest of the plants a bit. - [19:12]: Checked the humidifiers. --- Refilled the humidifiers with distilled water. - [19:44]: Going to be using Clonex rooting gel before planting the cuttings into Coco Coins (pre-soaked with microbes and aloe). But before that begins, going to transfer the Clonex gel into a squeeze bottle. --- Gently peeled back the seal on the original Clonex bottle. Just enough make a tiny opening, --- Then slowly and carefully poured the gel into an empty squeeze bottle. --- Also removed the sticker from the original bottle and placed it onto the new one. - [19:54]: Perfect! --- Instead of applying the gel to the cutting, going to be applying the gel to the Coco Coin. --- This squeeze bottle will make applying the gel a lot easier. --- Will take PPFD readings tomorrow. --- Also will change out the aloe solution to distilled water. --- I really hope I didn’t screw things up before they could even begin. --- Don’t die on me ladies! --- Please. Day 03 - Wednesday - 06/05/24 - Total Days: 100 ----------------------------------- Daily Averages [~23:00] - Temps: 81.9°F [27.7°C] - Humidity: 75.5% - VPD: 0.90 kPa - Soil %: [29, 36, 38, 36] ----------------------------------- - [09:40]: Quick morning check! --- #1 is looking a bit droopy, but looking okay. Topping is a high stress technique so going to take some time to recover. Don’t plan on flipping the main 4x4 tent to flower for a good week or so which should be enough time. --- #4 looks great! The defoliation seems to have no effect on growth. Nice! - [09:41]: Also quickly checked on the 3x3 veg tent, --- Nice! The cuttings are looking great! --- No yellowing and they all seemed to have turned up towards the light. --- So far so good! - [22:53]: Evening check. --- #1 is continuing to dominate this grow! She has spread wide and looking incredible! --- #2 is looking gnarly, but getting there. --- #3 is getting larger! But still a runt. By far, her leaves are the darkest of the bunch, but she is still growing! --- #4 looks happy and growing along beautifully! Wow! - [22:55]: Checked down both fill tubes. --- Both reservoirs were completely dry! - [22:59]: Poured 5 cups of distilled water down EB1’s fill tube. --- Poured 2 cups of distilled water down EB2’s fill tube. - [23:05]: Checked on the 3x3 veg tent. --- Ooo yea! The cuttings are still green! Nice! - [23:07]: Took PPFD readings. --- The cuttings were around 121 μmol/m²/s which gives a DLI of 7.84 mol/m²/d --- Nice! These levels are on the lower range for seedlings (~100-300), perfect! I think. - [23:14]: Swapped the aloe water out to straight distilled water. --- Going to let these cuttings soak for one more day before planting. --- Please don’t die girls! - [23:15]: Checked the humidifiers. --- Refilled the humidifiers with distilled water. --- Ooo yea! --- Tomorrow is the big rooting day! Day 04 - Thursday - 06/06/24 - Total Days: 101 ----------------------------------- Daily Averages [~23:00] - Temps: 81.9°F [27.7°C] - Humidity: 75.2% - VPD: 0.91 kPa - Soil %: [32, 38, 38, 34] ----------------------------------- - [16:20]: Evening check. --- #1 is a bit droopy, but growth is looking green and healthy. --- #2 is looking bigger! She’s also looking sort of droopy. --- #3 is growing along nicely! Looking good girl! --- #4 is looking great! A bit droopy but plan to water today. - [16:23]: Checked down both fill tubes. --- EB1's reservoir still has some water. --- EB2's reservoir was completely dry! - [16:23]: Checked the Ecowitt soil moisture sensor data: --- 28% - [CH01 EB1 - Garlic Budder #1] --- 36% - [CH02 EB2 - Garlic Budder #2] --- 37% - [CH03 GFP - Garlic Budder #3] --- 30% - [CH04 FPT - Garlic Budder #4] - [16:30]: Using a pump sprayer, --- Misted the straw mulch of #4 with 6 cups of distilled water. --- Focused mainly on the straw mulch. --- Also misted the straw mulch of #3 (in the grassroots fabric pot) a bit. - [16:43]: Poured 5 cups of distilled water down EB1’s fill tube. --- Poured 3 cups of distilled water down EB2’s fill tube. - [16:52]: Checked the Ecowitt soil moisture sensor data: --- 56% - [CH01 EB1 - Garlic Budder #1] --- 44% - [CH02 EB2 - Garlic Budder #2] --- 40% - [CH03 GFP - Garlic Budder #3] --- 45% - [CH04 FPT - Garlic Budder #4] - [17:01]: Took general PPFD readings. --- #1 was around 379 μmol/m²/s which gives a DLI of 24.56 mol/m²/d --- #2 was around 333 μmol/m²/s which gives a DLI of 21.58 mol/m²/d --- #3 was around 293 μmol/m²/s which gives a DLI of 18.99 mol/m²/d --- #4 was around 378 μmol/m²/s which gives a DLI of 24.49 mol/m²/d - [17:09]: Took the weekly height and light distance measurements. --- #1 was about 21" tall. --- #2 was about 13.5" tall. --- #3 was about 9.5" tall. --- #4 was about 19.25" tall. --- Hmm.. - [17:19]: Adjusted the right oscillating fan a bit. --- Re-angled the CloudRay S6 oscillating fan upwards. Been noticing that the air has been hitting the tops of the plants so easing off a bit (#1 is still getting hit, but she’s huge so not too worried). - [17:23]: Back to the measurements! --- #1 was about 9.5" away from the grow light. --- #2 was about 17" away from the grow light. --- #3 was about 17.5" away from the grow light. --- #4 was about 11.5" away from the grow light. - [17:46]: Checked on the 3x3 veg tent. --- Cuttings are still green! They do look a bit droopy but no signs of yellowing. --- Okay! - [17:55]: Time to begin the rooting process! --- For my first attempt at rooting, going to be using Coco Coins pre-soaked in saponins, microbes and aloe. --- To further help with rooting, going to also be using Clonex rooting gel. --- Filled a measuring cup with 4 cups of distilled water. ------ Added half of 1/64tsp of Quillaja Saponaria Extract [60] ------ Added 1/16tsp of Horticultural Aloe ------ Added 1/8tsp of Mycrobe Complete --- Mixed the solution thoroughly. --- Time for the Coco Coins! --- 10 cuttings means 10 Coco Coins. - [18:09]: Dropped 10 Coco Coins into the measuring cup. --- The coins immediately started to expand. --- A bit too much.. Oops! --- Poured the solution and Coco Coins into a pitcher. --- Added 2 cups of distilled water to the solution (now at 6 cups). --- Great! The coins are pretty much fully expanded, but going to wait a bit longer to fully saturate each coin. --- [~20-30 minutes later] - [18:42]: Great! --- Took the seedling and flood tray from the AC Infinity propagation dome and placed all 10 Coco Coins into the slots. --- Gave each Coco Coin a quick shake to remove excess solution. The coins were not dripping with solution but still pretty saturated. --- Arranged them into 3 groups with the cuttings in mind. --- Also tried to keep the pre-made holes intact. --- Time to inoculate the Coco Coins! - [18:54]: Using a squeeze bottle, --- While keeping the nozzle from making contact with the coco, gently filled each pre-made hole with Clonex rooting gel. Just enough gel to fully cover the hole of each coco coin. - [19:00]: Time to plant the cuttings! --- Gave each cup a misting of distilled water. Focused on wetting the top growth with water. --- Okay! --- To avoid mixing cuttings up. - [19:01]: Starting with the original #2 pheno cup, --- For each cutting, --- Using a pair of clean trimmers, made a final 45° cut about 1/2" from a bottom node. --- Then stripped away and scared the protective membrane below the node before planting. --- Made sure the node was about 1/2" below the surface of the coco. --- To help with planting, while inserting each cutting, gave the Coco Coin a gentle squeeze to loosen the coco. This also helped to ensure the coco and gel was in good contact with the cutting. --- Once the cutting was planted into the Coco Coin, made sure to place back in the same spot (made sure to keep the cuttings in their groupings). --- Once a cup was complete, made sure to keep the label with the group. --- Re-misted the top growth as needed to keep it wet. --- Also wiped the trimmers with isopropyl alcohol in between cuttings (plan to use 10% bleach solution for next time). --- Repeated this process until all 10 cuttings were cut, planted, and in the tray. --- The coco coins fit perfectly into the tray and don’t reach the bottom. Nice! --- The bottom air gap is important. --- Poured a bit of distilled water through one of the empty slots into the bottom of the tray. Just enough to fill the bottom of the tray, but not enough to reach any of the Coco Coins (~1/4cup). - [19:35]: Placed the propagation tray with cuttings into the 3x3 veg tent. --- Placed the first layer of the propagation dome on before giving the sides a misting of distilled water. --- Also sprayed the top of the propagation dome before covering the cuttings. --- Vents are all fully closed. - [19:40]: Placed the bar lights onto the top of the dome before configuring the controller. ------ Set the START/END times to 04:00PM/10:00AM ------ Set the bar light’s intensity to 2 (out of 10). --- Also made sure the propagation light controller’s time was in sync with the Controller 69 Pro. - [19:47]: Took PPFD readings. --- The cuttings were around 136 μmol/m²/s which gives a DLI of 8.81 mol/m²/d --- The PPFD levels are similar to the floor. --- Perfect! --- Going leave the IonBoard S33 on during this rooting process. --- Will check back tomorrow to cycle the air under the dome. - [19:56]: Checked the humidifiers. --- Refilled the humidifiers with distilled water. - [20:17]: Quick night check! --- Ooo yea! Growth is raging and looking perky! --- Mainly checked on #1 and #4 which were looking incredible! --- Keep on growing ladies! Day 05 - Friday - 06/07/24 - Total Days: 102 ----------------------------------- Daily Averages [~23:00] - Temps: 82.7°F [28.2°C] - Humidity: 76.2% - VPD: 0.89 kPa - Soil %: [37, 40, 38, 35] ----------------------------------- - [10:03]: Decided to increase the ambient temp in the 3x3 veg tent. --- Within the AC Infinity App, --- For the Veg Tent [3x3] controller, --- Adjusted the 'Vegetative [18/6]' Schedule for the heater. ------ Increased the Temp target value from 78°F to 82°F --- Hopefully this will help to keep the veg tent at a more consistent temp. - [22:26]: Evening check. --- Ooo yea! The garden is looking incredible! --- #1 is looking perky and just bushing out! Wow! --- #2 is getting big! Growth is weird and leaf fingers are huge! Just going to let her grow. --- #4 is looking happy and growing along like a champ! Nodes are starting branch out and she is turning into a bush! - [10:28]: Checked down both fill tubes. --- Both reservoirs were completely dry! - [22:33]: Poured 5 cups of distilled water down EB1’s fill tube. --- Poured 3 cups of distilled water down EB2’s fill tube. - [22:40]: Checked on the propagation dome (inside the 3x3). --- Ah yea! Looking great ladies! --- Lifted the top of the dome to let some fresh air in for a bit. --- Wow! --- Leaves still look nice and green! --- So far everything looks great! --- Just going to continue on! - [22:53]: Checked the humidifiers. --- Refilled the humidifiers with distilled water. - [11:01]: Decided to adjust the humidifier for the 3x3. --- Within the AC Infinity App, --- For the Veg Tent [3x3] controller, --- Adjusted the 'Vegetative [18/6]' Schedule for the humidifier. ------ Increased the VPD target value from 0.8kPa to 1.5kPa --- The higher VPD level will essentially turn the humidifier off. --- I won’t be needing the humidifier for a good week so might as well save the water. Day 06 - Saturday - 06/08/24 - Total Days: 103 ----------------------------------- Daily Averages [~23:00] - Temps: 81.6°F [27.6°C] - Humidity: 74.9% - VPD: 0.91 kPa - Soil %: [35, 40, 37, 31] ----------------------------------- - [07:40]: Quick morning check! --- #1 and #4 are looking perky and happy! --- Also checked on the propagation dome, --- All cutting still look green! Hyped! - [20:02]: Evening check. --- Wow the garden is raging with growth! --- #1 has blown up! She has clearly recovered and growth is ramping up again! --- #2 is stretching upwards! --- #3 is now the smallest of the 4, but still getting larger! --- #4 is looking incredible! Wow! Growth looks perky and happy! - [20:05]: Checked down both fill tubes. --- Both reservoirs were completely dry! - [20:10]: Poured 6 cups of distilled water down EB1’s fill tube. --- Poured 2 cups of distilled water down EB2’s fill tube. - [20:16]: Checked the Ecowitt soil moisture sensor data: --- 35% - [CH01 EB1 - Garlic Budder #1] --- 40% - [CH02 EB2 - Garlic Budder #2] --- 36% - [CH03 GFP - Garlic Budder #3] --- 27% - [CH04 FPT - Garlic Budder #4] - [20:19]: Using a pump sprayer, --- Misted the straw mulch of #4 with 5 cups of distilled water. --- Focused mainly on the straw mulch. --- Also misted the mulch of #3 a bit (in the fabric pot). - [20:27]: Checked propagation dome (in the 3x3), --- To cycle the air under the dome, lifted the top off for a bit. --- Ooo yea! Everything is still green and looking great! --- Keep on rooting ladies! --- Oops! - [21:45]: Checked the humidifiers. --- Refilled the humidifiers with distilled water. Day 07 - Sunday - 06/09/24 - Total Days: 104 ----------------------------------- Daily Averages [~23:00] - Temps: 81.5°F [27.5°C] - Humidity: 74.8% - VPD: 0.91 kPa - Soil %: [36, 40, 37, 36] ----------------------------------- - [08:18]: Quick morning check! --- Nice! The main tent is looking great! #1 and #4 are both raging with growth! --- Checked on the propagation dome (inside the 3x3) and the clones are still looking green! --- Wow! Everything is going almost too well! Just keep on growing! - [19:08]: Evening check. --- Garden is just exploding with growth! Seems everyone has fully recovered from the defoliation and topping! --- Wow #1 is bushed out and looking incredible! --- #2 is growing really starting to get large! Growth still is funky, but stoked none-the-less. --- #3 is starting to fill in the pot! Getting larger! --- Wow! #4 is getting taller and looks healthy and green! - [19:12]: Checked down both fill tubes. --- Both reservoirs were completely dry! --- Wow the canopy is really starting to get taller and closer to the light. May need to raise it up soon. --- Absolutely surprised how low the light levels have been throughout this entire cycle. Barely moved the light and have not increased the intensity past 2 (out of 10). Less is really more. --- Anyways! - [19:18]: Checked the Ecowitt soil moisture sensor data: --- 36% - [CH01 EB1 - Garlic Budder #1] --- 41% - [CH02 EB2 - Garlic Budder #2] --- 37% - [CH03 GFP - Garlic Budder #3] --- 34% - [CH04 FPT - Garlic Budder #4] - [19:19]: Poured 6 cups of distilled water down EB1’s fill tube. --- Poured 3 cups of distilled water down EB2’s fill tube. - [19:24]: Checked propagation dome (in the 3x3), --- To refresh the air, lifted the top off for a bit. --- Sweet! Still green! Wow! --- Using a spray bottle, misted the top growth with distilled water. - [20:35]: Checked the humidifiers. --- Refilled the humidifiers with distilled water. --- Wow what a week! --- Growth has been just insane in the 4x4 tent! All plants have fully recovered and have just exploded with growth. --- I think it’s time to flip to flower! --- Also, I’m absolutely baffled about how well the cloning process has been going. --- So far no issues! --- Not complaining, but just surprised. Keep on growing ladies! --- If all goes well, should have fully rooted clones soon ready for transplanting (into solo cups of course). --- Absolutely hyped for next week! --- Maximum warp Ensign, Engage! [END OF WEEK 14|07]
Likes
53
Share
11. Woche Big Bud Auto von Fastbuds entwickelt sich soweit gut wie ich finde, sie sieht super aus, der Lollipopp kam genau zur richtigen Zeit šŸ˜„ Edit für alle anderen: hier schleicht son Dude durch meine Kommentare, der hat stƤndig was zu nƶrgeln und weiß es besser so Geschichten und will irgendwie Aufmerksamkeit von mir. Die kriegt er auch ab sofort šŸ˜‚šŸ˜‚šŸ˜‚šŸ˜‚
Likes
7
Share
If you have been following my diary, you may know I appear to have an auto that started flowing during an 18 hour light schedule. Although the package came as a cookies gelato feminized seed (not an auto) but all indication sure appears to be an auto. Just an added bonus for a quick harvest, no complaints and love the looks of the genetics on the cookies gelato.
Likes
73
Share
@Ferenc
Follow
Day 72, 21st of November 2020: This genetics is fantastic and mad respect to Original Sensible Seeds.... Beautiful big, strechy plant. Very nice great creation. She stopped streching finally so no need to worry anymore lol... she is mad! Buds are on the way THC crystals started sitting on the leaves hahaha Fertilization is the same every 2nd day with the mix and the ratio above.... All LST has been removed as the plant remains the same so no need to keep her in "chains". The lamp is on 11.30 min and off 12.30 min. Last week was 15 min longer light cycle.... So every week 15 min shorter light cycle until the 5th week. So far -30 min. It switches on at 6 am and off at 17.30 pm.:
Likes
58
Share
happy day, weed masters! my girls get fat and enjoy the light! this week we are going to add a key element in the fertilization program that it is advisable to use in the second half of flowering as in this phase it develops a continuous growing need for phosphorus and potassium Fosfor Plus is able to provide the right nutrients at the right time for optimal bud development and rapid nutrient transport ---- stay on track to stay up to date best regards