


Likes
Comments
Share


Likes
31
Share


@Mr_Motalovah
Follow
Hello growers and tokers! 👋 👩🌾 🧑🌾.🔥💨
There has been much change this week!!
First there was a big defoliation done, I cleaned the bottom of the plants.
All the growth that wouldn't amount to anything because the light doesn't penetrate that low.
Also took off the biggest fan leaves to give more light penetration.
Then finally switched to 12/12..
After just 36 hours after the defoliation there wasn't much change
Some new growth..the colas are stacking nicely which is good.
Hope they stretch some more still..
I'm still watering every other day, After the defoliation I watered with only Enzymes 2ml/L to clean the roots a bit then started with the nutrientes again.
I dropped the amount of grow nutrients from 3ml/L to 1ml/L and started adding bloom nutrientes 2ml/L for now.
I'll slowly be upping the bloom nutrientes and after week 2 I'll no longer add grow nutrients.
That's it for this week. Stay tuned to see how they flower.
Stay safe!

Likes
31
Share


@Wicked_Stix
Follow
Was a smooth week. Did a flush and fresh nutrients. Kept the nutrient dose the same since everyone looks happy. Started training and trimmed a few leaves and branches off. I plan to switch them to flower after week 5. She is one of the slower growing plants. Heavy indica with short fat leaves. Still pumping nutrients 24 hours.

Likes
60
Share


@Natrona
Follow
FBA2502
Week 3 April 13-19 Veg 2
This week I introduced nutrients to the watering schedule. My planned feed schedule will be to feed, feed, water each week until the time to flush. , adjusting nutrients per the growth cycle. Hopefully this will keep from overfeeding and reduce salt build up in the soil.
Nutrients: I will be using General Hydroponics Flora line at ½ feed rate and Cal mag throughout this grow.
My tap water measures 8.3-8.5 so even after adding nutrients, I have to PH down my feed solution. Regarding nutrients, I’ve tried Fox Farm, TPS1, Plagron and now General Hydroponics. What I am looking for is organic, ease of use, minimal individual bottles that will yield large, dense sticky buds that hit hard in effect.
Plants range in height from 5-7” except #1 which has been pinned to the soil. I will try wrapping her around the perimeter of the pot. Since she leaned over, I pinned her down and have been anchoring along the rim, twisting the stem so the node is on the side or top rather than underneath. I don’t think she likes training since the stems are a bit floppy. They are all still in veg, bushy with large indica leaves. I’ve been tucking the large leaves under the bud sites to give more light under the canopy. I’m tempted to top one of the bigger plants to have a comparison on resistance and final yield.
This week I made a short video for each 2502 tester and a pic or 2.
GH Flora
Micro ½ tsp /gal
Gro ½ tsp /gal
Bloom ½ tsp /gal
Fox CalMag ½ tsp /gal
PPM 573 & 715 when I added Plagrons Royal Rush 4ml.
PH 6.7
Temp 65
Your likes and comments are appreciated. Thanks for stopping by.
Growers love 💚🌿
💫Natrona💫
Likes
95
Share


@Roberts
Follow
Northern lights is doing really good. I just topped her today I also removed the 1st node area. She is set to designate her growth to the 6 branches left. Everything is looking really good. Thank you Divine Seeds, Pro-Mix, and Medic Grow. 🤜🏻🤛🏻🌱🌱🌱
Thank you grow diaries community for the 👇likes👇, follows, comments, and subscriptions on my YouTube channel👇.
❄️🌱🍻 Happy Growing 🌱🌱🌱
https://youtube.com/channel/UCAhN7yRzWLpcaRHhMIQ7X4g

Likes
13
Share


@YOUNGSTERBR
Follow
Pesei a mão na cobertura orgânica, joguei muito perto dos caules, e ainda inoculei com chorume, queimaram as folhas novas

Likes
32
Share


@Theia
Follow
I think this will be the final weeks for ChiBan. The cold has forced a turn of purple colour which with her frost looks beautiful. Nice dense buds with a tropical smell. Delicious..
That's all this week for her.
Stay safe 😷😷
Grow well 🌿🌼🙏🏻👍🏻

Likes
454
Share

@yan402
Follow
🌸🍏✨🍭🌸🍏✨🍭🌸🍏✨🍭🌸
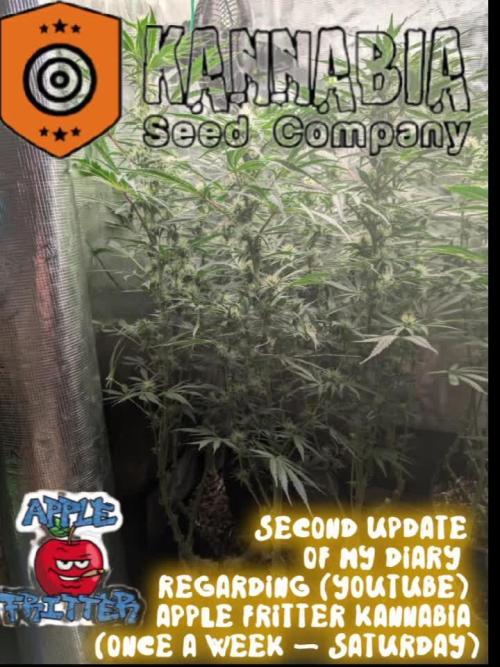
Hi and welcome to another Kannabia grow!
This time I’m running their Apple Fritter (feminized photoperiod). She’s going to veg under 24hr light and be manifolded.
Still cleaning the rest of my Candy Cream GF (11.04.25) — going to sow the seed tomorrow (12.04.25)
*been lazy, sowed on 14.04.25
🌸🍏✨🍭🌸🍏✨🍭🌸🍏✨🍭🌸
---
💭❗💭❗💭❗💭❗💭❗💭❗💭
❗Events & thoughts worth noting❗
💭❗💭❗💭❗💭❗💭❗💭❗💭
12.04.25 (GW1) – Cleaning + flushing the old coco coir. Might need to add another brick. *No new brick needed ✅
This is how I recycle my coco coir — fast, cheap, no BS.
🌿 Harvest plant
✂️ Chop roots small — they stay in for structure (organic perlite)
💦 Hot water rinse — remove salts & dust
🍶 Pre-soak with light feed:
Micro 10ml
Bloom 0ml
GreenBuzz 10ml
Cal-Mag 60ml
FFJ/FPJ 10ml (new disgusting batch)
pH down (citric acid)
♻️ Media stays — Roots stay — Back in service.
14.04.25 (GW1) – Planted seed in final pot ✅
16.04.25 (GW1) – Did last tent clean up + setup ✅📸
17.04.25 (GW1) – Seed germinated 🎉📸 — roughly 48hrs in final pot. Solid start👌♥️
23.04.25 (VW1) – Minimal burnt tips 📸 — not progressing, not a concern.
26.04.25 (VW1) – Started using the new batch of FPJ/FFJ
https://growdiaries.com/diaries/266849-grow-journal-by-yan402
30.04.25 (VW2) – Increased TriPartMicro & GreenBuzzBloom 10ml → 15ml
03.05.25 (VW2) – Increased TriPartMicro again 15ml → 20ml, topped the plant, and added final layer of clay pebbles around the base, trimmed side branches and did LST in preparation for "manifold" 📸
08.05.25 VW3 finished manifold📸
13.05.25 VW4 Increased TriPartMicro to 30ml and GreenBuzzBloom to 20ml.
15.05.25 VW4 Done defoliation and LST 📸
18-19.05.25 VW5 pruned all the shoots bellow my "mains" and did a full defoliation📸
24.05.25 VW6 increased GreenBuzzBloom to 30ml
04.06.25 VW7 did a cleanup📸
11.06.25 VW8 increase TriPartMicro to 40ml
17.06.25 (VW9) – Final structure pass 💈🌿
Did a clean perimeter prune + removed weak shoots. Ended up with 12 tops, was aiming for less, but she made the call
Didn’t fight it, just shaped it the best I could
Airflow’s good, structure’s stable
🛑 No more cuts until post-stretch
Pics coming shortly 😘
Flip coming soon — we’ll see how she handles it.
20.06.25 VW9 Switched lighting to 12 hours, may the stretch begin 🤞
22.06.25 VW10 Did a good LST session,made some pics, and came to some conclusions and a small change of plans:
Originally planned for 8 mains — long, spaced colas and maybe a couple stronger “titans” if she wanted to go that way.
But she’s showing me something else, and I’m not here to fight her — just guide her.
Now after stretch, I’m keeping side shoots only if they: Fill real canopy gaps
Don’t crowd neighboring tops (minimum 15cm spacing)
Aren’t growing into walls or toward the next plant
Anything too close, too low, or heading into shade gets removed. No point forcing it.
Looks like I’ll finish with 14–16 solid tops, depending on how she settles.
I’m just trying to give each one enough light and space to stack properly.
No overcrowding, no larf — just letting her do her thing with a bit of structure.
Increased Tri Part Micro to 50ml as well.
28.06.25 VW11 one week since I flipped to 12/12 and she is stretching nicely, a bit shy in showing pistils compared to the Fantasy Feast regulars I have in the same tent.
29.06.25 VW11 increased GreenBuzzBloom 30→ 60ml
06.07.25 FW1 TriPart Micro: 50→ 30ml
TriPart Bloom: 0 → 20ml
Home-made FFJ/FPJ (Watermelon + Pumpkin): 10 → 30ml
12.07.25 FW1 GreenBuzzBloom 60 →40ml, TriPart Bloom: 20 → 60ml, fpj 30→60ml
19.07.25 FW3 Got some bleached tops, been out and about at job interviews and didn't notice a last minute stretch spurt 😭, should recover fine though plenty of time left 😁
22.07.25 FW3 TriPartMicro 30→20ml , TriPartBloom 60→80ml , GreenBuzzBloom 40→50ml
24.07.25 FW3 Cal-Mag 60→40ml
🌱💦🌱💦🌱💦🌱💦🌱💦🌱
🌿 Day to day tasks & actions 🌿
🌱💦🌱💦🌱💦🌱💦🌱💦🌱
19.07.25 FW2 – Fed 5l of #1 → 2l runoff
20.07.25 FW3 – Fed 5l of #1 → 2l runoff
21.07.25 FW3 – Fed 5l of #1 → 1.5l runoff
22.07.25 FW3 – Fed 5l of #1 → 1.5l runoff
23.07.25 FW3 – Fed 5l of #1 → 1.5l runoff
24.07.25 FW3 – Fed 5l of #1 → 1.5l runoff
25.07.25 FW3 – Fed 5l of #1 → 1.5l runoff
26.07.25 FW3 – Fed 5l of #1 50% strength→ 1.5l runoff
(*RUNOFF reused for tomato plants)
🍶💧🍶💧🍶💧🍶💧🍶
💧 Nutrients in 30L #1
🍶💧🍶💧🍶💧🍶💧🍶
💧 TriPart Micro: 10 → 15 → 20 → 30 → 40 → 50ml → 30 → 20ml (0.67ml/L)
🍶 TriPart Grow: 0ml (0.00ml/L)
💧 TriPart Bloom: 0 → 20 → 60 → 80ml (2.67ml/L)
🍶 GreenBuzz Bloom: 10 → 15 → 20 → 30 → 60 → 40 → 50ml (1.67ml/L)
💧 Cal-Mag: 60→40ml (1.33ml/L)
🍶 Home-made FFJ/FPJ (new batch): 10 → 30 → 60ml (2.00ml/L)
💧 pH Down: Citric acid (buxXtrade)
📦 TOTAL: 250ml per 30L
🔬 8.33ml/L
🍶💧🍶💧🍶💧🍶💧🍶
⚙️✂️⚙️✂️⚙️✂️⚙️✂️⚙️
✂️ Tools & equipment ✂️
⚙️✂️⚙️✂️⚙️✂️⚙️✂️⚙️
✂️ 2× MarsHydro SP3000
⚙️ MarsHydro 150mm ACF Ventilator
✂️ Trotec dehumidifier (big unit)
⚙️ Mini no-name dehumidifier
✂️ Kebab skewers (LST – stainless)
⚙️ Wire + roast skewers (LST assist)
✂️ Scissors (HST)
⚙️ Vacuum (for spills & cleanup)
✂️⚙️✂️⚙️✂️⚙️⚙️✂️⚙️✂️⚙️✂️⚙️
---
🍏🍪🌬️🍬🍏🍪🌬️🍬🍏🍪🌬️🍬
Apple Fritter (Kannabia Seeds)
🍏🍪🌬️🍬🍏🍪🌬️🍬🍏🍪🌬️🍬
Species: 50% Indica / 50% Sativa
Genetics: Sour Apple × Animal Cookies
THC: Up to 25%
Effect: Euphoric, relaxing, creative
Flavor: Sweet, fruity, pastry notes
Flowering: 56–63 days
Resistance: High
Indoor yield: 450–500g/m²
Outdoor yield: 600g/plant
Structure: Strong, bushy, dense buds

Likes
27
Share


@valiotoro
Follow
Pheno 1 dark purple : On the nose, it reveals a sharp burst of fresh lemon, layered with a powerful eucalyptus aroma that’s both invigorating and camphorous. A truly refreshing and vibrant terpene profile😈🍋
Pheno 2 Green : this one is a real surprise! If I close my eyes, it’s like Nutella! It’s as if you’ve just walked into a kitchen where hazelnuts have been freshly roasted 🤤🌰
Pheno 3 light purple : It’s a mix of the first two with a hint of amarena cherry at the end🍒🍧


Likes
1
Share


@RosQuare
Follow
Everything has now been topped except the stunted GG#4 that we tossed away (tops cloned for the hunt)
Last week of veg to fill out their pots

Likes
11
Share


@electabruce420
Follow
F1 youngest of them all, will try to just leave it be without lst or topping or anything... Maybe.

Likes
6
Share


@nonick123
Follow
Día 16 (27/05) Parece que no va muy mal para el día 16... A ver si es capaz de coger marcha con el SuperSoil...
Día 17 (28/05) No muestra un gran crecimiento para día 18...
Día 18 (29/05) Por necesidad de espacio sale al exterior. Vamossssss!
Riego con 500 ml H2O
Día 19 (30/05) N/A
Día 20 (31/05) N/A
Día 21 (01/06) Preparo Té de Compost de Floración! Healthy Harvest 8 ml/L + Insect Frass 16 ml/l + Melaza 1 ml/L + 24 horas oxigenandose!
Día 22 (02/06) Riego con 500 ml de Té de Compost de Floración
💦Nutrients by Lurpe Solutions - www.lurpenaturalsolutions.com
🌱Substrate PRO-MIX HP BACILLUS + MYCORRHIZAE - www.pthorticulture.com/en/products/pro-mix-hp-biostimulant-plus-mycorrhizae
Likes
61
Share


@Comfrey
Follow
Die Blüten wurden zur Hälfte nass getrimmt. Die Trocknung erfolgte im Growzelt mit Ventilator und Abluft bei einer Temperatur von 22 Grad Celsius und einer Luftfeuchtigkeit von ca. 56 Prozent über 7-9 Tage. Bei der täglichen Kontrolle habe ich wenige Blüten gefunden, die ich entsorgen musste. Sie braucht schon etwas Aufmerksamkeit, die Shaman. Anschließend wurden die Blüten trocken weiter getrimmt und zum Aushärten mit Boveda 62% in Schnappdeckelgläsern bei 20 Grad in einem Eichenschrank gelagert. Das Endprodukt und ein abschließender Konsumreport folgen. Ich bin ziemlich happy! 💚

Likes
7
Share


@Cthoff
Follow
Alright gents, it’s the 2 week homestretch!!!
Gonna start flushing with RO water and that’s it. Want to get rid of all the nutes I’ve been feeding for that nice smooth smoke.
pH of 6.2-6.4......temperature usually 72-76 F on the water.
I only have be defoliating the bright yellow/white leaves.
Today was my last feeding with nutes and I’m excited to see development without nutes.
Really happy so far with my first grow. Spent so much time on YouTube, reading articles, and scrolling through so many friggin forums.

Likes
152
Share


@Hellishjam
Follow
It's been a really busy day and a half with the ladies the needed a lot of work seeing as the freaked out while i was gone with this heat we've been having. Yesterday was 32C humid of 42C, its been warm. They got a major trim job still needs will do when she recovers from this one. They got a feeding today, of a mixture of thing that been said i hope to hell they don't burn cuz it was a lot of fertilizer ahah. Each of the 4 big ladies got:
4 cups all purpose 4-4-4
6 Tbsp blood meal 14-0-0
1 cup kelp meal
1 cup fossilized carbon complex
2 cups glacial rock dust
6 Tbsp oyster shell flour
They also got 5 gallons of water PH at 6.8. Compost Tea is going to be started in roughly another 1 just waiting on the water temp to warm up a little more. I'm not going to Ph the brew at all just going to add the ingredients in and feed the way it comes out if it brew properly with a nice pleasant smell. Hopefully tea will be ready sometime tomorrow evening. Please don't burn please don't burn lol.
pineapple- 55 inches
Peyote-50
gorilla-58
BG41-49
Thats it for now just going to give them some tender loving care over the next couple days and get things clean up.

Likes
223
Share


@HazeyBobby
Follow
This is the last week of vegetative growth. The plant is growing very strong, forming strong branches and big fan leaves. Continued LST on the main stem and some other major branches. Growth is now penetrating the canopy and is being tucked under the net to fill it up. Pruned a few stems and leaves from below the canopy which may never see the light of day.
Pale leaf tips/edges may be due to light stress, so maintained the light distance whilst tucking branches under the net as they shoot through.
Tracking run-off volume/EC/pH at every fertigation event as I manage the feed EC to monitor what the plant is doing/feeding. Fertigation is maintained at twice a day (at lights on and 4hrs prior to lights off period) to maintain the target EC. Light period is during the night time to better maintain heat/humidity conditions during light off period (which happens during daytime).
-----------------------------------------------------------------------------------------------------------------------------------------------------------------------------------------------------------------------
The grow setup includes ;
- Secret Jardin DS120W tent (120cm x 60cm x 180cm) placed inside the bedroom
- Mars Hydro SP250 LED light
- extraction fan - AC Infinity Cloudline T6 (gives me great control over the environment)
- ventilation fans
- aquarium heater for nutrients solution (for winter use only)
- small oil heater (for winter use only)
- small dehumidifier
- 20L Airpots (as final pots) and 3.5L general plastic pots (for seedling stage)
- Canna Coco substrate mixed with 40% perlite
- GHE Flora Trio as base nutrients and various additives
- pH and EC/TDS meters
- 2x Govee Thermo/Hygro meters (one at canopy, the other at the roots level - these allow for external monitoring and recording)
-----------------------------------------------------------------------------------------------------------------------------------------------------------------------------------------------------------------------
Some strain info from Royal Queen Seeds ;
An amazing mix of genetics background - Its true genetics are unknown. Some say OG Kush is a mix of ChemDawg with a Lemon Thai and Pakistani Kush. Others say that it’s just a special cutting of ChemDawg from the early 90s. The most obvious trait of OG Kush is its strong, unique, very dank, slightly citrus aroma, almost like fuel or strong detergent. The flavour of OG Kush is equally as strong and dank, with a long-lasting aftertaste.
Strong mental and physical high - OG Kush is an extremely strong cannabis strain, with most experienced smokers listing it as one of their favourites. The effect is as strong physically as it is mentally. Though its effect is like an Sativa, the strain's genetics are mostly Indica. The effect is as strong and complex as the flavour. OG Kush takes around 8 weeks to flower and on average the yield is 500 grams per plant.
Big buds with lovely tones - OG Kush is known to stretch slightly during growth but soon starts to fill out during flowering. Generally, it will reach a height of 90 to 160 cm. Its buds are large and dense, lime green clusters covered with a large amount of resin.

Likes
4
Share


@theVotanaGarden
Follow
Cut down at day 80. I cut the first plant at day 56 and washed a lot of it into FF live rosin. First time doing that’d got lower yields than I wanted but think I know how to bump them up on the next wash!
The 56 tasted good but trichomes weren’t as mature as I wished they would be. I’m thinking the 80 day will be not enjoyable. This 80 day plant will be mostly for smoke.
Likes
14
Share


@Hempface86
Follow
All right guys run day 33 in the middle of week four and this is my sixth time trying to upload this diary so fingers crossed this goes through... As you can see so far so good this is my first run with organics so these plants are nowhere near as big as my plans typically are so don't think it's due to genetics it's because I'm not giving them the cocktail mix that I give or gave my older ladies but I will say I'm probably going to go back to that because I like huge plants and I cannot lie 🤥 the taste of the flower I grow with synthetics is just as good if not better than what I'm getting at the Dispensary I believe it all boils down to how you dry it and cure it.. with that being said shout out to Sensible Seeds for giving me an opportunity to grow their genetics and give him a shot and so far so good.. I hope everybody is doing well have a great day and happy growing ✌️

Likes
7
Share


@Mr_Pgrow
Follow
Very vigorous growth over the past week and has responded very well to LST.
Very full plant.
Watered in a Compost Extraction once again this week, which all my plants respond well too.
Another week down and bot much more to say, as usual. Plants are doing their own thing, I'm just making sure she gets water when she needs it.
Likes
3
Share


@dvr147
Follow
12/2/2024 - Starting this post a little early since it doesn't start until tomorrow. That said, two of the three plants are in flower while the Mystery Seed remains in Veg. I would expect it to transition and stretch over the next day or two. The other two plants (Granite Runtz & Frosted Cherry O's) are growing/stretching rapidly easily putting on 1-3 inches of growth per day. I have decided to top dress throughout flower with Gaia Green Power Bloom. I'm just a little leary of the Grow Dots fizzling out towards the end so I'm going to use a slow release organic to top dress with high in Phosphorous. These plants couldn't look any better and now my focus will turn to caring for all the bud sites and making sure each nug gets plump and dense and as big as it can get. I'm banking on a 1lb crop total from these three plants.
12/3/2024 - Ok we're into week 6 now and two of the plants are well into flower and the Mystery Seed is showing pre-flower now and is stretching out. I expect it to catch up with the other two in the next few days. Everything is going extremely well and I couldn't be happier. This morning I fed all three plants with Recharge and Silica along with 2 liters of water PH'd to 6.5. I think watering is going to increase a bit still from here but I'm paying very close attention to moisture in the soil. I've got PPFD readings up near 850-900 across the canopy and with the addition of side lights I'm hoping that I can get some deeper penetration to some of the lower branches. I continue to build out my toolkit for future grows.
12/4/2024 - Probably my last post for this week unless something spectacular happens. Everything is going very well though I found a few rust spots on one leaf which I removed from the Frosted Cherry O's...nothing I'm too concerned about at this point. Overall things are going extremely well and the plants are growing beyond my expectations. Looking forward to the coming weeks as the buds start to develop.
