




Processing
Likes
3
Share


@Dico29
Follow
Day 120
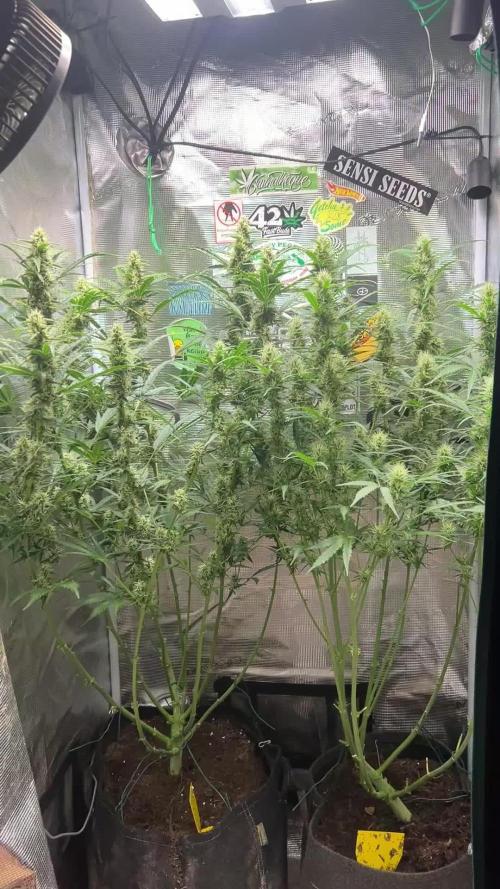
Smells good buds are fatter and looking better then I thought last week, I flushed but I think I may have caused nutrient burn or nitrogen since my stems have turned purple also along the buds and tips or ideas of what I should try thanks
Day 127 photos at the bottom

Likes
14
Share


@thebito
Follow
17/05 - Colheita realizada. Flores cortadas nas bases dos galhos para serem pesadas antes da secagem. Após isso foram removidas todas as fan leaves maiores e de fácil remoção e as flores foram deixadas em uma rede de secagem dentro da estufa.
18/05 - flores retiradas da rede e penduradas no teto da estufa com barbantes, pois estavam ficando amassadas > 21.3ºC - 22.3ºC / rh 52% - 64%
19/05 - 21.5ºC - 22.1ºC / rh 45% - 50%
20/05 - 21.7ºC - 22.3ºC / rh 46% - 51%
21/05 - 17.9ºC - 21.9ºC / rh 48% - 84%
22/05 - 20.1ºC - 23.3ºC / rh 49% - 81%
23/05 - 23.5ºC - 24.1ºC / rh 56% - 60%
24/05 - 23.5ºC - 24.0ºC / rh 46% - 65%
25/05 -
26/05 - 23.8ºC - 24.3ºC / rh 64% - 65% > flores aparadas e preparadas para a cura, sobra da poda guardada para dry sift, flores guardadas em jarros herméticos com higrômetros, ainda sem sachês de umidade

Likes
3
Share


@madcash
Follow
Trichs are getting frosty and buds stacking up. I wasn’t to let her go longer to see how much bulk she can pack on. Only day 66 after all
Likes
38
Share


@Ukfarmer420
Follow
Hi guys
So day 6 of the flip and the screen is nice and full I will now let the nodes and bud sites stretch up, connecting autopots up tomorrow with just water for a week, I had to wait as needed a new air pump for the resivour.
Blue cheese is a bit droopy also due to them needing water but have perked back up now.
I raised the lights as I noticed the purple stems so obviously to much wattage set on the light.
I am changing nutes to shogun for the autopot system, hence just the water for a week.
On the whole looking good but a long way to go.


Likes
76
Share


@Roberts
Follow
Purple Ryder auto is growing great under the Medic Grow Mini Sun-2, in the Agrogardens nutrition. She has a great canopy full of budding sites. She is starting to develop a aroma as well. Everything is looking really good, and she is ready for another week. Thank you Medic Grow, Agrogardens, and Doctors choice. 🤜🏻🤛🏻🌱🌱🌱
Thank you grow diaries community for the 👇likes👇, follows, comments, and subscriptions on my YouTube channel👇. ❄️🌱🍻
Happy Growing 🌱🌱🌱
https://youtube.com/channel/UCAhN7yRzWLpcaRHhMIQ7X4g


Likes
2
Share


@Huckleberry39
Follow
This little lady is doing great. Both new tops are going to be super stacked!! She is not going to get any bigger than like 3 foot i can see...which is fine with me. I'm having problems with my other plant getting to tall. All in all I am super happy with her and the gamble I took topping her!!

Likes
6
Share


Likes
4
Share

@jdean88
Follow
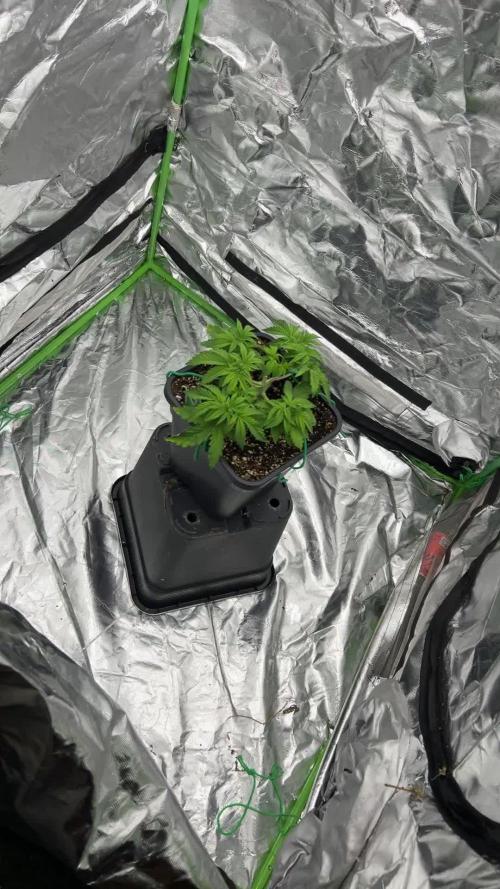
A lot of lst this week so plants looking a bit twisted from the amount of training the claw is slowly going away now on the og found ti be very sensitive to nutrients but she has riveted and starting to out grow the rest they are now showing signs of preflower coming so iam praying for a big stretch..the gorilla melon is now in the tent ready to be vegged big enough to fill the full tent will transplant soon into a bigger pot
Likes
5
Share

@DerEkstaseHase
Follow
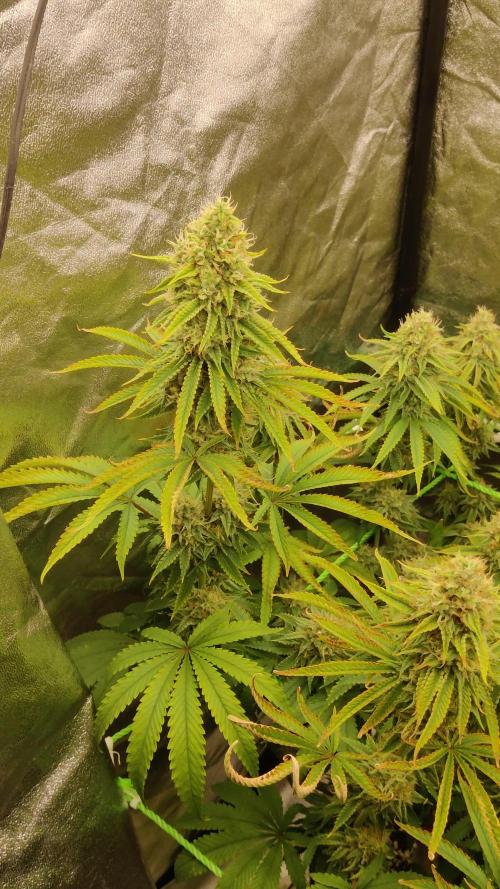
Diese Woche gab es ein paar Probleme, sowohl Salzaufbau im Substrat sowie Stress durch zu viel Licht.
Der EC im Drain lag bei 3,0 mS und der Ph bei 7,5, dadurch ist die Kaliumaufnahme blockiert.
Um da dagegen zu steuern habe ich ein Mal 6l Wasser mit CalMag und Ph 5,7 gegossen, um die Salzablagerung abzubauen.
Außerdem habe ich das Licht wieder auf 75% gedimmt.
Salzablagerungen sind zu diesem Zeitpunkt der Blüte relativ häufig, in Coco!

Likes
4
Share


@Orchard
Follow
&&&&&&&&&&& Week 1 -FLOWER- / TRANSITION &&&&&&&&&&
+++ 03.15.2021 +++
<---NOTES--->Started transition and changed light schedule on 3.15.2021 to 12/12 time @ 26" Light spectrums are set to max on all. First nutes applied 3.18.21. Took Pictures confirmed settings.
(((((((((((((((((((((((( CONDITIONS )))))))))))))))))))))))
*Nutes: CaliMagic GHE 1.75ml / Gal, FloraFlex B1 3g - 0.75 tsp/gal, FloraFlex B2 3g - 0.75 tsp/ gal, pH Down 1ml/ gal, RapidStart 0.5ml/ gal, ArmorSi 0.5ml/ gal (((((((APPLIED 3.18))))))
*Ph: 6.0
*Ec: 2.06
*Light: Mieemclux 1500W LED Veg+Bloom@ 26" 12/12; Mieemclux1500W LED Veg+Bloom@ 26" 12/12; Parfactworks RA1000W LED@ 22" 12/12
*Rh: 70%
*Temp: 78F
<-------- END -------->
+++ 03.18.2021 +++
<---NOTES--->Started Bloom nutes 3.18.21.
Started nutes durring transition as looking at FloraFlex feed charts it does not have a transition. I mixed and transplanted with only 1 week of nutes @ week 4 so I figured there would be little buildup. Started RapidStart. Roots should be all the way stretched out. ADD a little silicate for plant vigor. TOOK VIDEO.
(((((((((((((((((((((((( CONDITIONS )))))))))))))))))))))))
*Nutes: CaliMagic GHE 1.75ml / Gal, FloraFlex B1 3g - 0.75 tsp/gal, FloraFlex B2 3g - 0.75 tsp/ gal, pH Down 1ml/ gal, RapidStart 0.5ml/ gal, ArmorSi 0.5ml/ gal
*Ph: 6.0
*Ec: 2.06
*Light: Mieemclux 1500W LED Veg+Bloom@ 26" 12/12; Mieemclux1500W LED Veg+Bloom@ 26" 12/12; Parfactworks RA1000W LED@ 22" 12/12
*Rh: 70%
*Temp: 78F
<-------- END -------->

Likes
30
Share


@Bread_n_Buds
Follow
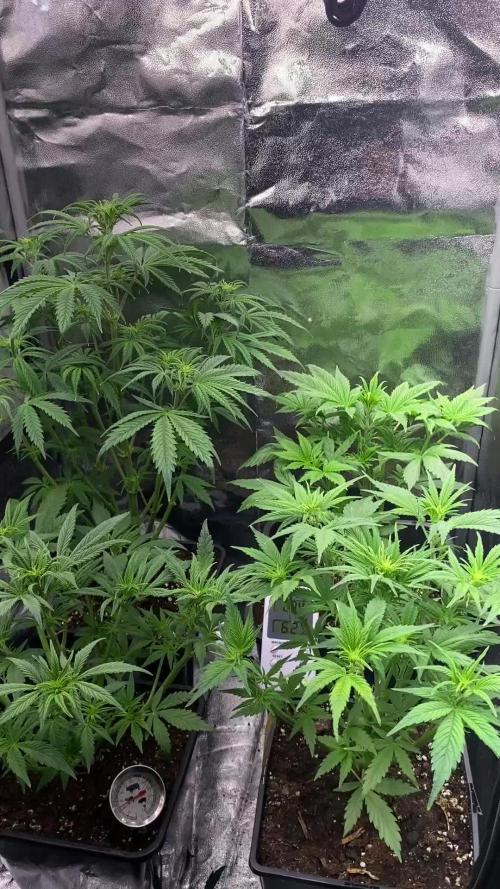
Here we are again ready to start again, always under the sign of Zamnesia, we make our fantastic plants and we show you what we are capable of. We have 5 autoflowering strains and 5 photoperiodic ones and now we present them to you.
The fifth and last autoflowering for now of this round that we present to you is another classic of the classics always in the Zamnesia version. We have already grown it once and we sincerely hope to find the purple phenotype, Mythical mythological herb really in music and in everything, WE ARE TALKING
To explain my germination method which is a combination of experiences acquired in the field and readings of right advisors, I have chosen to divide it into phases so whoever wants can follow them and understand better step by step.
- Preparatory Phase ---- Check the average temperature in the room, humidity status to understand well whether it is the case to start or wait, I decided for the end of August because the temperatures start to drop towards the 22-25 degrees recommended for germination.
Then another thing more or less credible depending on the sensitivity is the control of the lunar phases. I believe in it a lot, it is a method that ancient farmers used to understand when it was best to plant depending on the attraction of the moon. To make my life easier I use a simple app that advises you on the right time to plant, harvest and put in a jar (depending on the lunar phases).
- Phase 1 --- Soaking in water. There are many authoritative friends who advise against this method due to the risk of drowning, but I have always been fine and I follow the rule if it opens in water almost certainly the seed is healthy and will come out of the ground 90% normally.
- Phase 2 --- Opening of the seed in water. As soon as the seed opens and the root comes out a little you have to be very very careful not to leave the seed in water open for too long. This is why there is a risk of drowning. So as soon as the root has come out it must be planted. Do not wait for it to stretch out too much, in the absorbent paper you can wait a little longer in water no.
- Phase 3 --- While I soaked the seeds I prepared my pots: I use small biodegradable pots (choose the ones with holes underneath for drainage). A few hours before working with the opened seeds I moistened the soil with water adjusted to the right pH (5.8 - 6.2) and Plagron Power Roots. The small root is now open and we can make a little hole with a toothpick, widen it and insert the seed. Not too deep with the root facing downwards. From Serious Seeds we learned the dome technique: if you put a small dome of soil on the seed the water will settle on the sides avoiding overwatering problems.
- Phase 4 --- The plant emerges from the soil. Up to now I have not put the light on, now I turn it on at minimum after half a day of soil to give direction to the seedlings. The first week the light will be gradually brought from 40% to 60% to go to 70% - 75% in the remaining weeks of veg. During the first week maximum, I keep the cycle of 24 hours to avoid stretching. Be careful not to exceed the first week at least with photoperiodic.
- Germination % --- In water 20/20 seeds have opened for good luck I'm waiting to talk when they come out of the ground but it seems that we are going towards an excellent percentage of germination..."Not too bad"...
- Soil and Food --- The soil used is entirely organic in every part and is the Plagron Promix that will be used with the 100% organic pack supplied by Zamnesia complete with all the main fertilizers for your plant buy it at the link --
https://www.zamnesia.io/it/11457-plagron-easy-pack-natural.html
// Strain Description // Have you ever wondered what Jimi played in 1967? With Purple Haze Automatic, it has never been easier to experience the magic of Purple Haze firsthand. In just 65 days, this compact autoflowering will reward you with top-quality sativa buds that will take you on a long creative journey. -
- Get a seed of this fantastic strain --- https://www.zamnesia.io/it/8174-zamnesia-seeds-purple-haze-automatic.html
- Soil and Fertilizers entirely organic --- https://plagron.com/en
- Growbox --- https://www.secretjardin.com/
- Music and sound --- I made my girls listen to 432hz frequencies and music from www.radionula.com
- Z --- You can find these seeds, much more from the world of cannabis, mushrooms and an incredible series of accessories and gadgets on the reference site not only mine but of many growers ----
https://www.zamnesia.io




Likes
16
Share


@EaRtH
Follow
26.1. - I've added some wires back to spread the branches as much as possible. I think that plants look very nice and buds are getting bigger each day 😎
27.1. - Added more Cal-Mag and also some Epsom salt to the nutrient mix. I think the plants are starting to show signs of deficiency. Same thing happened on last run at the same time, so I hope I will catch it in time. Watered 💧
30.1. - I've decided to remove Bio Grow from my mix completely and upped the Cal-Mag. However, yellowing is still present 😩 Watered 💧
1.2. - Week wrap-up: I'm happy to say that this was another successful week as plants gained a lot of new growth and existing buds are gaining and becoming fat and frosty. ❄️ Also, I think I've managed to stop the yellowing.
Likes
Comments
Share

@theChimp
Follow
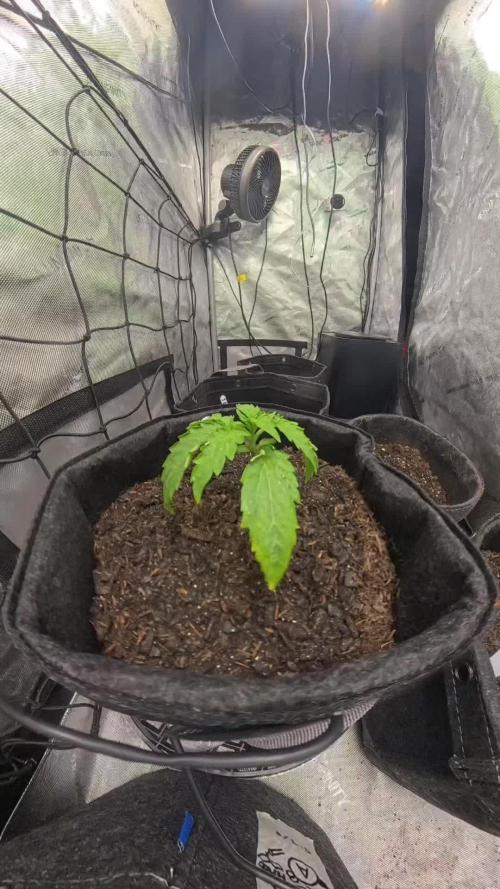
POTG continued its trend as the fastest-growing plant within the tent. The fourth and fifth nodes appeared this week.
All watering was completed by hand. Some leaf curling was observed, as well as browning at the tips of some of the oldest leaves. While not ideal, if the issue does not persist, it shouldn’t impact the harvest.
Furthermore, I was curious whether using a soil moisture meter would help with watering. While following publicly available soil moisture percentage guidelines, the plant started to develop some signs of overwatering. Within the week, I decided that sticking with my own sense of when the plants needed to be watered was much more effective. This is a useful reminder: chasing numbers is not always optimal, because no two grow setups are the same. Ultimately, you have to listen to your plants.
The fungus gnat problem has plateaued, and the neem oil application has been largely successful so far.
If we were trying to maximize harvest, I would have topped this plant at this point. However, since this is a part of a genetic expansion project, allowing us to determine our favorite strains, we are more focused on healthy plants and am not intending to force this plant to undergo much, if any, stress. Topping fast-growing autoflowers can be a useful technique, but I wouldn’t advise doing so on a slower-growing variety, as the plant may not fully recover before its internal clock flips it to the flowering stage.


Likes
14
Share


@Terpyboyz
Follow
Hi growmies 👌🏻 sorry I’ve missed out the last 3 weeks but al add them to the diaries soon. Everything has been going great so far only a few more weeks to go on some of these girls - the clones are in week 3 of flowering as well so they’ll not be far behind. Clones are looking beautiful as well happy with this run of they fill out a bit more before chopping 👌🏻🔥


Likes
4
Share


@SamDo
Follow
Hello growers,
Welcome back for vegetative week 14 of the Pineapple Upside Down from Humboldt.
This week was clearly a difficult one. The plant is still growing, but something was off. The overall development slowed down, and the lack of vigor became more noticeable compared to previous weeks.
After checking all the usual parameters, the issue finally became clear.
The reservoir pH was perfectly stable, sitting in the correct range around 5.7–5.9. However, the real problem was happening in the tray. The nutrient solution was sitting there for too long, and the pH was drifting significantly, reaching around 6.8.
This caused the coco substrate to buffer at the wrong pH level, leading to a partial nutrient lockout. Since the plant wasn’t drinking enough, the solution had time to degrade and shift, which is one of the limitations of the Autopot system when the plant is not actively feeding.
To correct the situation, I decided to fully reset the system.
A complete flush was performed using FlashClean from Terra Aquatica, with a very low EC and a pH adjusted to around 5.5. The goal was to clean the substrate and remove any accumulated imbalance.
After the flush, the system was left to drain and stabilize over the weekend.
I then restarted feeding manually with a much more controlled approach. Instead of letting the tray stay filled, I used small amounts of nutrient solution at pH 5.7 and EC 1.7, allowing the coco to absorb it before removing any remaining liquid to avoid stagnation.
The objective is to progressively bring the substrate back into the correct pH range and restore proper nutrient uptake.
This method will be maintained throughout the week to observe how the plant reacts. If the plant shows a strong recovery and regains vigor, the Autopot system will be reactivated. Otherwise, manual control will remain in place.
I also performed a light defoliation and cleanup, removing lower growth and excess foliage to improve airflow and light penetration.
At this stage, the situation is under control, but the outcome will depend on how the plant responds over the next few days.
The next update will be important to confirm whether this recovery strategy was effective.
Alright growers, take care and see you next week.
