
Likes
Comments
Share

@Pheno_Minds
Follow
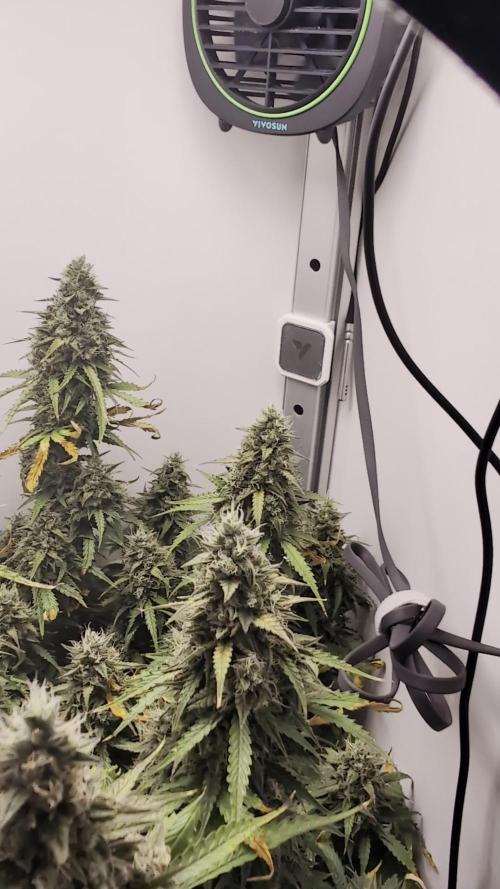
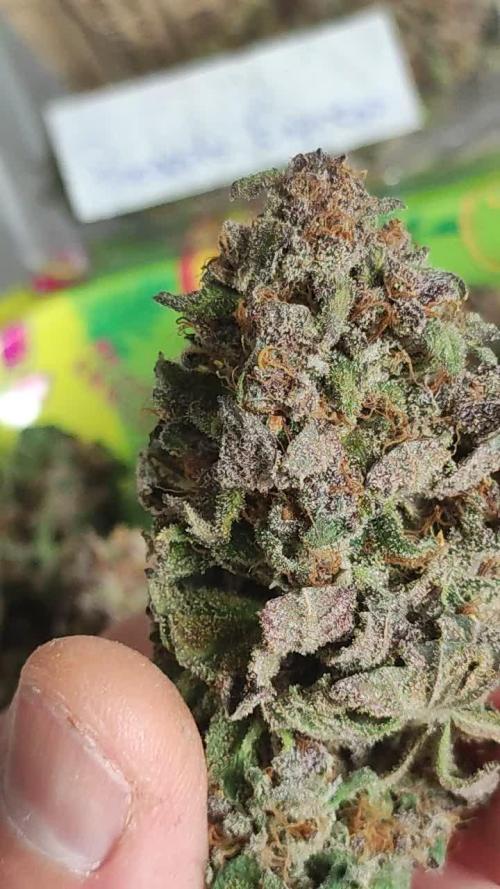
📋 Die Pineapple Pulse befindet sich in der finalen Phase, wir schreiben Blüte Woche 8, Gesamtwoche 10. Die Pflanze steht stabil, die Blütenstände sind massiv ausgebildet und zeigen eine dichte, kompakte Struktur. Die Blattfarbe zeigt an den unteren und mittleren Partien erste Anzeichen von Herbst, einige Blattränder sind vergilbt und trocken, was in diesem Stadium absolut erwartbar ist.
🌡️ Die klimatischen Bedingungen im Zelt lagen bei einer Temperatur von 29 °C und einer Luftfeuchtigkeit von 65 %. Die Wassertemperatur betrug 24 °C, bei einem CO₂-Gehalt von 1078 ppm und einer Lichtperiode von 18 Stunden am Tag.
✂️ Die Blüten sehen kompakt und harzig aus, die Struktur ist typisch für eine gut entwickelte Indica-dominante Genetik. Die gelblichen Stellen an den Blättern sind ein Zeichen dafür, dass die Pflanze ihre Reserven mobilisiert. Das passt zum aktuellen Plan. Jetzt heißt es Augen auf bei der Feuchtigkeit, um bei dieser Dichte Schimmel zu vermeiden. Der nächste Schritt ist die kontinuierliche Beobachtung der Reife, um den optimalen Erntezeitpunkt zu treffen.


Likes
13
Share


@Greenthumb84
Follow
Had to isolate one of the ladies due to being a week+ behind the other which involve putting in her own resvoir other four are starting flush. Also had to remove and clean the connection "T" as the roots were plugging up the "T" and restricting flow back to the res. The buds look amazing and am really looking forward to the pay off.
Likes
12
Share


@DBQush
Follow
Dear diary,
Week 5 completed and after a scare last week with magnesium deficiency, we were able to get it sorted and continue the mainlining.
🍀🍀🍀🍀🍀🍀🍀🍀🍀🍀
⏰ Day 32:
Gave a foliar of calmag water at 3.0ms 6.1ph during light off so it’s more gentle on the leaves followed by a regular feeding at 1.46ms 6.1ph.
Still seeing some deteriorating continuing on lower leaves, so will get epsom salt tomorrow to really target magnesium and increase the calmag with 0.7ml/l in feeds going forward.
⏰ Day 33:
Gave a foliar of epsom salt at 6.6g/liter(3.2EC 6.3ph)as lights went off but as I read more my ratios were off and I diluted the solution with 50% regular water.
Regular feeding at 1.45ms 6.2ph was given at lights on.
When inspecting the girls a few hours later they look a lot healthier already, so clearly magnesium was the issue.
Will give them today to recover and if everything keeps looking good by tomorrow, I will do the next topping.
If so I will have lost 5 days of progress due to the deficiency, but that’s the upside with photos I guess vs autos.
⏰ Day 34:
Another foliar of epsom salt applied and feeding of 1.5l each at 1.56ms 5.8ph.
A few hours later topping nr 2 done making it 4 tops each now and stripped the remaining growth.
I did however leave the fan-leaves attached to the new top node and for W.C #1 I left another set of fan-leaves for an extra boost as she’s a bit behind.
⏰ Day 35:
Did a quick check before lights off and they are praying and looking good considering the topping.
Then I did a regular feeding at 1.56ms 5.5ph when lights went on. Still looking good and no continued signs of the magnesium issue.
Lastly I removed the extra 2 fan-leaves I had left on WC #1 as her new tops are growing nicely and turned up the light slightly.
⏰ Day 36:
Regular feeding at 1.56ms 5.6ph.
Girls are looking healthy and enough has grown out that I can start tying down the 4 new mains.
Will probably top them again in 1-2 days if everything progresses nicely.
⏰ Day 37:
Foliar of epsom given just as lights turned off followed by regular feeding at 1.61ms 5.8ph when lights turned back on.
⏰ Day 38:
Regular feeding at 1.61ms 5.9ph.
Topping nr 3 was also done bringing it to 8 tops each and I will do the 4th and final topping as soon as the nodes have developed a bit more.

Likes
36
Share


@Bubble_Budz
Follow
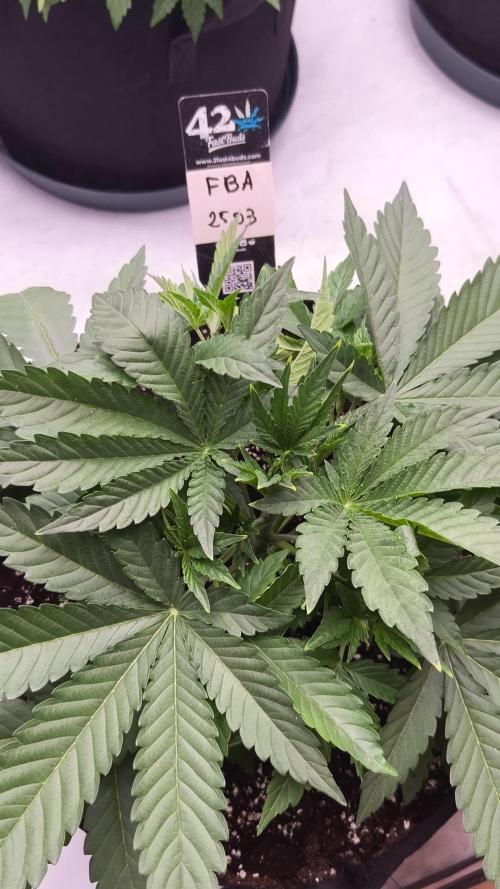
Grow notes week 3
#1 This plant is healthy and thriving. She’s the first to show pistols which means I should change her status to flowering but I won’t do that until it’s pretty obviously in flower. She’s taking the training nicely and I think I’m starting to figure things out when it comes to training.. the trick is to simply SLOW DOWN.
#2 is looking great! Her leaves are healthy and node spacing is just how I like it to look. She likes LST and seems happy with the maxi grow/bloom series. The roots on each plant are healthy and white
#3 is getting greener each day but I’m starting to believe it’s either genetics or this nutrient line that’s causing this effect.
#4 is the thickest and biggest plant of the bunch. However, she is displaying rust spots and potential calcium or iron deficiency on the lower older leaves. I may have to feed heavier on cal mag while running this nutrient line up.
Thanks for reading this far! I hope you enjoy these time lapses of this weeks growth.. as always
Stay highly dedicated & highly medicated folks 🔥🌿😎💨
Peace & blessings upon you!

Likes
3
Share


@Solarcradle
Follow
Jack Herer x Ruderalis
Day 1 Sprout on Sept 16, 2019 @ about 8-9 pm- Canuk Seeds - Jack Herer Fem Autoflower
September 13th at 6:30 pm: Planted in a 5 Gallon pot that was previously flushed, loaded with Gaia Green slow release nutrients and soaked down with a PH of 6.51. The pot has many fine roots remaining in it from my Amnesia XXL grow. I filtered through and took out a lot of the larger roots, while I tilled the soils with a fork and my hands until the coco medium was fluffy again. Lighting is a Phlizon 1000w LED/245 watt power draw, including 2 cob lights. It sits at about 25" from soil.
During my "First Grow" of Amnesia XXL I had kept my lighting really low from the start. I wanted a shorter plant that allowed light access across the canopy tops and less popcorn bud. With this grow, I am going to keep the lights higher up until I see how she's taking off in height. I would rather she does not reach more than 20" ...for a few reasons. Another thing I'm going to do differently this grow.... In my Amnesia XXL grow, I played with her watering PH values during her first two weeks of germination and vegetation. I watered her at values of PH 5.8X-6.1, trying to bring the PH of the medium down. In my reading, plants are able to uptake nutrients at different PH levels. With this grow - I will be watering her in a PH range of 6.6 to 6.1 from start to finish.

Likes
5
Share

@Ninjabuds
Follow
I like the structure of this plant it starting to look pretty healthy ima hook up the watering system soon and flip to flower soon aswell
Processing
Likes
41
Share


Likes
16
Share


@knnabisgrower
Follow
Empezando la 3ra semana aplicamos un riego con Oro negro para estimular el crecimiento vegetativo.


Likes
1
Share

@HoneyBlunt42
Follow
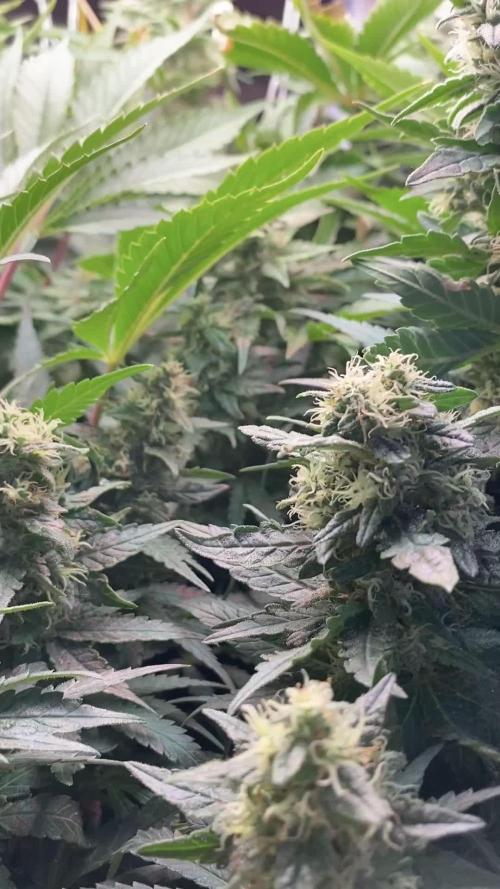
Колы набухают. Кормлю CalMag с базой, убрал PK booster. Иногда поливал не каждый день - увидел красные стебли на лопухах. Поставил на автополив, замешал 2 ml/l порцию для последних 2 недель цветения. Два других куста прошли половину сушки и усохли вполовину

Likes
35
Share

@Bncgrower
Follow
Another successful harvest. This time it was my perfect girl, a very good strain, easy to grow, fast, and without many demands. Besides the controlled environment, it has a wonderful smell. The buds were very dense and sticky. Every time I touched the scissors, a strong smell emitted that filled my room. I really liked the result, and this will definitely be the first of many. My favorite so far! ✌️💪🌿🍁

Likes
22
Share


@HighRangeFarmacy
Follow
Slowly tapered the nutes mainly just watering with 1/8 tsp per gal. of open sesame. Since I'm new I'm compiling everything I've read and making an educated guess at how I am supposed to flush these girls for 2 weeks. But simultaneously never just feeding plain water... What do you guys think? How close are we. Need tips

Likes
14
Share


@GodZilla_Owner
Follow
Another week down, and here’s where things stand:
BioBizz#1
This plant is now showing the first signs of nitrogen deficiency on its lowest leaves, even though I’m already feeding 120% of the Grow nutrient according to the schedule. It’s something I’ll keep monitoring closely.
AN#4
Still no visible deficiencies here! This one is thriving, and I’ve included a comparison photo in the gallery to showcase its progress.
AN#3
This plant continues to improve steadily, and due to space constraints, I’ve decided to send it into flowering as well. Let’s see how it performs moving forward! 😅

Likes
13
Share


@as_smas_ter
Follow
she's been in flush for nearly a week. still about another week left, im loving this strain. Been an easy grow, was still hungry for nitrogen early flower other than that has been a breeze, has luscious dense sour buds top to bottom, mephistos genetics are the best when it comes to autos that's for sure

Likes
19
Share


@adam_pawloski87
Follow
Let’s go Day 46 from seed!! What a great week it’s been, girls structured up real nice veg has been huge for us, looking super healthy an catching a nice smell ! This will be the last week of feeding them the veg schedule, next we will be dipping right into bloom, starting Monday yall We will be in full bloom !! Can’t wait to watch these ladies stack over the next few weeks 😍! I hope you all enjoy an have an amazing productive day an week ! Peace love an positive vibes y’all Cheers 😶🌫️💨💨💨💨💨🤙🏻

Likes
13
Share


@GrandmasBoy2021
Follow
I had a fun experience growing this strain. She started out strong and finished pretty strong! The buds are covered in THC and smells sweet. The only thing I would really do better next time is trying not to nutrient burn her as much as I did towards the end. I also experimented with harvest time and came to the conclusion that the it's best to harvest a few weeks after their recommended time if you want denser buds (in my opinion). I do wish the buds were a bit more dense but I'm not a pro grower and that could be the reason for that. It's all a learning experience. It could be the strain because I'm going a Gorilla Cookies (FastBuds) and those buds are huge and don't have as many leaves. Overall I'm blessed with the outcome and I'm going to enjoy the perfectly dried buds soon :D
I hope you all enjoy the little videos and music! haha I've only grown one plant before this which resulted in less than an eighth of bud so I'm beyond happy to say the least lol
Let me know if you have any questions regarding growing and for some possible tips! Happy growing Growmies!
Likes
33
Share


@ganjaman24
Follow
Grow cycle definitely does not correlate to manufacturer’s timeline, so be sure you plan accordingly. Although she’s not a bad plant doesn’t get too tall, odor isn’t too bad and she looks great!! After the cure I definitely love this strain wish she yielded a bit more but I’m happy with her. I definitely recommend this strain and any other Royal Queen Seeds strain.


Likes
16
Share


@Show_Me_Dank
Follow
She has been a beast and very easy so far. She does like it warm at least 80 and she happy. Using her as a mother plant to gets some clones.

Likes
6
Share


@rvabudman
Follow
Cant take my eyes off my plant. This is my second round of growing and I am the type of person who learns through failure (not gonna upload the pics of the first round plants lol). The buds are thickening up very nicely. Hoping to get between 3-4oz , the strain is high yielding but I have a smaller tent. My auto yielded 2oz with the same space (2 plants in one tent splitting the space), but the buds definitely didn't develop as well as these buds.