





Likes
35
Share


@Master_weeda
Follow
Bonjour à tous les padawans et maîtres jedis
Jour 92 arrosage avec 2 litres d'eau ph6.3
Processing
Likes
20
Share


@Silverback_Guerilla
Follow
1/21:
I rotated the edge plants and foliar fed with big bloom a few times today.
1/22:
I fed them about 3/4 gallon each after top-dressing their pots with a heaping tablespoon of happy frog cavern culture( bat and seabird guano). That will make some P and K available to them over the next 2 weeks as they begin to flower. Aside from that, I went with full strength veg nutes because I'm still seeing some yellowing and som cal-mag deficiencies. I also added some more liquid molasses. They're gonna need the energy as they start their stretch. I foliar fed a few times throughout the day with big bloom.
1/23:
EXPLOSIVE GROWTH last night...love it...everybody is stretching...pretty sure the 14/10 photoperiod is working!!
I foliar fed with big bloom a few times today.
1/24:
Definitely sativa. Neither one liked the FIM job..
1/25:
I tied down the mains on both of them and watered with a half-gallon each containing bembe, cal-mag, signal, armor si, and humic acid.
1/26:
Re-tied the mains again,,,strong branches!
1/27:
That's it for week #5!

Likes
11
Share


@AGrowerNotAShower
Follow
06/15: The ladies have started pre-flowering. They’re also growing in size. Annie has a height of 13”, soil to top leaves. She has a diameter of about 22”, which means I probably can’t fit more than three five gallons in my grow tent. I lowered the light to 12” in hopes of keeping her from getting too tall. Gave water in the afternoon. It was a day and a half since last watering. The five-gallon girls took in over 2000mL. I spotted to one worm in Alexis’s runoff and two in Annie’s. None in Aaliyah’s. I did notice that the bugs have no brown/black heads and also have a clitellum, which are characteristics not found in fungus gnat larvae. The plants look great as of now, but I’m going to keep a close eye on them for any changes.
06/18: Gave the ladies another watering. I didn’t see any pests, so I think we’re in the clear. I’ve been sticking to about a day and half between watering with about 1000μS. The salt in the runoff is a little higher than I would like it, but it’s nothing too crazy. Annie has a leaf or two with burnt tips, so I’m going to keep an eye on her. Both Annie and Aaliyah are about 15” high, but Annie has more of a curve on her main stem and is bushier. Her main stem is the same height as the other ones. The LST allowed Aaliyah to get light on her sides, but her main stem quickly grew back up and surpassed the others. Since the plants are going into flowering I want to avoid training them any further and just let them be. I also switched on the red light, but kept them blue. I read somewhere that this will allow the plants to get enough red light to help with the flowering, but still keep them a bit short because of the blue. I have enough space in the tent to allow the plants to double in height, but not much more after that.

Likes
2
Share


@Bluemels
Follow
Tag 30: Ich entferne die Sonnensegel und befestige Holzstäbchen an den Seitentrieben. Ich konnte den gebrochenen oberen Trieb retten und er wächst nun ohne Klebestreifen weiter!
Tag 33: Die Pflanze zeigt eine winzige Vorblüte.

Likes
18
Share


@TheItalianGrower
Follow
Hi guys, day number 40 is the last day at 18/6. Now I'll give 24 hours of darkness and Then I'll start the 12/12 cycle.
If I have not done anything wrong, I think I will collect about 100 grams of dried flowers per plant. I have not had any problems and I hope everything goes smoothly until the end.
Stay tuned 🦍😁💪🏻


Likes
36
Share


@Roberts
Follow
The big Potter of Gorilla Glue is doing well under the Spider Farmer G3000 light. She is starting to flower, and looking pretty healthy. Everything is looking good at thr moment. Thank you Spider Farmer, and Amsterdam Marijuana Seeds. 🤜🏻🤛🏻🌱🌱🌱
Www.amsterdammarijuanaseeds.com
Thank you grow diaries community for the 👇likes👇, follows, comments, and subscriptions on my YouTube channel👇. ❄️🌱🍻
Happy Growing 🌱🌱🌱
https://youtube.com/channel/UCAhN7yRzWLpcaRHhMIQ7X4g
Spider Farmer G300w: https://amzn.to/3S2zvsd
Spider Farmer 10X20 Heat Mat Kit - https://amz.fun/lsa0J
Spider Farmer Amazon Store: https://www.amazon.com/spiderfarmer
Spider Farmer Official Site: https://spider-farmer.com
Discount code: saveurcash

Processing
Likes
21
Share


@Fullmeltalchemist
Follow
5.23 F60
5.27 F65 - Everything has been going well this week. The plants went through a feed cycle that should carry them through flower no problemo. Started with the AACT Tea, then a bokashi drench with Fish Shit from Fishheadfarms and plain water from here on out. They are drinking quite a bit. 1.5-2 gallons a plant every 3ish days. The terps in my tents smell out of this world. The ScrOG and 3x3 are like a candy store. Passion Berry has mango/guava citrus terps while Deadstar v2 has strawberry watermelon terps. The 4x5 is much more varied, but in general the sweet pink dominates with it's grape candy terps and the dread bread cuts through with it stanky gassy lemon while the prayer pupil smells like moth balls and a bit of GMO. Very lucky to get to experience this much variety.
5.29 F67


Likes
28
Share


@Ferinky
Follow
En esta actualización se incluyen 2 semanas ya que por trabajo me fue imposible añadir la semana anterior.
El día 15 de Agosto recibió la segunda pulverización de Bacillus Thuringiensis para prevenir el ataque de las orugas.
Sigo alternando riego de agua un día con riego de Ascophillum Nodosum al día siguiente. He dejado de regar con Cannazym.

Likes
2
Share


@Green_Peace
Follow
The plants are growing at a good rate now and drinking a litre each per day. I feed them by hand and each plant gets 2litres every other day.
Didn't do anything else this week other than install the trellis on the last day.
This plant is on the laft in the timelapse video.
Likes
8
Share


@TorvicKofran
Follow
ENGLISH:
The first week of growth of my little ones has passed, I am very satisfied with the growth rate and progress of the girls, I am experimenting with a led lamp that had 95w stored and I am very satisfied although I have the feeling that my HM lamp 250w provides a little faster growth.
the first girl to go out was Tutankhamun. she was in a hurry to bring her leaves to light. then it was followed by Anubis, then Lennon and the last American pie, Kryptonite was also in the newspaper but at the time of passing it to the substrate his rai suffered a break so in this week he managed to get Cookies USA from pyramid seeds to replace his space and today it has already been passed to the substrate waiting for it to come to light, each one receives a 50ml irrigation enriched with rooting, vitamins and enzymes, following the table provided by the HESI manufacturer, I hope they increase their growth rate to a the third week switch to HM 250w to prepare them for flowering. I hope there will be no complications later, that's all for this week, I hope you are well and have a good week!
ESPAÑOL:
ya pasó la primera semana de crecimiento de mis pequeñas, me encuentro muy conforme con la velocidad de crecimiento y el avanze de las chicas, estoy experimentando con una lampara led que tenia guardada de 95w y estoy muy conforme aunque tengo la sensacion que mi lampara HM 250w aporta un crecimiento un poco mas rapido.
la primera chica en salir fue Tutankhamon. se notaba apurada en ya sacar sus hojas a la luz. luego fue seguida por Anubis, luego Lennon y al ultimo American pie, dentro del diario estaba tambien Kryptonite pero al momento de pasarla al sustrato su rai sufrio un quiebre por lo que dentro se esta semana logre conseguir la Cookies USA de pyramid seeds para reemplazar su espacio y hoy ya fue pasada al sustrato a la espera de que salga a la luz, cada una recibe un riego de 50ml enriquecido con enraizante, vitaminas y enzimas, siguiendo la tabla entregada por fabricante HESI, espero que aumenten su velocidad de crecimiento para a la tercera semana cambiar a HM 250w para prepararlas para la floracion. espero que no hayan complicaciones mas adelante, eso es todo por esta semana, espero se encuentren bien y que tengan una buena semana !.

Likes
27
Share


@DeepRootsGrowTrees
Follow
Gelato-K By Kannabia Seeds
Week #19 March 15th-22nd
Week #8 of Flower
About 4 weeks left. She continues to stack and swell her buds are cover in trichomes.

Likes
278
Share


@Metatronix
Follow
A big hello to all the cannabis growing gardeners...and all the other visitors that came across my grow journal.
Just on harvest day I was summoned on a long quest...around 700 km. will be away for three days. I will update this diary as fast as i"m back. For now just the photos as no time for anything.
----------------------------------------------------------------------------------
Now cannabis smell is overpowering in my grow room I can finally write something about Spider Farmers 6-Inch Inline Fan with Smart Controller and Carbon Filter :)
As my grow room gets really stinky at times i always invest in a top shelf carbon filter almost twice the size of the one provided by Spider Farmer, to my shock Spider Farmer carbon filter absorbs the smells wonderfully well.
No smell leaks and that just when the fan is running at 5 out of 10 levels of output. The smart controller is something completely new to me, and had a lot of fun experimenting with it during the veg and early flower, when the smell began i needed it to run full time at level 4 or 5 to rid the fragnance.
All in all the whole combo is a great deal. If you are not as keen on technology the set without the controller is awesome on it's own. But to have some extra options open, the controller at the device throws at you a ton of settings you can use to optemiase you grow enviornment.
The SE 7000 is hanged at 40 cm. over the canopy and runs at 520W.
This whole grow's main sponsor is Spider Farmer. You can easily obtain all the great grow equipment we use at: spider-farmer.com
A big thank you to Jessie and the whole Spider Farmer crew for supporting me with the newest technological advancements in horticulture. Thanks to them what i do here is possible.
Thank you Mafia Seeds for giving me the opportunity to try out your stock.
seedsmafia.com/en/feminized-cannabis-seeds/moby-dick-feminized.html
Plagron did send us their Contest package for the Power Buds competition .
Thank you for your visit, please leave a like and hope to see you beck here in about a week.

Likes
22
Share


@knnabisgrower
Follow
Finalizando la 6ta semana de floración notamos que engordaron muy bien los cogollos, a partir de ahora, sólo aplicaremos enzimas en los riegos para terminar de descomponer los nutrientes que se encuentran el sustrato, dejándolos disponibles para la planta y así terminar de alimentar con todo el sobrante mientras se van lavando las raíces.

Likes
16
Share


@MisterMaGoo
Follow
OK So had some non plant related as well as plant related issues this week.
Been hectic with personal life, and still finding my groove with the girls ..
I decided against any sort of training .... get it you can maximaxe and all but m all about letting them do their thing with some love and help, i feel like the hst and defoliation is just not for me at present time. If i get into commercial i definately see the advantages... Im growing for just myself , have zero friends and girlfriend doesnt really part take except the sometimes will hit a vape pen and shes done .. so all the fruits are for me and just do not see the need to mutalate my plants to get extra,, ill just grow more :D
Recap :
5 - Barneys Glue Gelato Autoflowers
2 - "Freebie" Caramel Cream Aut o <I believe Maine Clone Company > though did not have label.
All seeds came from AMAZING
NORTH ATLANTIC SEED COMPANY
.... ZERO issues ordering , shipping and popped 7 for 7 seeds even with some pretty disasterious goofs , see week 1
1. Struggled with Lighting - Definatly had the California Lightworks Solar Extreme TOO CLOSE .. now keeping a good 24 inches and will adjust soon with flowering
2. Struggled with PH
- My well water is great .. low PPM and 7.0 ph . BUT i use ph down it seems each day with the top off water to bring the girls down from 6.5 - 6.8 to a nice 5.9-6.0 Eariier not too bad as the girls were not drinking so much ... which leads me to next
3. THEY ARE DRINKING BOY ... Holy cow this week they became drinkers liike i did not expect. I run my lights 2 pm to 8 am and turn off until 2 pm each day .... I top off in the morning before i put them to sleep , the bigger girls ... 4 of the glue gelatos autos are drinking almost half gallon each per day atm . While my lil girls <caramel cream autos > are much shorter and i have one gelato glue auto on the smaller side . They do not drink nearly as much maybe a quart .
4. I goofed on the BLOOM, I did not expect bloom so early i was planning on this week to start them .... but nope showed signs of sulfur deficiency , caught it early and changed the feeding to bloom cycle and WOW they took the hell off ... Have TREMENDOUS growth in past week sinced changed cycle ... Again im following FAST BUDS auto feeding chart for expert for general hydro to the T and adding HYDROGUARD
5. I have one caramel cream auto with mag deficiency signs on some bpottom fan leaves but i believe i got that fixed when i did the water change, not sure why just her , unless i goofed on the bucket mix.
Which brings me to next statement ...
IM INVESTING IN A GDAM 13 GALLON x 8 bucket plus RES kit for next grow ...
Doing and maintaining 7 buckets is a royal pain in the ass . I honestly only expected 4 plants out of the 7 . AND expected fully i would kill something along the way
I am visually impaired and BRain Tumor Dude .. so i gots some issues sometimes . .. but if you check out the videos i post in a bit here you can see, WTF i am doing ok i feel like .
Great looking plants from my amateur opinion , always room for improvement as i am super critial of everything i do OCD/ADHD glorious combo
BUT YES a better setup is needed for ease of use .. I bought my complete setup at PA HYDROPONICS , meaning my BUCKETS with fittings and hydroton . 200 bucks could not find better price anywhere
he does a great fallponics custom build with 3 inch pvc that i have seen in action and tis a thing of beauty for us home growers. Plus i can add a small chiller to the mix to keep that temp a tad bit lower. IT about an 800 dollar upgrade BUT for the rest of my setup it belongs :
vivosun 4x9 tent
Ac Infinity T8 x 2 <one for vent one for blower , also have a great merv 13 filter box from ac infinity so as not to such in yuck from basement.
2 california solar extreme 550
So i figure adding an 8 bucket fallponics to fill the tent would look so much better tahn my 5 gallons and the constant checking each one and filling etc ....
Having the res would be nice I also see the cons of it as if you goof you goof on all not just one .... But i m fairly certain i will upgrade.
*****************
So right now it looks like nice buds are starting to form on all 7, the Glue Gleatos are much taller and full than the caramel creams ...
I am tracking water being added and at this rate will need another change over in a day or two if drinking 1/2 gal a day and about 3 gallons <12 liters> labout inch from bottom of net pot.
Rule of thumb being water change to replace nutes when you replace a volume equal to the total volume ... which is about every 6 days , last water change being 8/7
I will post some more when i inspect the ladies when i turn on the lights at 2 pm
First time grower in setu

Likes
5
Share

@all_about_420
Follow
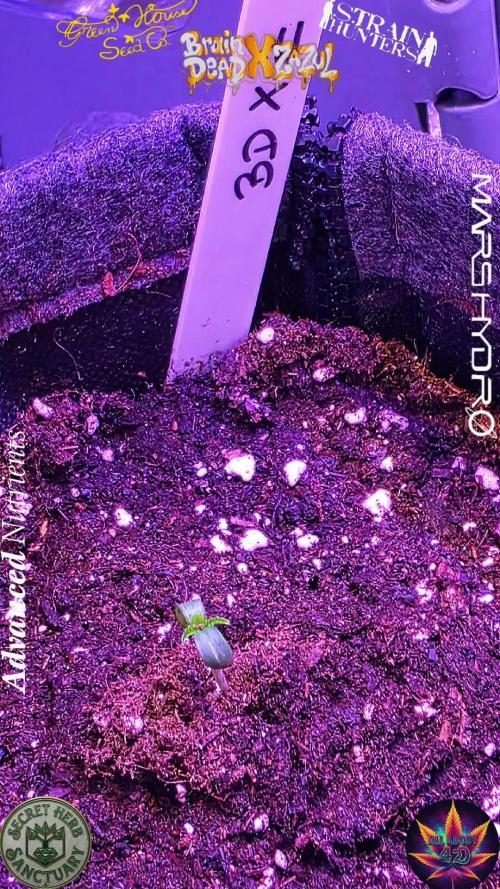
Das Pflanzentraining zahlt sich nun in vollem Umfang aus und die Pflanze antwortet mit einem extrem kräftigen Schub. Sämtliche Nebentriebe haben gleichmäßig aufgeschlossen und bilden ein absolut dichtes, homogenes Blätterdach, das die Grundfläche optimal ausfüllt. Das Zusammenspiel aus der genetischen Wuchskraft und der gezielten Nährstoffzufuhr sorgt für saftig grüne Sonnensegel, gesunde Blattränder und eine perfekte Verzweigung im Setup. Die Struktur steht fantastisch da, fängt das verfügbare Licht lückenlos auf und lässt bereits erahnen, wie viel Potenzial in dieser hübschen Dame für die nächste Entwicklungsphase steckt.
Likes
9
Share


@Lifesgarden420
Follow
This lady is getting better every week
All of her sisters are too
Amazing genetics with amazing nutrients

Likes
3
Share


@French__flair
Follow
Suivre les conseils semaine 1.
Une fois que les plantes ont colonisées le pot de 1L, les rempoter dans des pots de 3L (qu'on va arroser avec 3L). Cela doit prendre 4 à 7 jours en moyenne.
Surveiller l'aspect des plantes, les pointes des feuilles. Observer le haut et le bas. La couleur de la plante doit être uniforme entre chaque partie sinon c'est qu'elle a un manque ou un excès. Le plus souvent étant donné les engrais complet que nous utilisons il s'agit d'un excès. Dans ce cas il suffira simplement de faire un arrosage à l'eau au lieu de l'engrais et de reprendre les engrais à plus faible dose.
Les tiges sont un bonne indicateur de la santé des plantes, hors génétique spécifique, elles doivent être verte et tendre, pas dur.
On continue la FIM et la taille de certaines feuilles qui peuvent être gênante.
Likes
2
Share


@Comfrey
Follow
Die Pflanze gedeiht. Ich bin überrascht, wie viele Blüten sie produziert hat. Die Luftfeuchtigkeit ist morgens sehr hoch aber bislang sehe ich keine Fäulnisanzeichen. Wahrscheinlich liegen wir noch etwas weg vom Taupunkt.
Wasser + Ackerschachtelhalm.
Likes
11
Share


@russrahl
Follow
Had a cold, slow growing week this week. Night temps dropped down pretty low a few nights before I noticed, had a cold snap and I recently took my heating vent out of the tent, so I rerouted one of my AC exhausts trough this tent to heat it up again. I also had a bit to much nitrogen in my water mixture so this also slowed them down a bit, I diluted the nutrients in half but removing half of the water and adding strait water. There coming around now a few days later. Gonna be moving them to the big 4’x8’ tent soon(week or so prob till the tent is empty) with the RDWC 5gal bucket system and 1000w HPS for flowering. Gonna let them grow up a bit still before be start there LST, don’t wanna stress them yet after last week and there still staying low and bushy, not quite long enough shouts to pull over yet. Well that’s it for this week, cheers💨 #trusttheplant🌱
